
iPhone 11 Logic Board Replacement
Duration: 45 minutes
Steps: 44 Steps
In this repair guide, we'll walk you through the exciting process of swapping out the logic board on the iPhone 11! Grab your Pentalobe screwdriver, Phillips screwdriver, Y-Type screwdriver, standoff screwdriver, suction cup, tweezers, spudger, and heat gun – we’re ready to tackle this glued-on display together. If you find yourself stuck at any point, don't hesitate to schedule a repair for some expert assistance!
Step 1


Before diving in, make sure your iPhone battery is below 25% charge. A fully charged lithium-ion battery is like a little firecracker—poke it the wrong way and it might burst into flames or explode. Stay safe!
Popping open your iPhone’s screen will break its waterproof magic. Make sure you have some replacement seals handy before going further, or be extra careful to keep liquids away if you put it back together without swapping the seals.
- Make sure to power off your iPhone before you start taking it apart.
- Next, unscrew the two 6.7 mm-long pentalobe screws located at the bottom edge of your iPhone.
Step 2


Go easy on the pick—shoving it in too far could leave your device crying for mercy. Mark your pick to keep things chill and avoid any drama.
Feeling fancy? Mark the other corners with different measurements for extra style points.
Or, get creative: slap a coin on your pick about 3 mm from the tip for a built-in depth guard.
- Take your opening pick, measure out a cool 3 mm from the tip, and mark your spot with a permanent marker. Precision is key—even your pick deserves a little bling.
Step 3


Put on those safety glasses to keep your peepers safe from any sneaky glass bits that might try to escape during the repair!
Got a cracked screen on your iPhone? No worries! Just grab some tape and cover that glass to keep the shards in check and avoid any accidental pokes during your repair adventure.
And hey, if you're really in a bind, a little superglue on the suction cup can do the trick to help you lift that screen.
- Cover the iPhone's screen with overlapping strips of clear packing tape like you’re wrapping up a priceless piece of modern art.
- If the suction cup refuses to cooperate in the next steps, fold a sturdy piece of tape (duct tape works wonders) into a handy little grip and use that to lift the screen.
Step 4


The next three steps show off the Anti-Clamp, a nifty tool we cooked up to make opening your device a breeze. If you’re not rolling with the Anti-Clamp, just skip ahead three steps for a different way to crack things open.
Want the full scoop on using the Anti-Clamp? Here’s a guide with all the details.
If your iPhone’s surface is slicker than a slip-n-slide and the Anti-Clamp just won’t grip, slap on some tape to give it some extra traction.
- Give that blue handle a gentle pull to set the Anti-Clamp's arms free.
- Slide those arms over either the left or right edge of your iPhone—it’s like giving your phone a friendly hug.
- Line up the suction cups near the bottom edge: one goes on top, one goes on the bottom. Think of them as a team working together.
- Squeeze the cups together to get some solid suction right where you need it. Easy does it!
Step 5


- Slide that blue handle forward—arms locked and loaded.
- Give the handle a full spin clockwise (360 degrees) or until the suction cups start to stretch like a yoga pose.
- Keep the suction cups lined up like besties at brunch. If they start drifting apart, loosen them a bit and bring those arms back in sync.
Step 6


Turn the crank just a quarter at a time, then chill for a minute before the next move. Patience pays off—let the Anti-Clamp do its thing!
A hair dryer, heat gun, or hot plate can do the job, but don’t go wild with the heat—too much can mess with your screen or battery.
If the Anti-Clamp isn’t giving you enough space, warm things up a bit more and give the handle a quarter turn for some extra oomph.
- Warm up that iOpener and sneak it through the arms of the Anti-Clamp.
- Bend the iOpener so it rests on the bottom edge of your iPhone.
- Hang tight for a minute to let the adhesive loosen up and create a little opening.
- Slide an opening pick into the gap between the screen and the plastic bezel, avoiding the screen itself.
- Feel free to skip the next three steps.
Step 7

Gently warming the bottom edge of your iPhone loosens up the sticky stuff holding the screen in place, making it way easier to pop open.
- Grab a hairdryer, heat gun, or an iOpener and gently warm up the bottom edge of your iPhone for about a minute to get things ready.
Step 8


- If you’re rolling with just one suction handle, stick it to the bottom edge of the phone—just steer clear of that curved glass bit!
Tools Used

Step 9


The adhesive sealing the display is super tough—breaking that first little gap takes some serious muscle. If it’s being stubborn, try heating things up a bit more and gently wiggle the screen up and down to soften the glue until you can slip your tool in.
- Give that suction cup a confident tug straight up and keep steady—you want to tease open a tiny gap between the front panel and the back case.
- Slide an opening pick into the new gap, making sure you slip it beneath the screen and plastic bezel—avoid poking at the display itself!
Step 10


Keep your pick insertion under 3 mm to avoid poking any sensitive bits inside.
- Gently glide the opening pick around the lower left corner and then up the left edge of the iPhone, cutting through the sticky stuff that’s keeping the display snug. Keep it smooth and steady, and you'll get there in no time!
Step 11

Careful now! There are some sensitive cables snuggled up along the right edge of your iPhone. Steer clear of sticking your pick in this area, or you might find yourself in a bit of a cable pickle.
Step 12


Keep your pick insertion to under 3 mm to avoid giving those delicate display cables a rough time.
- Slip your pick back in at the bottom edge of your iPhone, then glide it up the right side to loosen up more of that stubborn adhesive. Keep it smooth and steady!
Step 13


The top edge of the display is held in place with a combination of glue and clips, so it's got a solid grip!
- Carefully nudge the right side of the screen downward just a bit, aiming toward the Lightning port.
- Slide your pick into the top-right corner of the device.
Step 14


Keep your pick to a maximum of 3 mm—going deeper might just tick off the Face ID sensor array!
- Keep gently tugging the display down towards the Lightning port until there's a nice little gap for your pick to slide in.
- Once you've got that gap, slide the pick to the top left corner and slice through any leftover adhesive holding the display in place.
Step 15

- Gently pull the little tab on the suction cup to pop it off the front panel.
Step 16


Hold off on pulling the display all the way off just yet—there are still some delicate ribbon cables hooking it up to the iPhone's logic board.
- Gently open the iPhone by lifting the display from the left side, just like flipping open the back cover of a book.
- Prop that display up against something sturdy to keep it from flopping around.
- When you're putting it back together, lay the display in place, align those clips along the top edge, and give the top edge a careful press to snap it into position. If it’s being a bit stubborn and doesn’t click into place, check those clips around the edges to make sure they’re not bent out of shape.
Step 17


Handle those display cables with care, folks! We don't want any accidental stretching or tearing going on.
- To reach the screws in the next step, just lift the bottom edge of the display a little and tilt it up. Easy does it!
Step 18


As you dive into this repair adventure, remember to keep an eye on each screw and return it to its original home when you're done. It's like a little game of hide and seek, but with tools!
- Grab your Y000 driver and carefully remove the three 1.1 mm screws holding down the battery connector bracket.
- When putting things back together, this is a great time to power on your iPhone and check that everything’s working smoothly before sealing the display. Don’t forget to shut it down completely again before moving on.
Step 19

- Take out the bracket and set it aside—like giving it a quick vacation from your device.
Step 20


Be careful not to mess up the sleek black silicone seal around this and other board connections. These little heroes are here to keep out pesky water and dust, giving your device some extra love and protection!
- Grab a spudger or just use your clean fingernail, and gently lift the battery connector out of its socket on the logic board. No need to muscle it—smooth moves only.
- Tilt the connector away from the logic board a bit, so it doesn’t sneak back and touch the socket while you’re working.
Tools Used

Step 21


- Grab your trusty Y000 driver and unscrew the five tiny 1.1 mm screws holding down the logic board cover bracket. Keep track of those little guys—they’re sneaky!
Step 22

- Take out the bracket and set it aside like a pro.
Step 23


- Grab a spudger or your trusty fingernail and gently pop that LCD panel cable connector loose.
- Next up, it's time to disconnect the digitizer connector right next door. You've got this!
Tools Used
Step 24


- Gently use the tip of a spudger or your fingernail to unplug the front panel sensor assembly connector.
Tools Used
Step 25

- Gently detach the display assembly. It's like giving your device a little spa day! If you're thinking about swapping out that waterproof adhesive around the display edges during reassembly, now's a perfect time to take a breather and do it!
Step 26


- Unscrew the two Phillips screws holding the rear camera cover in place:
- One is a 1.4 mm screw
- The other is a 1.3 mm screw
Step 27


The cover won’t chill out and lay flat until both tabs click into place.
- Gently lift the camera cover starting from the edge nearest to the battery, then take it off.
- When putting the camera cover back on, just reverse the steps shown in the pictures: first, lower the outer edge so the two little tabs on the cover fit snugly into the bracket on the camera module’s outer edge. Then, simply swing the cover closed.
Step 28


- Grab a spudger or your trusty fingernail and gently pry the two camera cable connectors straight up to disconnect them from their sockets. Nice and easy, no rush!
Tools Used
Step 29


- Slide the spudger's tip into the bottom right corner of the camera, right between the camera assembly and the iPhone's frame.
- Gently nudge it upwards to pop that camera out of the iPhone like a pro!
Tools Used
Step 30

- Lift out that rear camera assembly like a pro—it's ready for its close-up elsewhere!
Step 31


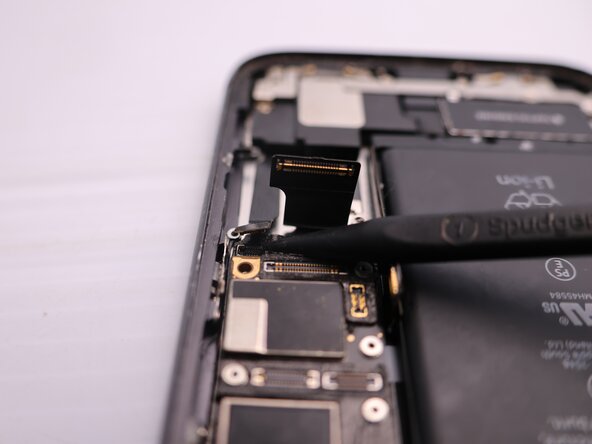
- Grab a spudger or your trusty fingernail and gently pry up to disconnect that flex cable for the Lightning connector assembly. You've got this!
Tools Used
Step 32


- Unscrew the three Phillips screws hanging out around the SIM card reader—each one’s a little different, so don't mix them up!
- Pop off the grounding bracket that's held down by the last screw—it's ready to retire for now.
- One’s a 1.5 mm screw, tiny but mighty.
- Another is a 1.9 mm screw—give it a twist.
- Last up: a 1.6 mm screw locking down the grounding bracket. Show it who's boss!
Step 33


If you're in a bind, a small flathead screwdriver can do the trick—just go slow and steady so it doesn't slip and play bumper cars with any nearby parts.
- Grab your standoff driver and carefully unscrew the 3.1 mm screw holding down the SIM card reader connector bracket.
Step 34


- Pop off the connector bracket for the SIM reader like a pro!
Step 35


- Gently nudge the Lightning connector flex cable aside, then grab your trusty spudger and pop up the SIM card reader flex cable. Easy does it!
Tools Used
Step 36


- Grab your trusty spudger and gently nudge the SIM eject plunger toward the edge of the phone. Give it a little push—no need to be shy, but don't go Hulk mode on it.
Tools Used
Step 37


- Gently lift the SIM card reader and slide it out toward the edge of your iPhone.
- Take the SIM card reader off and set it aside.
Step 38


- Grab a spudger or your trusty fingernail, and gently pry up those two front camera cable connectors. Just pop them straight up from their sockets—easy does it!
Tools Used
Step 39

- Carefully detach the front camera assembly. Take your time, it's like a little puzzle piece, just waiting to come out!
The front camera array is home to the FaceID sensor, and it's tightly paired with the motherboard. If you swap in a front camera array from a different board, FaceID won't work. To keep FaceID working like a charm, make sure your logic board has its original front camera array. Need help with this tricky part? You can always schedule a repair.
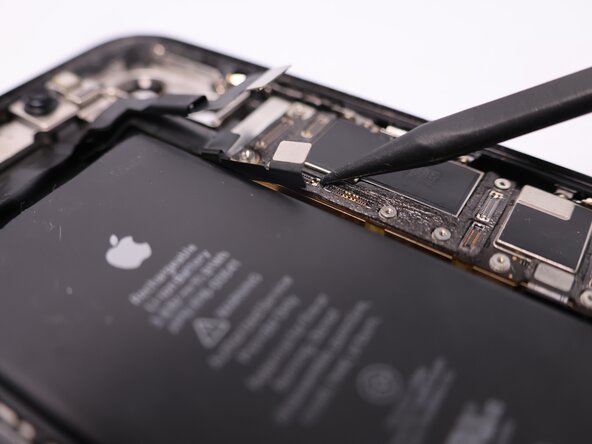
Step 40

- Unscrew the two 3.2 mm standoff screws and let the adventure begin!
Step 41

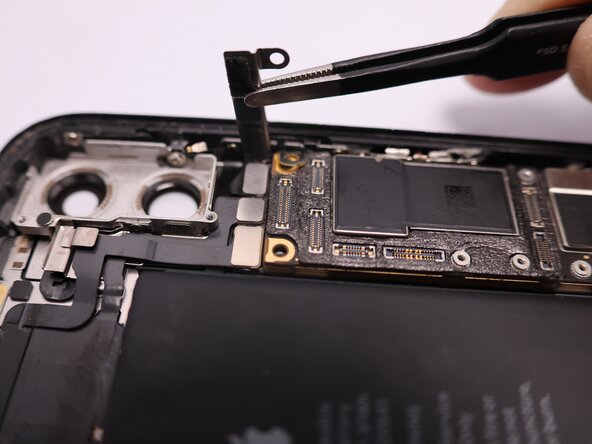
- Take off the upper cable bracket and set it aside. You've got this!
Step 42
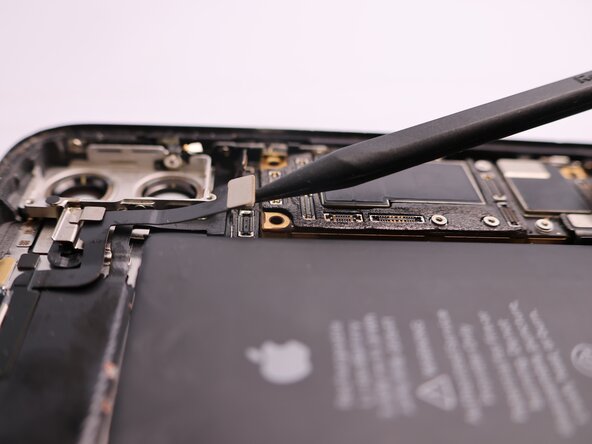


- Grab your trusty spudger and gently pry apart the cable connectors for the volume, power, and silent switch. Easy does it!
Tools Used
Step 43
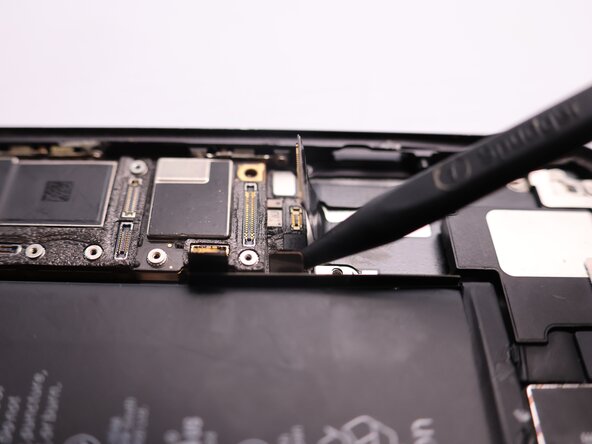

- Grab your trusty spudger and carefully pop off the cable connectors for the charging port and the wireless charging coil.
Tools Used
Step 44

Watch out for those sneaky cables! Keep the logic board free and clear so it can shine.
- Now, just retrace your steps and put everything back together like a pro! You've got this! If you find yourself stuck, don’t hesitate to schedule a repair for some extra support.


