iPhone 11 Pro Max Face ID Not Working Repair
Duration: 45 minutes
Steps: 13 Steps
Dot projector components are super delicate. A drop or some water can easily mess them up, which might cause Face ID to stop working. Since the dot projector IC is encrypted and swapping it means dealing with tricky data encryption bonding for the new chip, fixing Face ID can be quite the challenge. But don’t worry—Salvation Repair has come up with a straightforward and effective way to get your Face ID back in action. Let’s dive in!
Step 1


- Head over to Settings > Face ID & Passcode > Set Up Face ID. If you find yourself seeing the message, 'Move iPhone a little lower/higher,' it means Face ID is being a bit tricky. Looks like the dot projector might be throwing a tantrum!
- Next up, gently remove the display and detach the Face ID module. Uh-oh, there's a red mark! That little indicator is telling us the phone has had a swim – water damage alert!
Step 2


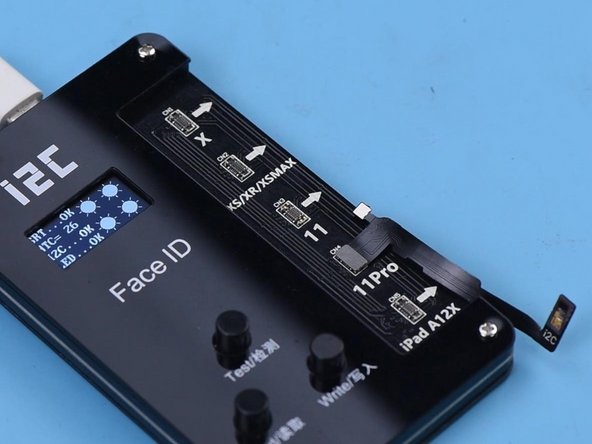
- Hook up the dot projector flex cable to the I2C Repair Programmer. The test confirms the dot projector flex cable is acting up.
- Hit “Read” to pull the data from the dot projector flex cable.
- Attach a new I2C iPhone 11 Pro Max flex cable to the programmer. Then press “Write” to transfer the saved data onto the new flex cable.
Step 3

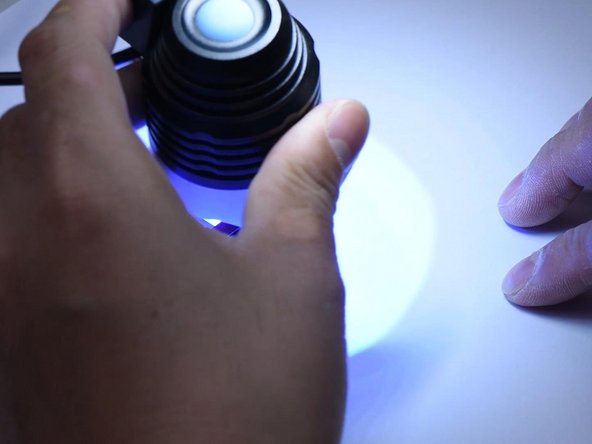
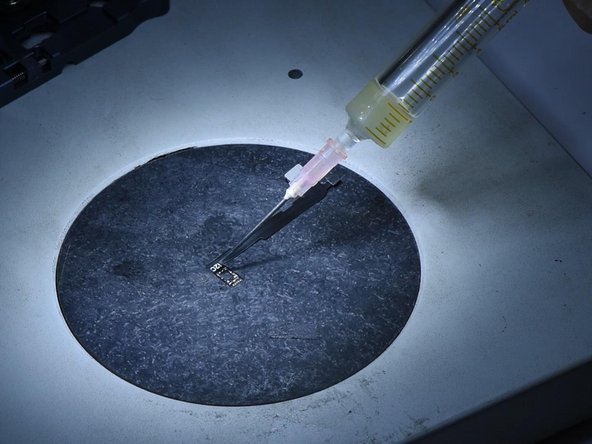
- Apply a tiny dab of UV Adhesive to the crystal of the dot projector flex cable and cure it with a UV lamp. This little trick will keep that crystal nice and secure.
- Gently peel off the foam from the back of the dot projector.
Step 4


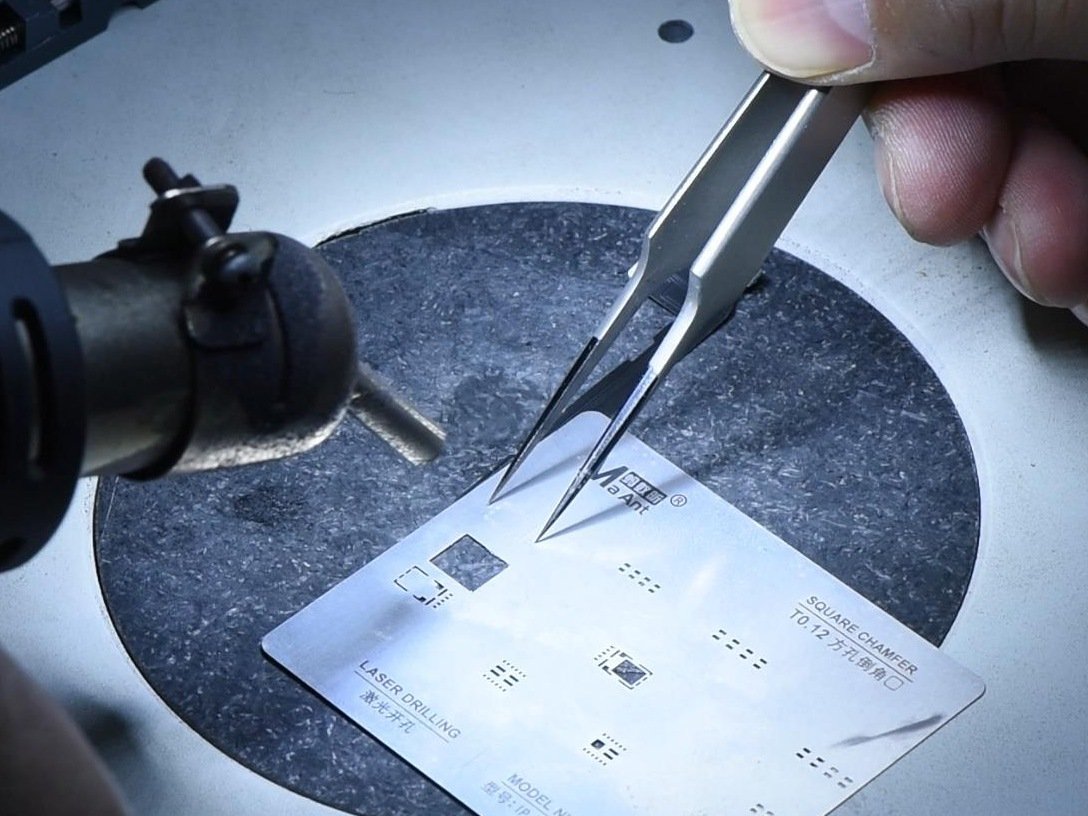
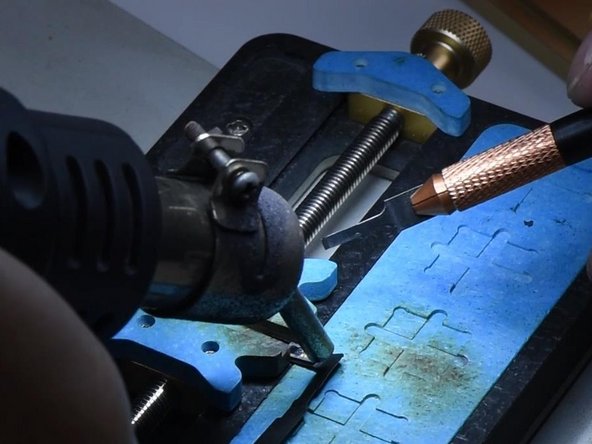
- To make your assembly game stronger, grab a Sculpture Knife and give your module a little mark for easier positioning.
- Now, let's get crafty! The dot projector flex cable is hiding under the metal plate, so gently lift that plate to free the cable.
Step 5


- Pop the Face ID module onto the Holding Fixture, then grab your grinder and smooth out the welding area on that metal plate.
- Slip the pry knife into the gap between the dot projector module and the crystal—go slow and steady, like you’re sneaking a cookie from the jar.
Step 6

- Crank up that hot air gun to a cozy 150℃ and gently coax the dot projector flex cable away.
- Now, turn up the heat to a sizzling 320℃ and carefully detach that dot projector module like a pro.
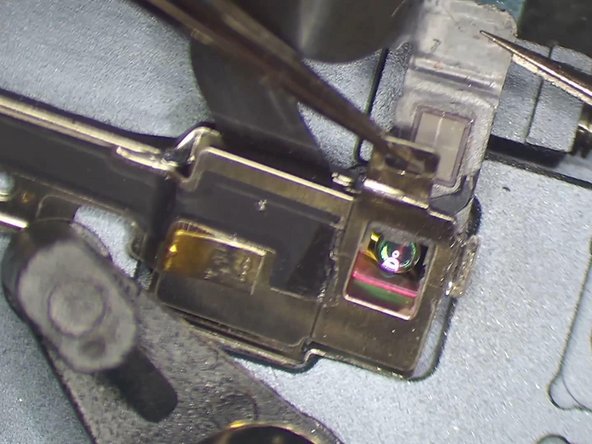
Step 7


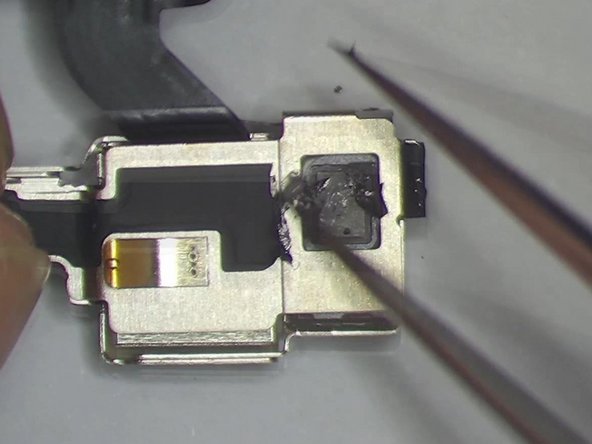
- Secure the dot projector module onto the Holding Fixture. Warm it up gently using a Hot Air Gun set to 320℃, then carefully remove the MOSFET.
- Put a tiny dab of Solder Paste on the bonding pad using a Soldering Iron heated to 365℃. Connect pin 2 and pin 3 of the MOSFET by bridging them with a 0.02mm copper wire.
Step 8


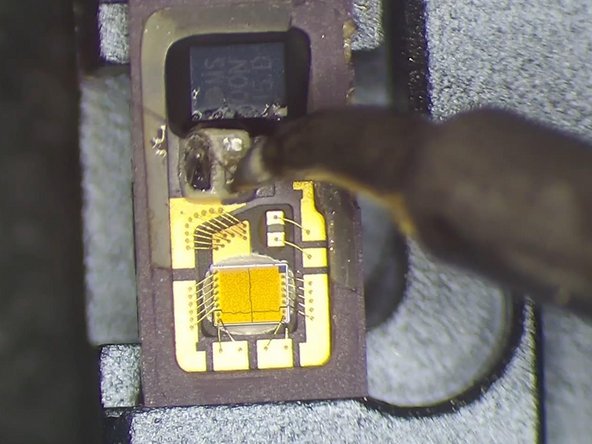
- Pop the dot projector module onto the holder like a pro. To give the tin a cleanup, grab your Soldering Iron set to 365℃ and swipe on a little rosin, then hit it with some solder-wick magic.
- Next up: freshen the module with PCB Cleaner. Warm things up with a Hot Air Gun at 240℃, and chase off any leftover adhesive with tweezers.
Step 9


- Grab that fresh flex cable. Position the Reballing Stencil just right, then spread some medium-temperature Solder Paste evenly like a pro.
- Fire up the Hot Air Gun to 320℃, heat it all up, then once it cools down, peel off the Reballing Stencil and admire your work.
Step 10
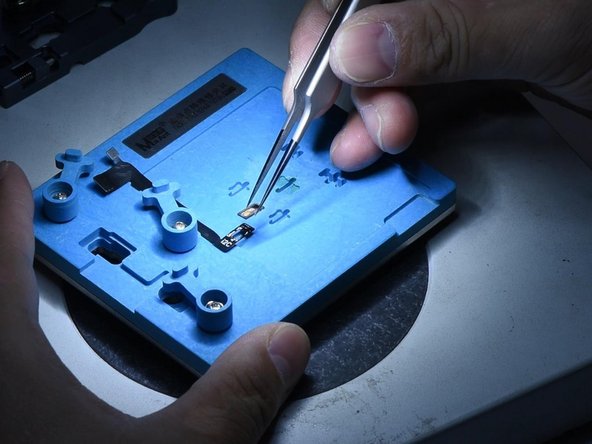

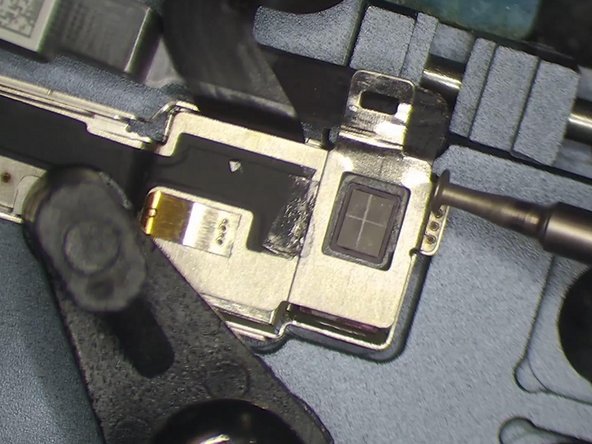
- Give it another warm hug with your hot air gun set to 320℃ and sprinkle on a little Paste Flux to the flex cable. It's like a cozy blanket for your electronics!
- Next, snugly fit the flex cable into its holder and make sure to line up the dot projector module just right. Precision is key, so take your time!
Step 11


- Get your hot air gun ready and crank it up to 320℃. Solder away!
- Next, grab that flex cable you just soldered and connect it to the I2C programmer. Hit 'Test' and look for the 'Pass' message on the screen—this means your flex cable is good to go!
- Now, secure the flex cable to the Holding Fixture and carefully position the dot projector flex cable in place. You're almost there!
Step 12


- Squeeze a little bit of that 460 Adhesive between the dot projector module and the crystal. Just a dab will do it!
- After the adhesive has had a moment to set, gently position the flex cable. You're doing great!
Step 13


- Keep an eye out for more updates coming your way!


