
iPhone 12 and 12 Pro Teardown
Duration: 45 minutes
Steps: 22 Steps
Thanks for tuning in as we dive into the inner workings of the iPhone 12 and 12 Pro!
Ready for a peek inside the iPhone 12 and 12 Pro? We’ve got you covered. Catch the teardown recording above, or keep scrolling for a step-by-step breakdown—including a bonus look at the new MagSafe power puck. Curious about the rest of the iPhone 12 lineup? We’ve got the mini and Pro Max teardowns too. For more tips and tech adventures, check out our YouTube channel, Instagram, Twitter, or sign up for our newsletter to stay ahead of the curve when the latest gadgets land on the repair bench.
Step 1


- While the Mini and Max models keep us on the edge of our seats, let’s dive into the middle siblings and check out what they bring to the table:
- A14 Bionic chip featuring the fourth-generation Neural Engine
- 6.1 inch (2532 × 1170 pixels) Super Retina XDR OLED screen with True Tone and HDR for stunning visuals
- 12 MP camera setup with ultra-wide (ƒ/2.4) and wide (ƒ/1.6) lenses — plus the Pro model adds a telephoto (ƒ/2.0) lens and a LiDAR scanner
- Built-in storage options of 64 GB (iPhone 12) and 128 GB (12 Pro)
- 5G connectivity (sub-6 GHz and mmWave), along with 4x4 MIMO LTE, 802.11ax Wi-Fi 6, and Bluetooth 5.0
- MagSafe wireless charging at 15 Watts
- Enhanced IP68 water resistance, rated for up to 6 meters deep for 30 minutes per IEC standard 60529
Step 2

Absolutely! These time-twisted phones are the brainchild of our amazing EU team, who got things done while the U.S. was catching some z's (or scrolling through endless feeds).
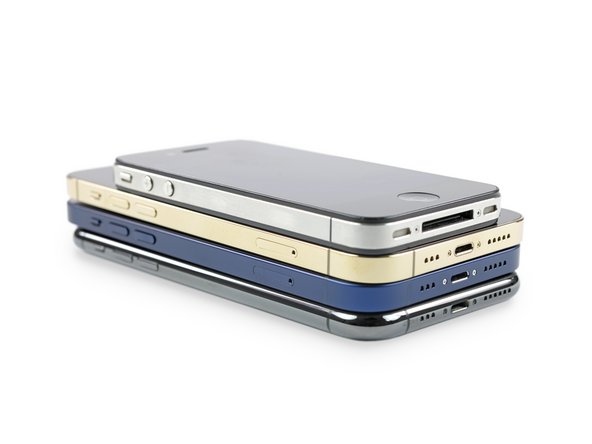
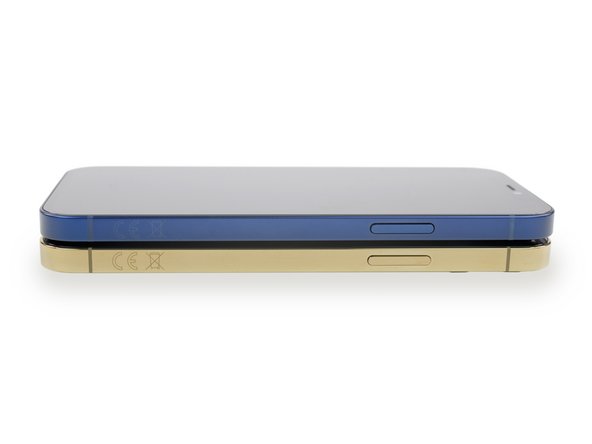
- Remember when the iPhone 4 rocked the world with its bold, squared edges? Those sharp lines were so iconic, they practically had a life of their own—until a developer left a prototype behind at a bar and it all got leaked. 😅
- Well, square’s back! But this time, no leaks—just sleek, flat edges that shake things up without making the phone feel any bigger. Plus, it might give you a little more screen space. How cool is that?
- Take a trip down memory lane with us as we compare the iPhone 11 Pro, iPhone 12, 12 Pro, and, for a bit of nostalgia, the iPhone 4. Spot the changes? We’re curious if you can catch them all!
- Notice anything different? For starters, the US models have this tiny millimeter wave window. It's probably not the designer's favorite feature, but hey, at least it’s not as annoying as those EU regulatory markings... 🙄
Step 3


Apple has now started having authorized repair centers warm up iPhones with heat before opening them. So yeah, their official method for cracking open iPhones has definitely stepped up its game.
- Enough history—time to get this device open!
- As usual, a couple of tricky Pentalobe screws stand in our way—but we've got the tools and skills to handle them.
- With a few suction handles and opening picks, we can carefully work our way inside—this isn’t our first rodeo.
- Heat and patience will guide us—while it’s not a completely new challenge, different technicians have encountered varied difficulties during opening. Maybe the adhesive was tweaked for extra water resistance?
Tools Used

Step 4


Starting with the iPhone 7, Apple decided to flip things around and open the device from the opposite side. Before that, iPhones from the 5 and 6 series opened from the bottom to the top. And if you’re feeling nostalgic, earlier models required a near-complete disassembly to get inside.
- The display opens from the right side now, which might just be a win for all the left-handers out there. High five!
- It’s a little awkward getting the connector shield loose with the screen still hanging on, but a little screen maneuvering gives you enough room to work your screwdriver magic.
- Bonus: you get a pretty sweet mirrored photo out of the deal.
Step 5


The 12 Pro isn’t showing off its skills just yet—but stick with us, we’re about to get hands-on and see what’s really going on under the hood.
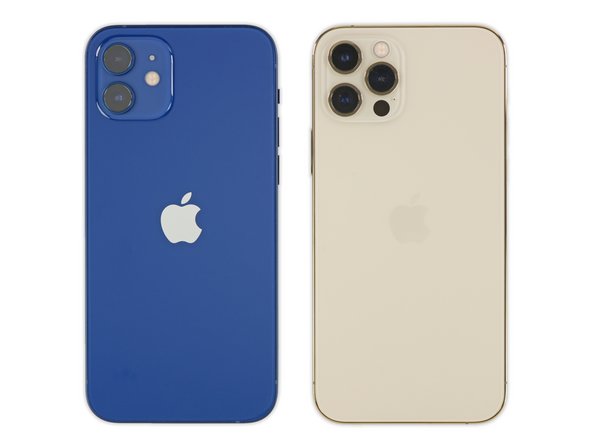
- With both screens powered off, it's time for a little 'Spot the Differences' challenge. The 12 is on the left, and the 12 Pro is on the right.
- Aside from the camera shields, there aren’t any huge differences when looking at them from above. Who would’ve thought?
- On the bright side, these make for some pretty sweet wallpaper material. Keep an eye on the homepage where we’ll be posting top-notch wallpapers for both the iPhone 12 and 12 Pro.
- Our early tests show that both displays work fine if swapped between the regular 12 and the 12 Pro—even though the max brightness specs are just a tiny bit different. But hey, if we uncover more details later, we’ll keep you updated!
Step 6


The main difference here? The Pro packs an extra camera and a LiDAR sensor, while the regular 12 just rocks a plastic spacer. Yep, it’s basically a placeholder, like the phone’s way of saying, ‘Maybe next time!’
- Alright, let's pop off those camera shields and spot the main difference between these two phones: the Pro has an extra camera lens hanging out.
- Now, let's check out the 12, and... wait, is that a fancy bit of plastic doing some high-tech magic?
- Both phones come with 12 MP wide and ultra-wide cameras rocking f/1.6 and f/2.4 apertures, while the Pro goes the extra mile with an f/2.0 telephoto lens.
- The Pro’s cameras also bring some cool perks to the party, like ProRAW, dual OIS, and the low-light perks thanks to LiDAR.
Step 7


What’s the deal with the switch? The logic board’s gone big—like, really big—thanks to Qualcomm's 5G chips. It doesn’t squeeze in under the cameras anymore, so it’s found a new spot.
Good news: speaker removal and replacement just got way simpler. No more wrestling with stubborn adhesive! Since you have to take out the speaker to swap the battery, this redesign makes life way easier for anyone doing repairs.
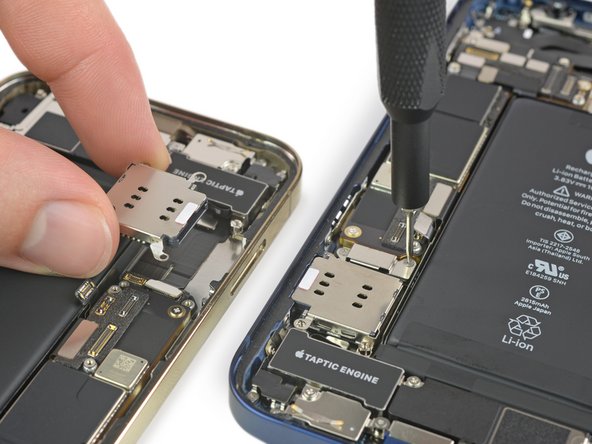
- These modular SIM card readers are pretty neat for repairs, even if their placement is a bit quirky—the SIM tray, logic board, and battery have all switched sides compared to older models.
- The speakers in both models now come secured with Phillips screws, making them super easy to take out—definitely a welcome change.
- While pulling out the speakers, we spotted something interesting: instead of the usual sticky adhesive, there are bright orange rubber gaskets behind the speaker grilles—kind of like what you'd find in Samsung phones.
Step 8


Looks like there's a little extra room in here—maybe just enough to sneak in a 3.5 mm headphone jack? Probably not quite that much space, but hey, a person can dream!
- There’s a whole squad of standoff screws hanging out at the bottom of the case. The Marlin Precision Screwdriver Set for iPhones has just the thing to tackle them—no sweat.
- Both the iPhone 12 and 12 Pro are rocking the same Taptic Engine—totally swappable in our testing. It’s a touch smaller than the one from the standard iPhone 11, but it’s also packing a bit more thickness.
- Craving details? Here you go: the Taptic Engine in the 12 series measures 22.25 mm x 9.48 mm x 3.56 mm. Last year’s version (from the green iPhone 11, shown at left) sized up at 26.9 mm x 11.18 mm x 3.44 mm.
Step 9


It's a bit of a bummer to see Apple ditching those cool L-shaped battery designs they crafted for the latest iPhones. There were whispers about Apple opting for more budget-friendly components to balance out the 5G costs, and it looks like that might just be the case.
- Right underneath the battery, you’ll find the stretch-release adhesive hanging out just where you’d expect—like your favorite road trip playlist. The iPhone 12 and 12 Pro each have four tabs, and they're pretty reliable.
- Rumor has it (and we’ve double-checked) that the 12 and 12 Pro are sporting identical batteries. Both come in at 10.78 Wh. Matching twins!
- That’s a bit less juice compared to the 11 and 11 Pro, which clock in at 11.91 Wh and 11.67 Wh. But thanks to the super-efficient new 5nm A14 chip, official specs say battery life holds steady.
- One thing Apple could freshen up: the tiny, flimsy pull-tab 'starter' section. Are these designed for miniature hands? Come on, Apple!
- The good news? The batteries are interchangeable in our swap tests.
Step 10
Not captured in the X-rays: all the smudges we inevitably leave behind on these gadgets...
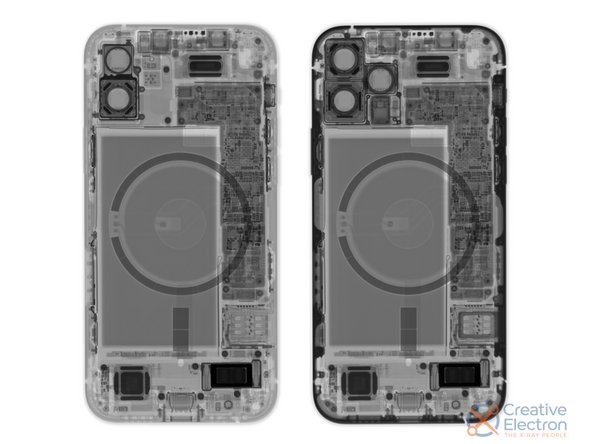
- Hold up—let’s take a quick X-ray detour, courtesy of Creative Electron. Here’s a sneak peek inside before we get hands-on!
- Check out that MagSafe wireless charging array! It’s awesome seeing those magnets in action. Magnet paper gives you a glimpse, but X-rays really turn things up a notch.
- And about that dark border on the iPhone 12 Pro X-ray? That’s not a filter—it’s the denser stainless steel frame showing up against the lighter aluminum of the iPhone 12. Science wins again!
Step 11


- Now that the battery is out of the way, it’s time to focus on the heart of the device.
- We carefully unplug a bunch of cables from the logic board. Luckily, it’s held in place by just three screws on each unit. Our trusty Marlin driver is ready to wrap things up.
Step 12


- A bit of heat (yes, quite a bit) combined with some gentle prying gets you two logic boards for the effort of one! We carefully opened up one of the iPhone 12 boards to take a peek at all that cool silicon inside. If you're wondering which board is which, you're not alone—the logic boards for the iPhone 12 and 12 Pro are almost twins, differing only in a few serial numbers.
Step 13

- Shout out to our amazing community for bringing you part two of IC Identification:
- NXP Semiconductor CBTL1614A1 display port multiplexer
- Texas Instruments SN61280 camera power management
- STMicroelectronics STB601A04 power management
- STMicroelectronics STWPA1-3033ABM wireless charging IC
- Texas Instruments SN2611A0 battery charging IC
- Apple/Cirrus Logic 338S00537 mono audio amplifier
- Apple/Cirrus Logic 338S00565 ? audio codec
Step 14

- Step right up for some IC Identification! Let's dive into the techy goodness. First up, we've got the Bosch Sensortec unknown accelerometer—it's a little mystery, but we're here to solve it! Next, say hello to the Qualcomm SMR526 RF transceiver, keeping those signals strong and clear. Then, we have the Apple 338S00564 power management chip, making sure your device stays powered up. Don't forget about the Qualcomm PMX55 power management, another key player in the power game! Moving on, check out the Skyworks Sky5 RF module, helping with all those radio frequencies. Last but not least, we have the Texas Instruments LM3637 LED driver—likely to brighten your day! Ready to tackle these components? Let's do this!
Step 15


We think these might relate to all the cool stuff Apple was chatting about at their keynote!
- Our US versions come packed with some cool 5G mmWave antenna modules. One is neatly tucked into the side of the frame, and the other is chilling on the back of the logic board.
- The antenna embedded in the frame is from USI, labeled 339M00104 S30U7FH.
Step 16


The magnets' polarity cleverly widens where you can place the phone while still keeping it perfectly lined up for top-notch charging.
- Time to strip things down to the essentials—Lightning connector assemblies, Face ID, flash modules, and a few more bits. Most of these parts look almost identical across models, except for some ribbon cable zigzags here and there.
- And of course, we can't ignore the mighty MagSafe charging setup! The coils might be old news, but those 18 magnets are still putting in work.
Step 17

- Say goodbye to mmWave and hello to high-speed 5G everywhere! This teardown is officially a wrap.
- The 5G revolution is here, and Apple's diving right in. They've clearly made some trade-offs to fit in those fresh new 5G components.
- The battery is now leaner and more basic, no longer the elegant design it used to be. The logic board, on the other hand, has grown quite a bit, giving up some of the miniaturization gains from the past few years. The Taptic Engine has shrunk a little, and the speakers have gotten a makeover—different, not necessarily worse.
- It’s surprising to see so many adjustments made for this emerging tech. Out of all the potential Apple innovations, this one feels the least groundbreaking. But hey! At least Apple kept the solid screen and battery repair procedures we've come to expect.
- That said, the iPhone 12’s repairability score comes with a big, bold asterisk. We’ve detailed some concerns in a follow-up article: Is This the End of the Repairable iPhone?
- Before we hit that final score, though, there's one more thing.
Step 18


Take a look inside for the first time with this X-ray view, courtesy of Creative Electron.
- Look what we've got here—another gadget ready for a little teardown fun.
- Apple’s new MagSafe charger isn’t hiding in the tiny iPhone box (you’ll have to fork over extra cash for it), but we grabbed one for a bit of hands-on experimentation.
- It works with all iPhones (and plenty of other Qi-compatible devices), but we’ve got a different plan for ours today.
- This MagSafe puck makes an interesting side-by-side with Apple’s other wireless charger for the Apple Watch. For a full breakdown of its insides, check out our detailed comparison.
- Spot the difference: MagSafe rocks a dark ring of magnets around the edge—matching up with the magnets inside the newest iPhones. The Apple Watch charger? Just has one lonely magnet in the center.
Step 19


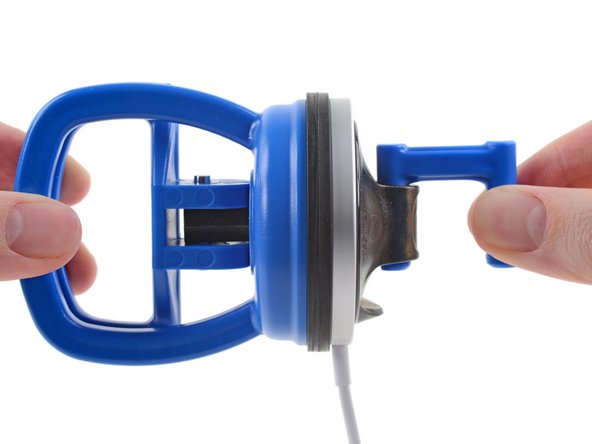
- Spot the only seam where the rubber and metal meet—that’s your entry ticket.
- Let’s get things toasty! Hit that seam with heat to soften up the glue, then slap on a suction cup on each side for a friendly game of tech tug-of-war.
- The white charging surface stretches a bit, but the actual gap is holding on for dear life. Optimism points for effort, but we’re not there yet.
- Time to bring out the blade! Slide a razor knife under the white cover and work your way between the plastic and metal. A little gentle prying gets us moving.
Step 20

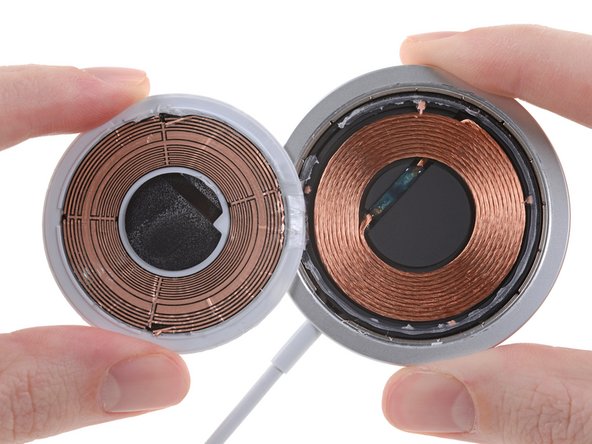
- Surprise! Charging coils hiding inside. Who would’ve thought?
- Flip over the white cover and you’ll spot a copper sticker, all etched up and ready to party, with four leads perfectly spaced around the charging coil.
Step 21


- Gently prying up the coils reveals the circuit board, but surprise! It's got a metal shield covering it.
- With the latest iPhones on the way, there's no time for microsoldering today. We’re diving straight in with the flush cutters to make our way through. The result might not win any beauty contests, but it's exactly what we need!
- Nestled on the little circuit board is a chip marked STWPSPA1. It's probably a close relative to STMicroelectronics' STWBC-EP, which is their 15W wireless charger IC.
Step 22


- While further disassembly may not reveal much more, that's where X-rays come to the rescue! Check out this close-up of the strain relief at the cable attachment point, along with a fantastic view of that USB-C connector.
- If you're craving even more iPhone 12 goodness, dive into our latest article: How LiDAR Works, and Why It’s in the iPhone 12 Pro.
- And once you’ve soaked that all in, don't miss our teardown of the iPhone 12 mini!


