
iPhone 12 Pro Max Earpiece Speaker and Front Sensor Assembly Replacement
Duration: 45 minutes
Steps: 32 Steps
This part is matched to your specific iPhone straight from the factory.
In this guide, you’ll learn how to carefully remove or transfer the earpiece speaker and front sensor assembly from your iPhone 12 Pro Max. This assembly is attached to the back of the display and includes a microphone, ambient light sensor, flood illuminator, and proximity sensor. Since it’s uniquely paired to your iPhone at the factory, you need to move it from your old screen to the new one when replacing the display. The flood illuminator is a key part of Face ID’s biometric security, so if it gets damaged or isn’t installed properly, Face ID won’t work. Swapping it out for a new part won’t help either, so handle everything with care. If something goes wrong, only Apple or an authorized technician can get Face ID back up and running.
Step 1

Heads up: Before you start, make sure your iPhone’s battery is below 25%. A fully charged lithium-ion battery is like a ticking firecracker if punctured—let’s keep things safe and cool!
Opening up your iPhone's display means you're going to break those waterproof seals. Make sure you have some replacement seals ready before you dive into this step. If you decide to reassemble your iPhone without swapping out the seals, just be extra careful around liquids!
- Shut down your iPhone before you start taking it apart. Trust me, it’s much happier that way.
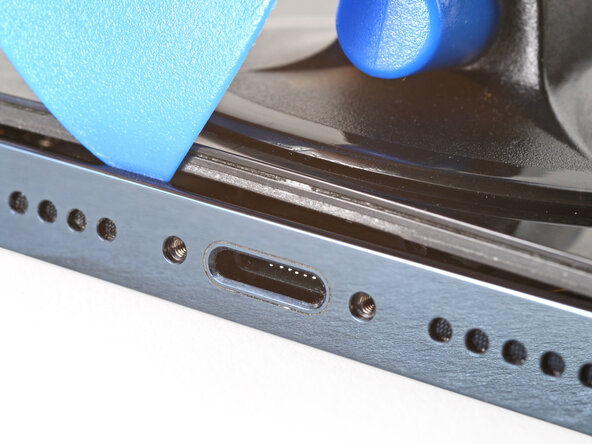
- Take out the two pentalobe P2 screws (they’re 6.7 mm long) from the bottom edge of your iPhone—right next to the charging port.
Step 2


Pushing your pick in too deep could cause some accidental damage to your device. To avoid that, simply mark the pick where you need it and keep everything safe.
Feel free to mark the other corners too, just to be extra sure you're on track.
Another trick is to tape a coin to the pick about 3mm from the tip – a simple and handy way to keep it in check!
- Grab your opening pick and measure about 3 mm from the tip. Mark that spot with a permanent marker so you’ve got a clear guide.
Step 3


Don't forget to rock those safety glasses! They're your best buddies in keeping your eyes safe from any sneaky glass bits that might decide to go on an adventure during the repair.
Got a cracked iPhone screen? Slap some tape over that glass to keep the shards in check and save your fingers from surprise pokes.
If your suction cup is giving you attitude, a dab of superglue can convince it to stick to the screen. Desperate times call for sticky measures!
- Cover the iPhone’s screen completely with overlapping strips of clear packing tape—think of it like putting on a protective film that sticks around.
- If the suction cup doesn’t want to stick in the upcoming steps, no worries! Fold a sturdy tape (like duct tape) into a little handle and use that to gently lift the screen instead.
Step 4


Ready for some tool magic? The next three steps show off the Anti-Clamp—a nifty gadget that makes opening your device a breeze. If you don’t have the Anti-Clamp, just jump ahead three steps for a different technique.
Want the full scoop on using the Anti-Clamp? Check out the guide linked here.
Is your iPhone a little too slick for the Anti-Clamp to grab? Slap on some tape to give it extra grip—problem solved!
- Give that blue handle a little tug backward to free the Anti-Clamp's arms.
- Gently glide those arms over either the left or right edge of your iPhone.
- Place the suction cups close to the bottom edge of your iPhone—one on the front and the other on the back.
- Squeeze the cups together to create a strong bond with your device. You've got this!
Step 5


- Give that blue handle a gentle tug forward to lock those arms in place.
- Now, twist the handle a full 360 degrees or until those suction cups start to stretch out. You've got this!
- Keep an eye on those suction cups to ensure they're staying in sync. If they start to wobble out of line, just loosen them a tad and get those arms back on track.
Step 6


Turn no more than a quarter at a time, then take a breather for a minute. Let the Anti-Clamp and a little patience do their magic!
For detailed tips on how to wield a hair dryer like a pro, check out this guide.
If the Anti-Clamp isn't quite making the magic happen, just add a little more heat to the area and give the handle a friendly quarter turn.
- Give your iPhone a cozy spot on a solid surface, like a hardcover book, so it can chill hands-free and stay nice and flat; this will make the next steps a breeze.
- Grab a hair dryer and warm up the bottom edge of your iPhone. You want it to feel pleasantly warm—almost like it's ready for a beach day.
- Take a quick breather for one minute to let that adhesive loosen up and create a little opening for you.
- Slide an opening pick under the screen's plastic bezel once the Anti-Clamp has made a nice enough gap for you to sneak in.
- Feel free to skip the next three steps.
Tools Used

Step 7

Don’t let your hair dryer hang out in one spot too long—keep it moving to avoid any accidental roasting.
- Grab your hair dryer or heat gun and warm up the bottom edge of your iPhone for about 90 seconds, or until it’s just a bit too hot to comfortably touch.
Tools Used

Step 8


- Grab your single suction handle and stick it near the bottom edge of the phone—but don’t get too close to the very edge of the glass, we want a good grip, not a slippery slip!
Tools Used

Step 9


Gently slide the opening pick under the thick plastic bezel, making sure you don't harm the screen. You should notice a slight gap, and the pick should glide smoothly without snagging. If there's no visible gap, give the screen a little more lift to create one.
The adhesive keeping the screen snug and secure is pretty tough, so getting that first little gap open will require some muscle. If you're struggling to make any headway, try applying a bit more heat and gently rocking the screen up and down to loosen up the adhesive. Once you've created enough of a gap, you'll be able to slide your tool in and keep going.
- Give that suction cup a gentle but determined tug to open up a little gap between the screen and the frame.
- Slide in an opening pick at a sharp angle into that newfound space.
Step 10


- Grab your trusty hair dryer and give some warm love to the right edge of your iPhone – that’s the side with the power button! Heat it up for about 90 seconds, or until it feels a tad too hot to handle. You're doing great!
Tools Used
Step 11


Keep your pick to a maximum of 3 mm—going deeper might lead to some unintentional damage to the internal components. Stay safe and happy repairing!
- Gently slide the opening pick around the bottom right corner of your iPhone to loosen up the adhesive holding it tight.
- Keep sliding the pick up along the right edge until you reach the top right corner—smooth and steady wins the race.
- Pause and leave the pick in place at the top right corner before moving on to the next step.
Step 12

- Grab a trusty hair dryer and give the top edge of your iPhone a warm-up session for about 90 seconds, or until it feels just a tad too hot to handle. You're doing great!
Tools Used
Step 13


Keep your pick under 3 mm to avoid bumping into the top sensors. A little too much could cause some trouble, so take it slow and steady.
- Gently glide the opening pick around the top right corner of your iPhone to break free that stubborn adhesive.
- Keep the pick snugly in the top left corner before moving on to the next step.
Step 14


- Grab a hair dryer and warm up the left edge of your iPhone for about 90 seconds, or until it feels just a tad too hot to handle.
Tools Used
Step 15

Hey there! Just a heads-up: there are some fragile cables snugly tucked along the left edge of your iPhone. So, steer clear of inserting your pick in that area to avoid any accidental damage to those little guys.
Step 16


Twist gently and steadily—slow and steady wins the race!
If the adhesive is being stubborn, give the left edge a little heat to loosen things up.
- Place a second opening pick at the bottom left corner of your iPhone.
- Gently twist both picks at the same time until the left edge clicks free.
Step 17


Hold off on pulling the display all the way off just yet—there are still some delicate ribbon cables hooking it up to the iPhone's logic board.
- Turn your iPhone so the right edge is looking right at you.
- Open up your iPhone by lifting the display from the right side, just like flipping the cover of a book.
- Prop the display up against something sturdy so it stays put while you tackle the rest of the phone.
- When you're putting it back together, gently place the display in the right spot, align those clips along the top edge, and press the top edge down until it clicks into place. If it’s being stubborn, give those clips around the edge a quick check to make sure they’re not bent out of shape.
Step 18

As you work through this repair, be sure to keep track of each screw and its original spot. Putting them back in the right place will help prevent any mishaps with your iPhone down the line.
- Unscrew those four tiny Y000 screws, each measuring 1.1 mm, that are holding the battery and display connector cover in place.
- Now's a perfect moment to give your iPhone a little test drive! Power it on and check that everything's functioning smoothly before you seal up the display. Just make sure to power it down completely before diving back into the repair!
Step 19

- Pop off the battery and display connector cover like a pro!
Step 20


Be gentle with the black silicone seal around this connector and others. It's like a superhero cape for your device—keeping water and dust out, so your tech stays safe and sound.
- Grab a spudger or use your trusty fingernail to gently pop the battery connector up from its spot on the logic board.
- Tilt the connector away from the logic board so it doesn't sneakily reconnect and power up the phone while you're working your repair magic.
Tools Used

Step 21


- Grab a spudger or your trusty fingernail and gently disconnect that display cable connector. You've got this!
- To get those connectors back together, make sure they’re lined up just right. Press down on one side until you hear that satisfying click, then do the same for the other side. Remember, no need to press the middle! If it’s not aligned, those pins can bend, and we definitely don’t want that. Keep it cool and take your time!
Tools Used
Step 22

- Grab a Y000 driver and unscrew the four tiny 1.1 mm screws that are holding down the front sensor connector cover. They're small, but you've got this!
Step 23


- Flip the cover up from the left side until the little clip on the right pops free.
- Take off the cover with a triumphant flourish.
- When putting things back together, slide that right-side clip into its slot first, then swing the rest of the cover into place like a pro.
Step 24


- Grab your trusty spudger or just use your fingernail, and gently pop off the front sensor assembly cable connector. Easy does it!
Tools Used
Step 25

- Let's get that display assembly off! It's time to reveal the inner workings.
- When you're putting everything back together, feel free to hit pause here if you're thinking about swapping out the waterproof adhesive around the display's edges. It's a great chance to keep things nice and sealed!
Step 26

- Let's get those screws out! Start by unscrewing the four little screws that are keeping the speaker/sensor assembly snug against the back of the display.
- You'll need two trusty 1.3 mm Phillips screws for this part.
- Don't forget about that one sneaky 1.8 mm shouldered Y000 screw hiding in there.
- And lastly, there's a tiny 1.1 mm Y000 screw that needs your attention too!
Step 27


The speaker is connected by a super delicate ribbon cable. Handle it with care to avoid any stress or damage to this little guy.
The earpiece speaker is held in place with a gentle stickiness.

Step 28

If you've got a hair dryer, heat gun, or even a hot plate handy, you can use those too! Just make sure you're not cranking the heat too high and giving your display an unwelcome sauna session.
- Grab your iOpener and let it chill on the top front of the display for a couple minutes. This gets the adhesive nice and soft so the sensors are easier to handle.
Tools Used

Step 29


Be gentle when prying—those light sensor ribbon cables are delicate, so take your time to avoid any damage.
- Grab your trusty spudger and gently lift the ambient light sensor out of its cozy notch in the front panel.
- Keep sliding the spudger under the sensor and its cable to break up that stubborn adhesive holding the cable in place. Nice and easy does it!
Tools Used
Step 30


- Grab the point of your spudger and gently work it into the notch around the microphone. Give it a little lift, and voilà! The microphone should separate from the front panel with ease.
Tools Used
Step 31


- Gently use the spudger's tip to lift the proximity sensor and flood illuminator module out of its cozy little spot in the front panel.
Tools Used
Step 32


- Before you wrap things up, double-check your new part against the old one—sometimes you'll need to move over a few bits or peel off some sticky stuff before popping it in.
- Ready to put everything back together? Just walk your steps backward and you're good to go.
- Done with old parts? Show your planet some love and drop them off at an R2 or e-Stewards certified recycler.
- If your device is still being stubborn, try a little troubleshooting or schedule a repair with us. You’ve got this!


