
iPhone 13 Pro Teardown
Duration: 45 minutes
Steps: 11 Steps
Step 1


- The iPhone 13 lineup made its grand entrance at the September 14th Apple Event, showcasing four new models. With every new iPhone release, there's always something new to learn, and this time it's no different. We're diving into the iPhone 13 Pro to uncover its new interior structure and see what that means for repairs.
- First, let's start by removing the SIM card tray. This little metal tray holds your Dual SIMs in place, with a waterproof and dustproof rubber ring inside to keep everything safe and dry.
- Next up, grab your tools and unscrew two screws at the bottom of the device. These screws, along with the adhesive, help keep everything tightly secured. It's a simple step, but crucial for the next phase of the teardown.
Step 2


- First up, heat the phone with a heating pad for about 3 minutes to loosen things up. Once it's nice and toasty, grab a suction cup and gently lift the display. If you see a gap, slide in a plastic card and run it along the edge. Just like the iPhone 12 Pro, the flex cable for the iPhone 13 Pro is on the left side. So, you'll want to start opening the display from the right edge.
- Heads up! The sensor module's flex cable is pretty short, so when you're lifting the display, try to keep the angle under 90 degrees. No need to rush—if it bends too much, that cable might snap!
- Next, unscrew the three screws holding the battery shielding cover in place. Use a spudger to pry off the cover. Once that's off, disconnect the battery, and you're all set for the next step.
Tools Used

Step 3


- Keep going and unscrew the four screws that are holding the sensor module shield in place. Once that's done, disconnect the sensor and screen flex cables to get the screen off.
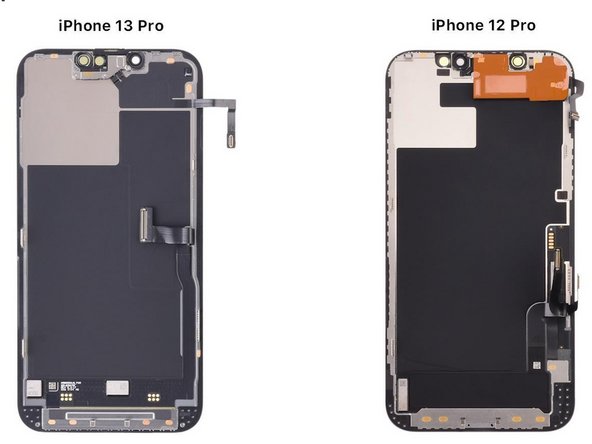
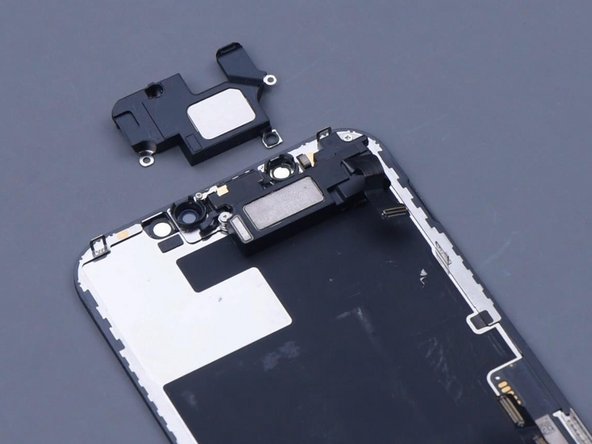
- For the iPhone 13 Pro, the earpiece is located on the housing. But for the iPhone 12 Pro and earlier models, the earpiece is attached to the screen itself.
- The display and touch flex cables are now combined. This means that refurbishing the screen of the iPhone 13 Pro might be a bit trickier.
Step 4


- Let's kick things off by unscrewing those three little screws that are keeping the sensor flex cable in place. A little heat from your trusty hot air gun will help you peel away that flex cable like a pro!
- Oh, and just a heads up, the aperture for the ambient light sensor is hanging out at the bottom right of the notch. Keep your eyes peeled!
Step 5


- The flex cable here is a multitasker—front microphone, distance sensor, and ambient light sensor, all rolled into one. Not quite the floodlight superstar of the iPhone 12 Pro, but still pretty snazzy.
- Spot the dot projector! On the iPhone 13 Pro, it’s relocated right to the center. It’s making moves.
Step 6

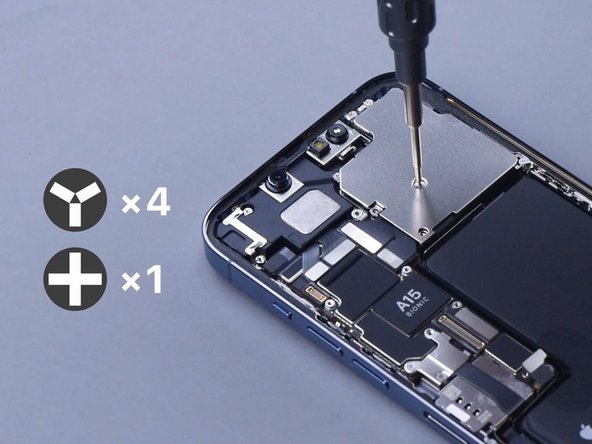
- Alright, let’s dive into the inner workings of your device! The interior of the iPhone 13 Pro has a sleek look compared to the iPhone 12 Pro, with a nice, tidy battery surface and that shiny A15 chip just hanging out on the motherboard.
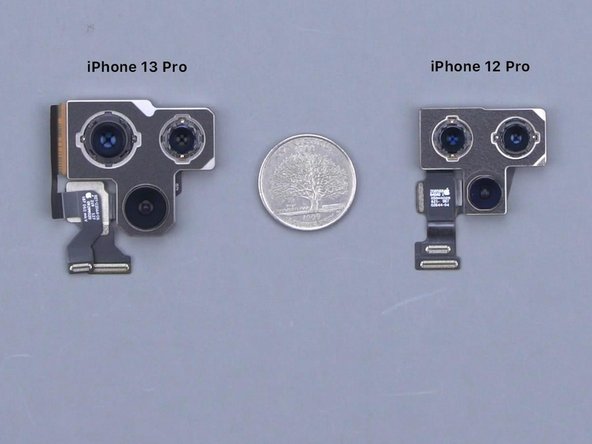
- Time to get our hands dirty! First, let's tackle those 5 screws holding the rear camera shielding cover in place. Once they’re out, carefully disconnect the camera's flex cable and gently remove the camera itself. Fun fact: The iPhone 13 Pro sports a larger camera than its predecessor, the iPhone 12 Pro!
Step 7

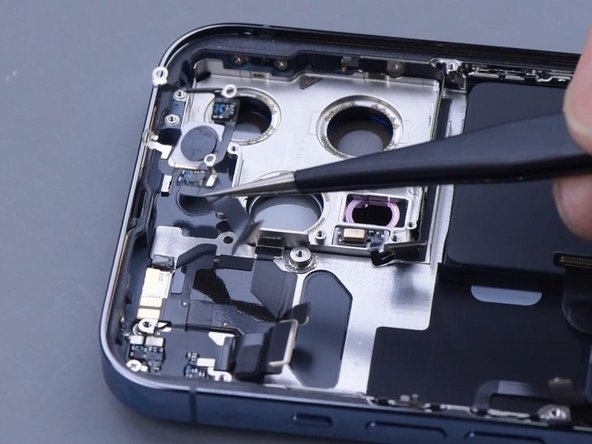
- Lift out the LiDAR—don’t worry, it’s wrapped up in buffer foam like a tiny VIP.
- Unplug the lower antenna and charging port flex cables. Next, pop off the dot projector and Face ID module flex cables. Easy does it!
Step 8
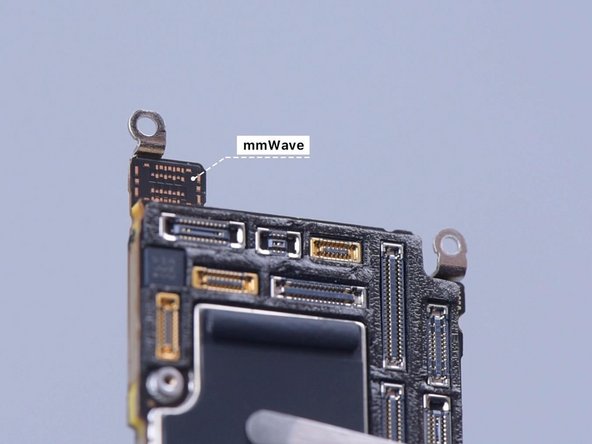

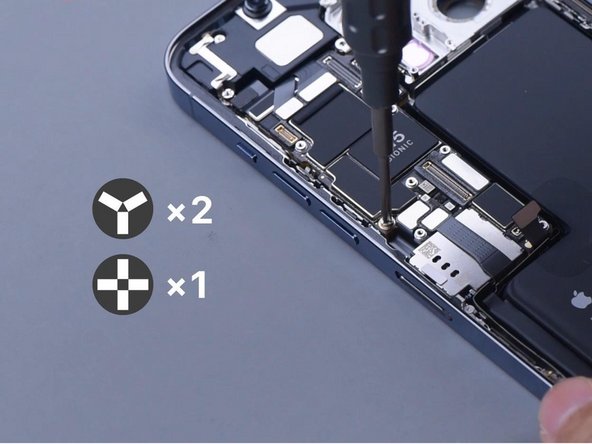
- Take out the motherboard. It’s rocking a double-layer design, and heads up—the SIM card reader is soldered right onto it. You’ll notice some heat dissipation tape chilling on both sides of the board.
- The spot for mmWave on the motherboard? Totally empty—just waiting for some action.
- Pop out the earpiece. It’s gotten a size boost compared to the last model, so keep that in mind.
Step 9

- Take out the Face ID flex cable. The dot projector and infrared camera of the iPhone 13 Pro are now hanging out on the same flex cable, so fixing Face ID down the line could be a bit of a puzzle.
- Next up, pop off the flash flex cable. Undo the screws holding the signal antenna, then remove the antenna itself. Say goodbye to the NFC antenna too.
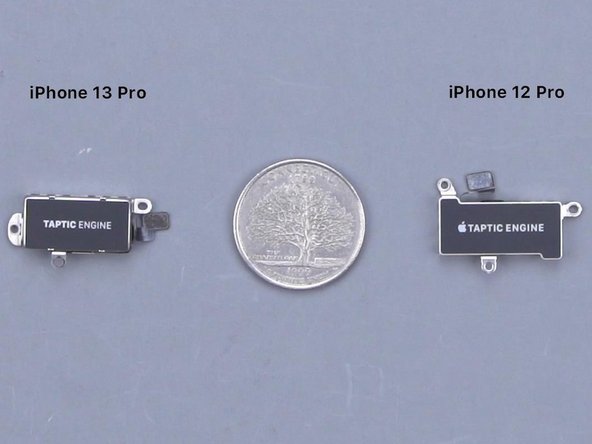
- Unscrew everything keeping the charging port flex cable in place. After that, pull out the speaker and Taptic Engine. By the way, the Taptic Engine in the iPhone 13 Pro is a little more compact.
Step 10
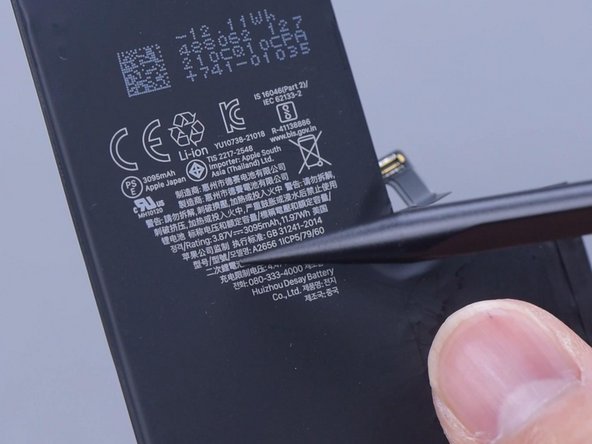

- Next up, let’s get that battery out! Grab your tweezers and gently pull out the adhesive strips—patience is key here. Fun fact: the battery capacity just got a boost, going from 2815 mAh to a beefier 3095 mAh. Nice upgrade!
Step 11


- Now, let's get that plastic piece out of the way and gently detach the charging port flex cable.
- The back cover of the iPhone 13 Pro is a doppelgänger of the iPhone 12 Pro, so we can assume the refurbishment process is pretty much the same as its predecessor. Overall, tackling the iPhone 13 Pro is a bit more straightforward than the 12 Pro, but watch out—screen refurbishing and Face ID repairs can be a bit trickier.
- Stay tuned! We’ll soon be rolling out videos on how to separate the motherboard, refurbish the screen, and tackle the back cover, diving deep into the repair challenges of the iPhone 13 Pro. Don't miss out!


