iPhone 13 SIM Card Reader Replacement
Duration: 45 minutes
Steps: 38 Steps
Get ready to swap out that SIM card reader in your iPhone 13! It's simpler than it sounds, and with a bit of patience and care, you’ll have your device back in action in no time. Let's make this journey together, step by step. If you find yourself needing a hand, just schedule a repair!
Step 1
- Grab a SIM card eject tool or a paperclip and gently poke it into the tiny hole on the SIM card tray, which you can find on the side of your iPhone near the volume buttons.
- Give it a firm push to pop that tray out!
Tools Used
Step 2
The SIM card is ready to pop out of the tray without any fuss.
- Gently pop out the SIM card tray from your iPhone. No need to rush, just a smooth pull and it's out!
- When putting the SIM card back in, make sure it's sitting snugly and facing the right way inside the tray. A little orientation goes a long way.
- There's a small rubber gasket around the SIM tray that helps keep out water and dust. If it looks worn out or is missing, be sure to replace it, or the whole SIM tray, to keep your iPhone safe from the elements.
Step 3
Heads up! Drop your iPhone battery below 25% before diving in. Poking a charged lithium-ion battery is a risky move—it could go up in flames or even pop!
Opening up your iPhone's display might just pop those waterproof seals right off! So, make sure you've got some replacement seals on hand before diving into this step. If you decide to put your iPhone back together without replacing them, just be extra careful to keep it away from any liquids.
- Before diving in, make sure your iPhone is powered off—safety first!
- Grab your P2 pentalobe screwdriver and unscrew the two 6.8mm screws at the bottom of the phone. Easy peasy!
Step 4
Be careful not to shove that opening pick in too deep; it could end up hurting your device. Let’s make sure we mark it properly to keep everything safe and sound!
Feel free to add some flair by marking the other corners of the pick with various measurements.
Another nifty trick? Tape a coin about 3 mm from the tip of the pick for a little extra guidance!
- Grab your trusty permanent marker and measure out 3 mm from the tip. Give that opening pick a little dot—trust us, it’ll help you out later!
Step 5
Put on your coolest safety glasses to shield your eyes from any sneaky glass bits that might try to escape during the repair. Stay safe while you work your magic!
Got a cracked screen on your iPhone? No worries! Just throw some tape over that glass to keep it in check and avoid any accidental cuts while you work your magic.
If you're really stuck, a little superglue on the suction cup can give you the extra grip you need to lift that screen off.
- Cover the iPhone's screen with overlapping strips of clear packing tape until the entire front is protected.
- If the suction cup doesn't want to stick in the next steps, no worries! Just fold a sturdy piece of tape (like duct tape) into a little handle and use that to lift the screen instead.
Tools Used
Step 6
In the next few steps, we'll introduce you to the Anti-Clamp! This nifty little tool is designed to help make the opening process a breeze. If you're not using the Anti-Clamp, no worries—just skip ahead three steps for a different approach.
For all the juicy details on how to work the Anti-Clamp like a pro, be sure to check out this guide.
If you find that your iPhone's surface is a bit too slick for the Anti-Clamp to grip, a little tape can work wonders! Just stick some on to amp up the gripping power.
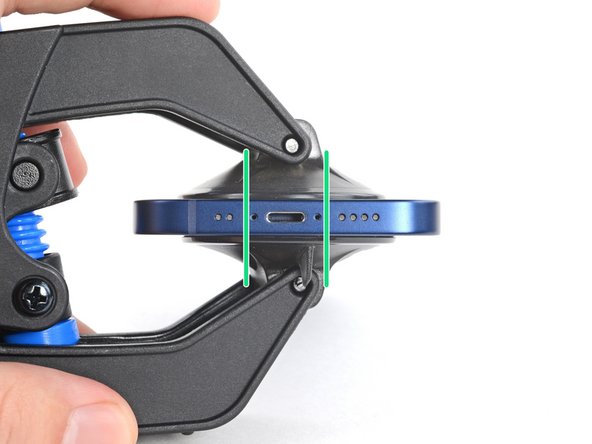
- Give the blue handle a little pull back to release the Anti-Clamp's arms.
- Gently slide those arms over the left or right side of your iPhone.
- Place the suction cups close to the bottom edge of your iPhone—one on the front and one on the back.
- Squeeze the cups together to create a solid suction on your chosen spot.
Step 7
- Slide that blue handle forward to lock those arms like a pro.
- Spin the handle in a full circle (yep, 360 degrees) or until you see the cups start to stretch.
- Keep the suction cups lined up with each other. If they start wandering off, loosen them a bit and get the arms back in sync.
Step 8
Turn no more than a quarter turn at once, then chill for a minute. Let the Anti-Clamp and a little patience do all the heavy lifting!
Need a little help with your hair dryer? Check out our guide for all the steps you need.
If the Anti-Clamp isn’t giving you enough space, no worries! Just apply some extra heat and give the handle a gentle quarter turn to loosen things up.
- Let's get that iPhone propped up on something solid, like a sturdy hardcover book. This will keep it hands-free and nice and level for the next steps—easy peasy!
- Grab a hair dryer and warm up the bottom edge of your iPhone. It should feel a tad too hot to comfortably touch—just the right amount of cozy!
- Now, hang tight for about a minute. This gives the adhesive a chance to loosen up and create a gap for us.
- Once that gap is nice and big thanks to the Anti-Clamp, slip an opening pick right under the screen's plastic bezel.
- Feel free to skip the next three steps!
Tools Used
Step 9
Keep that hair dryer moving and grooving! Don't let it chill in one spot too long, or you might end up with some unexpected surprises.
- Grab a hair dryer or heat gun and warm up the bottom edge of your iPhone for about 90 seconds, or until the screen feels just a touch too hot to keep your fingers on comfortably.
Tools Used
Step 10
- Grab that suction handle and place it on the bottom edge of your phone, making sure not to get too close to the glass edges. You're aiming for a secure grip, not a glass disaster!
Tools Used
Step 11
The adhesive holding the screen in place is tough – it takes some serious effort to pry that gap open. If you're struggling, don't worry! Apply a little extra heat and gently rock the screen back and forth to loosen the adhesive. This should give you just enough wiggle room to get your tool in and keep going. You've got this!
- Gently tug on that suction cup with steady pressure to make a tiny space between the screen and the frame. You've got this!
- Now, slide an opening pick into that little gap beneath the screen's plastic bezel. Easy peasy!
Step 12
- Grab a hair dryer and gently warm up the right edge of your iPhone (the side with the power button). Aim for about 90 seconds, or until the screen feels just a little too warm to touch. This will make things a whole lot easier when you move on to the next steps.
Tools Used
Step 13
Keep your pick under 3 mm in there, or you might poke something important!
- Gently slide the opening pick around the bottom right corner of your iPhone to break that pesky adhesive seal.
- Keep gliding the pick along the right edge of the iPhone until you reach the top right corner.
- Pop the pick into the top right corner and let it hang out there while you tackle the next steps.
Step 14
- Grab a hair dryer and warm up the top edge of your iPhone for about 90 seconds, or until it feels just a bit too toasty to touch.
Tools Used
Step 15
Keep your pick to a maximum of 3 mm in depth, or you might accidentally poke those delicate top sensors!
- Glide your opening pick along the top right corner of the iPhone to slice through the sticky adhesive—like a ninja with a tiny sword.
- Park that pick in the top left corner and chill for a sec before moving on.
Step 16
- Grab your hair dryer and warm up the left edge of your iPhone for about 90 seconds, or until it feels a little too toasty to touch. This helps loosen things up for the next step.
Tools Used
Step 17
Be careful around the left edge of your iPhone—there are some sensitive cables hiding there! Keep your pick away from this area to avoid any accidental damage.
Step 18
Gently work the twisting motion—no need to rush it!
If the adhesive is playing hard to get, give the left edge a little warm-up.
- Place a second opening pick at the bottom left corner of your iPhone.
- Gently twist both picks at the same time to release the left edge clips.
Step 19
Hold your horses on fully separating the display! Those delicate ribbon cables are still hanging out with the iPhone’s logic board, so let's keep them together for now.
- First things first, if you still have the suction handle on, give it the boot!
- Now, let’s rotate that iPhone so the right edge is looking right at you.
- Next, it’s time for a little showbiz—open your iPhone by swinging the display up from the right side, just like you're flipping open the front cover of a book.
- Pro tip: lean the display against something sturdy to keep it upright while you get your hands busy with the rest of the phone.
- When it’s time to put everything back together, lay the display back in place, align those clips along the top edge, and gently press the top edge into its snug spot before giving the rest a little firm press down. If it’s being stubborn and doesn’t click in easily, check out those clips around the display's edges—make sure they're not bent out of shape.
Tools Used
Step 20
Keep a close eye on every single screw during this repair—each one has a home, and putting them back in the right spots is key to keeping your iPhone happy and safe.
- Grab your Phillips screwdriver and carefully take out the three 1.3 mm screws holding down the battery and display connector cover.
- When putting everything back together, it’s a smart move to power on your iPhone and check that all functions are working before sealing the display. Don’t forget to power it down completely again before moving on.
Step 21
- Take off the cover with a little finesse!
Step 22
Be careful not to mess up the black silicone seal that hugs this and other board connections. These seals are like tiny superheroes, keeping out water and dust like a champ!
- Grab a spudger or just use a clean fingernail, and gently pop the battery connector up from its socket on the logic board. No heavy lifting required.
- Give the connector a little bend away from the logic board so it doesn't sneak back and accidentally power on the phone while you're working your magic.
Tools Used
Step 23
When re-attaching press connectors like this one, line up one side carefully and press down until you hear a click, then do the same on the other side. Avoid pressing in the middle—that’s a no-go! If the connector isn’t properly aligned, those tiny pins might bend and cause lasting damage.
- Gently pop the display cable connector loose using a spudger or your fingernail—no need to wrestle with it.
Tools Used
Step 24
- Let's start by removing the three screws holding down the front sensor connector cover:
- One 1.7 mm Phillips screw
- One 1.3 mm Phillips screw
- One 1.8 mm Y000 screw
Step 25
- Lift the cover from the middle of the phone and gently swing it up until the tiny clip near the edge pops free.
Step 26
- Time to pop that cover off! Just give it a little tug and watch it go.
- Now, when you're putting everything back together, start with the clip on the left edge—slot it in like a pro before hinging the rest of the cover into place. You've got this!
Step 27
- Gently use a spudger or your fingernail to disconnect the front sensor assembly cable connector. It’s a simple step, just make sure you're careful not to apply too much force!
Tools Used
Step 28
- Time to say goodbye to the screen! Carefully remove it and take a moment to appreciate the journey. If you're feeling adventurous and want to give your device a little spa treatment, pause here to swap out that waterproof adhesive around the edges of the display. It’s a small touch that goes a long way!
Step 29
- Grab your Phillips driver and carefully unscrew the three 2.2 mm screws holding down the Taptic Engine. Keep track of those little guys!
Step 30
- Carefully take off the Taptic Engine bracket from the top two screw hole tabs.
Step 31
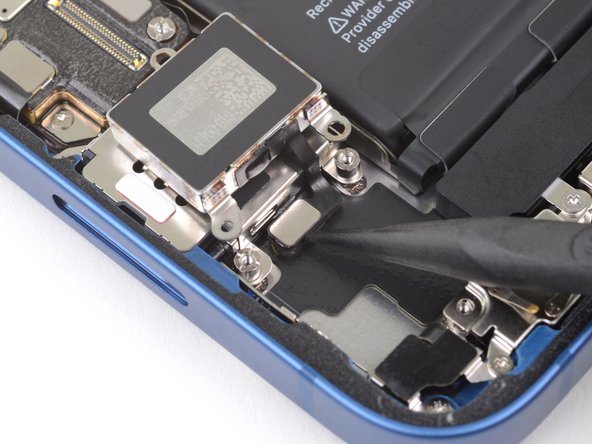
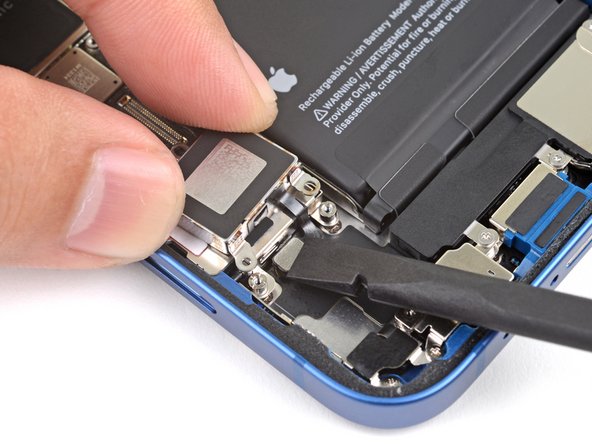
Take it easy when handling that delicate ribbon cable connecting the Taptic Engine to the logic board. No sudden moves – just gently swing the Taptic Engine over to the SIM card reader without twisting or pulling it. Patience is key!
- Lift the Taptic Engine from its lower edge and flip it over so that it rests upside down on the SIM card reader.
Step 32
- Gently use the pointed end of a spudger to lift the Taptic Engine cable connector straight up and unplug it from its socket on the logic board.
Tools Used
Step 33
- Carefully take out the Taptic Engine from the iPhone.
Step 34
- Time to reunite the Taptic Engine with its home! Here’s how:
- Flip the Taptic Engine upside-down and rest it on the SIM card reader. Make sure its ribbon cable is aiming right at the connector on the logic board.
- Tap the Taptic Engine press connector back into place using the flat end of a spudger or your finger—whichever feels more like your style.
- Swing the Taptic Engine back into its recess like you’re putting the finishing touch on a masterpiece.
Tools Used
Step 35
You'll find the SIM card reader cable connector hanging out right next to the battery cable connector. It's like they’re best buddies!
- Gently slide the point of your spudger under the SIM card reader cable connector, and carefully lift it up out of its slot on the logic board. Take your time, it's easier than it looks!
Tools Used
Step 36
If you're using a small flathead screwdriver in place of the usual tool, just go slow and steady—these little guys can slip and take a chunk out of nearby parts if you're not careful!
To tackle those standoff screws, grab a standoff screwdriver or bit. It’ll make your job a whole lot easier!
- Unscrew the three screws holding the SIM card reader in place:
- One 1.2 mm Phillips screw
- Two 3.2 mm standoff screws
Step 37
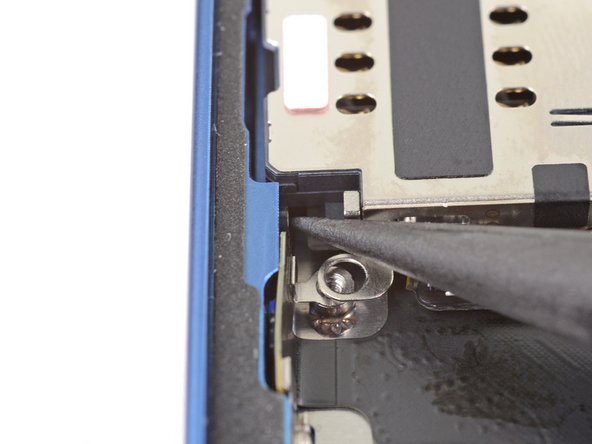
When the SIM card eject pin is fully extended into the phone, it prevents the SIM card reader from being easily removed. So, be careful when you're popping that pin out!
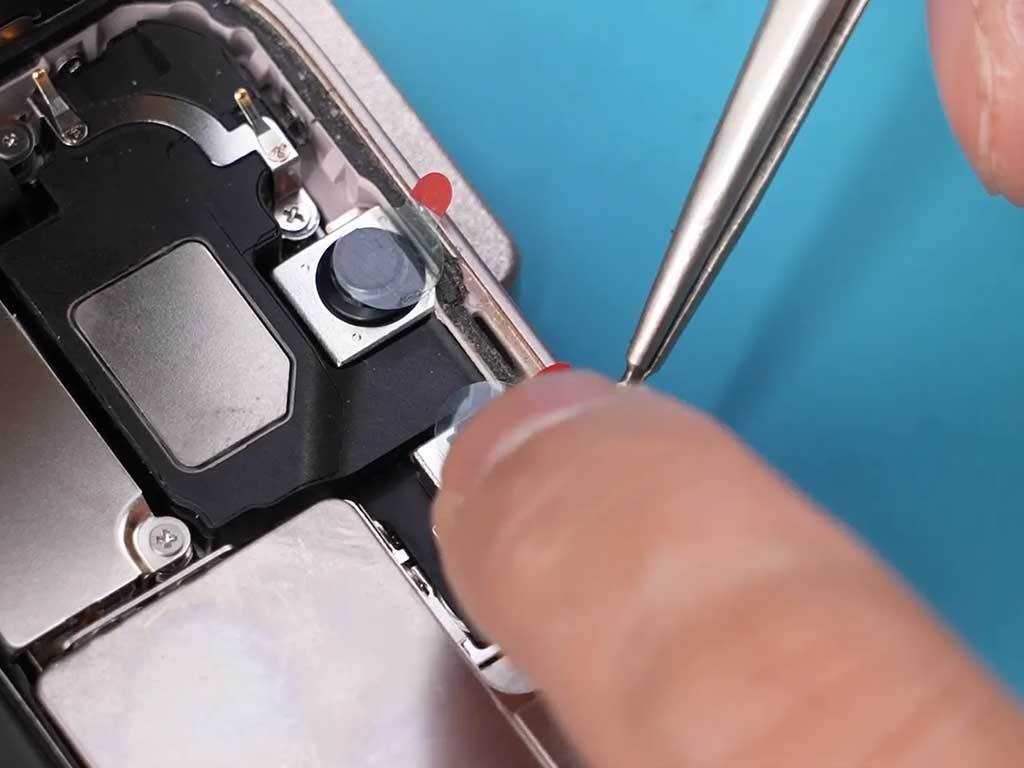
- Grab your trusty spudger and nudge the SIM card eject pin away from the SIM card reader, sending it toward the edge of the phone like a gentle little push. Easy does it!
Tools Used
Step 38
- Check out your new part next to the old one—make sure you move over any pieces or peel off any sticky stuff before popping it in.
- To put your device back together, just walk through these steps backwards.
- When it’s time to say goodbye to old parts, drop them off with a certified e-waste recycler.
- Something not quite right? Try a bit more troubleshooting, or connect with our iPhone 13 Answers community. And if you’re stuck, you can always schedule a repair.


