iPhone 15 Battery Replacement
Duration: 45 minutes
Steps: 33 Steps
Ready to give your iPhone 15 a new spark? Swap out the battery and keep your phone running like a champ. Most iPhone batteries hold strong for about 500 charge cycles (think 18–24 months), so if yours needs constant juice or seems sluggish, it’s probably time for a fresh one. Grab a replacement battery and back glass adhesive before you start. If your battery is looking a bit puffy, handle it with care. Heads-up: On iOS 17.6 and earlier, Apple’s parts pairing can pop up annoying warnings and hide battery health info, but your new battery will still work just fine. Using iOS 18 or newer? You can calibrate genuine Apple batteries with Repair Assistant. If things get tricky, you can always schedule a repair.
Step 1


Let your phone’s battery drop below 25% before you start—charged lithium-ion batteries can be a bit spicy when it comes to safety.
- Disconnect all cables from your phone before getting started.
- Press and hold the power button along with either volume button, then swipe to turn off your phone.
Step 2


Ensure there's a nice, smooth spot near the bottom edge that's large enough for a suction cup to get a good grip.
- Got a screen or back glass that’s seen better days? Cover those cracks with overlapping strips of packing tape—your fingers will thank you, and taking things apart gets way less dicey.
Step 3


Don't let your pick go on an adventure deeper than intended—mark its depth to keep your device safe.
Want to get fancy? Mark different measurements on each corner for pro-level control.
Or, tape a coin 3 mm from the tip of your pick and boom—built-in depth check!
- Get your measuring skills on! Mark a spot 3 mm from the tip of the opening pick with a permanent marker. You've got this!
Step 4


- Grab your P2 pentalobe driver and twist out the two 7.7 mm screws flanking the charging port—nice and easy, you got this!
Step 5

Don't overdo it with the heat! Keep it cool – your battery doesn't love getting too hot and could get damaged. Play it safe!
- Grab your trusty hair dryer or heat gun and give the bottom edge of that back glass a warm hug until it feels nice and toasty to the touch.
Tools Used


Step 6


- Stick a suction handle onto the bottom edge of the back glass—think of it as giving your device a little handlebar mustache.
- Give that handle a firm, steady tug to coax a gap between the back glass and the frame. Slow and steady wins this race.
- Slip the tip of an opening pick into the gap you just created. Like threading a needle, but way more satisfying.
Tools Used

Step 7

Heads up! When you’re slicing through the adhesive holding the back glass, watch out for these tricky spots:
- Heads up: there's a sneaky little cable hiding by the volume down button, linking the back glass to the phone. Keep your pick away from this spot—one wrong move and the cable gets sliced.
- Spring contacts are hanging out all around the edge of the phone. When you’re sliding your pick, stick to the shallow end as directed so you don’t accidentally bend these guys.
Step 8


Be careful not to push your opening pick more than 5 mm into the bottom edge. A little goes a long way!
- Gently slide your pick back and forth along the bottom edge to loosen that sticky adhesive. Take your time, it's like a mini workout for your fingers!
- Once you've got a little movement, leave your pick in the bottom right corner. This will keep the adhesive from re-sticking itself. It's like holding a door open to keep the party going!
Step 9

- Warm up the right side of the back glass until it feels nice and toasty.
Step 10


Keep that pick of yours under 7 mm along the right edge – we don't want any surprises!
And remember, steer clear of slicing past the volume buttons to keep the wireless charging cable safe and sound.
- Gently rotate your pick around the bottom right corner and slide it towards the volume down button. Keep going until you feel a firm stop from a large clip holding the back glass in place.
- Once your pick is in, leave it there to keep the adhesive from resealing. You're doing great!
Step 11

- Warm up the left edge of the back glass until it feels pleasantly hot to the touch.
Step 12


Along the left edge, keep your pick shallow—no deeper than 5 mm—to avoid any oops moments.
- Pop in a second opening pick along the bottom edge—double the fun!
- Spin that pick around the bottom left corner like you mean it.
- Slide your pick up to the top left corner, breaking up the sticky stuff as you go.
- Let that pick chill in place so the adhesive doesn't sneak back together.
Step 13

- Warm up the top edge of the back glass until it feels nice and toasty.
Step 14


Keep your pick shallow—don't go deeper than 3 mm along the top edge.
You may experience some satisfying clicks as the top two clips pop free.
- Swing your second opening pick around the top left corner, then glide it over to the top right to loosen that stubborn adhesive.
- Keep this pick parked right there so the adhesive doesn’t sneakily stick itself back together.
Step 15

- Warm up the top right corner of the back glass until it feels nice and toasty.
Step 16


Keep your pick no deeper than 4 mm along the right edge to avoid any trouble.
- Twist that second opening pick around the top right corner and glide it over to the volume up button to break free from the adhesive's grip.
Step 17


If that back glass is acting stubborn, take another lap around the edge to make sure you didn’t miss any sticky spots or sneaky clips.
- Gently swing open the back glass towards the right side of the phone. No rush, just a smooth move!
- Place the back glass on a raised surface, ensuring the cable isn't under any pressure. We don't want to stress it out!
Step 18

As you dive into this repair adventure, remember to keep an eye on those screws! They have a way of playing hide and seek, so make sure each one returns to its cozy little spot after you’re done.
- Grab a tri-point Y000 driver and unscrew the two 1.3 mm-long screws holding the lower connector cover in place. It's a small step, but it gets us one step closer to fixing that device!
Step 19


- Grab your tweezers and gently slide the cover upward to unhook it from the logic board.
- Take off the cover and set it aside.
- When putting it back together, make sure to hook the top edge of the cover into its slot on the logic board before tightening the screw to keep it secure.
Tools Used

Step 20


To reconnect a press connector, carefully line it up over the socket and press down on one side until you hear a click. Then, press down on the other side. Ensure it's seated flat, as the rubber around the socket might prevent a full connection.
Look for a plus and minus sign on the connector head – that's your guide to proper alignment!
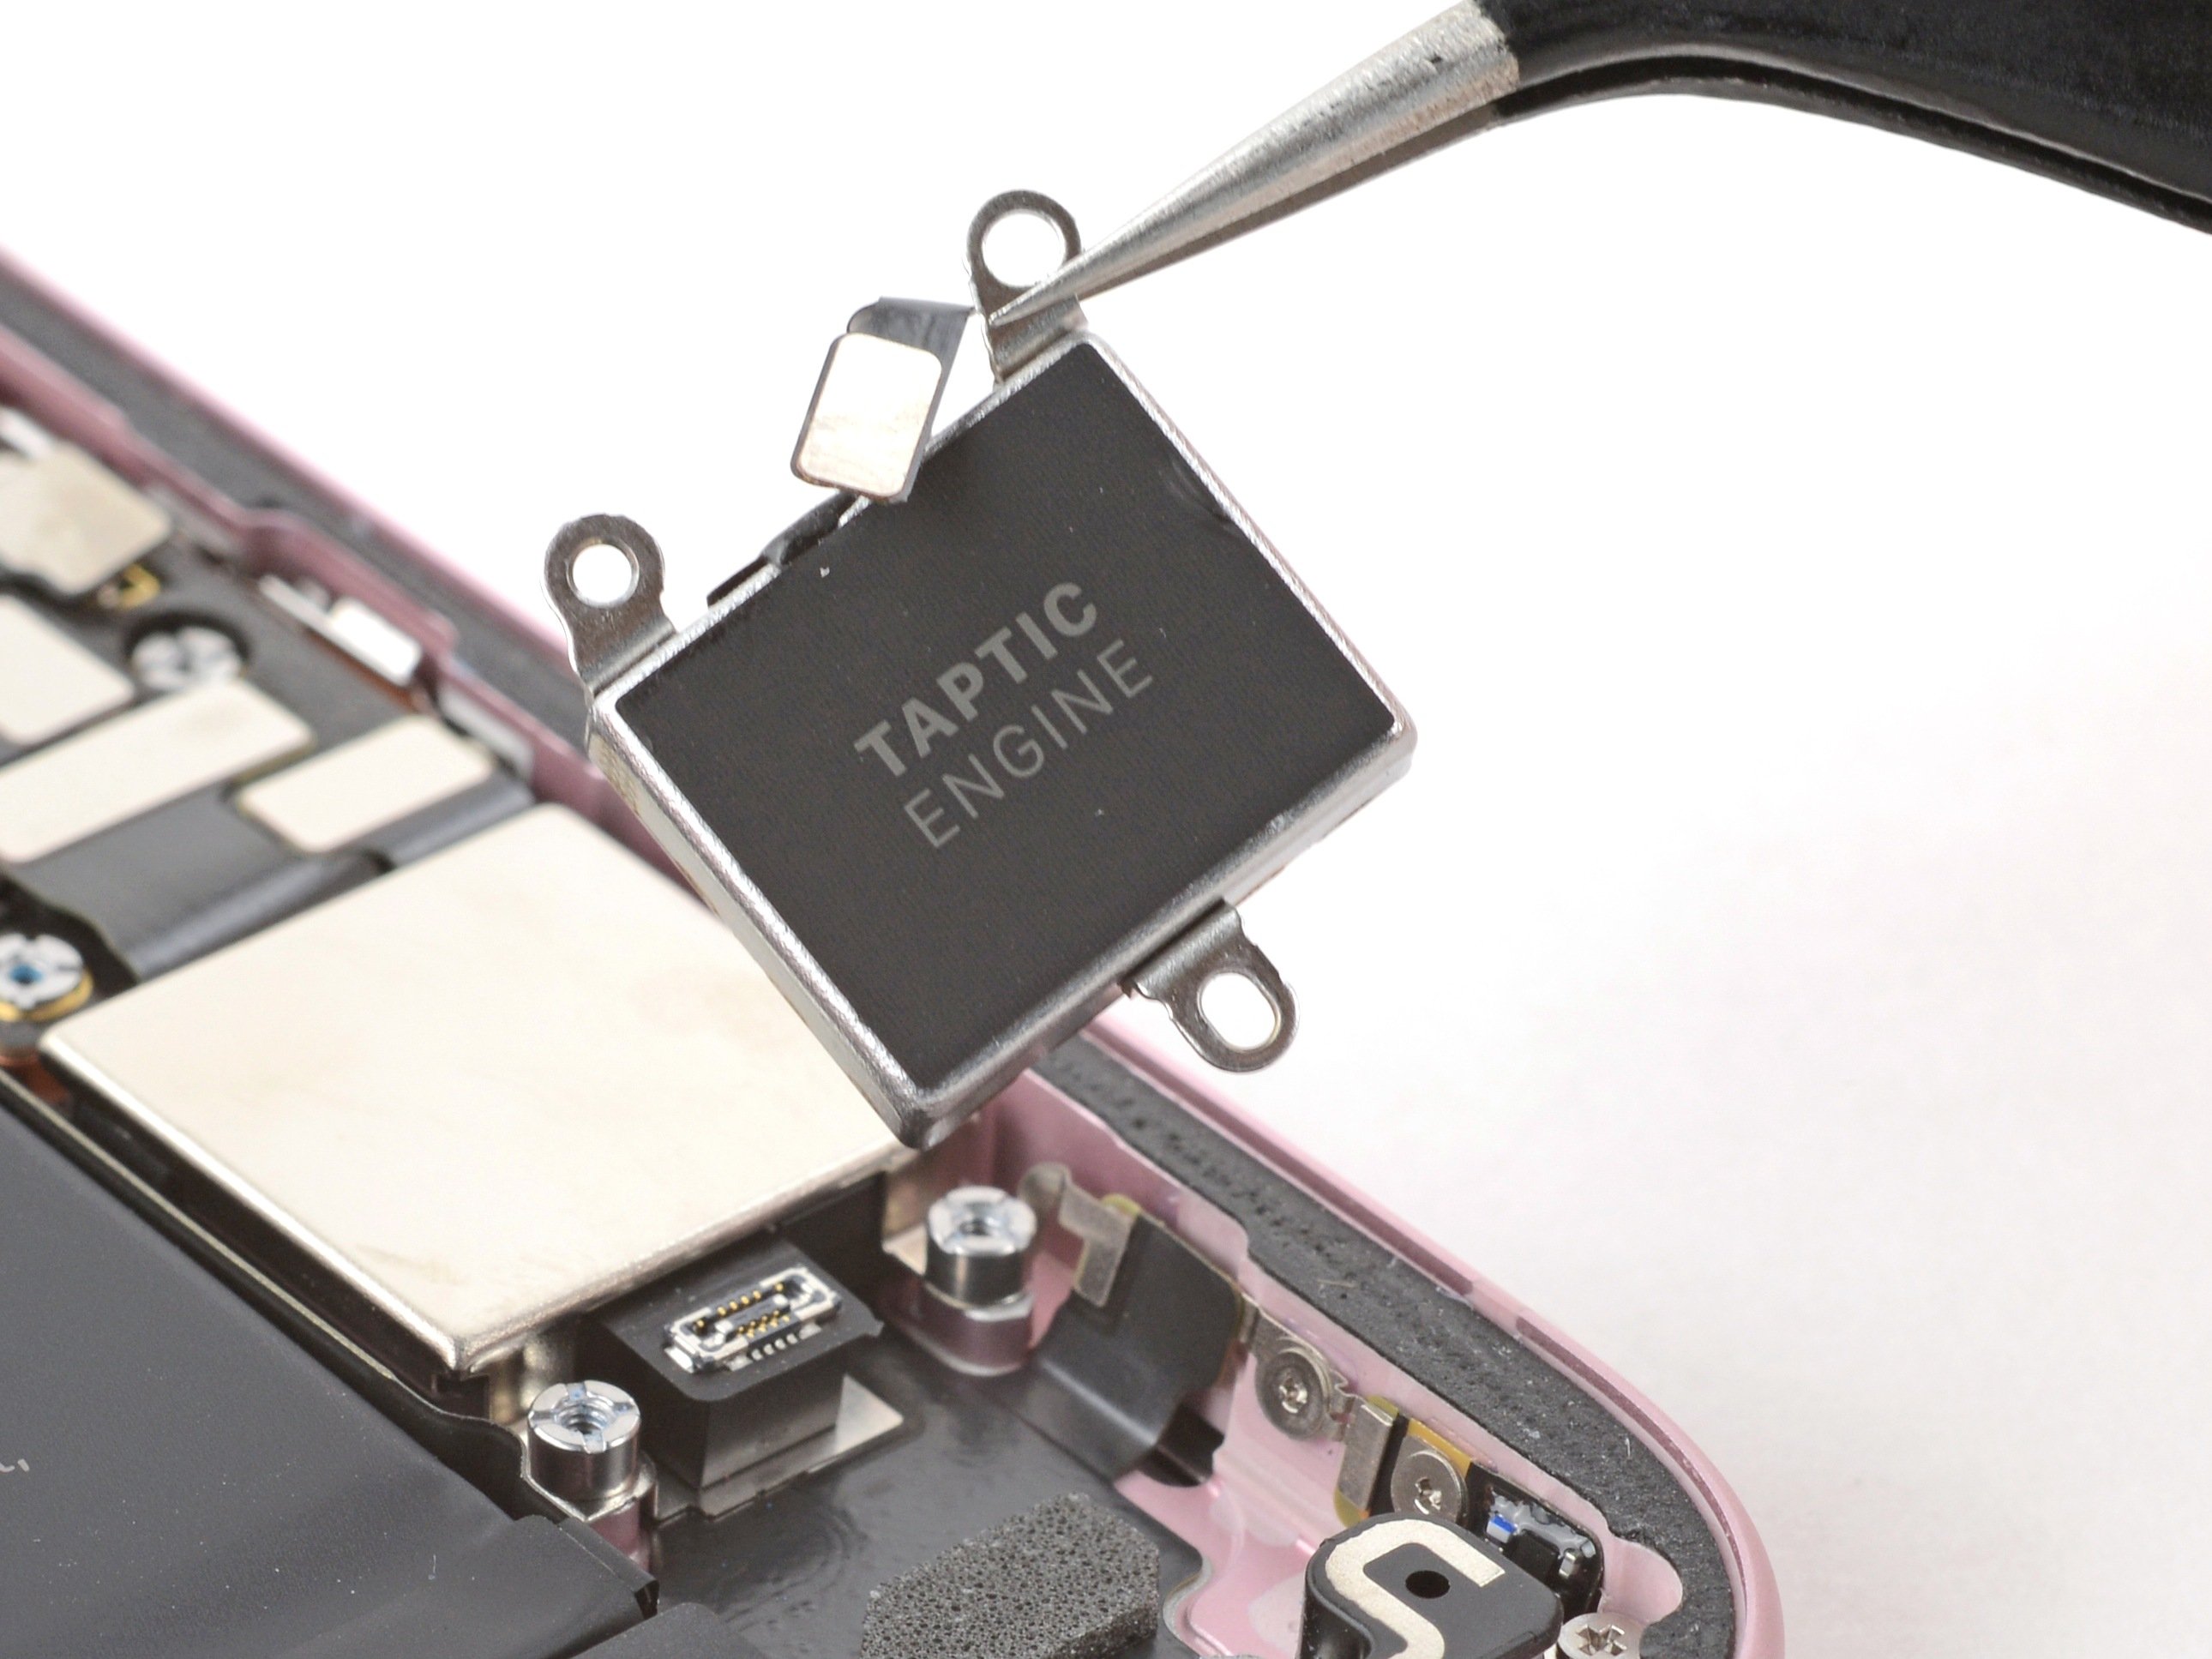
- Grab that back glass and hold it upright like you're presenting a trophy! Now, give it a little twist to peek at the battery press connector hanging out right below those volume buttons.
- Time to bring in your trusty opening pick! Use the tip to gently pry up and disconnect the battery press connector from the logic board. You're doing great!
Step 21


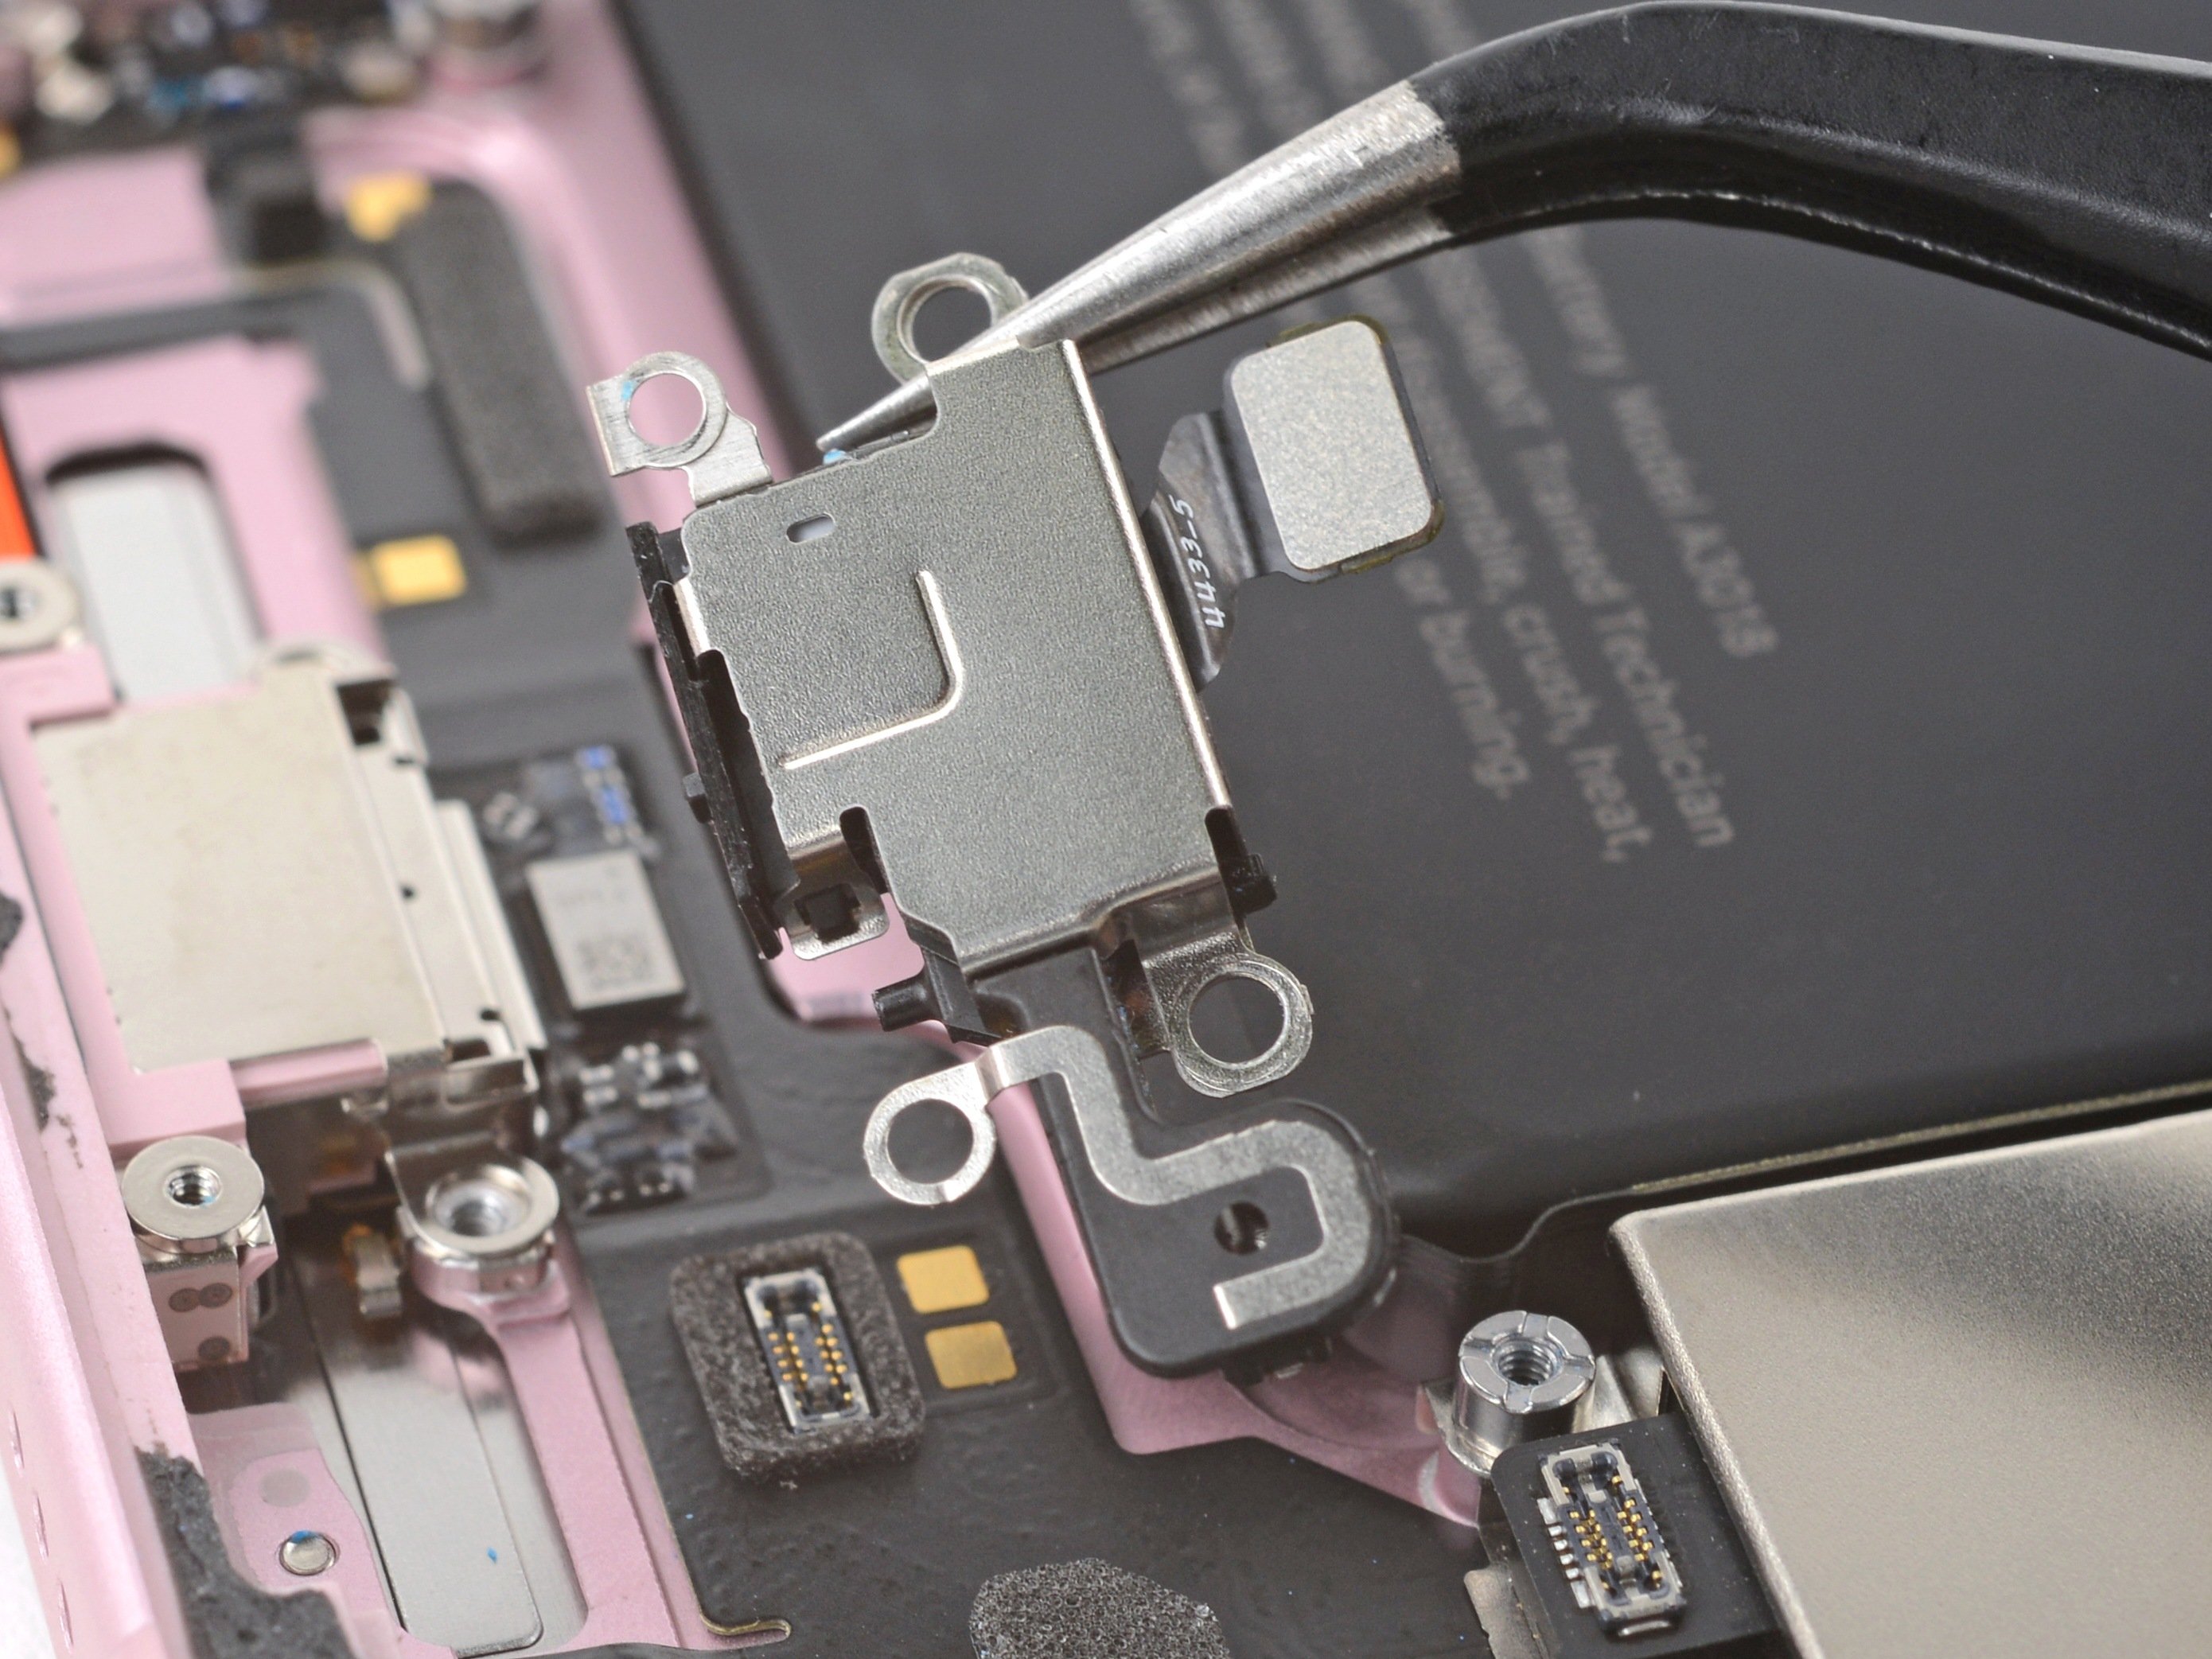
- Grab your tri-point Y000 driver and zip out that tiny 0.9 mm screw holding down the middle connector cover.
Step 22


- Take the flat end of a spudger or your finger and gently nudge the cover downward to unclip its top edge.
- Carefully lift off the cover.
- When putting it back, line up the cover’s tab just behind the clip on the logic board. Press down with one finger and slide the cover forward to snap it into place.
Tools Used

Step 23


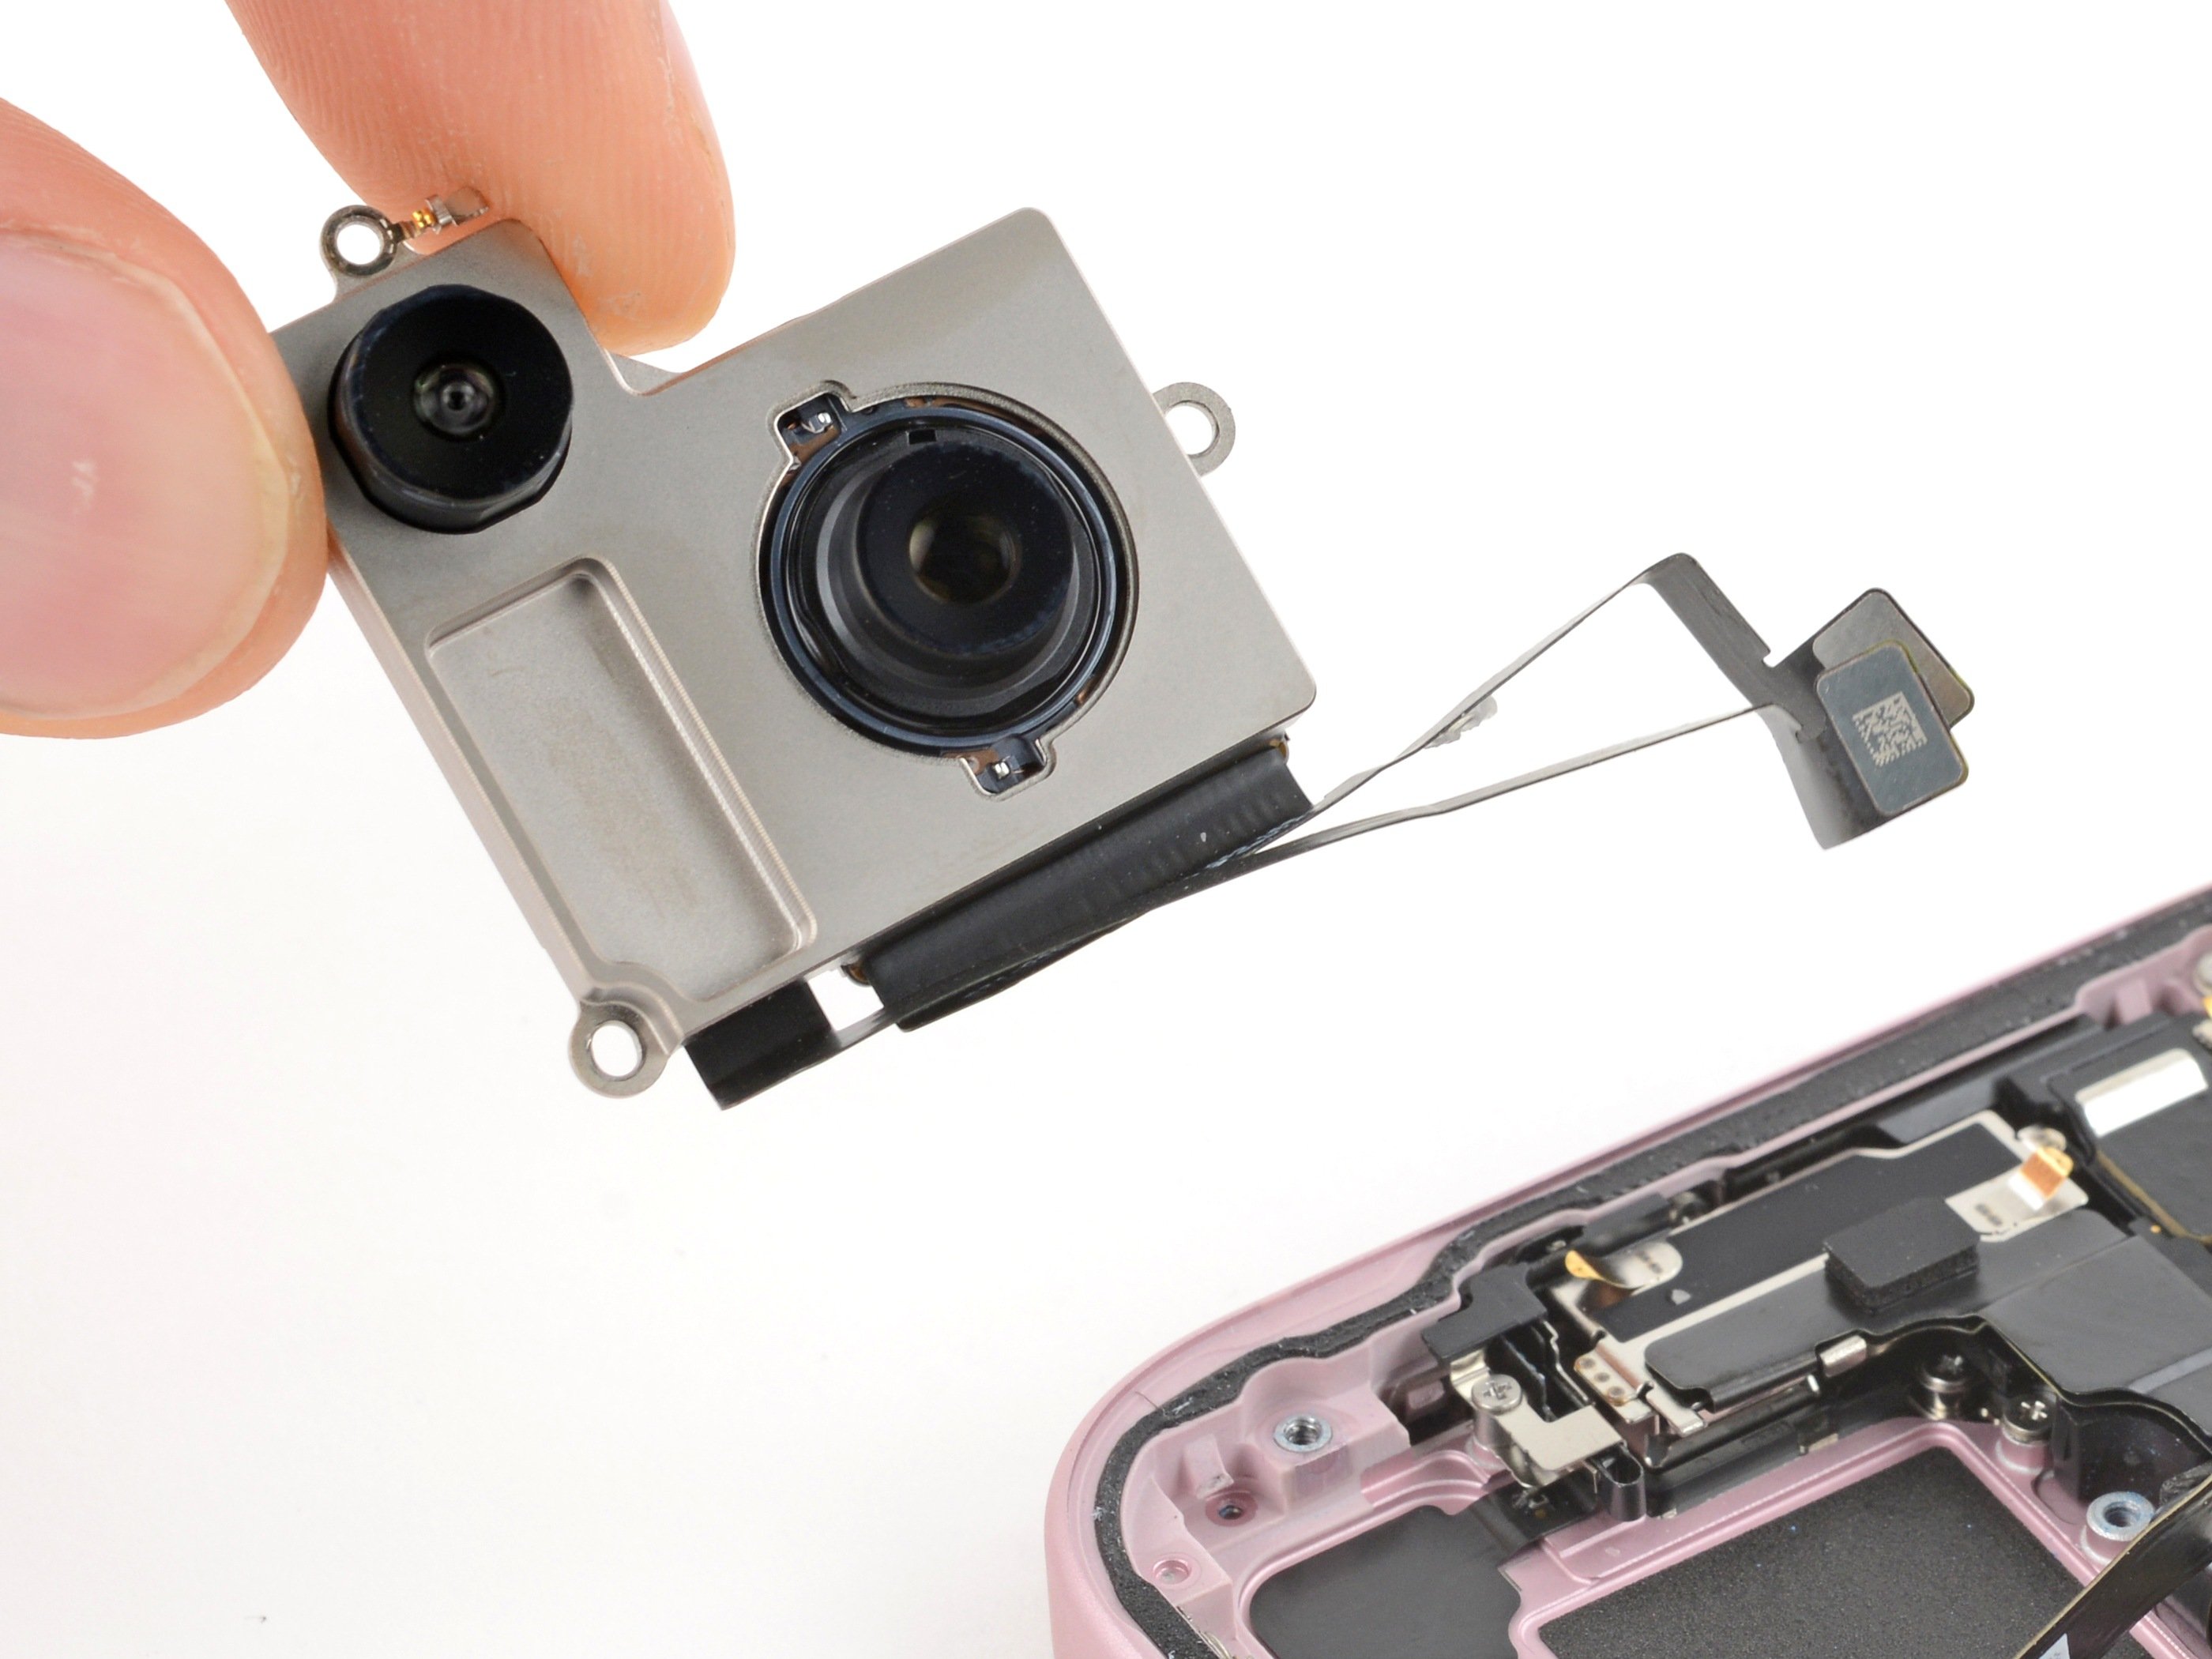
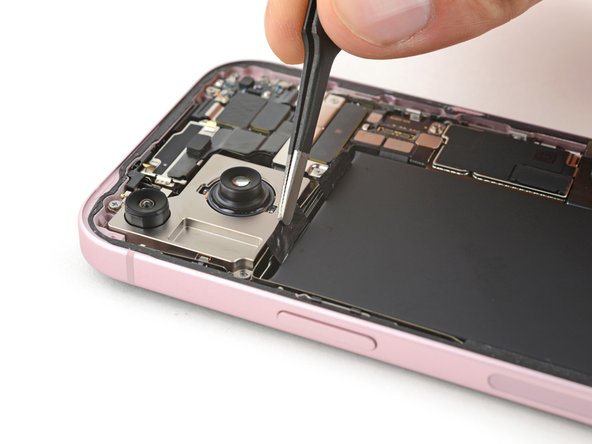
- Grab an opening pick, slide it under the wireless charging coil and NFC connector, and gently lift them free. Don't rush—let the pick do the work!
Step 24

- Let's get that back glass off, shall we?
- As you put everything back together:
- Here's a great moment to test your handiwork before sealing everything up. Just reconnect the battery and back glass for a quick check—power on your phone and see if it’s all working like a charm. Once you're satisfied, power it down and continue with reassembly.
- Follow this guide to reapply the adhesive and get that back glass back in place.
Step 25


Watch out not to bend the cable or poke the battery with your tool — gentle hands win the day!
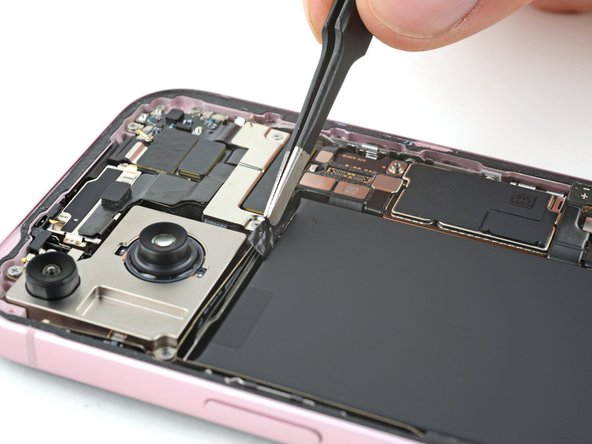
The battery cable is lightly stuck to the logic board—think of it as a gentle hug from some adhesive.
- Gently slide an opening pick underneath the battery cable and carefully lift it away from the logic board. Take your time, no rush!
Step 26


Watch out for your battery—don’t poke, dent, or stab it with any sharp tools!
Your iPhone's battery is held in place with two super stretchy adhesive strips. The next four steps will guide you on how to peel them away and liberate your battery like a pro!
- Grab your trusty opening pick and gently slide it under the edge of each stretch release pull tab at the top of the battery. Scrape it up just enough so that you can hold onto the tab with your blunt nose tweezers. You've got this!
Tools Used
Step 27

Hold off on yanking that tab out from beneath the battery just yet.
- Grab those blunt nose tweezers and gently clutch the pull tab, then peel it away from the battery like a pro.
- Now, do the same with the other pull tab. Easy peasy!
Tools Used
Step 28


The stretch release adhesive likes to hug the top edge of the battery, so you’ll need to peel it away before you tackle those sticky strips.
- Grab one of the pull tabs with tweezers and gently nudge it away from the battery—like you're coaxing a cat off your keyboard.
- Slide an opening pick along the top edge of the battery to slice through the sticky adhesive strip. Smooth moves only!
- Repeat the process for the other pull tab. Double the tabs, double the fun!
Tools Used
Step 29


If a strip snaps off, see if you can fish it out from under the battery. If it’s stuck for good, no stress—just head to the next step for a backup plan.
Give the strip plenty of time to stretch and keep a good grip. Steer clear of dragging it over any components or cables hanging out above the battery. Wrapping it around a tool can give you extra muscle if you need it.
- Grab the pull tab on one of the adhesive strips and gently stretch it out, keeping it as close to the surface as possible while you slide it out from under the battery.
- Do the same thing for the second strip—nice and easy.
Step 30


Great job if you’ve already taken off both stretch release adhesive strips! The battery is ready to come out. If not, no worries—just follow the next few steps to gently remove it using some isopropyl alcohol and a trusty plastic card. You’ve got this!
- Lean the right side of your phone up—yep, the volume button side gets to chill for a minute.
- Grab your pipette or syringe and drip a few drops of super-strong isopropyl alcohol (90% or higher) along the inside edge of the battery.
- Now prop up the top of your phone and show some love to the upper edge of the battery with the same isopropyl alcohol treatment.
- Kick back for a minute and let the alcohol work its magic, sliding underneath the battery to loosen up that stubborn adhesive.
Tools Used

Step 31

Handle your battery with care—no bending or creasing allowed! If it's being a little stubborn, just add a few more drops of isopropyl alcohol and give it another go. You've got this!
Adhesive can be stubborn, so give it some time! Hold steady pressure for up to a minute to help it loosen up.
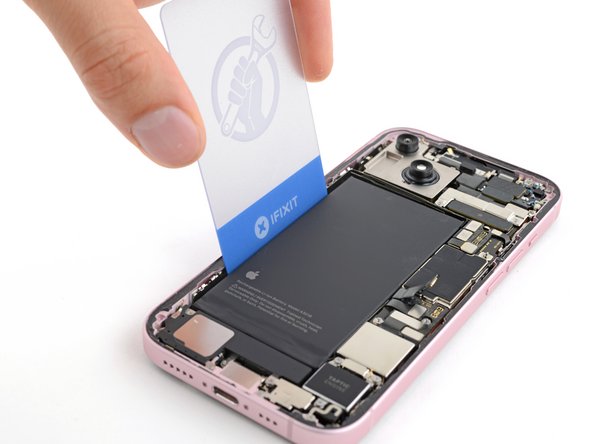
- Slide the short end of a plastic card between the battery’s left side and the frame—think of it like swiping for treasure.
- Hold your phone steady and gently lift the battery out. A little prying power goes a long way!
Tools Used
Step 32


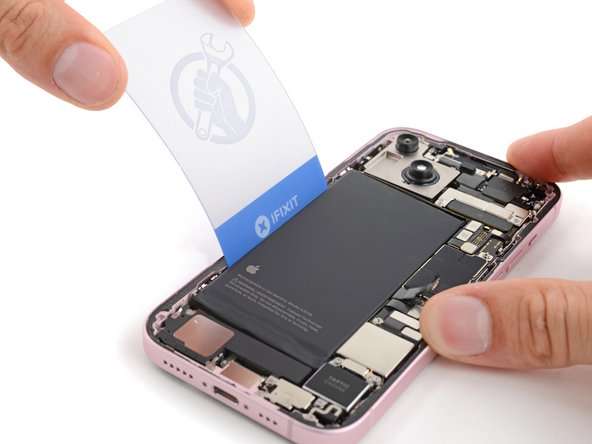
- Now, gently slide that plastic card a little deeper under the battery. Give it a little wiggle to cut through any stubborn adhesive left behind.
- Once you're in there, carefully lift the battery out and grab it with your fingers to pull it free.
Step 33


- Now it's time to put your phone back together! Just retrace your steps from the beginning.
- Once you're done, if you replaced a part, check out Apple's Repair Assistant to calibrate it. Just make sure your device is updated to iOS 18, then head to Settings→General→About→Parts & Service History, hit Restart & Finish Repair, and follow the easy on-screen prompts.
- For the best battery performance, don't forget to give your new battery a little calibration love after finishing this guide!
- Have some e-waste? Make sure to take it to an R2 or e-Stewards certified recycler – it's good for the planet!
- Things didn't go as smoothly as planned? No worries! Try some basic troubleshooting or reach out to our Answers community for a helping hand.