iPhone 15 Plus Battery Replacement
Duration: 45 minutes
Steps: 33 Steps
Ready to give your iPhone 15 Plus a fresh lease on life? If you're noticing your battery needs a boost and your device is lagging or demanding frequent charges, it might be time for a swap. iPhone batteries are built to maintain 80% of their original capacity for around 500 charge cycles, or about 18–24 months. For this repair, you’ll need a replacement battery and some back glass adhesive. If your battery is swollen, be sure to handle it with care. A quick heads-up: On iOS 17.6 and earlier, you might get a warning about the new battery and lose access to battery health info, but don’t worry – it’ll still work just fine! If you’re on iOS 18 or newer, use the Repair Assistant to calibrate your new Apple battery. If you need help, feel free to schedule a repair.
Step 1


Let your phone's battery dip below 25%—keeping that lithium-ion battery fully charged can be a bit risky. So, let it chill for a bit before you dive into repairs!
- First things first, unplug all those pesky cables from your phone. We don’t want any surprises while we’re working our magic!
- Now, give those power and volume buttons a solid hold and slide to power down your phone. Let it take a little nap while we get to work!
Step 2


Find a nice, flat spot along the bottom edge where your suction cup can get a good grip.
- If your screen or back glass is shattered, grab some packing tape and lay it over the glass in overlapping strips. It'll help protect your hands and make disassembly a whole lot smoother.
Step 3


Going too deep with your opening pick can poke your device where it shouldn't be poked. To keep things safe, mark your pick so you know how far is too far.
Want to get fancy? Mark each corner with different measurements for extra precision.
Or, tape a coin 3 mm from the tip of your pick—it's a low-tech way to keep from going overboard.
- Grab your opening pick and mark a spot 3 mm from the tip with a permanent marker—precision is key, and your pick’s about to get a stylish new look!
Step 4

- Grab your trusty P2 pentalobe driver and carefully unscrew the two 7.7mm screws on either side of the charging port. Easy peasy!
Step 5

Keep an eye on the heat—don't let your phone get too toasty! Those batteries can get a bit cranky if they overheat.
- Grab a hair dryer or heat gun and warm up the bottom edge of the back glass until it feels nice and toasty to the touch.
Tools Used


Step 6

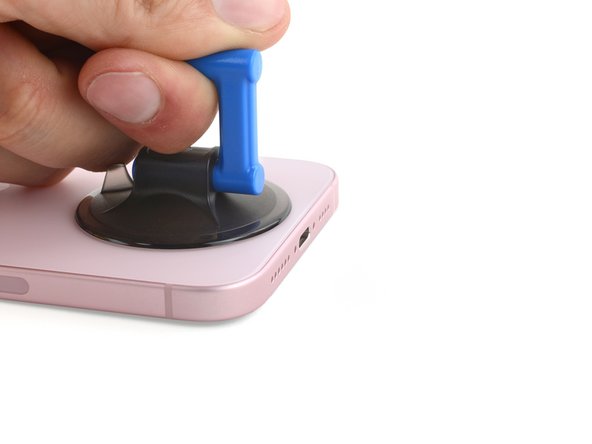
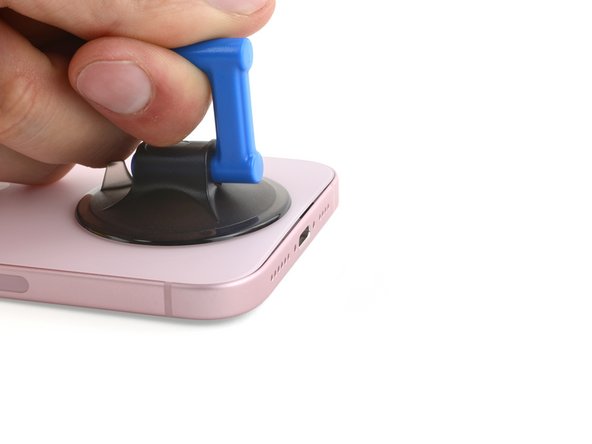
- Stick a suction handle onto the bottom edge of the back glass.
- Give the handle a firm, steady pull upwards to gently separate the back glass from the frame.
- Slip the tip of an opening pick into the gap you just created.
Tools Used

Step 7

As you carefully cut through the adhesive holding down the back glass in the upcoming steps, watch out for these areas:
- Watch out for the sneaky cable connecting the back glass to your phone—it's hanging out right next to the volume up button. Keep your pick away from this spot so you don't accidentally slice it.
- You'll find several spring contacts around the edge of the phone. Slide your pick only as deep as each step suggests, otherwise these little guys might get bent out of shape.
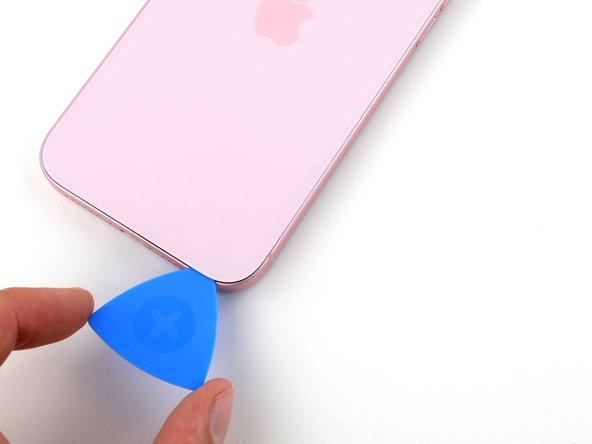
Step 8


Keep your opening pick under 5 mm deep along the bottom edge, or you might find yourself in a pickle!
- Wiggle your pick back and forth along the bottom edge to loosen up that stubborn adhesive.
- Keep the pick hanging out in the bottom right corner so the glue doesn't sneak back together while you work.
Step 9

- Warm up the right edge of the back glass until it feels nice and toasty to the touch.
Step 10


Keep your pick shallow—no deeper than 7 mm along the right edge to keep things safe.
Steer clear of the volume buttons area to avoid messing with the wireless charging cable.
- Twist your pick around the bottom right corner and slide it halfway up the right edge until you hit that satisfying click from the clip holding the back glass in place.
- Keep that pick right where it is to stop the adhesive from snapping back together.
Step 11

- Warm up the left edge of the back glass until it feels nice and toasty to the touch.
Step 12


Keep your pick under 5 mm deep on the left edge—no need to go poking around more than that!
- Slide a second opening pick into the bottom edge—give it a little wiggle to get comfy.
- Twist the pick around the bottom left corner like you're turning a tiny doorknob.
- Glide the pick all the way up to the top left corner to break up that stubborn adhesive.
- Let the pick chill in place so the sticky stuff doesn’t sneak back together.
Step 13

- Warm up the top edge of the back glass until it feels nice and toasty!
Step 14


Keep your pick no deeper than 3 mm along the top edge, or you might find yourself in a bit of a pickle!
As the top two clips pop loose, you might catch some satisfying clicks and taps.
- Swing your second opening pick around the top left corner like you're slicing through butter, then glide it across to the top right to break up the sticky stuff.
- Let that pick hang out there to block the adhesive from making a comeback.
Step 15

- Warm up the top right corner of the back glass until it's nice and toasty to the touch.
Step 16


Be careful not to push your pick more than 4 mm along the right edge. Stay gentle to avoid any mishaps!
- Gently twist the second opening pick around the top right corner and slide it over to the volume up button to loosen the adhesive without breaking a sweat.
Step 17


If the back glass is stubbornly clinging on, cruise around the edges again to hunt down any sneaky adhesive or clips that didn’t get the memo.
- Carefully swing the back glass to the right side of the phone, like you're opening a secret compartment.
- Once open, let the back glass rest gently on a raised surface—this way it won’t put any unnecessary strain on the cable.
Step 18


As you tackle this repair, remember to keep a close eye on each screw and return it to its original spot like a pro!
- Grab your trusty tri-point Y000 driver and get ready for some action! Carefully remove the two 1.3 mm screws that are holding the lower connector cover in place. You've got this!
Step 19


- Grab your tweezers and gently slide the cover upward—think of it as giving the logic board a little nudge so the cover pops free.
- Lift the cover off and set it aside like a pro.
- When you’re putting things back together, make sure to hook the top edge of the cover into its slot on the logic board before you lock it down with the screw.
Tools Used

Step 20


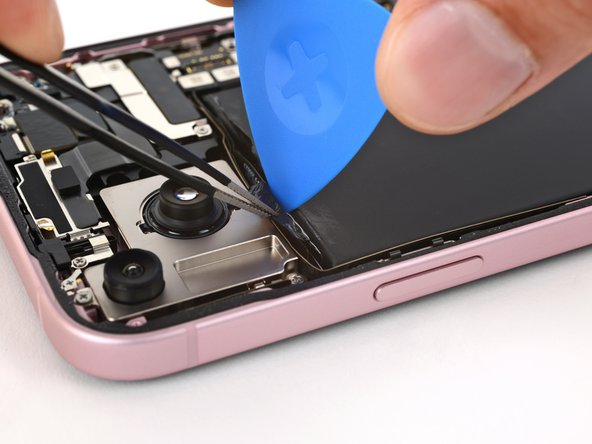
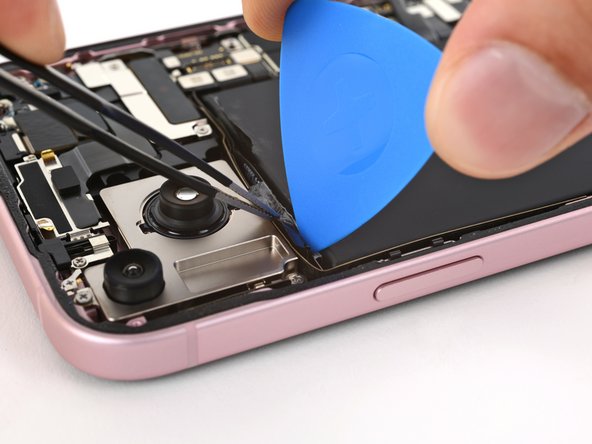
To reconnect a press connector, line it up with its socket and gently press down on one side until you hear a satisfying click, then do the same on the other side. Make sure it lies flat, since the insulating rubber around the sockets might keep it from snapping in all the way.
You'll spot a plus and minus sign printed right on the head of this connector to help you get it in the right way.
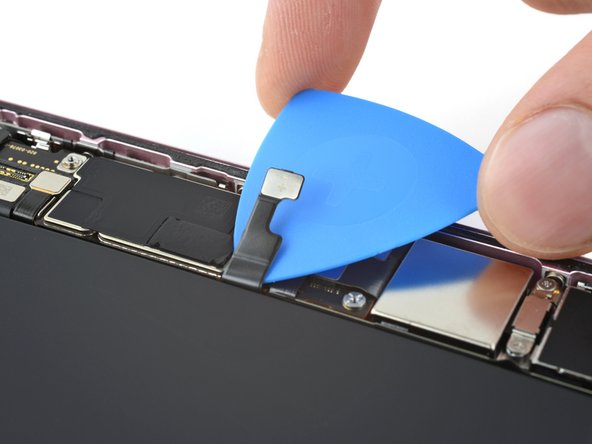
- Hold the back glass upright in one hand, then swivel the bottom edge to the left—like you’re showing off a secret compartment—to expose the battery press connector sitting just below the volume buttons.
- Grab an opening pick and gently pop up the battery press connector from the logic board. Nice and easy does it!
Step 21


- Grab your trusty tri-point Y000 driver and get to work! Unscrew that 0.9mm screw holding the middle connector cover in place. Easy does it!
Step 22


- Gently nudge the cover downward using the flat end of a spudger or just your finger to pop its top edge free.
- Lift off the cover carefully.
- When putting it back, line up the cover’s tab just behind the clip on the logic board. Press down with one finger and slide it forward until it clicks into place.
Tools Used

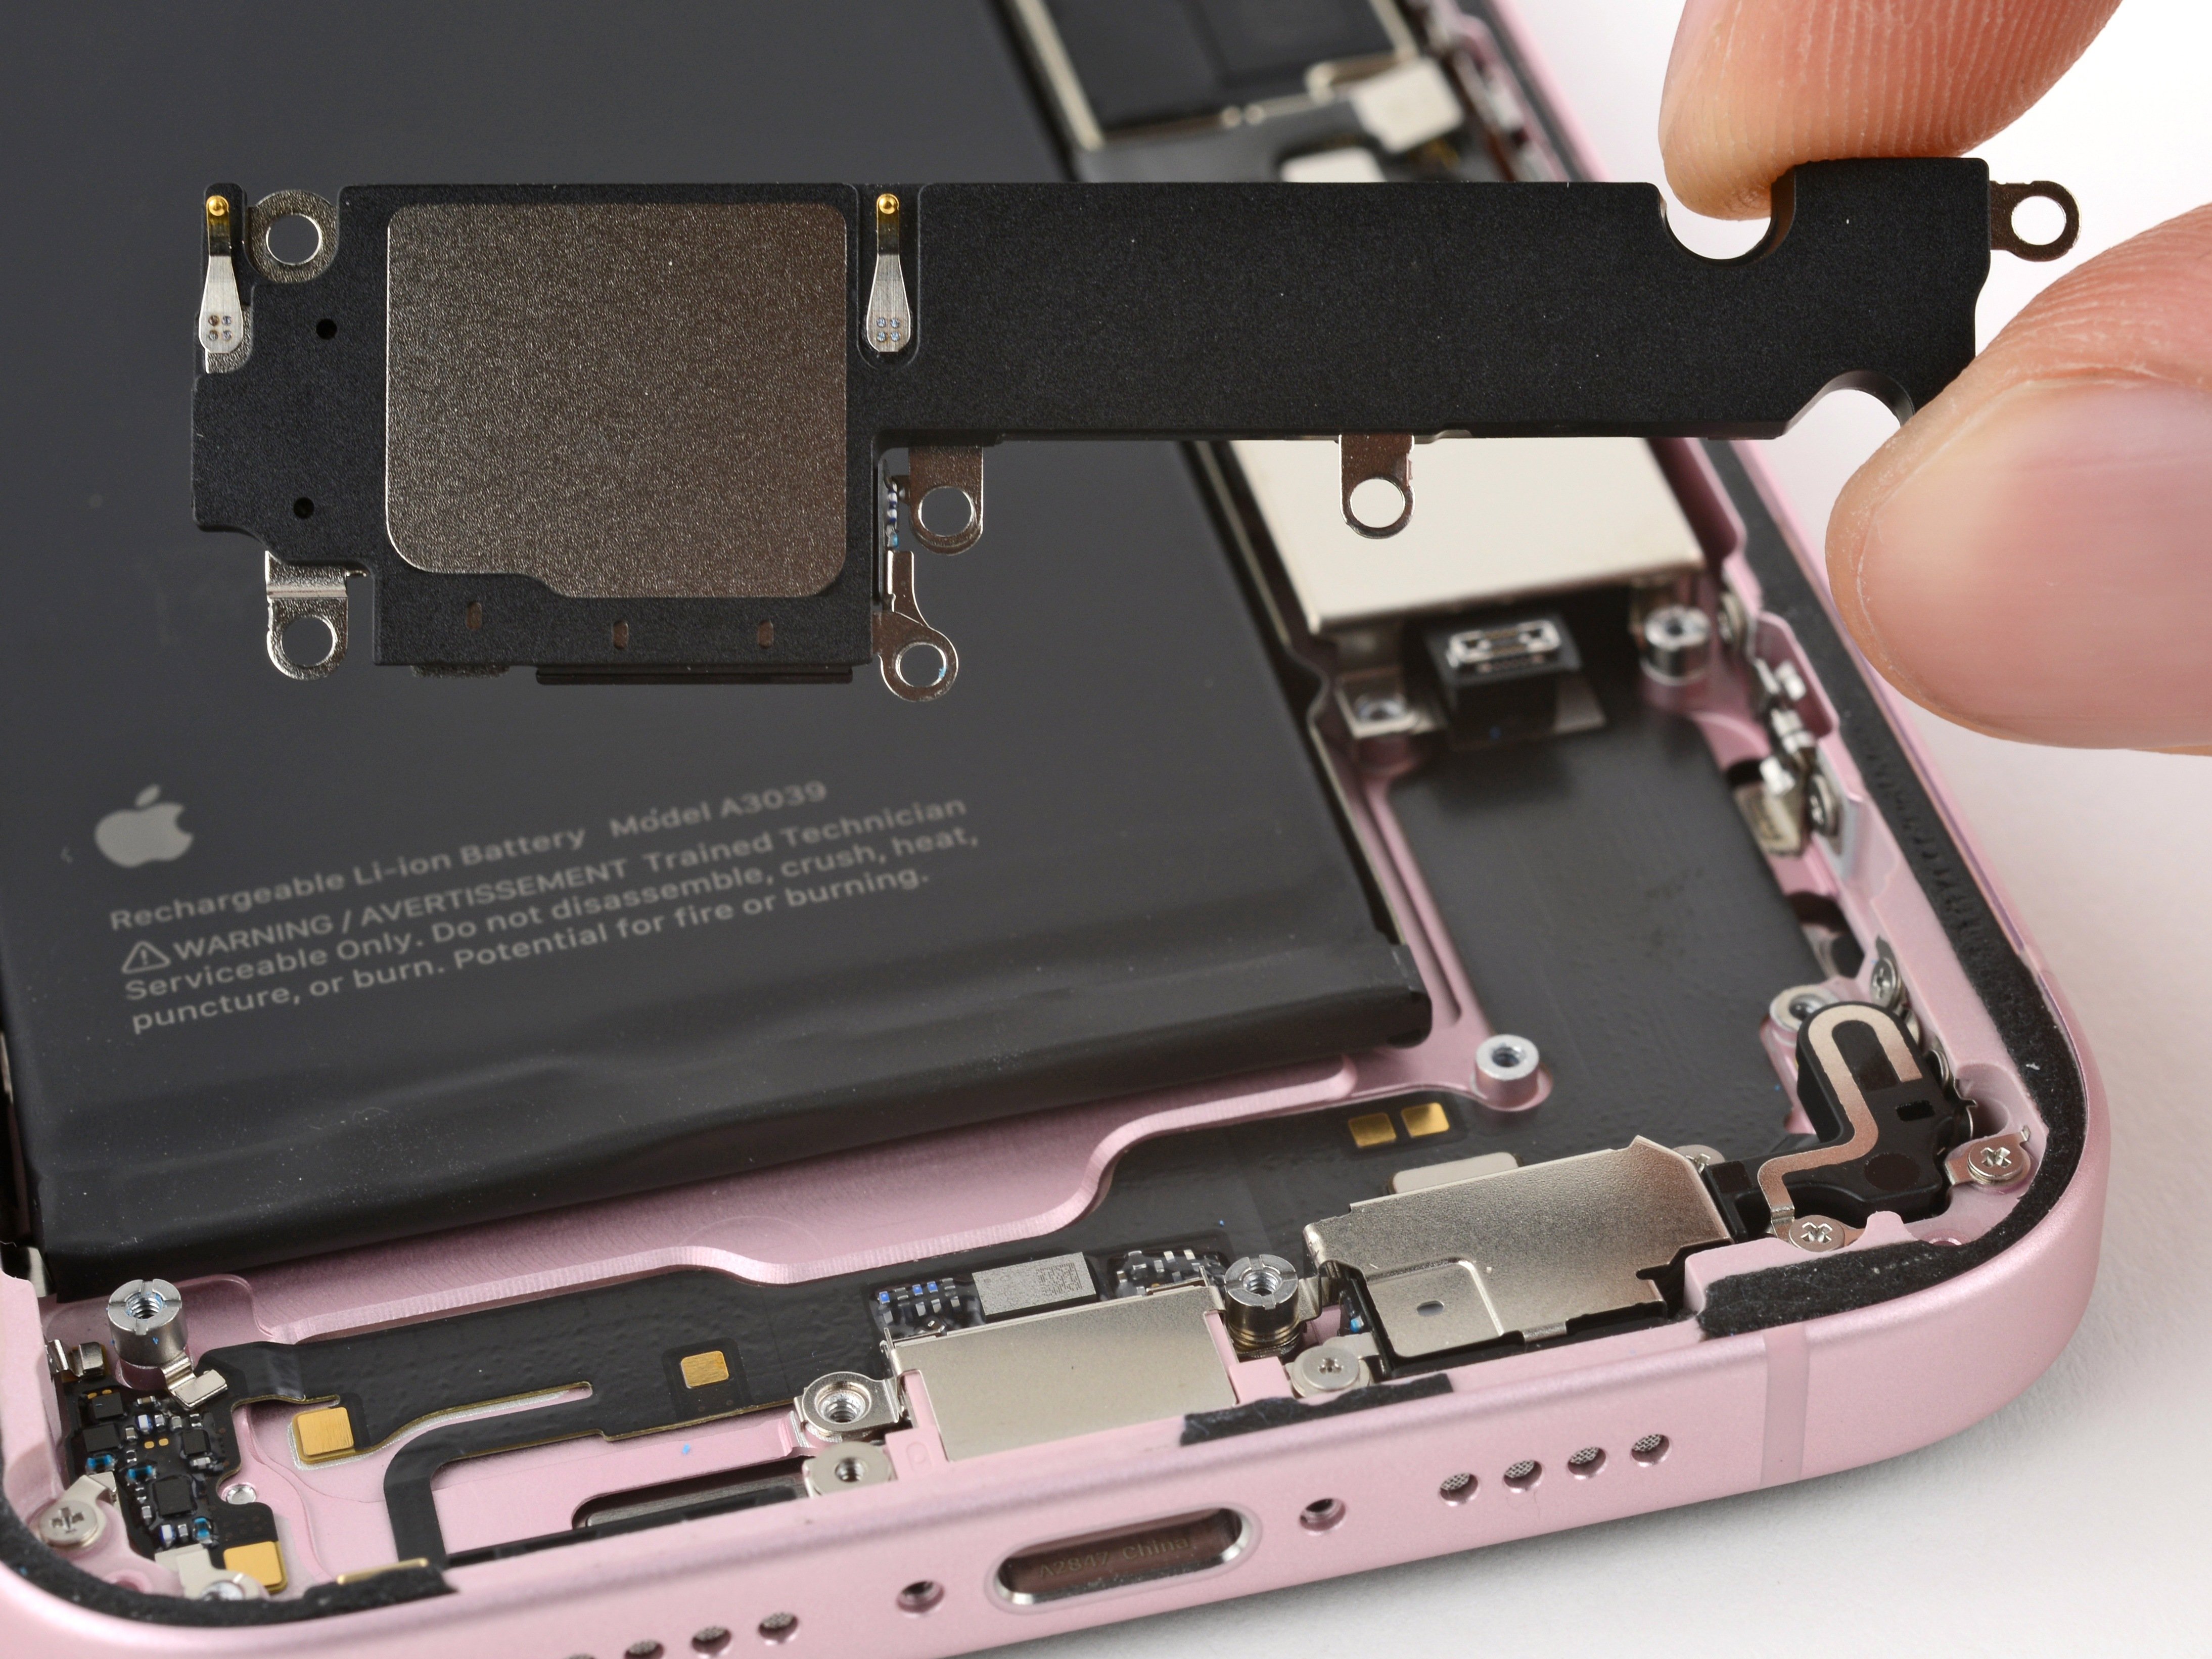
Step 23


- Grab your opening pick and gently pop up the wireless charging coil and NFC connector—disconnect them like you're breaking up with your ex, but with way less drama.
Step 24

- Carefully take off the back glass.
- When putting things back together:
- Here’s a smart move—before sealing everything up, briefly reconnect the battery and back glass, power on your phone, and check that it’s all running smoothly. Once confirmed, power it down and keep going with the reassembly.
- Follow this guide to apply new adhesive and properly reinstall your back glass.
Step 25

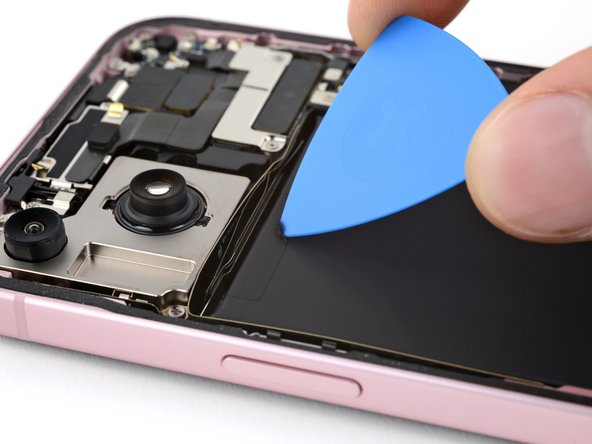
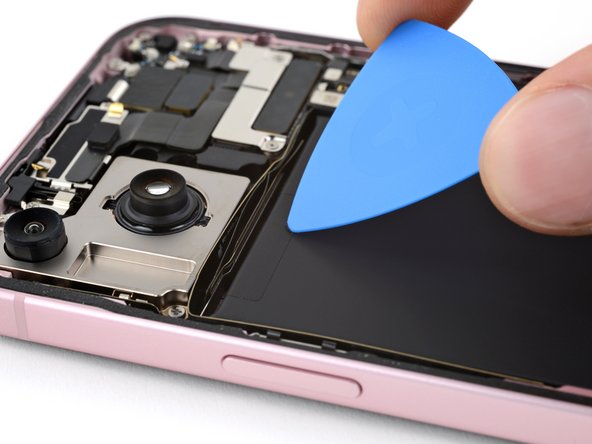
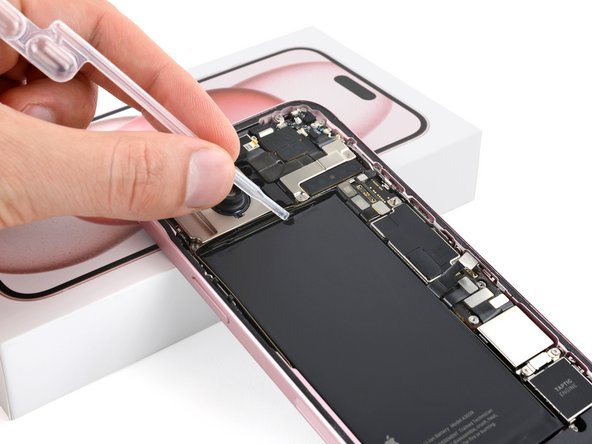
Heads up! Keep the cable crease-free and avoid poking dents in the battery with your tool. Treat it gentle, like it’s got feelings!
The battery cable is held in place by a little bit of light adhesive that's stuck to the logic board. No worries, just a little wiggle and it should be good to go!
- Gently slide an opening pick beneath the battery cable to lift it off the logic board. Think of it as giving the cable a little nudge to break free—no forceful moves needed!
Step 26

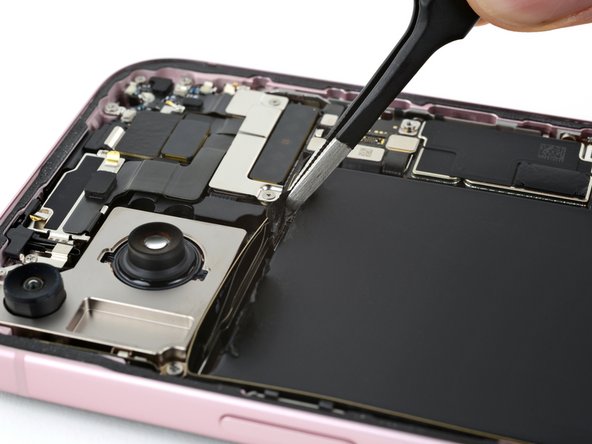
Take care not to dent or poke the battery, and keep sharp tools away from it to avoid any mishaps.
Your iPhone battery is held in place by two stretch-release adhesive strips. The next four steps walk you through removing them so you can set your battery free.
- Gently slide the tip of an opening pick under the edge of each stretch release pull tab at the top of the battery until you can grab the tab easily with blunt-nose tweezers.
Tools Used
Step 27

Hold your horses! Let's not yank that tab out from beneath the battery just yet.
- Grab a pull tab with blunt nose tweezers and gently peel it right off the battery—like unwrapping a snack, but way more useful.
- Go ahead and do the same with the other pull tab.
Tools Used
Step 28

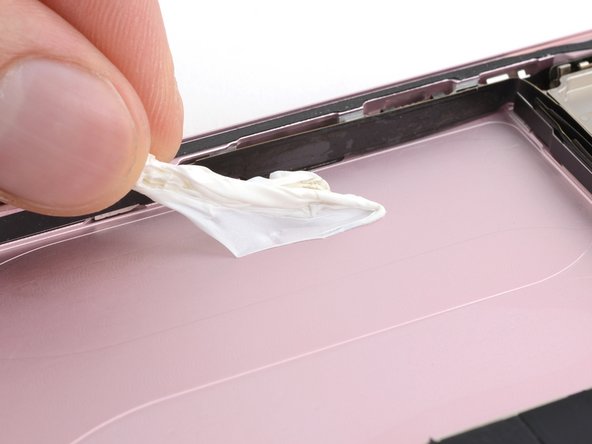
The stretch release adhesive likes to hug the top edge of the battery, so you’ll need to loosen its grip before pulling out the strips.
- Grab one of the pull tabs with tweezers and gently lift it away from the battery.
- Slide an opening pick under the adhesive holding the strip to the battery’s top edge, carefully slicing through.
- Do the same for the other pull tab to free it up.
Tools Used
Step 29


If you're working with your fingers, switch up your grip now and then—otherwise the strip might stretch weirdly or snap.
If a strip snaps off, see if you can fish it out from under the battery. If it's hiding too well, no stress! Just head to the next step for a backup plan.
Take your time stretching the strip. Give it some room and keep it clear of any cables or parts while you pull.
- Grab the whole pull tab on the adhesive strip with your blunt nose tweezers—don’t be shy.
- Twist those tweezers and roll the adhesive strip up, pulling it out slowly and at a low angle from underneath the battery. Smooth and steady wins the race.
- Do the same for the other strip. You got this!
Tools Used
Step 30

Nice job if you managed to peel off both stretch release adhesive strips—you’re all set to take the battery out! If not, no worries, just follow the next three steps using isopropyl alcohol and a plastic card to get it free.
- Lift the right side of the phone up a bit (that's where the volume buttons hang out).
- Grab a pipette or syringe and squeeze a few drops of super-concentrated isopropyl alcohol (over 90%) right along the inner edge of the battery.
- Now, prop up the top edge of the phone and do the same thing for the upper edge of the battery.
- Hang tight for a minute and let the isopropyl alcohol sneak under the battery to loosen that stubborn adhesive.
Tools Used

Step 31


Handle your battery gently—no bending or folding. If it’s sticking around, a little more isopropyl alcohol should help loosen things up.
Adhesives can be stubborn, so give it some time. Keep steady pressure for about a minute and let that glue loosen up its grip.
- Slip the long side of a plastic card between the battery's left edge and the phone frame.
- Keep the phone steady and gently pop the battery up.
Tools Used
Step 32


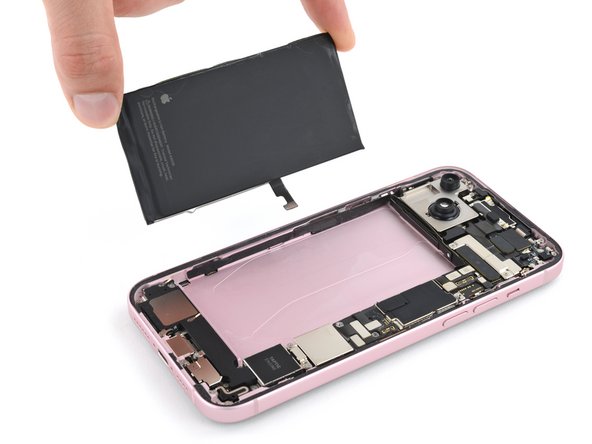
- Slide the plastic card a bit further under the battery—give it a gentle wiggle until you can start popping that battery loose.
- Lift the battery just enough so you can grab it with your fingers—no need to wrestle, just a smooth move!
Step 33

- To put your phone back together, just go through these steps backwards.
- Once your repair is done, some replacement parts might need a little calibration using Apple's Repair Assistant (available with iOS 18). Just update your device, head to Settings → General → About → Parts & Service History, tap Restart & Finish Repair, and follow the prompts.
- For the best results, make sure to calibrate your new battery after finishing this guide.
- Don’t forget to recycle your e-waste responsibly at an R2 or e-Stewards certified recycler.
- If things didn’t quite work out, try some basic troubleshooting or reach out to our Answers community for a hand. And if it’s still tricky, you can always schedule a repair.