iPhone 15 Pro Battery Replacement
Duration: 45 minutes
Steps: 34 Steps
Ready to give your iPhone 15 Pro a fresh battery? Dive in! iPhone batteries usually hang onto about 80% of their mojo for 500 charge cycles—think about a year and a half to two years. If you notice your phone needs more juice than usual or starts lagging, swapping out the battery could be a game changer. Grab some replacement screen adhesive for a smooth reassembly. If your new battery isn’t sticky yet, you’ll need adhesive for that, too. Dealing with a swollen battery? Handle with care. Heads up: With iOS 17.6 and earlier, you might see pop-up warnings or lose battery health info, but your new battery will still work fine. On iOS 18 and up, authentic Apple batteries get calibrated using Repair Assistant. Feeling stuck? You can always schedule a repair.
Step 1


Make sure your phone’s battery drops below 25% before diving into this repair—because a charged lithium-ion battery can get pretty fiery if it’s hurt.
- First things first, unplug all cables from your phone. Let's make sure nothing's connected while you work your magic.
- Next, hold down the power button and one of the volume buttons, then slide to power off. Take a breather, you've got this!
Step 2


Find a nice, smooth spot near the bottom edge that’s just right for your suction cup to grip onto.
- Got a cracked screen or back glass? No worries! Just grab some packing tape and lay a few overlapping strips over the glass. It’ll keep you safe and make disassembly a breeze.
Step 3


Push the opening pick in just enough—going too deep can poke your device where it hurts.
Mark the corners of your pick with different measurements if you want to keep things stylish and precise.
If you're feeling crafty, tape a coin to your pick exactly 3 mm from the tip for a quick depth guide.
- Mark the opening pick 3 mm from the tip using a permanent marker to keep things precise.
Step 4


- Grab your P2 pentalobe screwdriver and unscrew the two 7 mm-long screws hanging out beside the charging port.
Step 5

Keep the phone comfy—don't let it get too hot, or the battery might throw a tantrum.
- Grab a hair dryer or heat gun and warm up the bottom edge of the screen until it feels nice and toasty to the touch.
Tools Used


Step 6


- Stick a suction handle down on the lower edge of your screen.
- Give it a strong, steady pull—enough to open up a little gap between the screen and the frame.
- Slide the tip of an opening pick into that gap to get things started.
Tools Used

Step 7

As you’re slicing through the adhesive that holds the screen in place, keep an eye on these spots—they’re trickier than they look!
- Two fragile cables are holding the screen to the phone—one chilling right above the action button, and the other hanging out near the middle of the left edge. Treat them like the VIPs they are!
- There are a bunch of spring contacts all around the phone’s edge. When sliding your pick, don’t go deeper than suggested in these spots—unless you want to give those contacts a surprise bend. Go easy and you’ll keep everything in tip-top shape!
Step 8


Keep your pick shallow—no deeper than 3 mm along the bottom edge, or you might poke something you don't want to!
- Gently wiggle your pick side to side along the bottom edge to loosen that stubborn adhesive.
- Keep your pick wedged in the bottom right corner so the adhesive doesn’t sneak back together.
Step 9

- Warm up the right edge of your screen until it feels nice and toasty.
Step 10


Keep your pick's adventure along the right edge to under 5 mm—no deep dives!
- Gently slide your pick along the bottom right corner of the screen, moving towards the power button. You'll hit a hard stop at a clip holding the screen in place.
- Now, flip your pick so the flat edge is resting under the screen. Easy, right?
Step 11


- Twist the pick carefully to create a little more room between the screen and the frame until you hear that satisfying click when the right clip pops free.
- Now, slide in a second pick just to the right of the first one to keep that gap nice and open.
Step 12


- Gently slide the first pick down to the bottom right corner of the screen.
- Next, ease the second pick up to the top right corner to loosen that adhesive grip.
- Keep both picks in place to stop the adhesive from closing back up on you.
Step 13

- Warm up the top edge of the screen until it's nice and toasty to the touch.
Step 14


Keep your pick's depth to just 3 mm along the top edge—no need to dig in deeper than that!
- Glide your pick along the top right corner and across the top edge to pop loose the two clips and peel away the sticky adhesive.
Step 15

- Warm up the left edge of the screen until it feels nice and toasty.
Step 16


Careful not to poke your pick more than 2 mm along the left edge—those two screen cables are hanging out just beneath, and we don’t want to mess with them!
- Swing your pick around the top left corner—think of it as tracing a lazy river.
- Glide your pick down to the bottom left corner to break up that sticky adhesive. You're making great progress!
Step 17


If the screen’s acting like it’s glued to its spot, grab your opening pick and make another lap around the edges to loosen up any stubborn adhesive.
- Grab a small box or a stack of books and place it to the left of your phone to keep the screen propped up while you disconnect the cables.
- Gently lift the right edge of the screen like you’re opening a book’s front cover.
- Keep the screen propped so you can reach the cables easily without putting any strain on them.
Step 18


- Grab your trusty Y000 screwdriver and take out the six screws holding down the logic board cover:
- Four screws are 1.6 mm long
- And two are a bit shorter at 1.3 mm
Step 19


- Twist the bottom of the logic board cover to the left, then gently slide the top left corner out from under the ambient light sensor cable. Out it comes!
- When you’re putting it back, make sure the top left corner tucks neatly underneath the ambient light sensor cable.
Step 20


To snap a press connector back in place, line it up over the socket, then push down gently on one side until you hear a click—now, give the other side a little love. It should sit nice and flat, but keep an eye out for the insulating rubber around the socket, which sometimes likes to play hard to get.
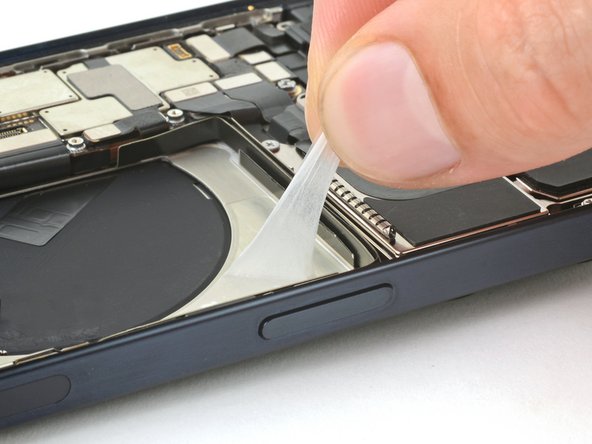
- Take your opening pick and gently nudge it under the connector at the bottom right corner of the logic board. A little prying action will disconnect the battery press connector with ease. You've got this!
Step 21


- Gently slide the tip of your opening pick under the screen cable and lift it up to disconnect it from the middle of the logic board.
Step 22


- Carefully slide the tip of an opening pick under the ambient light sensor cable located near the top left corner of the logic board.
- Lift the cable gently to unplug it.
Step 23


Watch out for those spring contacts while cleaning the frame—treat them gently so they stay happy and intact!
- Carefully remove the screen.
- When putting everything back together, just follow this guide to stick on the new adhesive and pop the screen into place.
Step 24


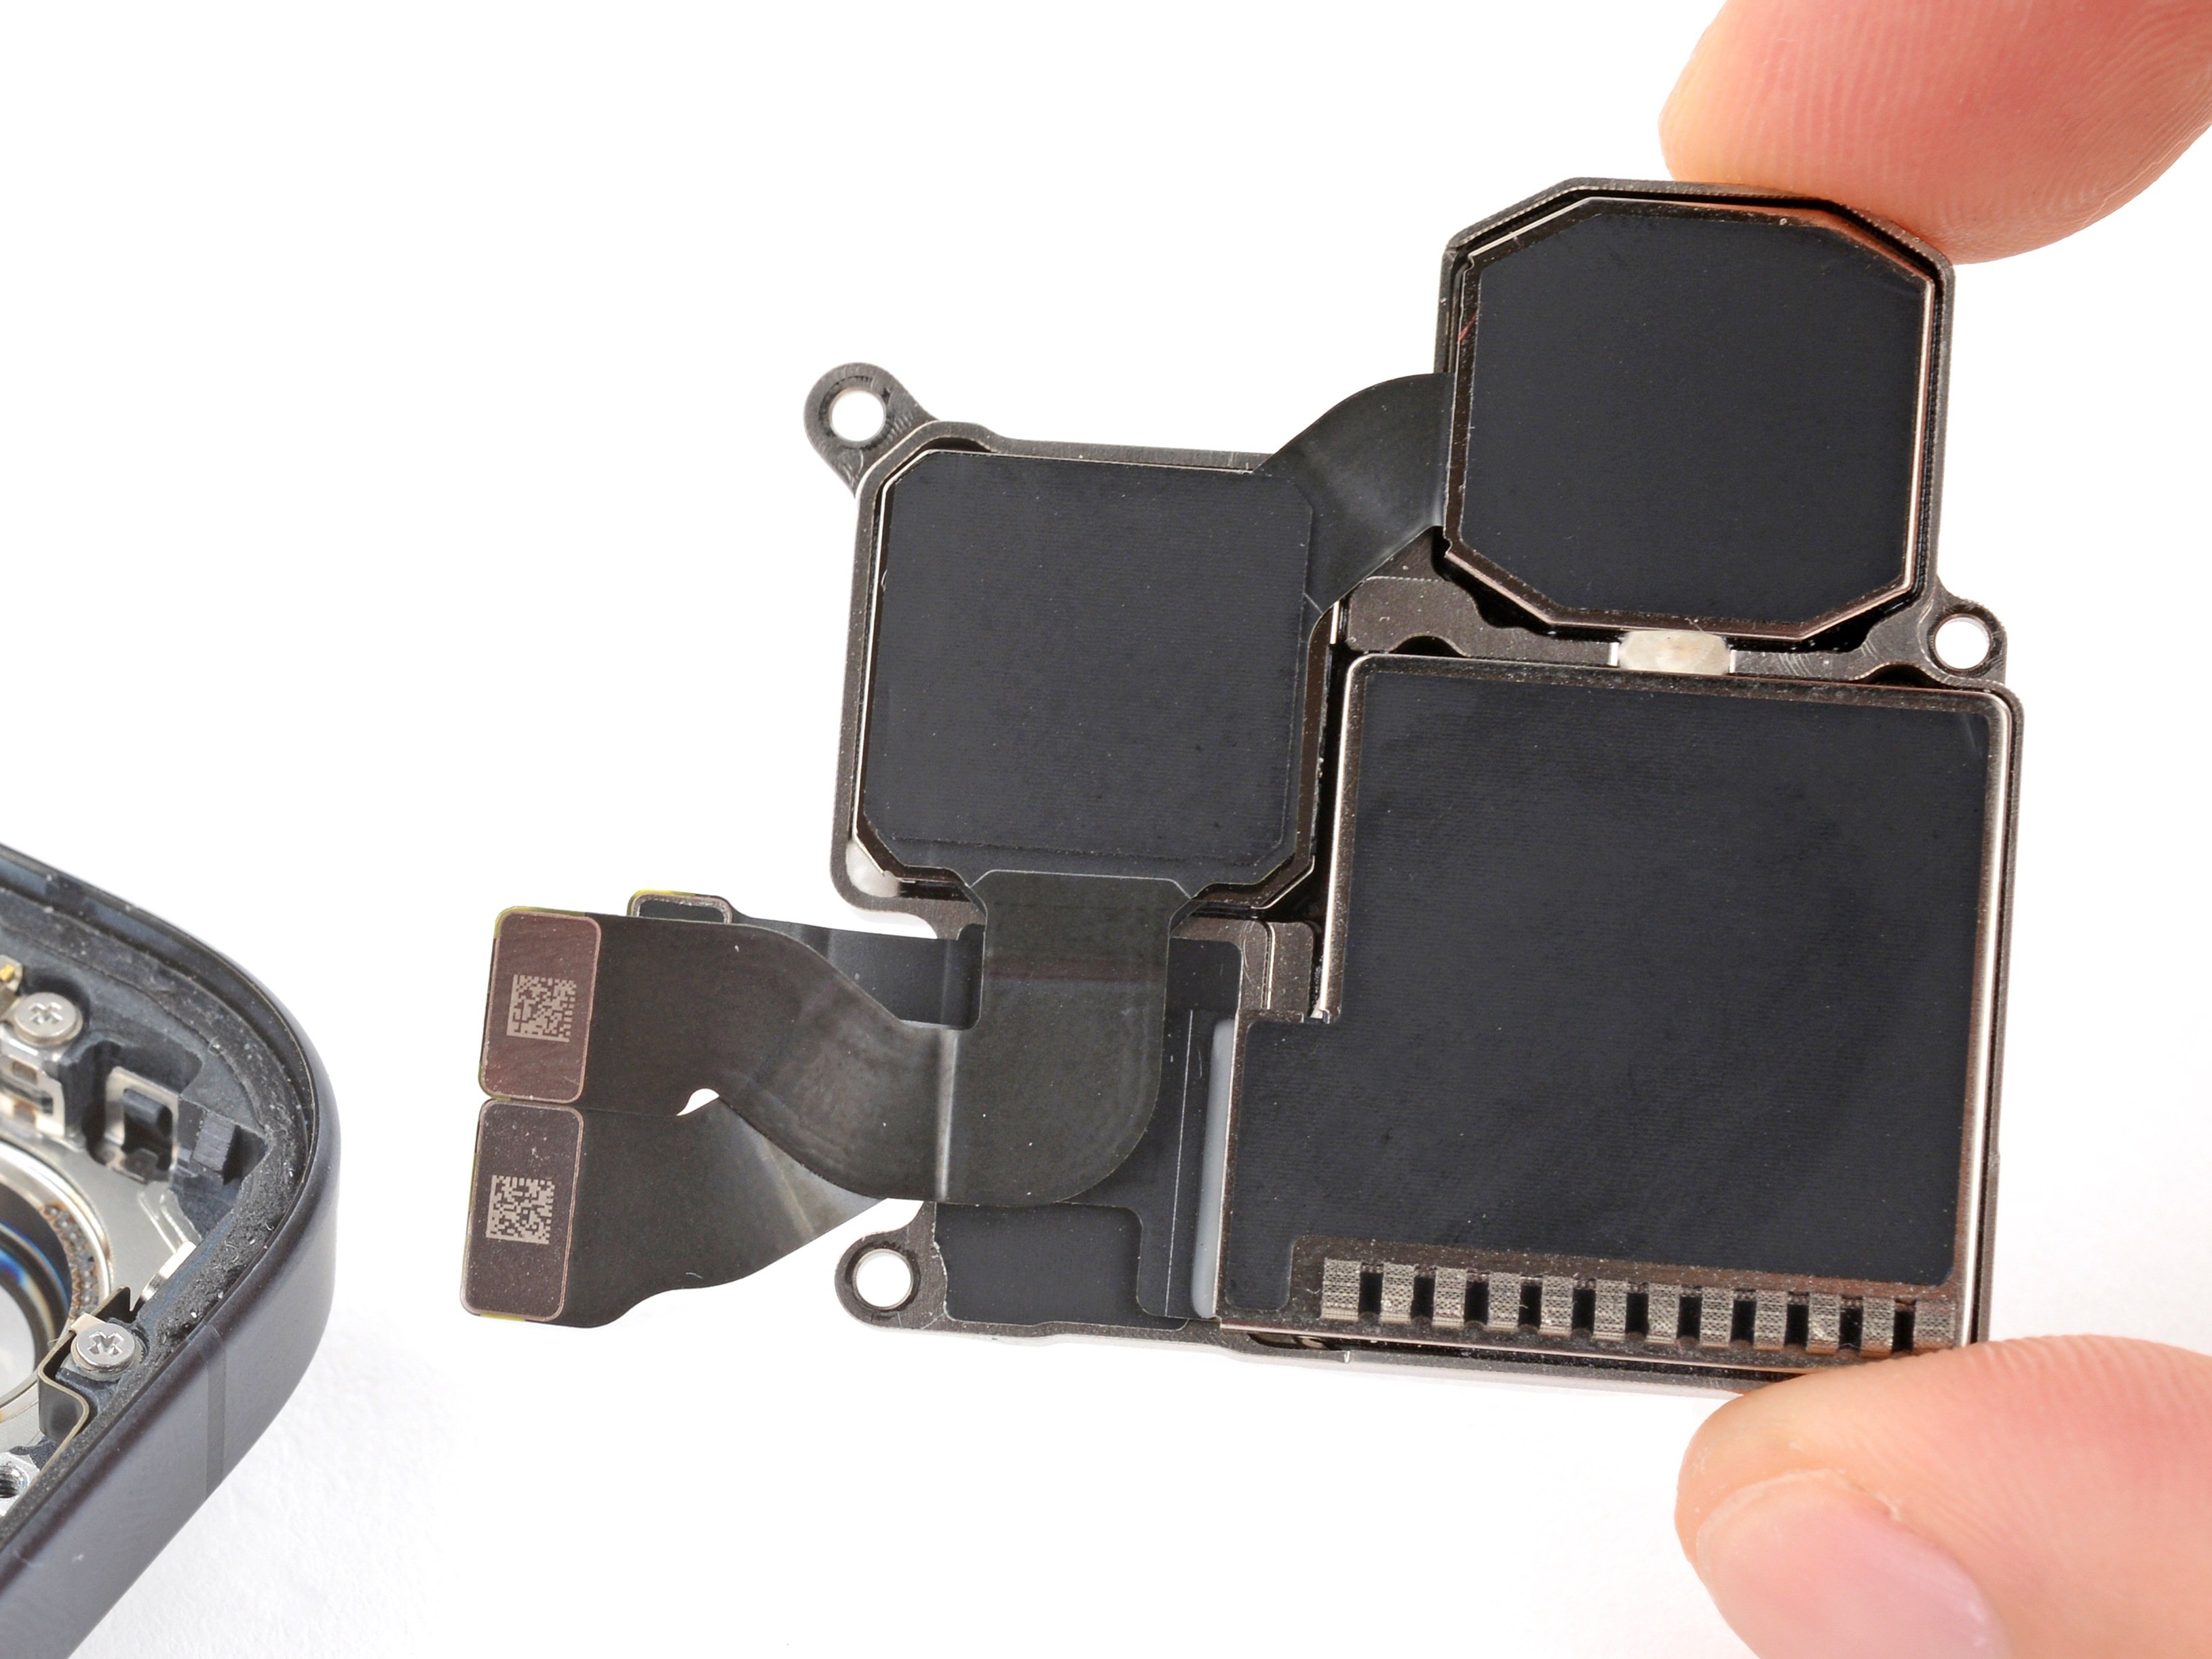
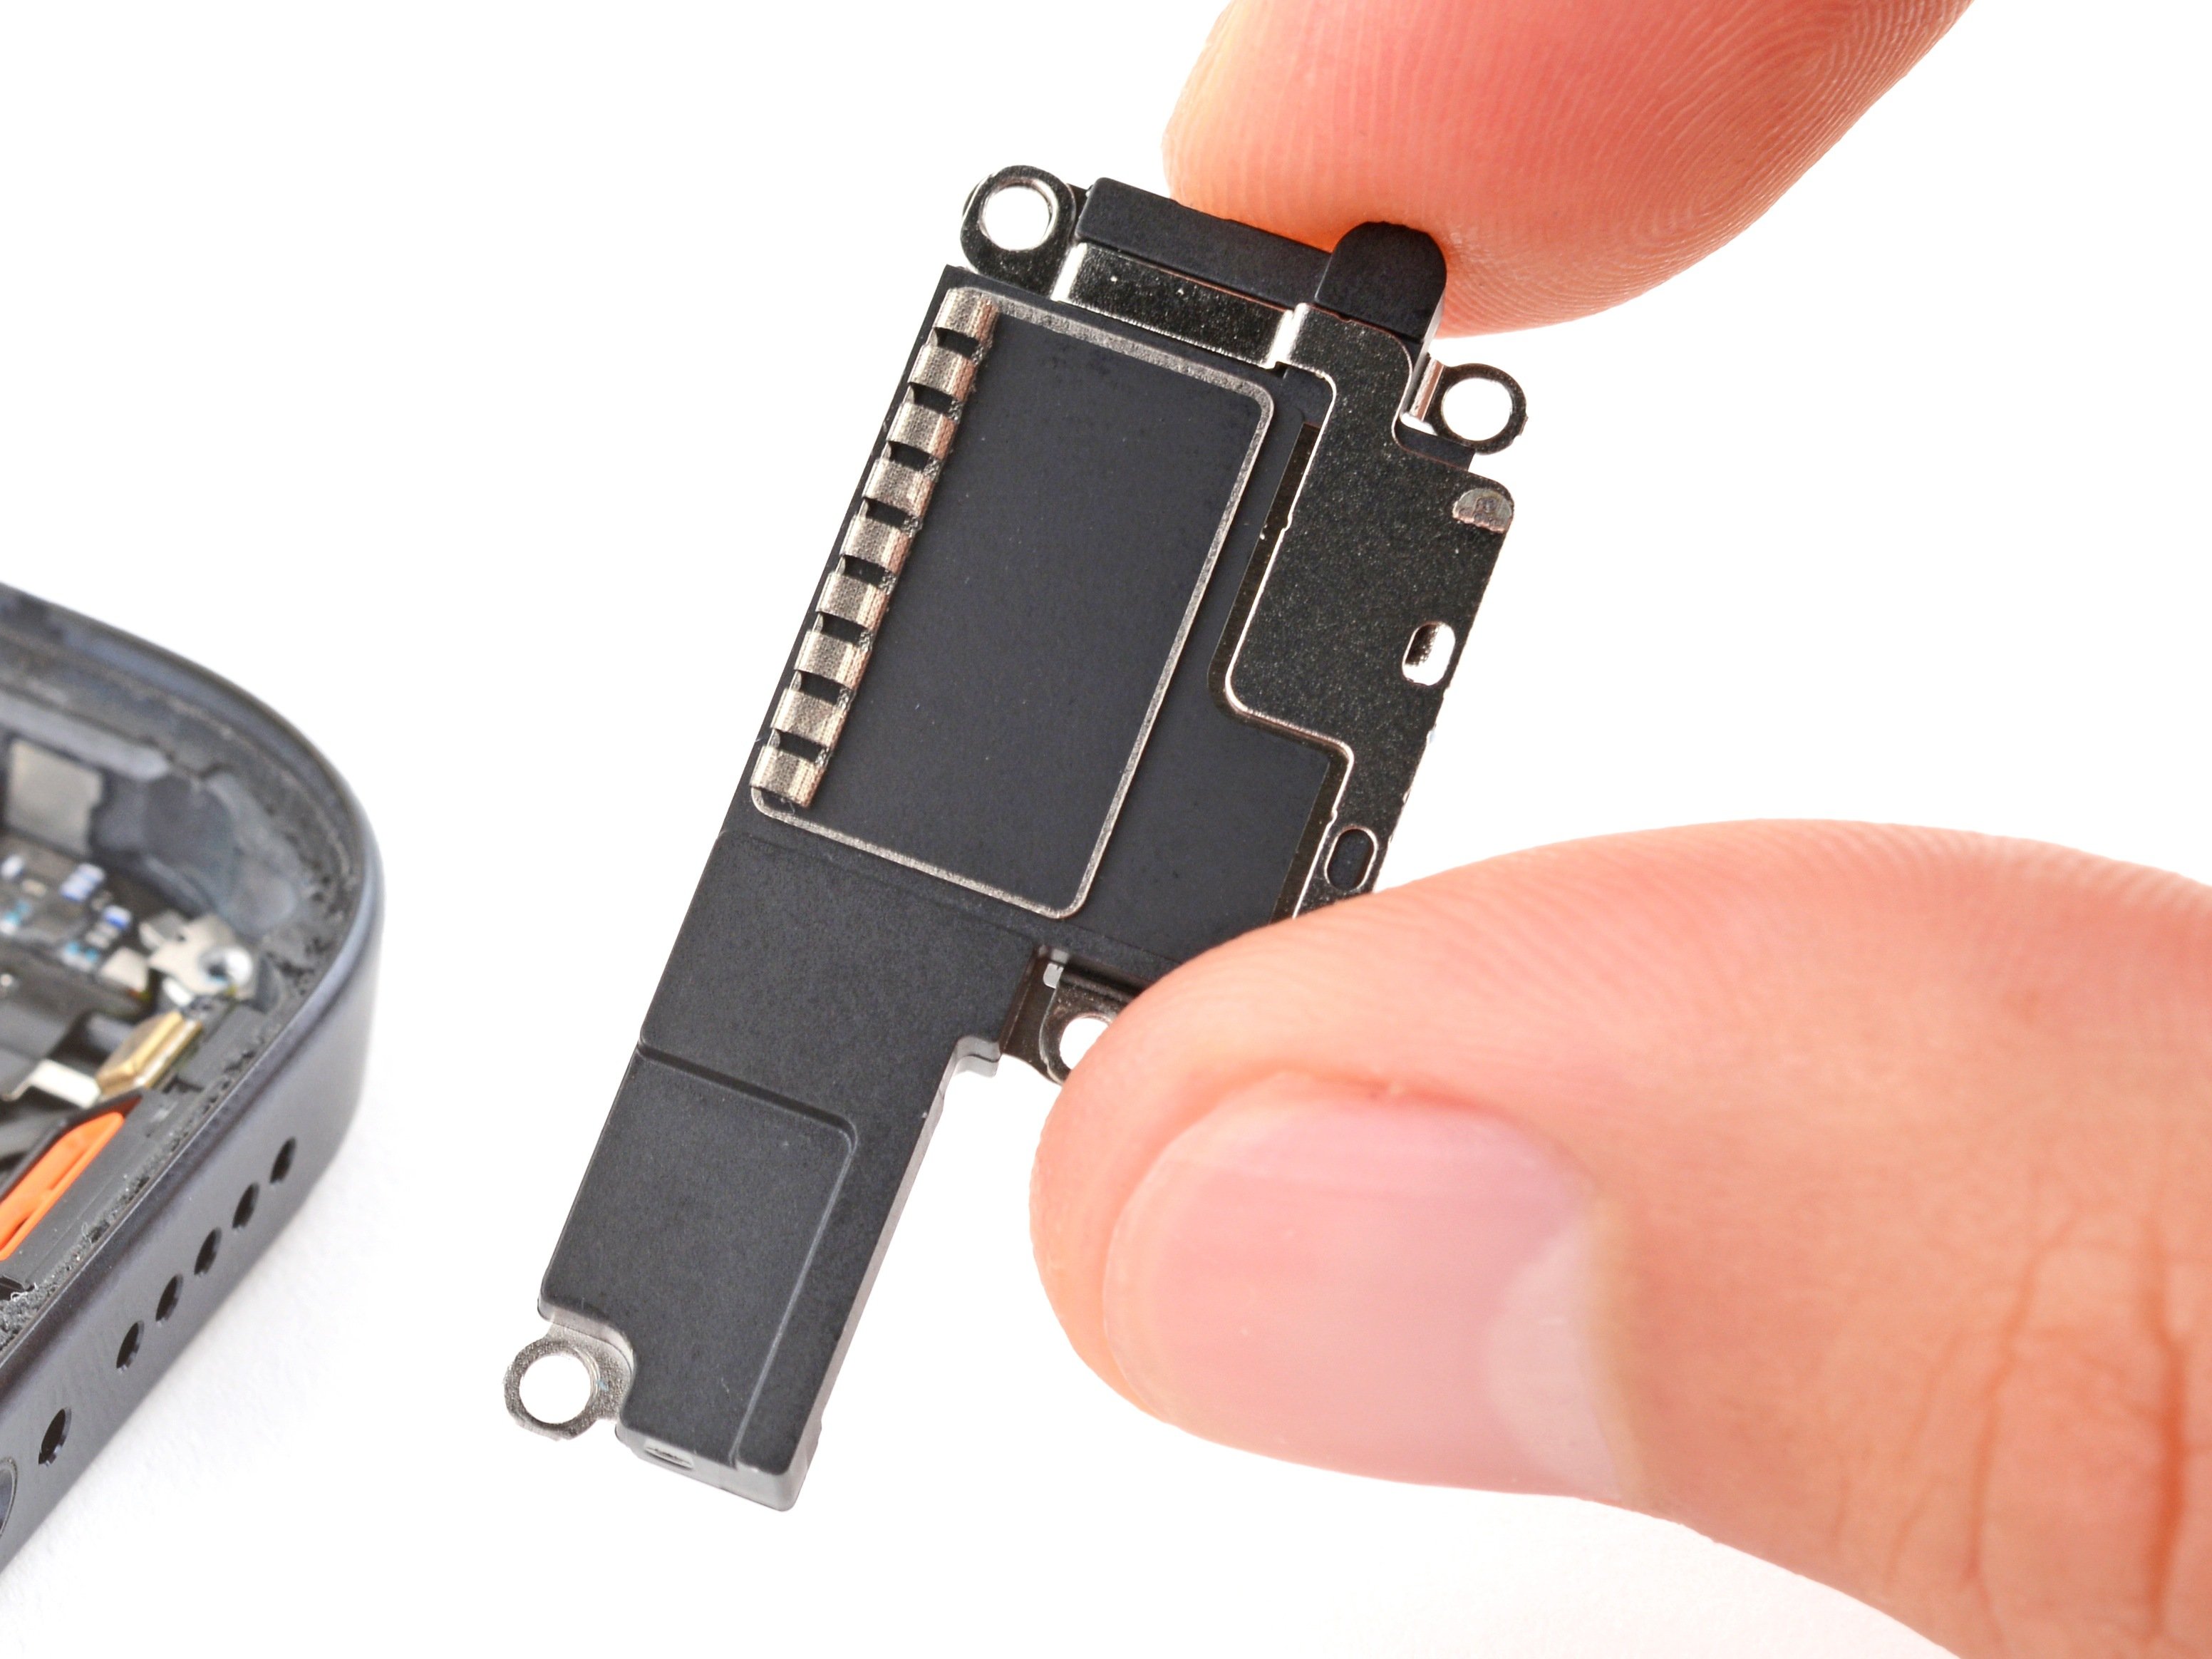
- Grab your Phillips #000 screwdriver and remove the four screws holding the loudspeaker in place:
- One screw is 2.7 mm long
- The other three are 2 mm long each
Step 25


A plastic buffer is stuck to the top edges of both the loudspeaker and the Taptic Engine, keeping everything snug and in place.
- Give the bottom edge of the loudspeaker a little lift, then grab it with your fingers to start moving it.
- Peel the loudspeaker away from the plastic buffer at the top edge, then gently remove it.
Step 26


- Grab a spudger and gently use its point to lift and disconnect the Taptic Engine press connector. Easy does it – no need to rush!
Tools Used

Step 27


- Grab your Phillips #000 screwdriver and spin out those two tiny 2 mm screws holding down the Taptic Engine. Easy does it!
Step 28

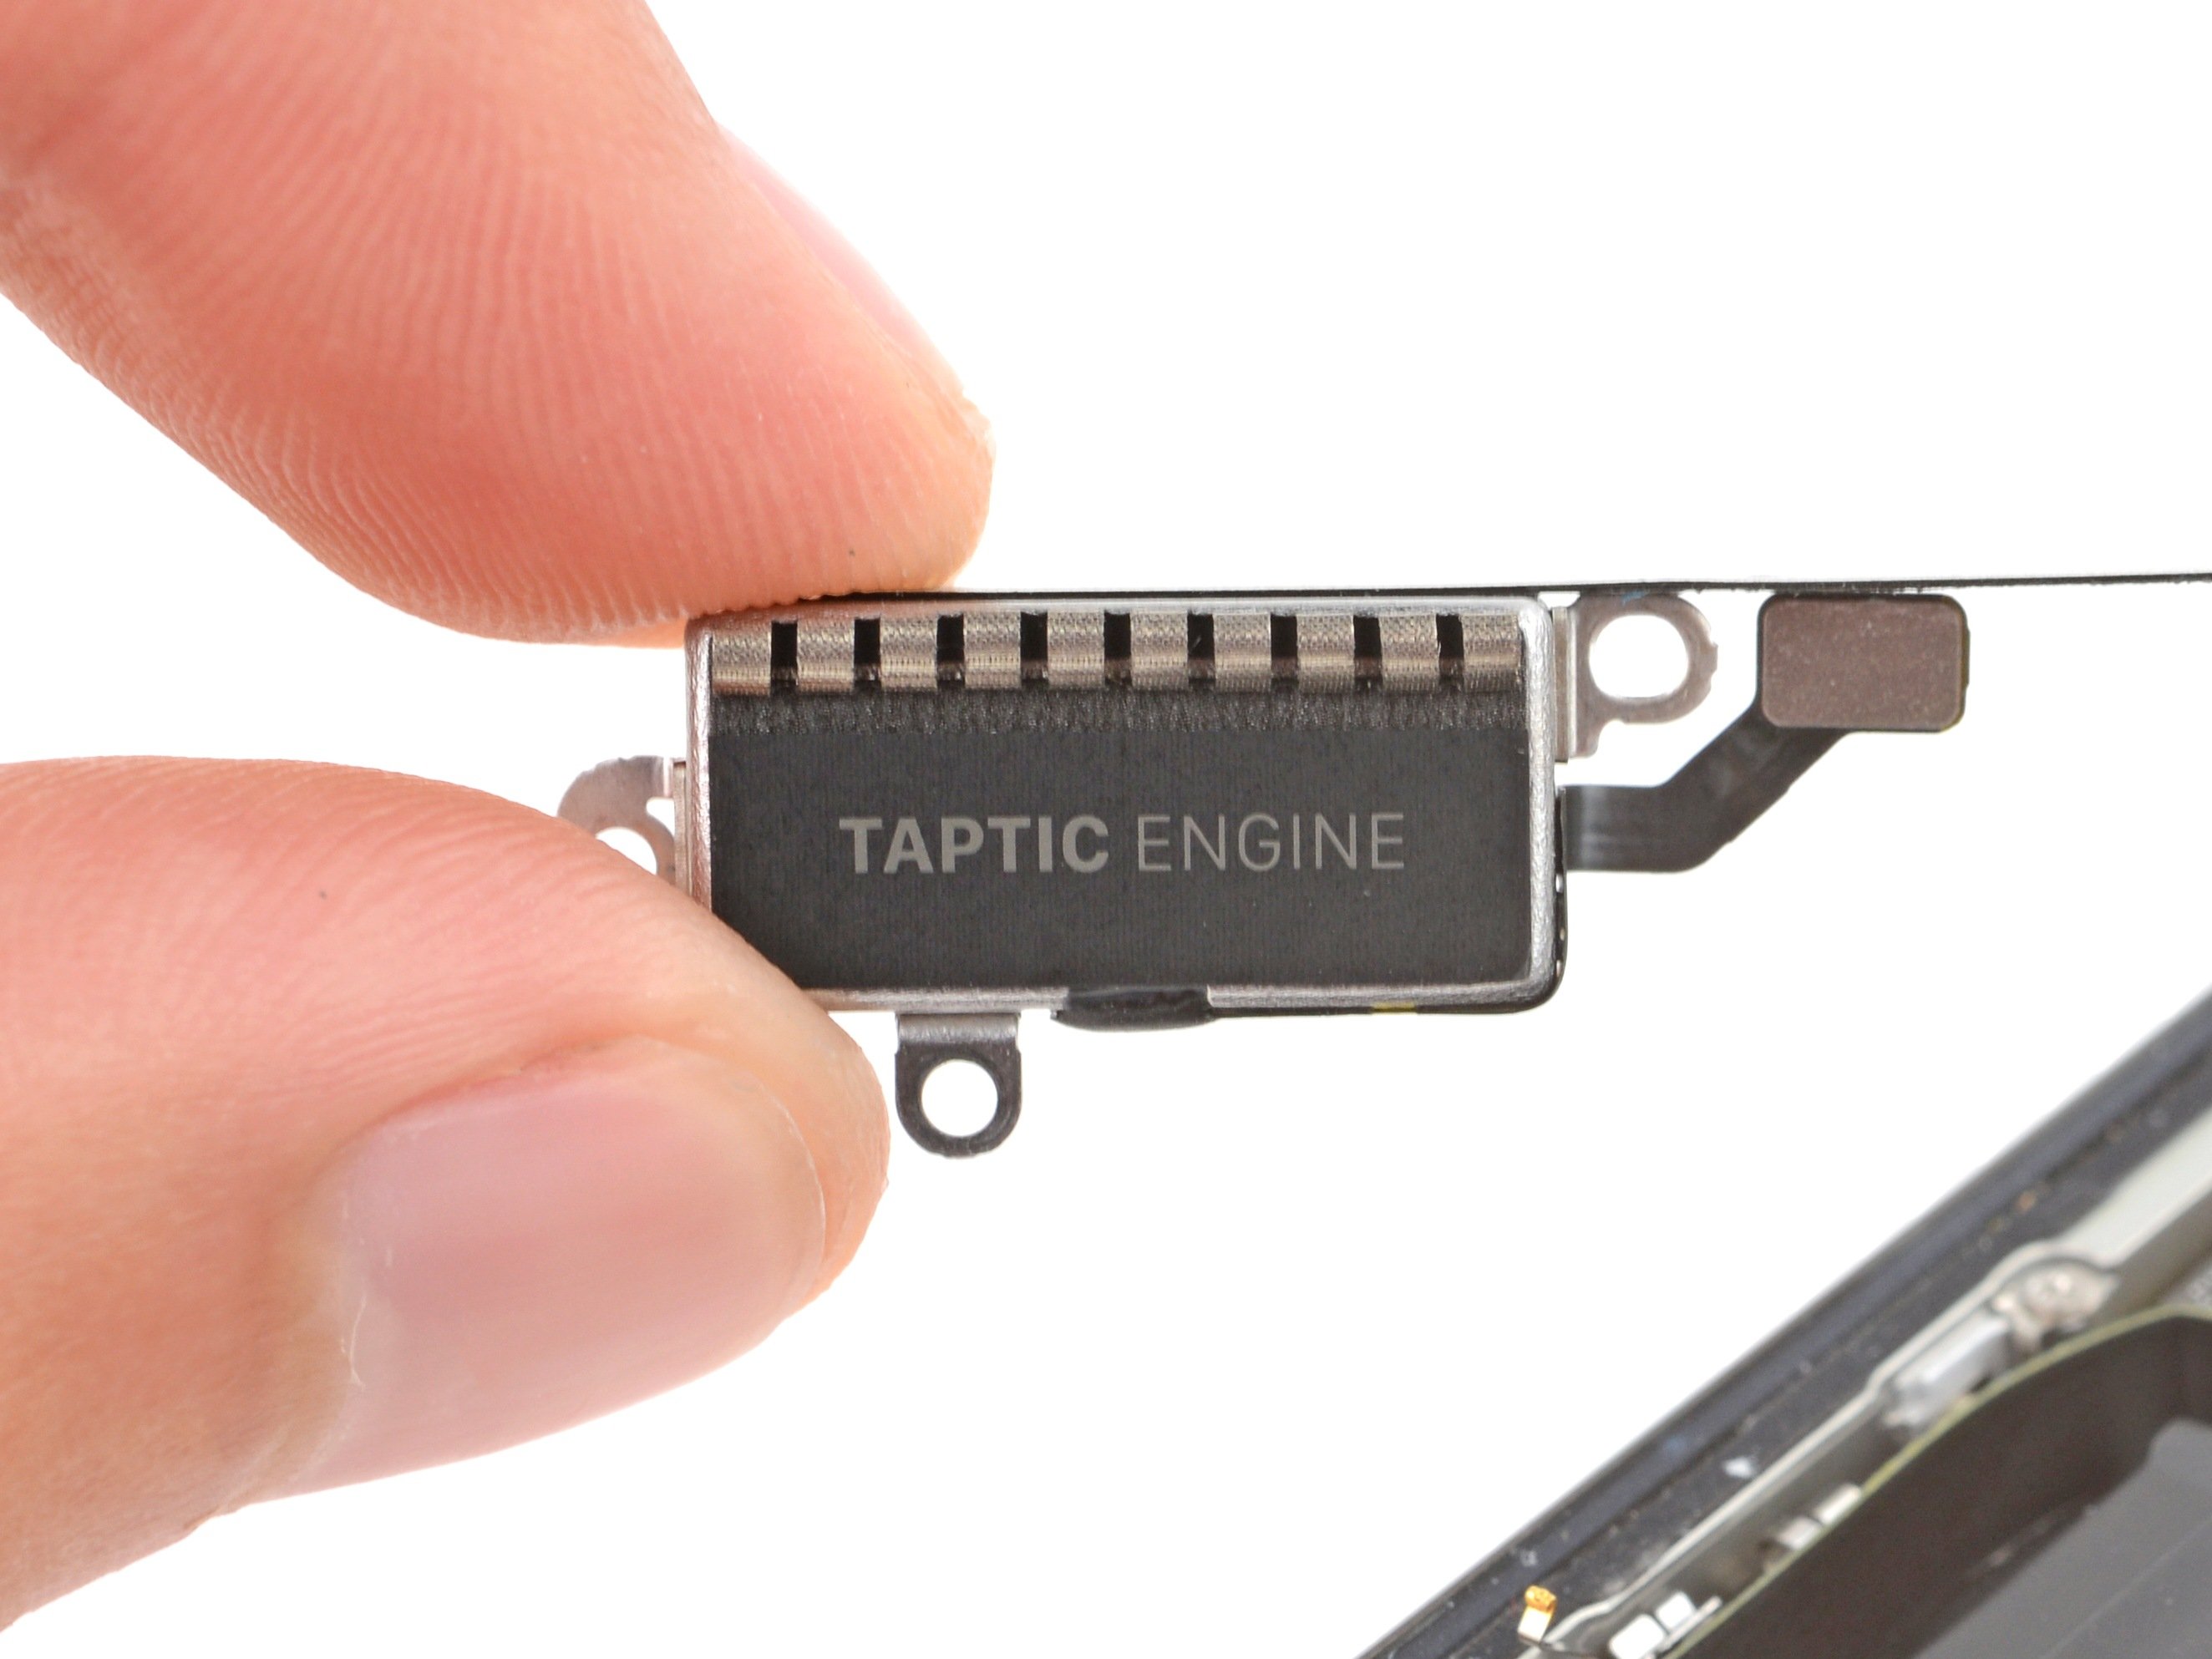
- Carefully lift out the Taptic Engine.
Step 29

Three strips of stretch-release adhesive are holding the battery in place—two along the bottom and one at the top. Time to get that battery free!
In the next steps, you'll be gently pulling each tab out from under the battery. It’s like a little tug-of-war, but you’ve got this.
The strips will loosen as you stretch them, but they might snap before you can get them all the way off—especially the top one. If one breaks, no need to panic! We’ve got an alternate method to finish the job, just keep going.
- At the end of each strip, you'll find a black pull tab, gently stuck to the edge of the battery. Give it a little tug, and you're all set to go.
Step 30


Be extra careful not to poke or dent the battery with your tool. A damaged battery can leak some nasty chemicals or even catch fire—definitely not something you want happening! Keep it safe, keep it smart.
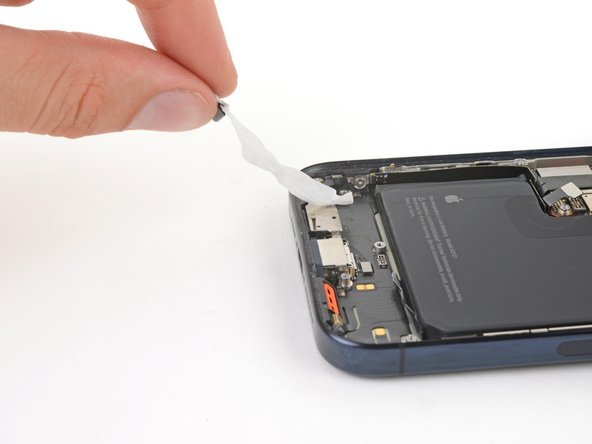
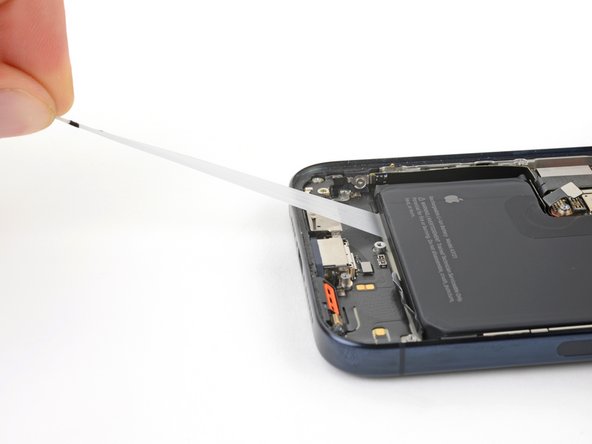
- Grab an opening pick and carefully nudge one edge of the adhesive pull tab away from the battery. Be gentle, it’s a little shy!
- Next, take your blunt nose tweezers and give the pull tab a good grip, then slowly peel it off the battery's edge. Nice and steady.
- Now, repeat this process for the other two pull tabs. Patience is key!
Step 31

If the strip snaps off, see if you can fish it out. If it’s hiding under the battery and you can’t grab it, no sweat—just head to the next step.
- Gently pull one of the tabs out from under the battery until you can grab it with your fingers or loop it around your tool.
- Keep the phone steady by holding the edges of the frame—avoid pressing down on the battery itself.
- Slowly and smoothly pull the strip at a low angle, making sure not to drag across any other components.
- Keep pulling, re-grabbing or looping the strip around your tool as needed, until it slides completely free from under the battery.
- Do the same for the other two strips to finish up this step.
Step 32


Nice work! If you've removed all three adhesive strips, you're good to go—you can now take out the battery! If not, no worries, just keep going and follow the next couple of steps to loosen up the adhesive using some isopropyl alcohol and a trusty plastic card.
- If that pesky top strip is still hanging around, give the top edge of your phone a little boost!
- If there are any stubborn bottom strips left, lift up the left edge of the phone (the side where the volume buttons are located).
- Grab a pipette or syringe and drizzle a few drops of high-octane isopropyl alcohol (over 90%) along the lifted edge of the battery.
- Now, take a breather for about a minute while the isopropyl alcohol sneaks under the battery, working its magic to loosen that sticky adhesive.
Step 33

Avoid bending or folding your battery. If the adhesive is being stubborn, add a few more drops of isopropyl alcohol and give it another go.
Watch out not to scratch the frame beneath the battery—the wireless charging coil hangs out near the center and deserves some respect.
Depending on the strength of your adhesive, this part might take a little time. Apply steady pressure for up to a minute to give the adhesive a chance to loosen up.
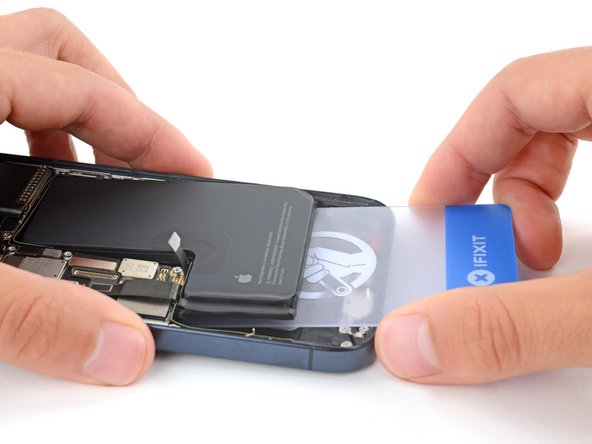
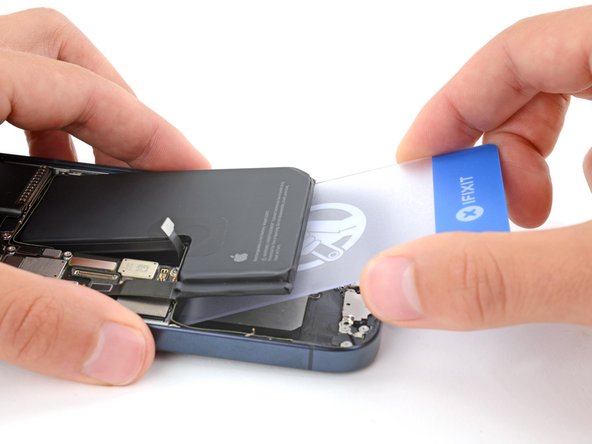
- Slide the narrow edge of a plastic card into the gap between the bottom of the battery and the frame.
- Carefully lift the battery until the adhesive lets go completely.
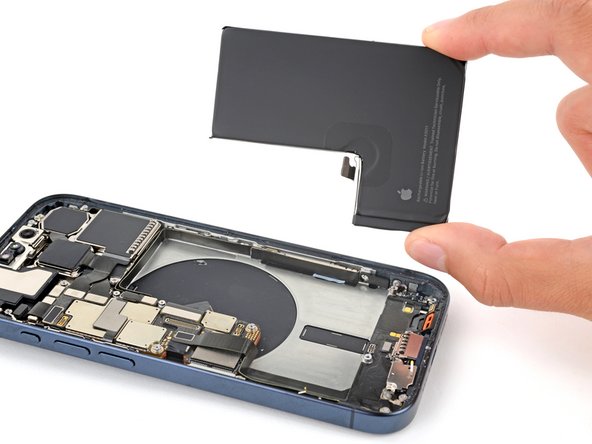
Step 34

- Put your iPhone back together by simply reversing these steps.
- Once your repair is done, you might be able to calibrate the new part using Apple's Repair Assistant on iOS 18 and later. Just update your device, go to Settings → General → About → Parts & Service History, tap Restart & Finish Repair, and follow the prompts.
- For the best results, make sure to calibrate your new battery after finishing this guide.
- Don’t forget to recycle your electronic waste responsibly at an R2 or e-Stewards certified recycler.
- If things didn’t go quite as planned, try some basic troubleshooting or visit our Answers community for a hand. And if you’re stuck, you can always schedule a repair with us.