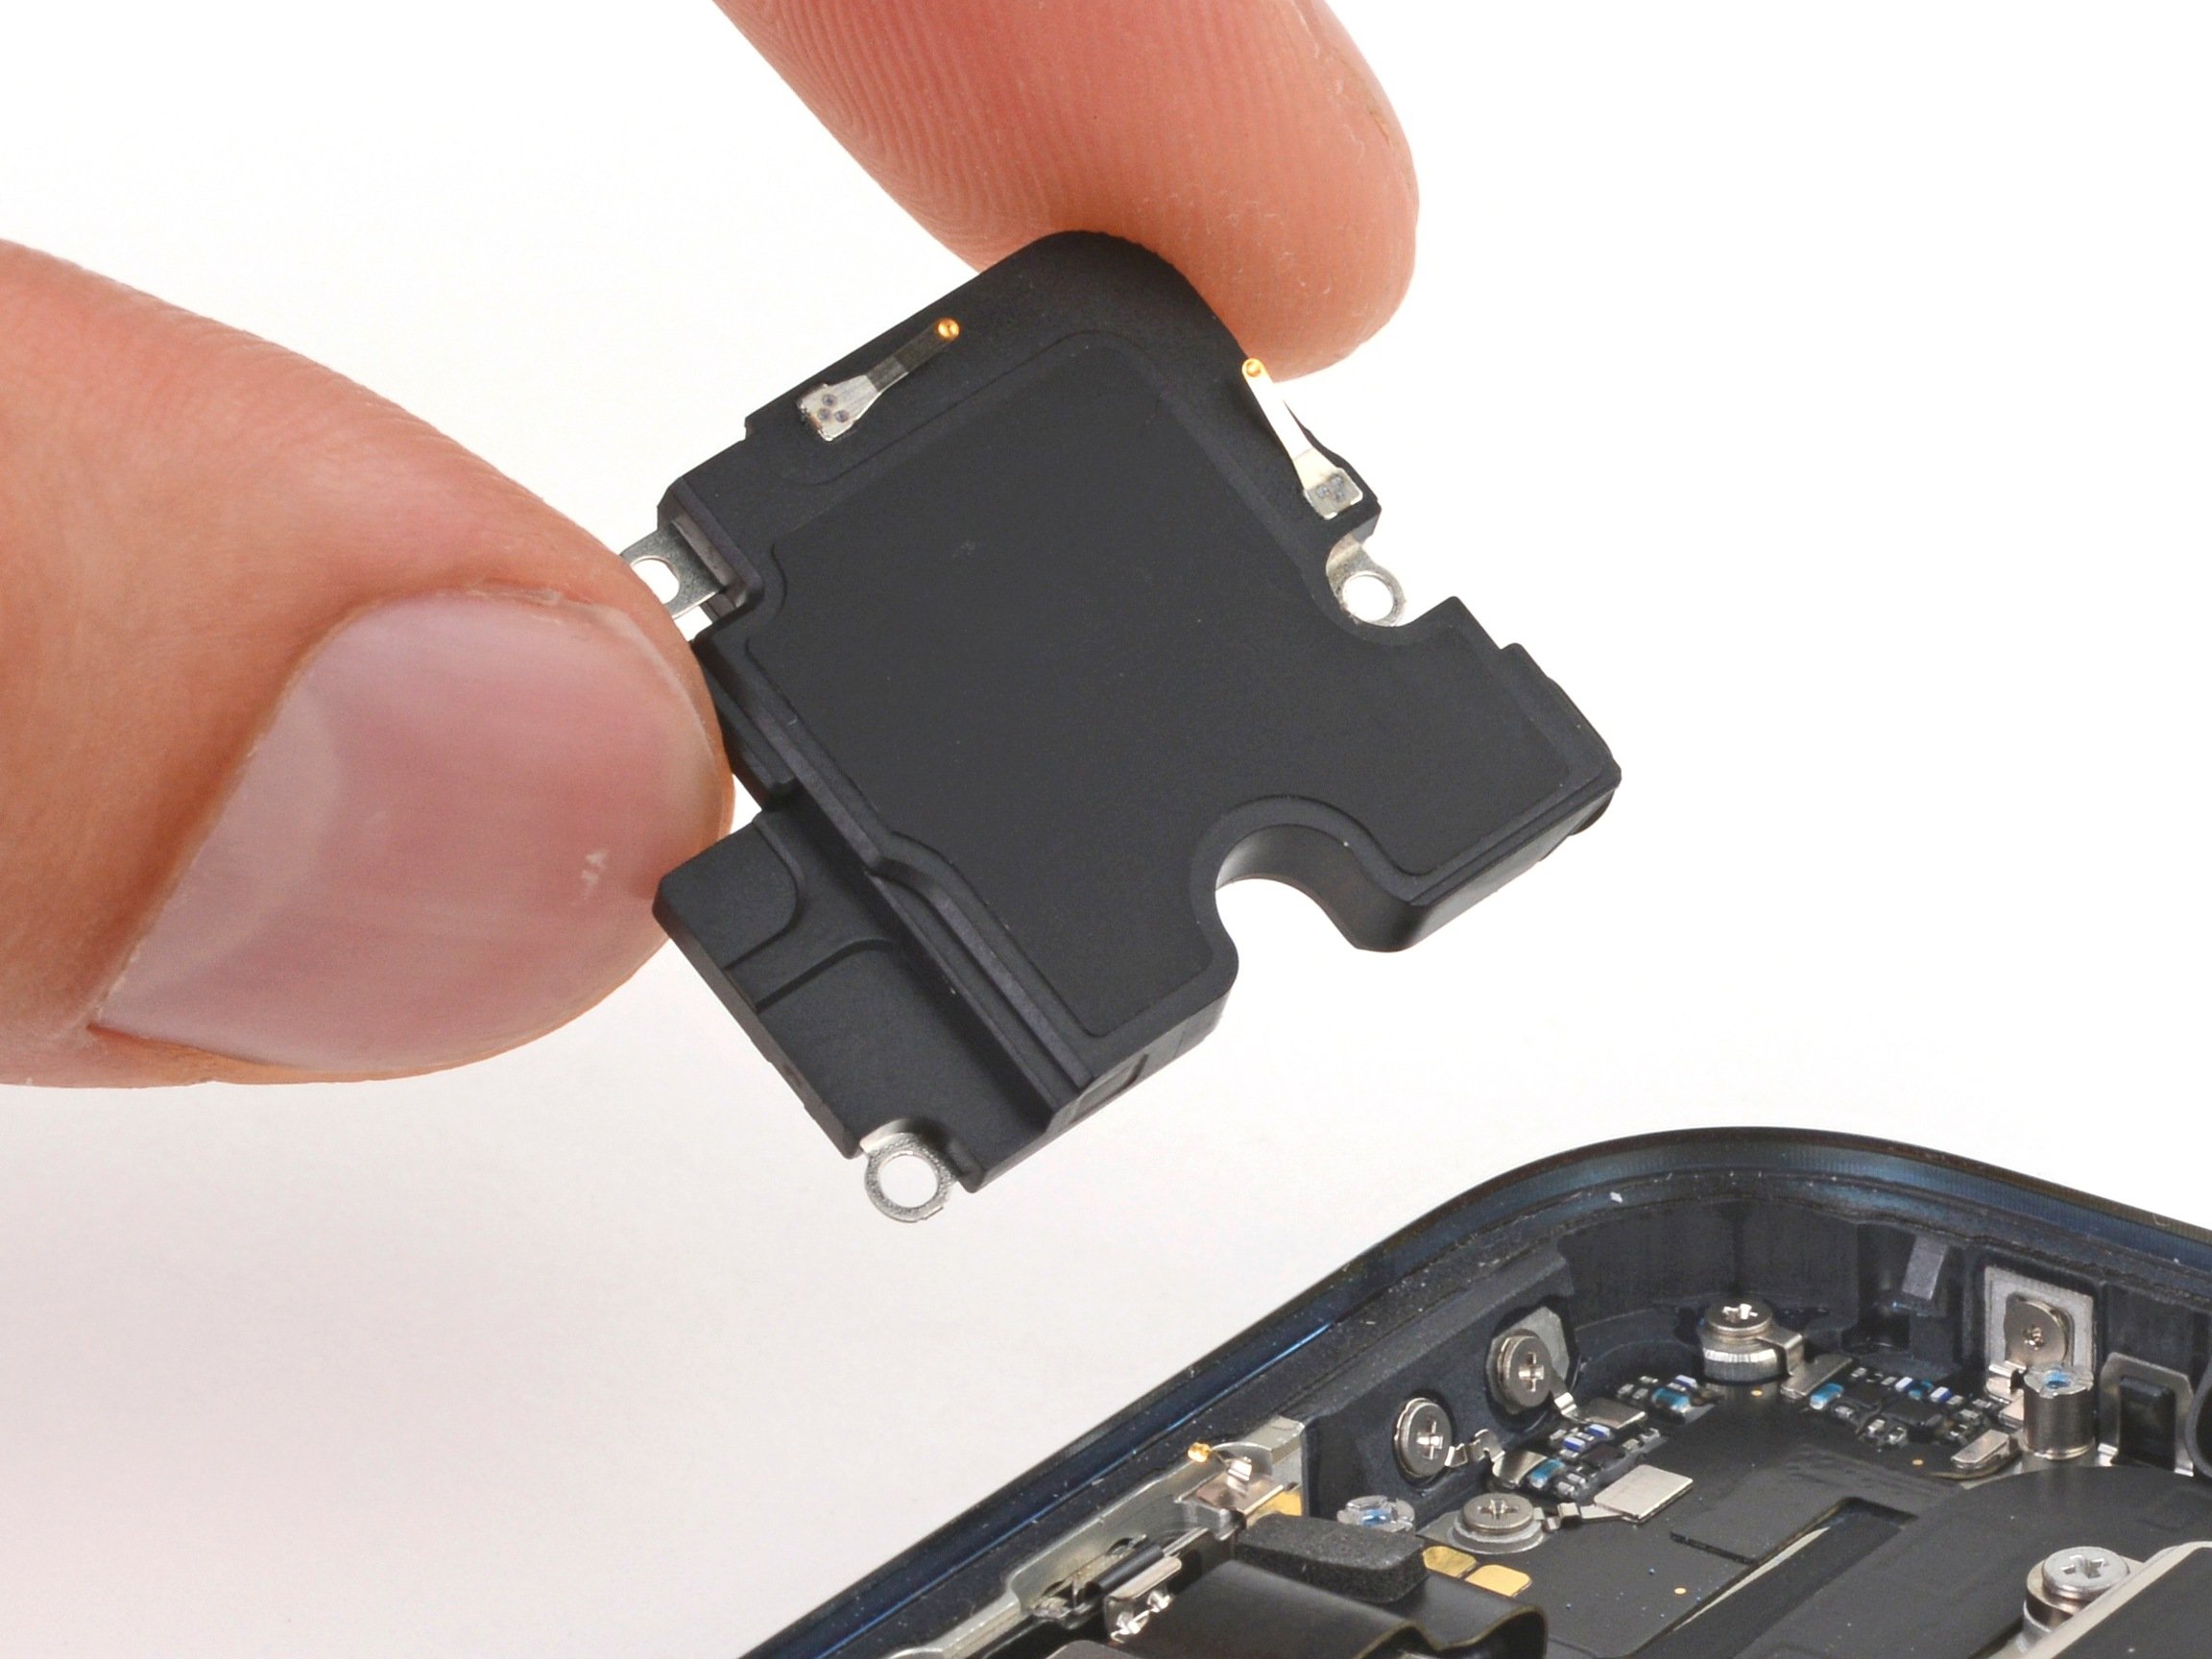
iPhone 15 Pro Max Earpiece Speaker Replacement
Duration: 45 minutes
Steps: 25 Steps
Ready to kick crackling calls to the curb? This guide walks you through swapping out that pesky earpiece speaker in your iPhone 15 Pro Max. If you're hearing static instead of sweet nothings, it might be time for an upgrade. Don't forget—you'll need fresh screen adhesive to finish up the job.
Step 1


Let your phone’s battery drop below 25% before starting—charged lithium-ion batteries can be a bit of a firecracker, so better safe than sorry!
- Disconnect any cables hanging out of your phone—give it some breathing room.
- Press and hold the power button along with one of the volume buttons, then slide to shut your phone down. Easy does it!
Step 2


Ensure there's a nice, smooth spot near the bottom edge that’s large enough for a suction cup to latch on to.
- Got a seriously shattered screen or back glass? Throw on some packing tape—layer it up to keep glass splinters at bay and make your teardown way less hazardous.
Step 3


Be careful not to insert the opening pick too deep—it could damage your device. Mark the pick to help prevent any mishaps.
Feel free to mark the other corners of the pick at different points to keep things accurate.
Another trick: tape a coin to the pick about 3mm from the tip for extra precision.
- Grab your opening pick and measure out 3 mm from the tip. Give it a mark with a permanent marker so you know exactly where to stop—no guesswork, just smooth moves!
Step 4

- Grab your trusty P2 pentalobe driver and unscrew the two 7.2mm screws on each side of the charging port. You'll have this part done in no time!
Step 5

Keep things cool—overheating your phone can give the battery a real bad day.
- Grab your hair dryer or heat gun and warm up the bottom edge of the screen—aim for 'toasty' but not 'lava'.
Tools Used


Step 6


- Grab a suction handle and place it on the bottom edge of the screen.
- Give it a good pull to gently separate the screen from the frame, creating a little gap.
- Slide the tip of an opening pick into the gap you just made.
Tools Used

Step 7

As you cut through the adhesive holding the screen in place, watch out for these sensitive spots:
- There are two delicate cables connecting the screen to the phone. One is just above the action button, and the other sits near the middle of the left edge. Handle with care, as these little guys are sensitive!
- Keep an eye out for multiple spring contacts around the perimeter of the phone. Be cautious and don't insert your pick deeper than suggested in these spots to avoid bending any of the contacts. We want everything to stay in tip-top shape!
Step 8


Be careful not to push your opening pick more than 3 mm into the bottom edge. We want to keep things safe and sound!
- Gently slide your pick back and forth along the bottom edge to separate the adhesive. Take it slow and steady, it'll pop right off.
- Leave your pick in the bottom right corner to keep the adhesive from sealing itself back up. You’ve got this!
Step 9

- Warm up the right edge of your screen until it feels nice and toasty—just enough to loosen things up.
Step 10


Keep your pick to a maximum depth of 5 mm along the right edge, and you'll be golden!
- Slide your pick along the bottom right corner, moving toward the power button. You'll hit a clip that’s holding the screen in place—this is your cue to stop.
- Twist the pick so that the flat side is now under the screen, ready for the next move.
Step 11


- Gently twist the pick to widen the gap between the screen and frame, just enough to release the clip on the right.
- Slip in a second opening pick right next to the first one on the right side.
Step 12


- Slide your first pick back down to the bottom right corner—keep it cozy there.
- Move the second pick up towards the top right corner to break up that stubborn adhesive.
- Let those picks chill in place so the adhesive doesn’t get any ideas about sticking again.
Step 13

- Warm up the top edge of the screen until it feels nice and toasty to your fingers.
Step 14


Keep your pick on the surface – no deeper than 3 mm along the top edge, please!
- Gently glide your pick around the top right corner and along the top edge to pop off those two clips and break free from the adhesive holding it down.
Step 15

- Warm up the left edge of the screen until it feels pleasantly warm to the touch.
Step 16


Keep your pick shallow—no more than 2 mm—along the left edge to dodge those two sneaky cables hooking up the screen to your phone.
- Gently twist your pick around the top left corner of the screen like you're opening a treasure chest.
- Slide your pick down to the bottom left corner to break free that pesky adhesive holding everything together.
Step 17


If the screen is giving you a hard time, take a stroll around the edges and see if there's any adhesive or clips that might have missed their cue to release.
- Carefully swing the screen open to the left side of the phone.
- Lean the screen against a box or something similar to keep the cables relaxed and safe.
Step 18


As you go, keep each screw in its original spot—your device will thank you for not mixing things up later!
- Grab your trusty tri-point Y000 driver and unscrew the six screws holding that logic board cover in place:
- One screw that's 2.1mm long
- Five screws that are 1.5mm long
Step 19


- Grab those tweezers or use your fingers to gently slide the logic board cover down towards the bottom of the phone. This will help you free that sensor cable like a pro!
- Now, go ahead and remove the cover. You're doing great!
Tools Used

Step 20


To reconnect a press connector, line it up carefully over its socket and press down gently on one side until you hear a satisfying click, then do the same on the other side. Make sure it lies flat—sometimes the insulating rubber around the sockets can keep it from snapping in all the way.
- Gently slide the tip of your opening pick under the battery press connector to pop it up and disconnect it. You've got this!
Step 21
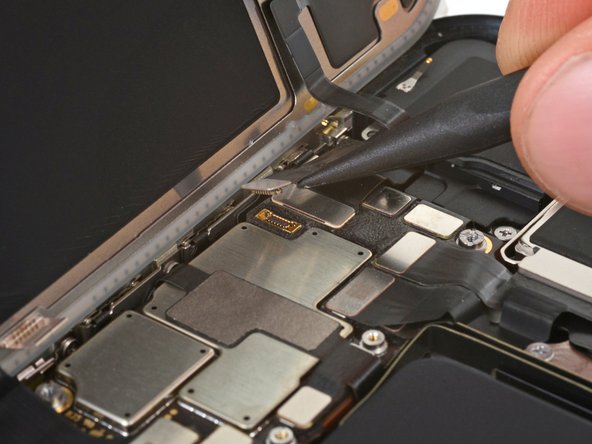

- Grab your trusty spudger and gently pop up the ambient light sensor connector from the top left corner of the logic board. Easy does it!
Tools Used

Step 22


- Carefully unplug the screen press connector. Give it a gentle tug, no need to rush!
Step 23


Handle the spring contacts with care while cleaning the frame to keep everything happy and working perfectly.
- Lift off the screen like you're opening a treasure chest—carefully, of course.
- When you're putting things back together, pause here and use this guide to slap on some fresh screen adhesive. Stick with it!
Step 24

- Grab your Phillips #000 driver and loosen the two screws holding the earpiece speaker in place:
- One screw measuring 1.8 mm
- One screw measuring 2.4 mm
Step 25


- Put your device back together by reversing these steps.
- Remember to drop off your e-waste at an R2 or e-Stewards certified recycler.
- If things didn’t quite work out, try some basic troubleshooting or get help from our Answers community. And if it’s still tricky, you can always schedule a repair with us.


