iPhone 16 5G mmWave Antenna Replacement
Duration: 45 minutes
Steps: 60 Steps
Ready to boost your iPhone 16’s 5G game? Swap out that mmWave antenna if your phone keeps dropping mobile data but still clings to Wi-Fi. Grab some fresh back glass and antenna adhesive—those are must-haves for this job. Take it one step at a time and your phone will be back to lightning speed in no time. If things get tricky, you can always schedule a repair for backup.
Step 1


Let that battery drop below 25%! A fully charged lithium-ion battery can be a bit of a safety concern, so giving it some time to drain is always a good call.
- Disconnect any cables plugged into your phone.
- Press and hold the power button along with either volume button, then slide to turn your phone off.
Step 2


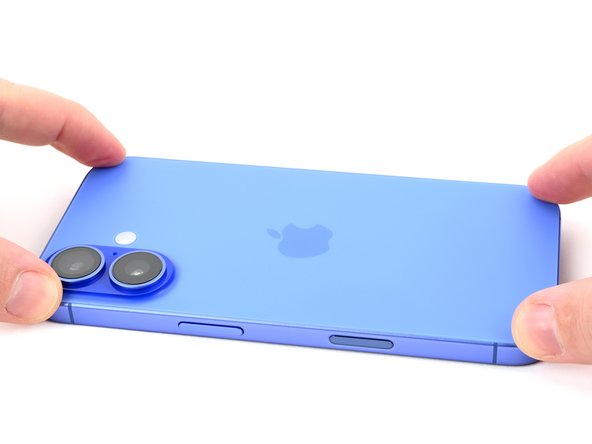
Find a nice, clean spot near the bottom edge where your suction cup can really hang out and stick.
- Got a seriously shattered screen or back glass? Slap on some overlapping strips of packing tape to keep things together and save your fingers from surprise glass attacks. Plus, it’ll make taking everything apart way smoother.
Tools Used

Step 3


- Grab your P2 pentalobe driver and carefully unscrew the two 7.7 mm-long screws sitting snugly on each side of the charging port.
Step 4


If you push your opening pick in too deep, it could hurt your device. To keep things safe, just mark your pick to avoid any oopsies.
Feel free to also mark the other corners of the pick with different measurements for extra precision.
Or, you can stick a coin to the pick about 3mm from the tip with tape—easy peasy!
- Mark a spot 3 mm from the tip and brighten up that opening pick with a permanent marker. You're doing great!
Step 5

Heating the back glass? An iOpener is your new best friend! Just follow these simple steps to warm it up and get it applied just right.
- Grab a hair dryer or heat gun, and gently warm up the bottom edge of the back glass until it feels nice and toasty. Just a little heat is all you need to get things moving!
Tools Used


Step 6


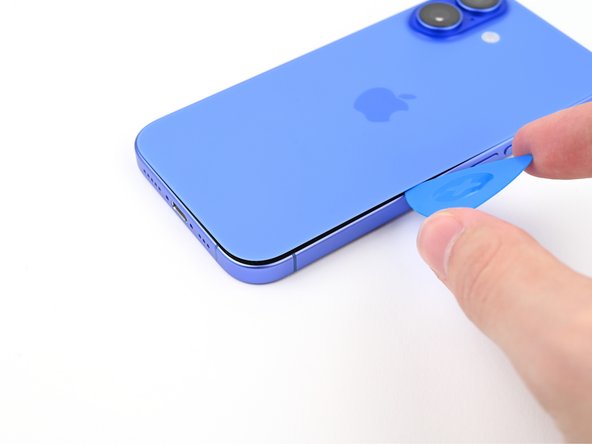
- Place a suction handle along the bottom edge of the back glass.
- Hold the frame steady with one hand, then give the handle a firm, steady pull to loosen the back glass from the frame.
- Slide the tip of an opening pick into the gap you've created.
Tools Used

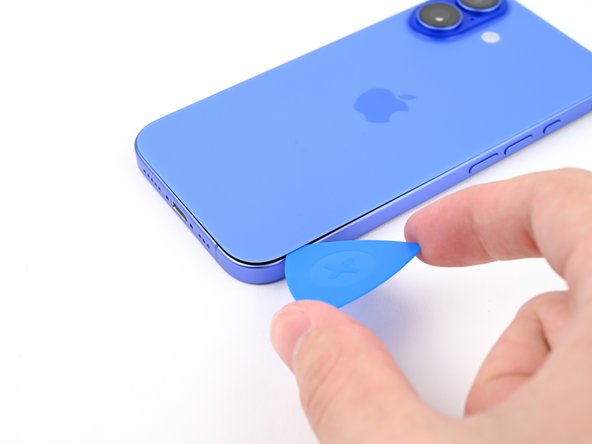
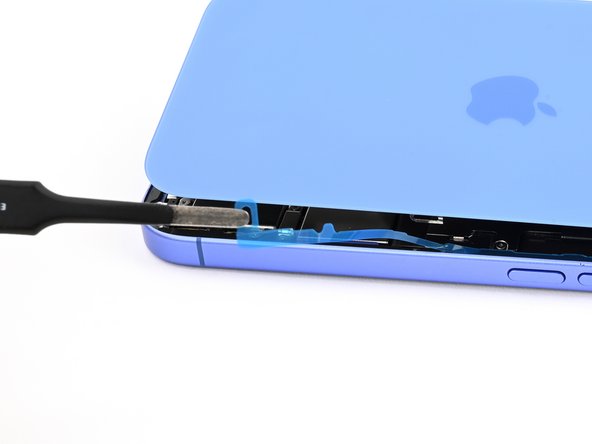
Step 7

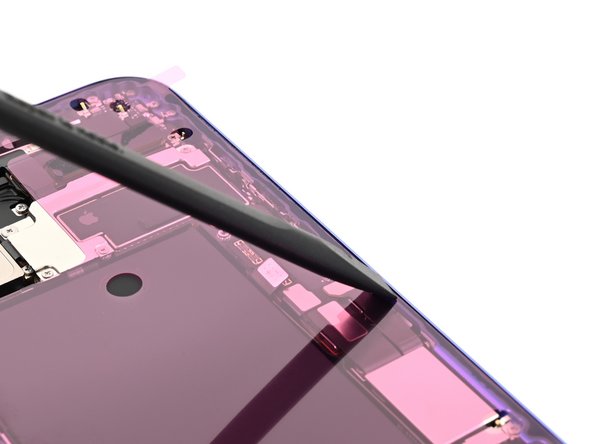
As you carefully cut through the adhesive that's keeping the back glass in place, remember to keep your pick no deeper than 3 mm. We definitely want to avoid any unintentional damage to the delicate areas beneath!
- Heads up! There's a fragile cable linking the back glass right next to the volume down button. Keep your pick away from this spot to avoid any accidental snips.
- Around the edges, you'll find several spring contacts. Handle them gently as you work your way around.
Step 8

- Grab your trusty hair dryer or heat gun and warm up that right edge of the back glass until it's nice and toasty!
Tools Used
Step 9

Keep it light, folks! Don't plunge your pick deeper than 3 mm, or you might accidentally tickle the spring contacts—let's avoid that mishap!
When you're gliding past those volume buttons, remember: it's a no-contact sport! Sliding too far could give the wireless charging cable a rough day. Stay in the zone!
Get ready for a little click—once you slide past the metal clip, you’ll feel it pop loose.
- Gently slide your pick from the bottom right corner over to the volume down button to loosen the adhesive and free up that metal clip.
- Keep the pick in place so the adhesive doesn’t snap back together on you.
Step 10

- Grab a hair dryer or heat gun and give the left edge of that back glass a nice warm-up until it's comfortably hot to the touch.
Tools Used
Step 11


Keep your pick within 3 mm to avoid any accidents with the spring contacts. A little care goes a long way!
As you move along, you'll feel those metal clips pop loose—like little high-fives from your device.
- Place your second opening pick at the bottom edge. It's like opening a book, but with a little more finesse.
- Now, gently slide that pick around the bottom left corner and along the left edge of the screen. Your goal here is to break the adhesive seal and release those pesky metal clips.
- Once you're near the top left corner, leave the pick in place to make sure the adhesive doesn't stick back together. It's like holding a door open, so it doesn't slam shut on you.
Step 12

- Warm up the top edge of the back glass using a hair dryer or heat gun until it feels nice and toasty—just enough so it’s ready for the next move.
Tools Used
Step 13


Keep your pick nice and shallow—no deeper than 3 mm—or you might poke those delicate spring contacts.
You'll notice and feel the metal clips pop free as you slide past them.
- Swing your second pick around the top left corner, then cruise along the top edge to slice through that sticky adhesive and pop those metal clips free.
- Keep gliding your pick around the top right corner until you hit the Action button—don't stop now!
- Leave this pick chilling in place so the adhesive doesn’t sneak back together.
Step 14


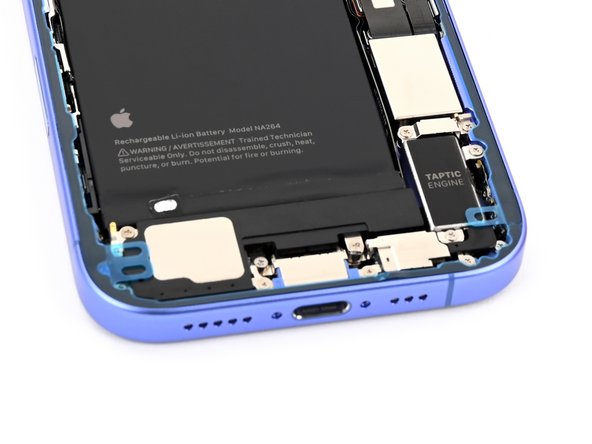
By now, the back glass should be free from the frame. If it's still hanging on, grab your pick and carefully run it around the edges again to check for any stubborn adhesive or clips you might've missed.
- Gently swing the back glass open to the right to loosen up the last bits of sticky stuff.
- Prop up the back glass with something sturdy and clean—no balancing acts here.
- Take out those opening picks before moving on to the next step.
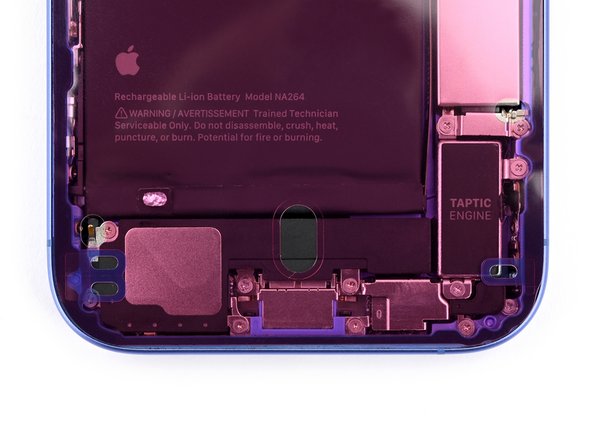
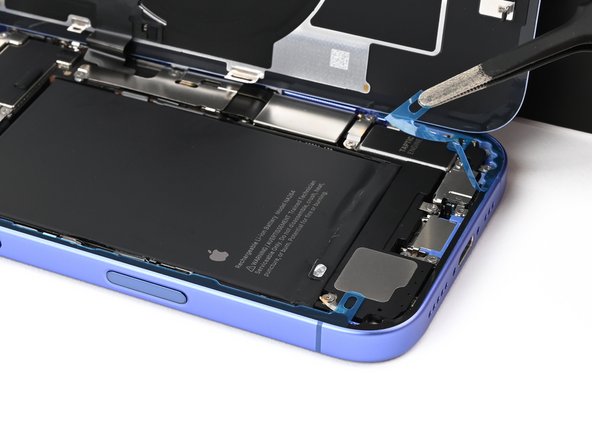
Step 15


- Grab your trusty tri-point Y000 driver and unscrew the two tiny 1 mm-long screws holding down the middle connector cover. Keep them safe!
Step 16


- Grab your trusty spudger and pop it into either of the cutouts on the middle connector cover.
- Give the cover a gentle nudge towards the left edge of the phone to unhook it from the logic board.
- Now, simply lift off the cover and voilà!
Tools Used

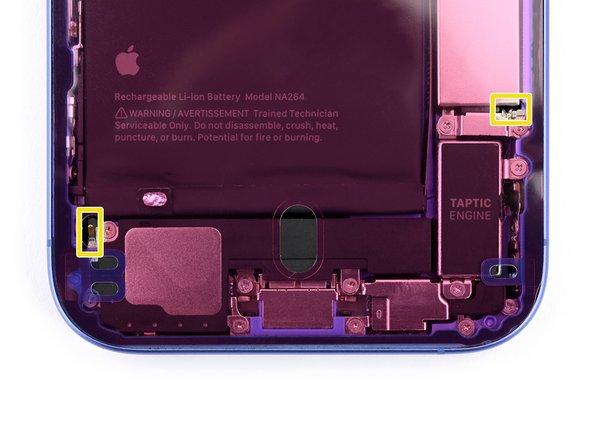
Step 17


- Gently use the spudger's tip to carefully lift and disconnect the battery press connector. You've got this!
Tools Used
Step 18


- Gently use the tip of a spudger to lift and detach the connector for the wireless charging coil. You've got this!
Tools Used
Step 19

- Gently pry the back glass away from the frame and set it aside.
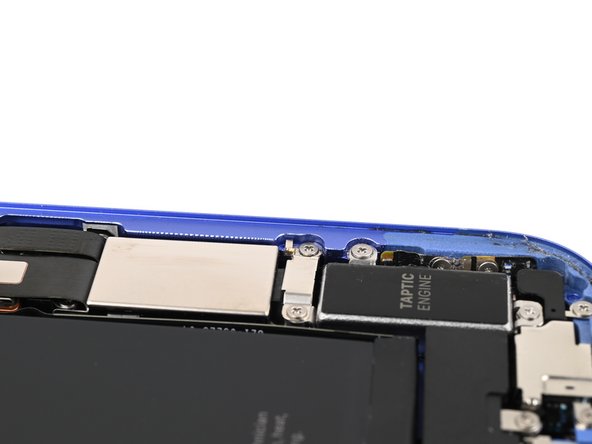
Step 20


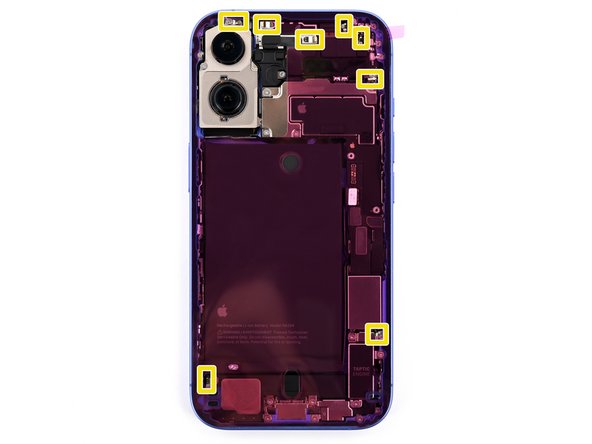
- Grab your screwdriver and carefully remove the four screws holding down the top bracket:
- One Phillips screw, 3.5 mm long
- Two Phillips screws, each 1.4 mm long
- One tri-point Y000 screw, 1.0 mm long
Step 21


- Grab some tweezers or just use your fingers to lift off the top bracket with ease.
Tools Used

Step 22


Peek underneath the first connector to find its shy sibling hiding right below.
- Grab your trusty spudger and gently flip up those two front camera connectors—kind of like popping the lids off tiny, electronic soda cans.
Tools Used
Step 23


- Slide the tip of your trusty spudger between the top edge of the front camera and the frame. It's like a gentle nudge to get things started!
- Carefully lift the front camera out of its cozy frame and say goodbye to it. You're making progress!
Tools Used
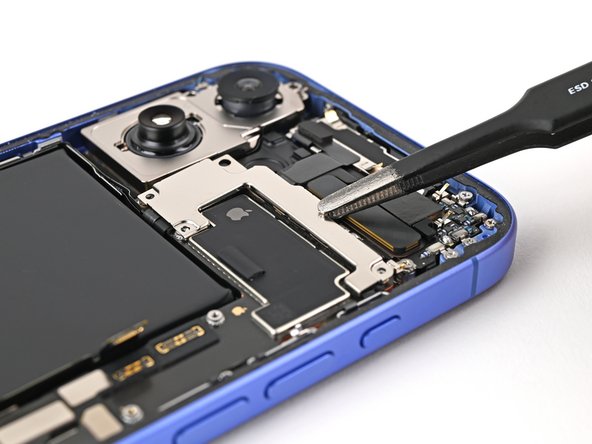
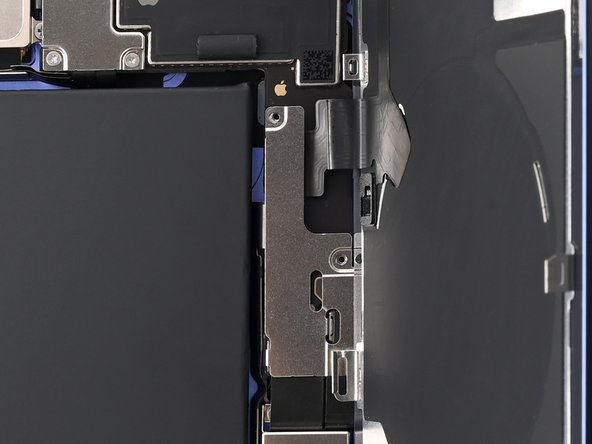
Step 24


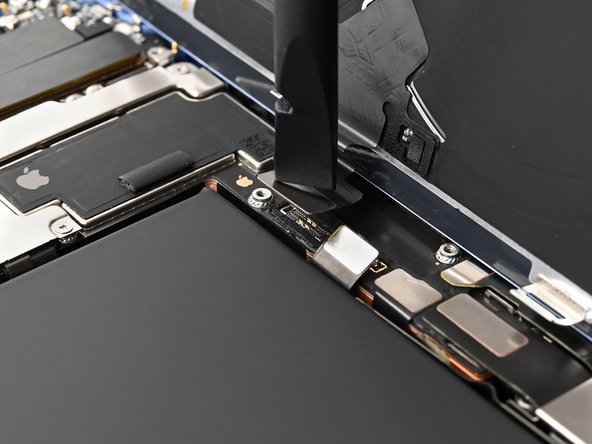
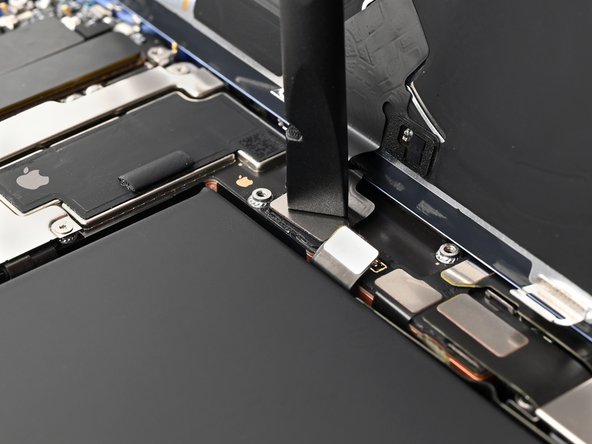
- Grab your trusty spudger and gently nudge up that 5G mmWave antenna press connector to disconnect it. You've got this!
Tools Used
Step 25


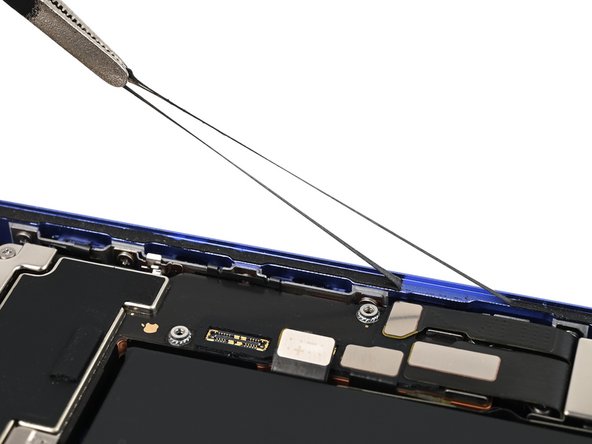
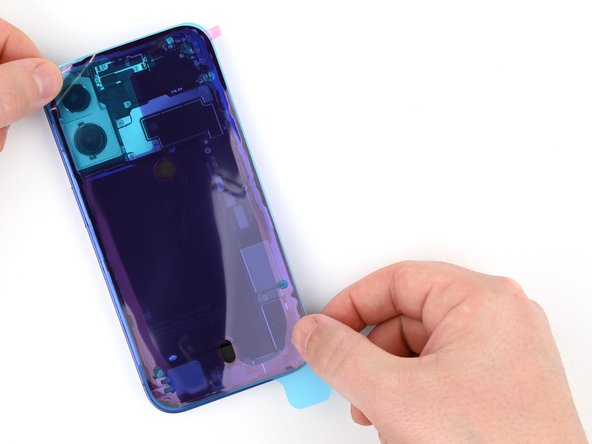
For a better grip on that pesky adhesive strip, try twisting it around the end of your tweezers while giving it a gentle pull. It's like a little dance—easy and effective!
- Grab your angled tweezers and carefully grip the black pull tab at the bottom right corner of the 5G mmWave antenna.
- Now, with your free hand, press the antenna down while you gently pull on the stretch-release adhesive strip with the tweezers. Keep it at a low angle and give it some time to stretch and peel away from under the antenna.
- If the adhesive strip decides to give you a hard time and breaks, no worries! Try to fish it out with your tweezers and keep going.
- If retrieving the strip isn't working out, don't stress—just follow the next two steps for an alternate approach. Otherwise, feel free to skip ahead to the next step.
Tools Used

Step 26


- Pour a few drops of isopropyl alcohol (>90%) on the bottom edge of the 5G mmWave antenna.
- Gently lift the bottom edge of the phone to let the alcohol work its magic and flow under the antenna.
- Give it a minute to let the adhesive loosen up and do its thing.
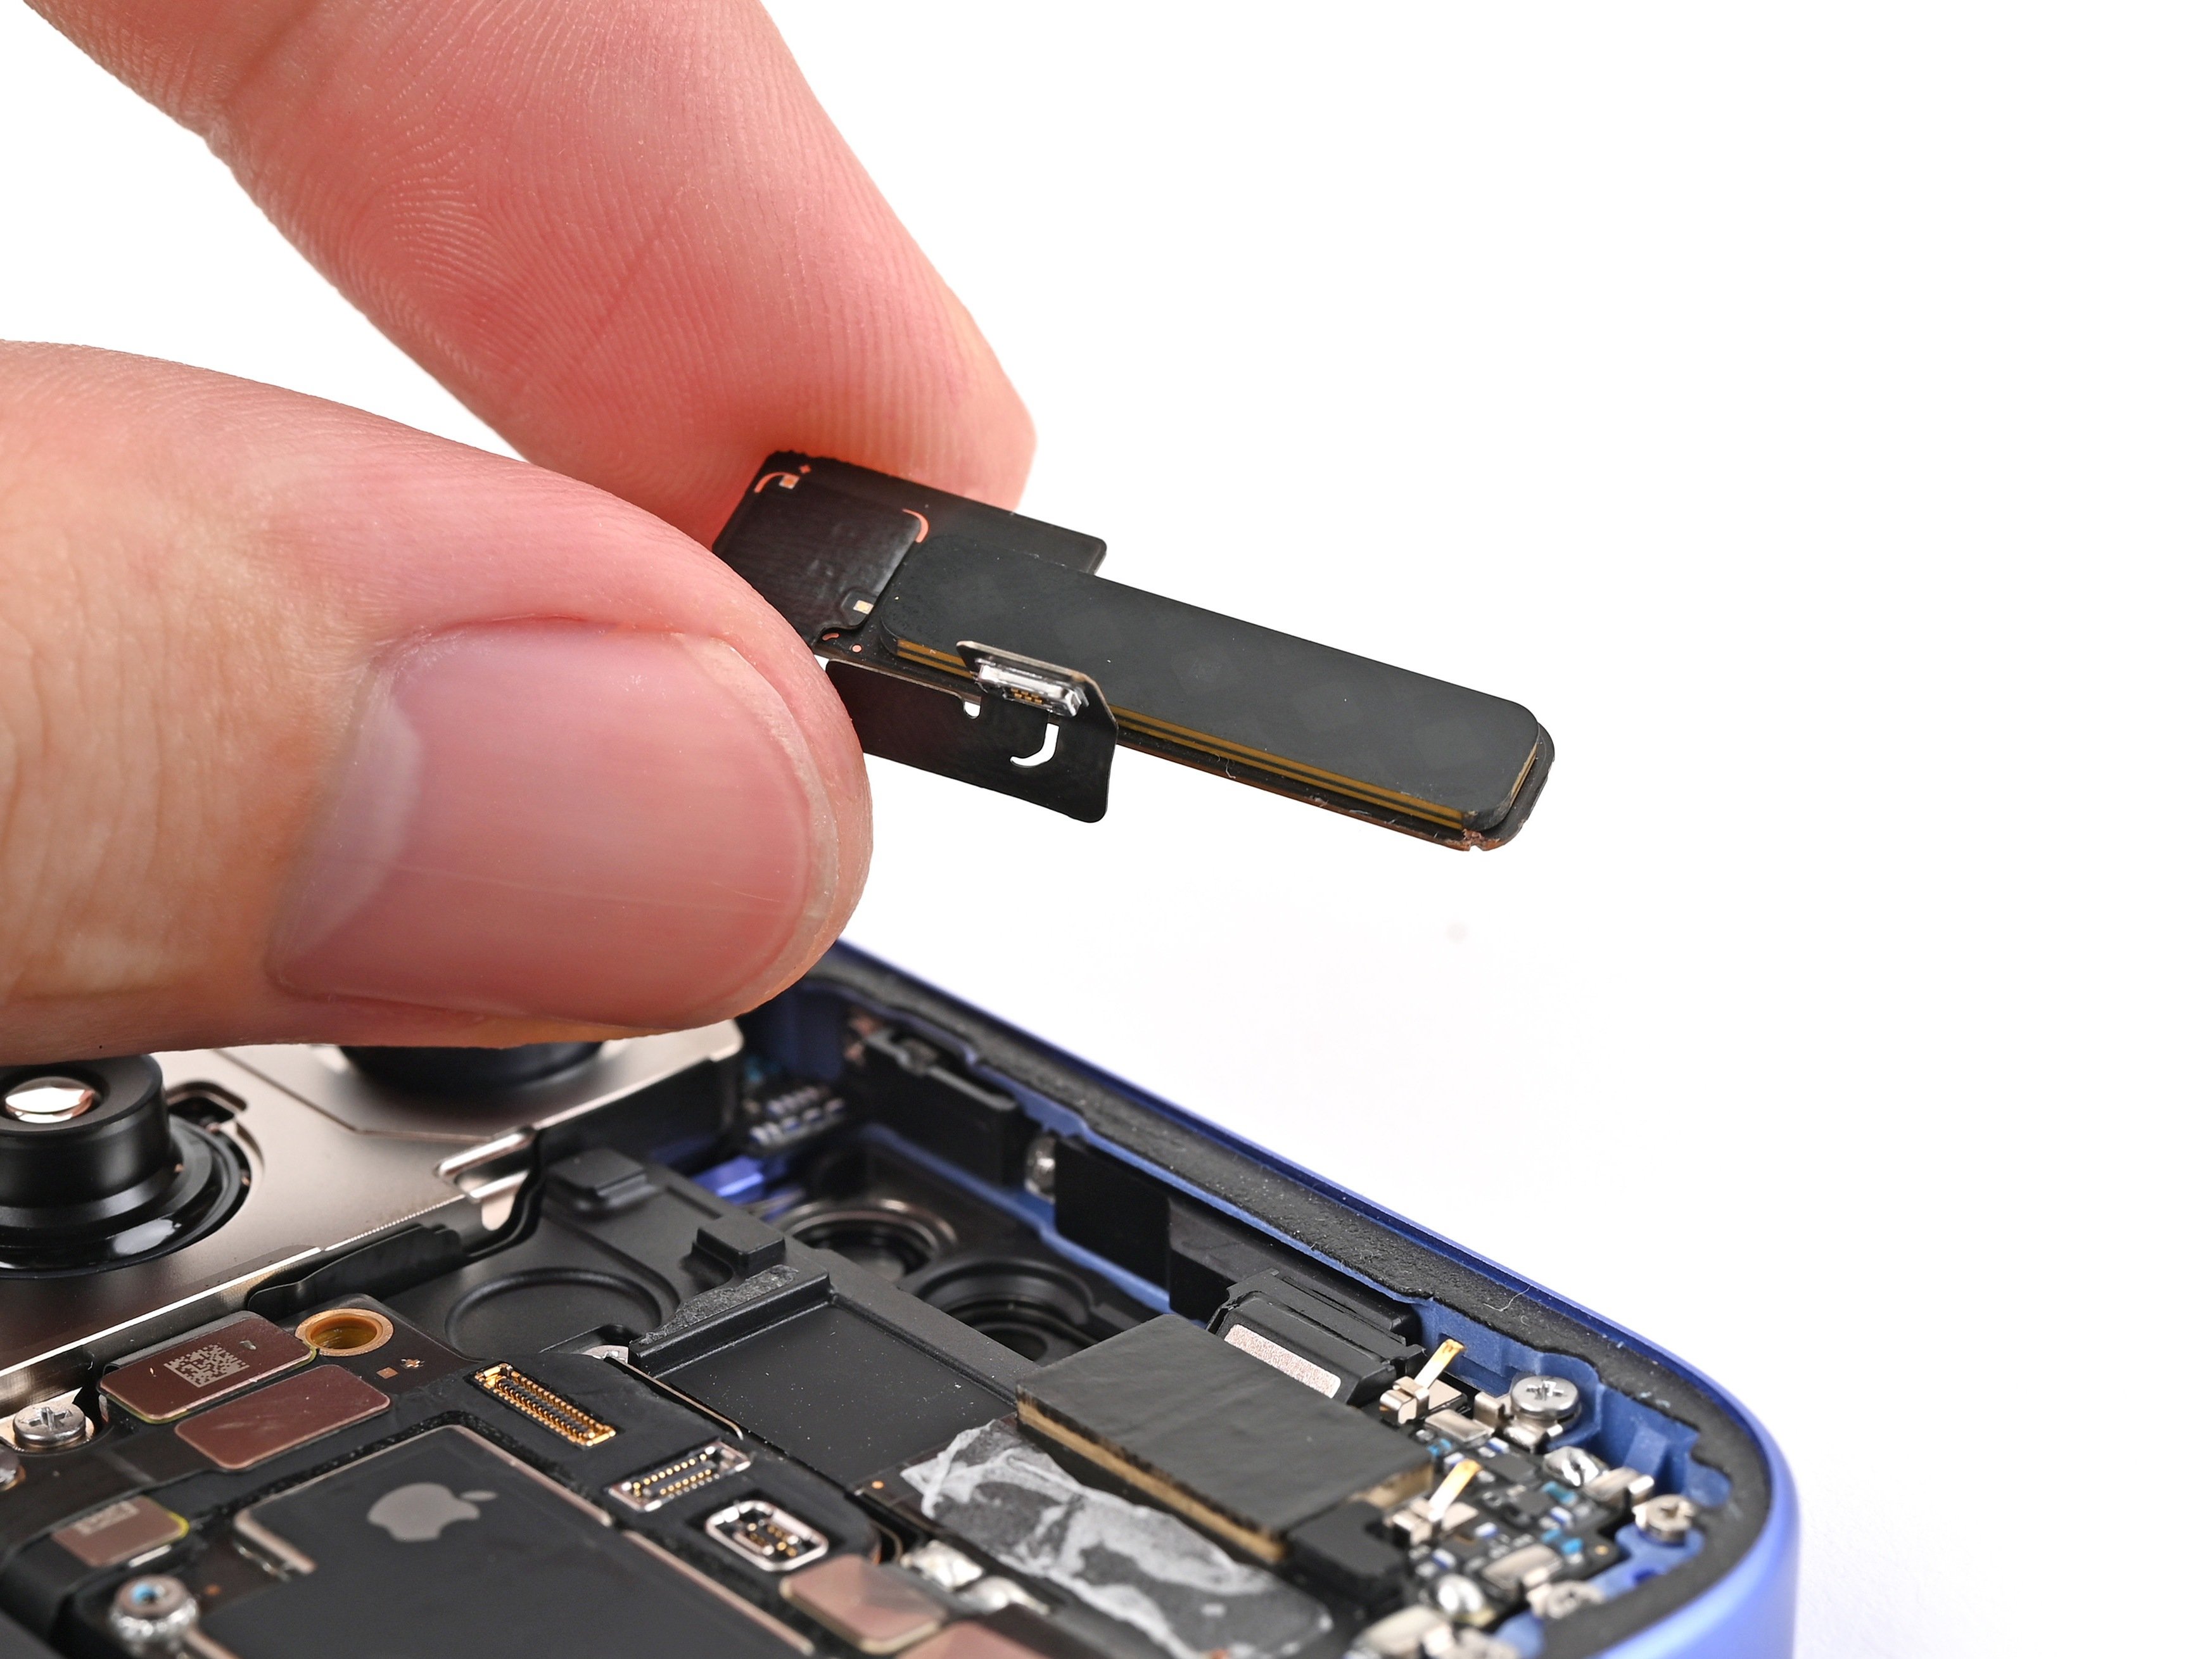
Step 27


- Slide the flat end of your trusty spudger under the top left corner of the 5G mmWave antenna, right by the front camera opening.
- Gently lift the antenna to break up that sticky adhesive holding it down.
Tools Used
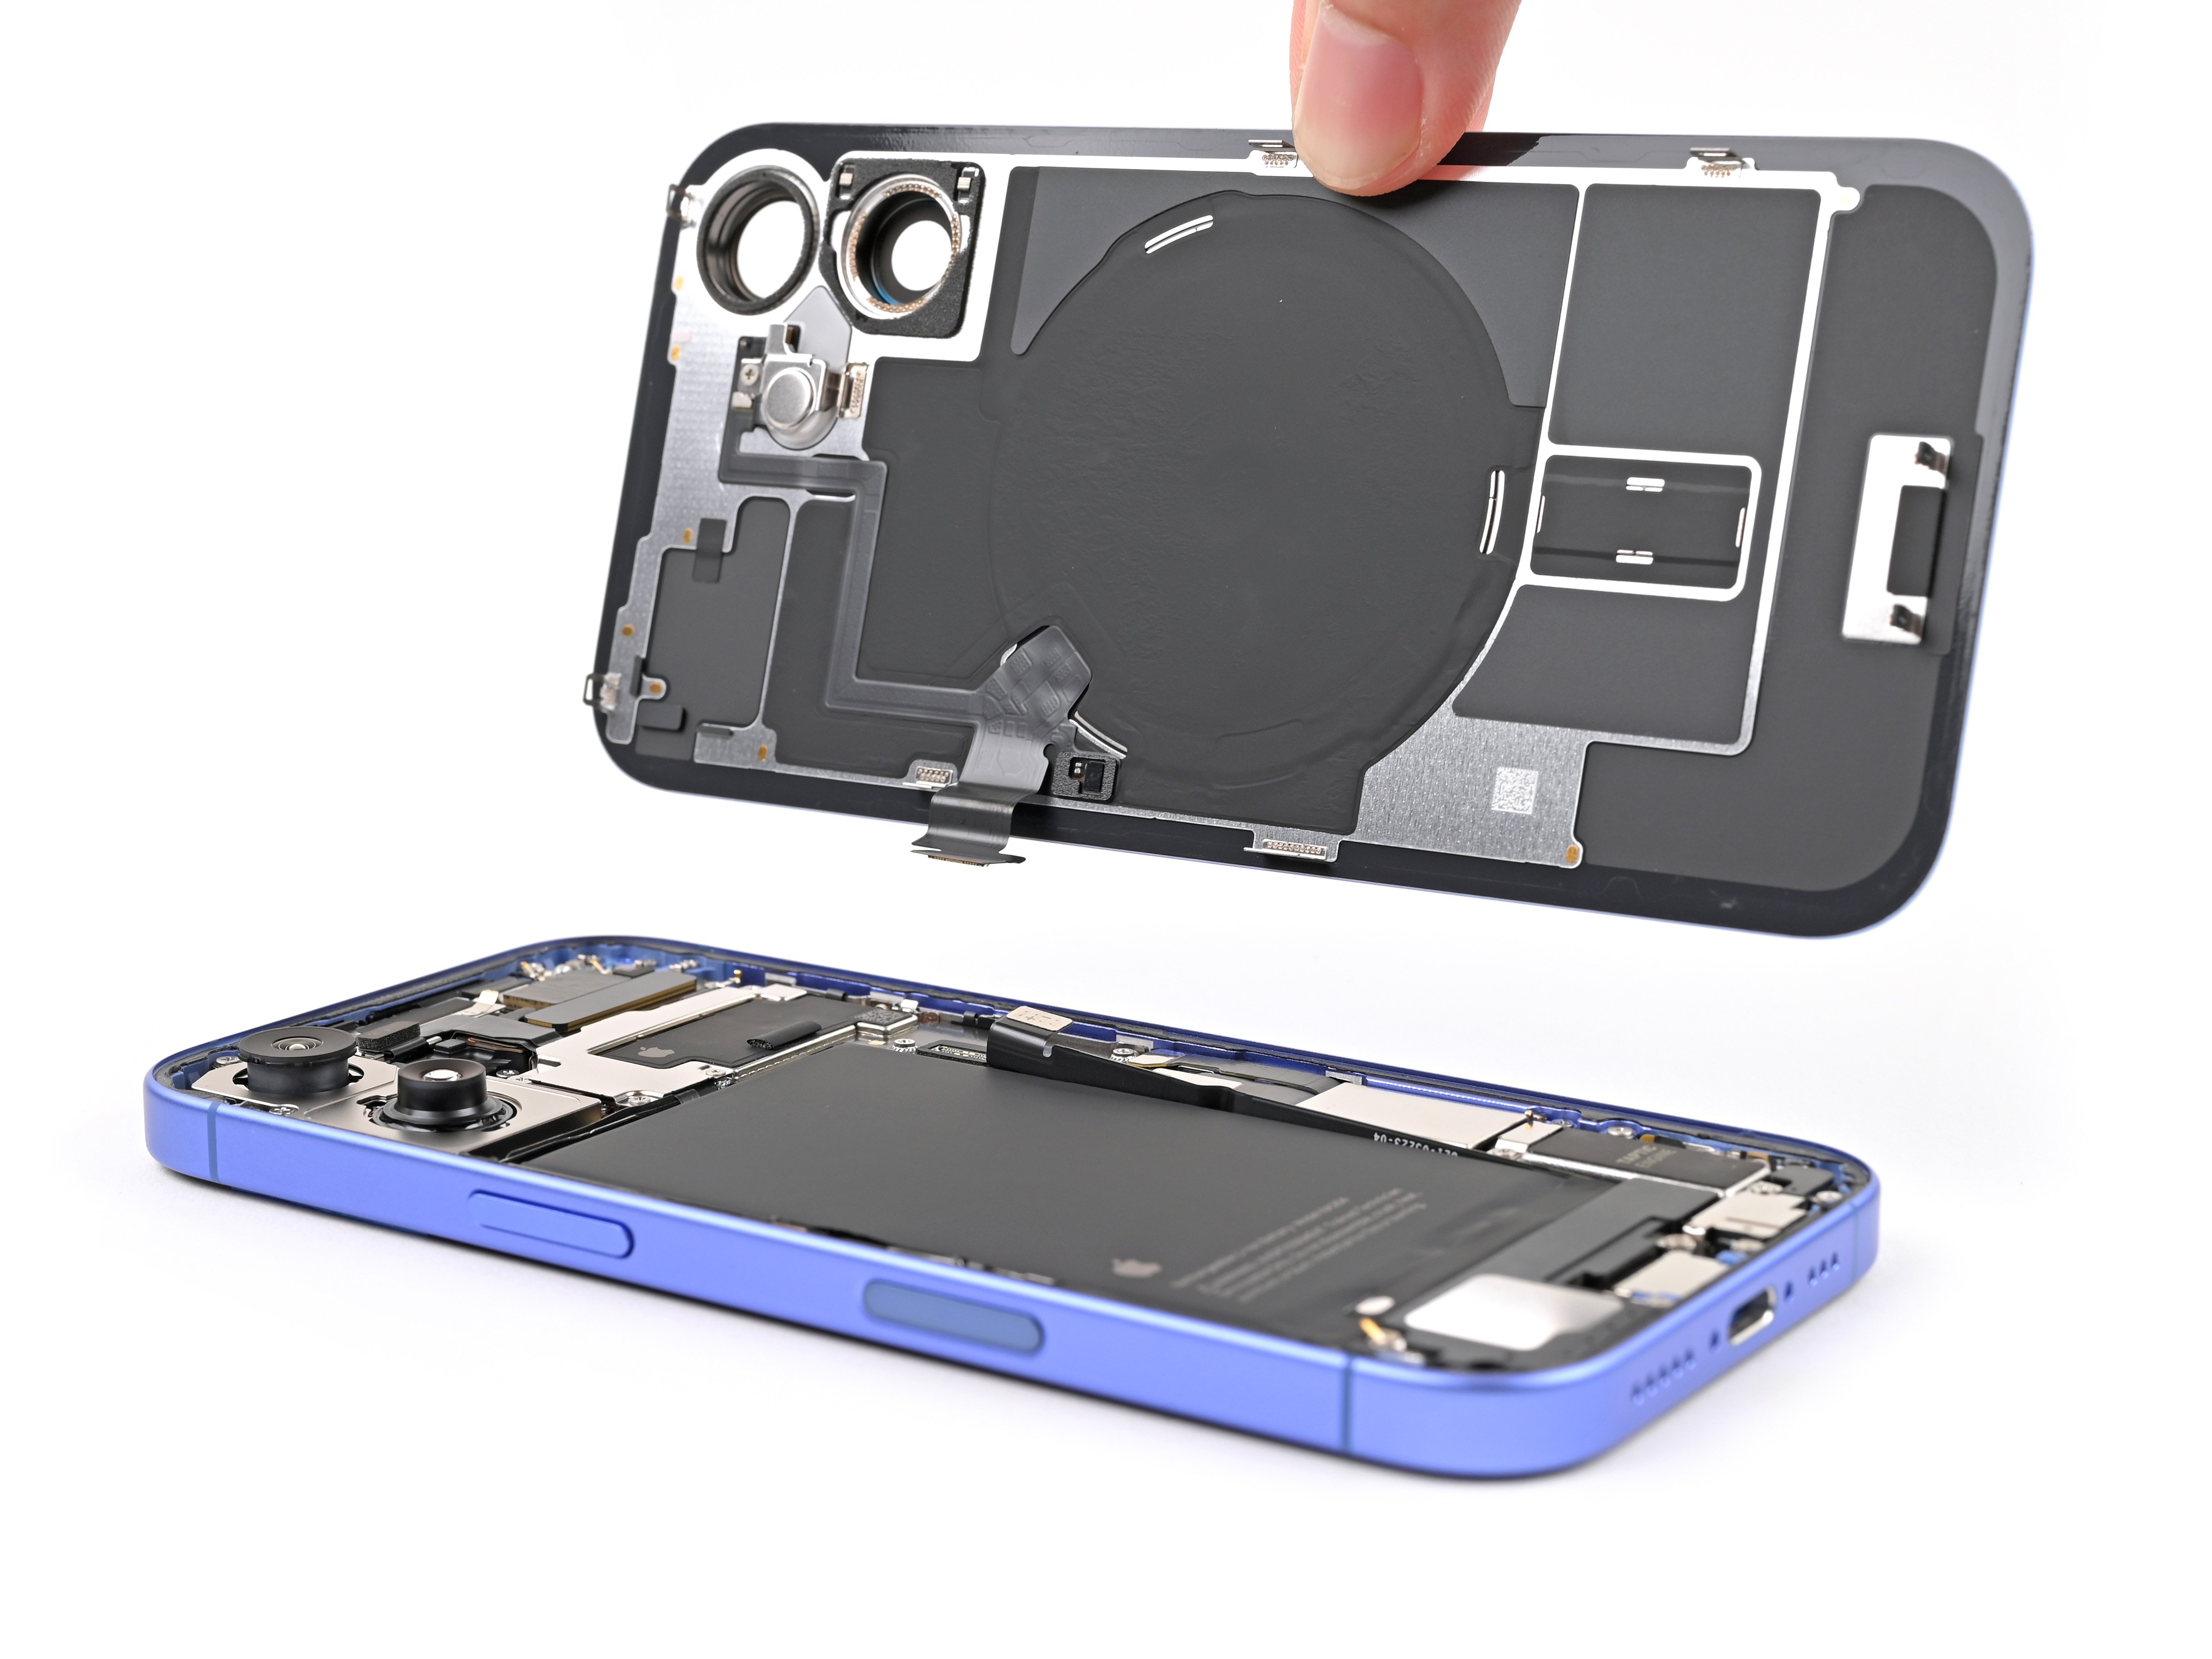
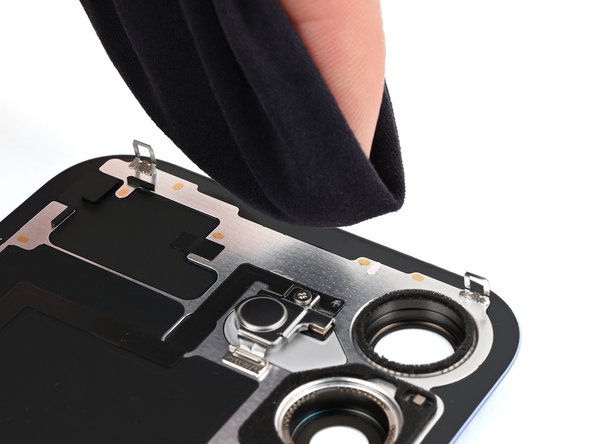
Step 28


- Gently lift the 5G mmWave antenna away from the earpiece speaker and take it off. Be careful, you're doing great!
Step 29

When you reconnect a connector, line it up over the socket and press down gently with your fingertip or a spudger—one side, then the other—until you hear that little click. If it’s being stubborn, don’t force it. Just adjust its position and give it another go.
- Nice work taking it apart! Now, let's get your device back together with the next steps.
Tools Used
Step 30


- Grab your trusty tweezers or just your fingers and go to town on that stubborn old adhesive stuck to the top of the earpiece speaker. It's time to show it who's boss!
Tools Used
Step 31


Make sure to stick the tape only to the sleek black fiberglass section of the antenna—leave that shiny metal part untouched! You're doing great!
- Stick a skinny strip of double-sided tape—Tesa tape works great—onto the back of the 5G mmWave antenna.
- Peel off that top layer to reveal the sticky side. Ready for action!
Step 32


Hold off on letting the adhesive touch the earpiece speaker just yet to keep that antenna perfectly aligned.
- Grab those tweezers (or just your fingers, whatever works!) and hold the 5G mmWave antenna right above its spot on the earpiece speaker.
- Use the flat end of a spudger or your finger to snap the antenna's press connector into place. It's like plugging in a tiny power-up.
- Gently press the 5G mmWave antenna down into its cutout, making sure it sticks snugly to the earpiece speaker. Solid connection—nice work!
Step 33


- Snuggle the front camera assembly right into its cozy spot in the frame.
Step 34


- Gently use the flat end of a spudger or your finger to press down and connect the bottom front camera connector first, then follow up with the top one.
Tools Used
Step 35

- Grab the top bracket with tweezers or your fingers and pop it back into place. Easy does it!
Tools Used
Step 36


- Grab your trusty screwdriver and get ready to secure the top bracket with these four screws:
- One 3.5mm Phillips screw – nice and straightforward.
- Two 1.4mm Phillips screws – a little smaller, but still no big deal.
- One 1.0mm tri-point Y000 screw – this one’s a bit different, so don’t forget it!
Step 37


Watch out for those spring contacts while cleaning the frame—they’re delicate little guys and don’t like getting roughed up!
Perfect time for a quick check! Hook up the battery and back glass, turn your phone on, and make sure everything’s working like a charm. Once you've confirmed all is good, power down, unplug the battery and back glass, and keep rolling with the reassembly.
Sticky adhesive can be a real pain. If it’s putting up a fight, hit it with some heat using a hair dryer or heat gun to loosen things up and make removal easier.
- Take the pointy end of your spudger and gently press and roll the adhesive until it’s ready to be grabbed with your tweezers.
Tools Used
Step 38

- Grab those tweezers and gently peel away the sticky adhesive from your phone. Take it slow—no need to rush.
- Keep going with the tweezers, repeating the process until every last bit of adhesive has been evicted. You’ve got this!
Tools Used
Step 39


Leftover residue can mess with your iPhone's seal, so make sure to give that frame a good clean before moving on.
- Grab a microfiber or lint-free cloth and wrap it around the tip of a spudger. Now, drop a few splashes of high-concentration isopropyl alcohol (over 90%) onto the cloth.
- Gently wipe along the frame's edge, moving in one direction to clean up any leftover adhesive residue.
- Take a breather for a couple of minutes to let any extra alcohol evaporate before jumping to the next step.
Tools Used
Step 40

Feel free to skip this step if you're using a new back glass.
- Dab a little bit of that high-octane isopropyl alcohol (over 90%) onto a microfiber or lint-free cloth and give the back glass's perimeter a gentle wipe-down to get it ready for some fresh adhesive love.
- If you spot any clips on the back glass that are looking a bit wonky, no worries! Just carefully coax them back into shape with your fingers.
Step 41

Your adhesive might come in different colors or have tabs in other spots—no worries, that's totally normal!
- Place your replacement adhesive over the frame, making sure the larger blue liner is facing down with the pull tab on the bottom-right corner. It’s like lining up the perfect match!
- Look for the camera cutout and the notches along the edges to line things up just right. It’s all about getting that fit perfect!
Step 42

- Grab the pull tab and start peeling off the back liner from the adhesive at the bottom. Hold up—don’t go all the way just yet!
Step 43

Once you’ve pressed that adhesive into position, there's no going back—if it's not quite right, you’ll need to remove it and kick things off with some fresh adhesive.
- Keep the blue liner out of the way, and line up the adhesive with the bottom edge of your iPhone.
- Press the bottom edge of the adhesive into its spot in the frame—make sure those spring contacts are chilling in their cutouts in the liner.
Step 44


When you line up the bottom edge of the adhesive just right, the sides and top will snap into place like a charm. If it’s off, peel it off and give it another go with fresh adhesive.
No spare adhesive on hand? No worries! You can put your iPhone back together and use it as is for now, but heads up—your phone won’t be water-resistant until you pop in some new adhesive.
- As you peel away the back liner from the adhesive, press it firmly along the edges of your iPhone’s frame—stick with it, you’re almost done!
Step 45

- Grab the flat end of your spudger and gently press the adhesive down all the way around the frame. Show that sticky stuff who's boss.
- Watch out for those spring contacts poking through the pink liner—no need to give them a high five.
Tools Used
Step 46


- Grab the tiny pull tab hanging out in the top-right corner and give it a gentle tug to peel off that pink adhesive liner.
Step 47

Heads up: your pull tabs might be hanging out in different spots.
- After you've pulled off the top liner, you should spot three slim liners on top of the adhesive, with pull tabs at the bottom edge.
- If those pull tabs are nowhere to be found, no worries! You might have accidentally removed the thin liners in the earlier step. If the adhesive is clean and looks good to go, you’re clear to continue. Just be cautious and avoid touching the exposed adhesive until you're ready to install the back glass.
Step 48

- Lean the back glass up along the right edge of your iPhone, propping it securely on a box or another sturdy object to keep it steady.
- Gently use the flat end of a spudger or your finger to reconnect the charging coil press connector.
Tools Used
Step 49


- Gently use the flat end of a spudger (or your finger if you're feeling extra confident) to reconnect the battery. No rush, just a smooth and careful move.
Tools Used
Step 50


The connector cover comes with two little hooks that slide right into the slots on the logic board—kind of like puzzle pieces snapping together.
- Place the connector cover onto the phone with the hooks just a tad to the left of their slots on the logic board.
- Gently press down and slide the cover to the right with your finger until the hooks snap snugly into their slots.
Step 51

- Grab your tri-point Y000 driver and get ready to secure those two tiny 1 mm-long screws holding the middle connector cover in place. A little precision goes a long way here, so take your time!
Step 52


When you peel off the liners in this step, the adhesive will be wide open and ready. Just be sure nothing gets sticky with it!
- Grab those blue tabs and peel off the liners from the bottom, left, and top edges of your iPhone. Hold off on the right edge for now—its time will come!
Step 53

- Carefully hold the back glass just above the phone, making sure it doesn’t touch the adhesive yet, so you can reach the last liner along the right edge.
- Grab some tweezers or just use your fingers to peel off that final liner along the right side of the phone.
Tools Used
Step 54

- Hold the back glass above your phone and line it up nicely with the frame.
- Gently lower the glass straight down onto the frame and press until you hear the clips snap into place.
- Give the edges a good press all around to make sure every clip is locked in tight.
Step 55


- Get that glue working by warming up the edges of the back glass. Grab an iOpener, hair dryer, or heat gun—just make sure it’s nice and toasty (not scorching!).
- Give the back glass a firm press all around the edges to help everything stick.
- If you have screen vise clamps, now’s their time to shine! Clamp them on to lock in that bond. No clamps? No worries—keep going for more ways to keep the back glass secure.
Tools Used
Step 56

To get that iPhone back in action and ensure the back glass hugs the frame just right, don’t forget to factor in that sneaky camera bump!
No original box? No problem! Feel free to skip this step and use a different method instead.
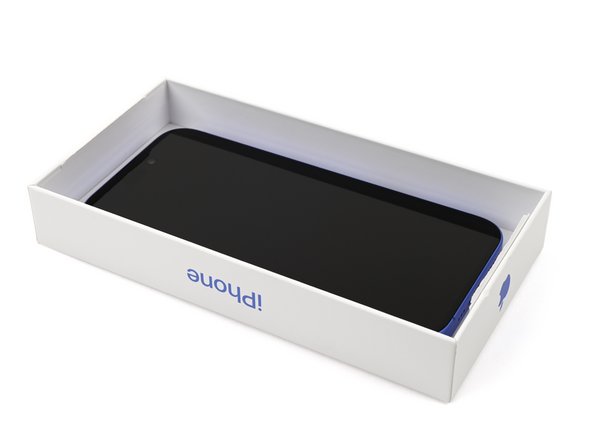
- Grab the lid from your iPhone box and set it down on a nice, flat surface.
- Pop your iPhone into the lid, screen facing up, so the camera bump fits into its cozy spot.
- Find something about the same size as your phone, but a bit taller than the box sides—stack it right on top of the iPhone, then add a few hefty items for good measure.
- Let your improvised weight stack chill for at least thirty minutes. If the stuff you used isn’t super heavy, give it even more time. For best results, let it sit overnight.
Step 57


Don't have your iPhone's original box? No problem! Just follow these next three steps for a solid way to compress that back glass evenly like a pro.
- Set the iPhone down screen-side-down on a soft, flat spot so it stays safe and sound.
- Slap some tape on the back glass to keep that finish looking sharp while you work.
Step 58
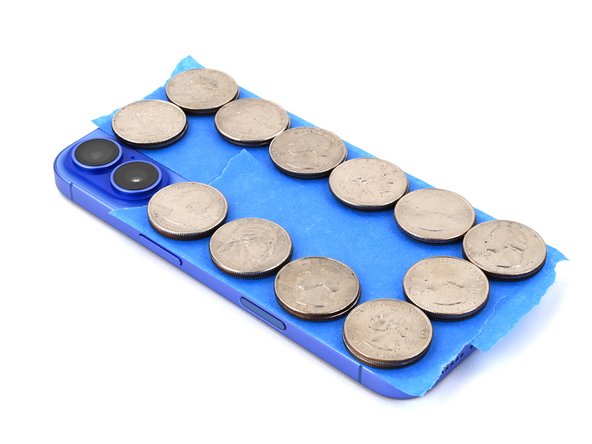

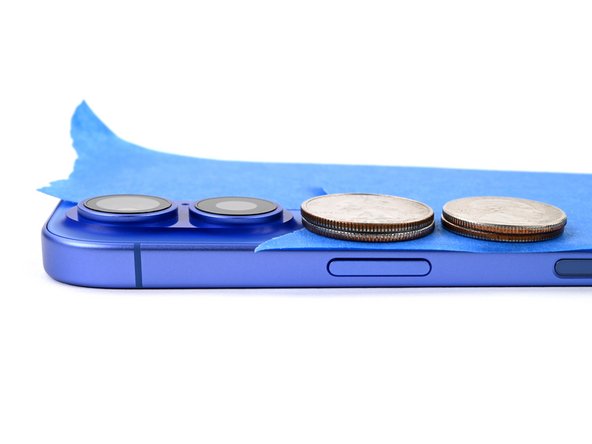
- Lay down a couple of coin stacks or anything about the same thickness along the tape edges on the back glass.
- Space the stacks evenly and make sure they're at least as tall as the camera bump.
Step 59

Coins might leave marks on the surface below, so keep anything valuable out of the way.
- Pile a few hefty books or other weighty items on top of your iPhone—think of it as a spa day with a little pressure.
- Let your phone chill under the stack for at least half an hour. If your weights are on the lighter side, give it more time. For best results, let it stay stacked overnight.
Step 60


- Got e-waste? Make sure to drop it off at an R2 or e-Stewards certified recycler — let’s keep the planet happy!
- If things didn’t quite go your way, no worries! Give some basic troubleshooting a shot, or swing by our iPhone 16 Answers Community for some friendly advice.
- And remember, if it feels like a tough nut to crack, you can always schedule a repair with us.