iPhone 16 Microphone Replacement Guide: Step-by-Step Tutorial
Duration: 45 minutes
Steps: 35 Steps
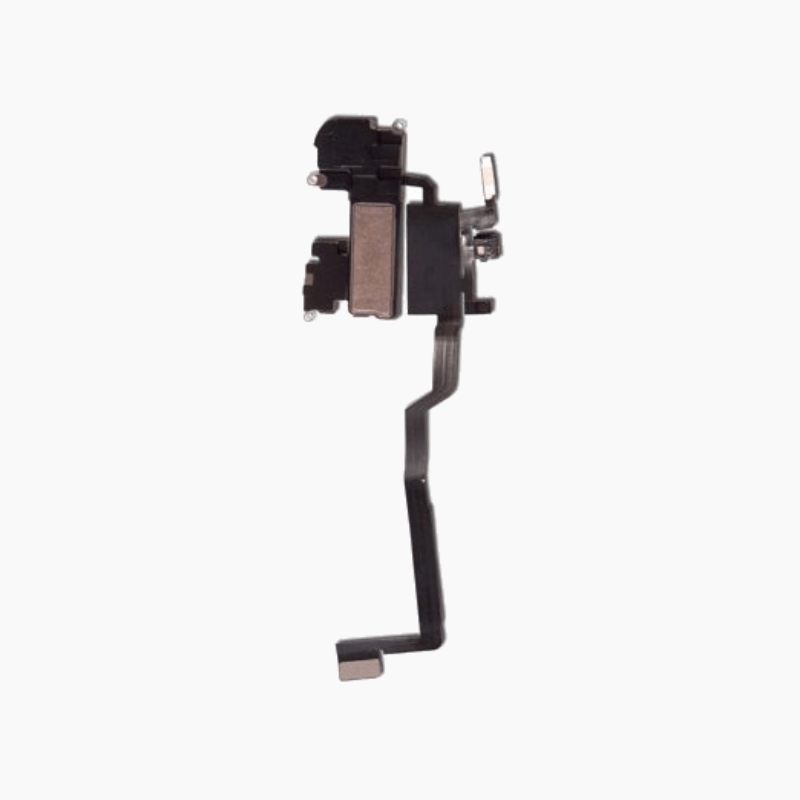
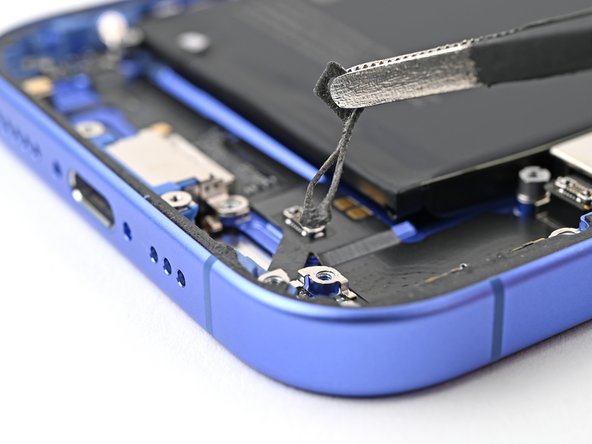
Ready to swap out the microphone in your iPhone 16? If your device is struggling to pick up your voice or having some hiccups, it might be time for a microphone makeover! This guide focuses on the main microphone of the three available, and it can be replaced all in one go. Just so you know, there’s another microphone snugly nestled in the charging port assembly, and a third one is hanging out with the power button assembly. Don’t forget to grab some replacement back glass adhesive to complete your repair mission. If your shiny new microphone doesn’t come with adhesive already, make sure to snag some replacement microphone adhesive too. If you need help, you can always schedule a repair.
Step 1
Let your phone’s battery dip below 25%. A fully charged lithium-ion battery can be a bit of a drama queen when it comes to safety.
– First things first, let’s free your phone! Go ahead and unplug any cables that are connected.
– Now, it’s time to power down. Hold down the power button along with either the volume button, and slide to turn off your phone. Easy peasy!
Step 2
Ensure there’s a nice, flat surface near the bottom edge that’s roomy enough for a suction cup to make its home.
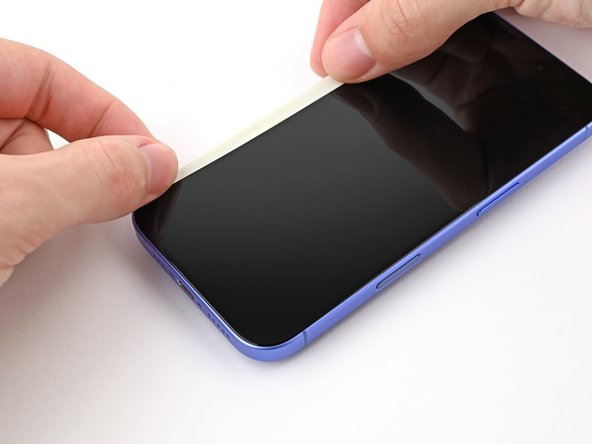
– If your screen or back glass is pretty dinged up, grab some packing tape and layer it over the damaged areas. This little trick not only keeps you safe but also makes taking things apart a whole lot simpler!
Tools Used
Step 3
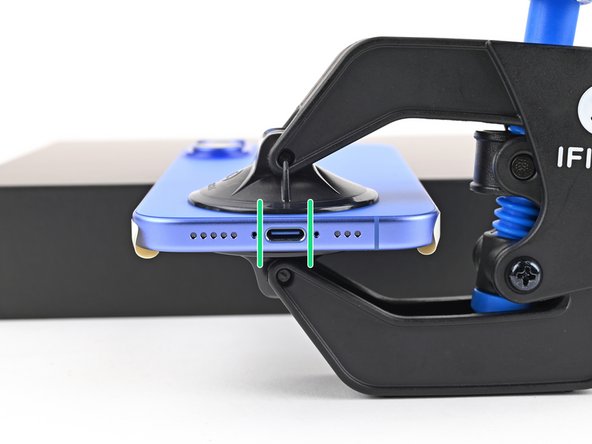
– Grab your trusty P2 pentalobe driver and let’s tackle those two 7.7 mm screws hanging out on either side of the charging port. You’ve got this!
Step 4
Be careful not to insert that opening pick too deep! You might end up causing some damage to your device. To keep things safe, let’s mark your pick so we can avoid any mishaps.
Feel free to mark the other corners of the pick using different measurements for extra precision.
If you’re feeling crafty, you can also attach a coin to a pick about 3 mm from the tip using some tape. It’s a handy trick!
– Take a moment to measure 3 mm from the tip, then grab a permanent marker and give your opening pick a little mark. You’re doing great!
Step 5
Get ready for the next four steps where we introduce the Anti-Clamp, our nifty little gadget to help you kick off the opening process with ease. If you’re not rocking the Anti-Clamp, feel free to leap down four steps for another approach.
The Anti-Clamp works its magic by applying suction to both the screen and the back glass. If you’re just looking to pop open the back glass, make sure to tape down the screen first. And hey, if you want to dive deeper into the tape technique, check out our full instructions.
Want to master the Anti-Clamp? Head over to this guide for all the details!
Just a quick tip: ensure the tape is only holding down the screen and not the back glass. You’re almost there!
– Snip off two strips of tape, then stick them along the long edges of your phone. Give them a little fold over the screen to keep everything snug and secure. You’re doing great!
Step 6
If your iPhone’s surface feels a bit too slick for the Anti-Clamp to get a good grip, just grab some tape and give it a little texture to help it hold on better!
– Give the Anti-Clamp’s blue handle a gentle pull back to unlock those arms and get the party started!
– With the back glass facing up, carefully slide the arms over the right edge of your phone, placing one suction cup on the back glass and the other on the screen. Aim to center those cups near the bottom edge for the best grip.
– Support your phone so it sits nice and level between the Anti-Clamp’s arms—using a small box works wonders!
– Squeeze those cups together to create a solid suction. You’ve got this!
Step 7
If tape isn’t on hand, try warming up the suction cups a bit to make them stick better.
– Grab that blue handle and pull it forward to lock those arms in place.
– Give the handle a solid turn—just one full spin (360 degrees) or until those cups start to stretch out.
– As the cups stretch, keep an eye on their alignment. If they start to wiggle out of place, no worries! Just take off the Anti-Clamp and stick some tape on there to help them stay put.
Step 8
Watch out for the heat—keeping your phone cooler than a summer breeze is key, because that battery doesn’t like the heat at all!
If you don’t see a gap after a minute, just crank up the heat a bit more and give that handle a quarter turn. Let the Anti‑Clamp and a little patience do their magic for you.
– Grab your trusty hair dryer or heat gun and warm up that bottom edge of the back glass until it feels nice and toasty.
– Hang tight for about a minute while the adhesive says its goodbyes and a little gap forms between the back glass and the frame.
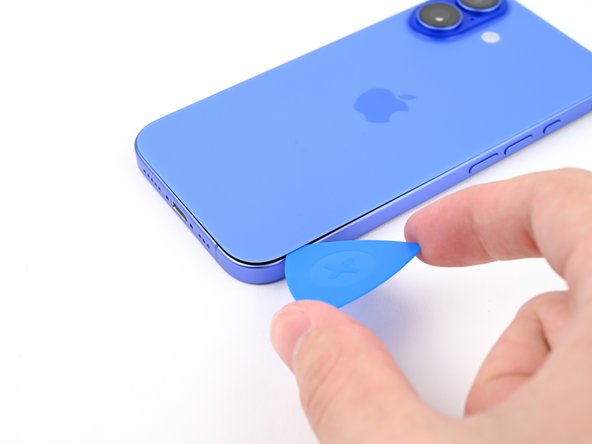
– Slide an opening pick into that gap you just made.
– Say goodbye to the Anti-Clamp by pulling on those handy tabs on the suction cups.
– Feel free to skip the next two steps.
Tools Used
Step 9
Feeling a bit chilly about that stubborn back glass? No worries! You can heat things up with an iOpener. Just follow these handy tips to warm it up and apply the iOpener like a pro.
– Grab that trusty hair dryer or heat gun and warm up the bottom edge of the back glass until it feels nice and toasty to the touch!
Tools Used
Step 10
– Grab a suction handle and stick it on the bottom edge of that back glass.
– With one hand steadied on the frame, give that handle a solid, steady tug to open up a little gap between the back glass and the frame.
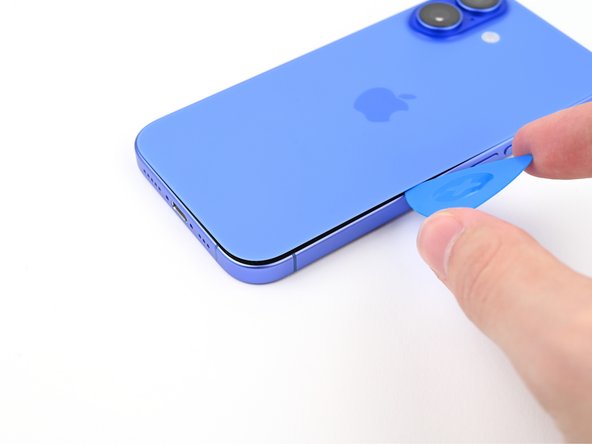
– Slide the tip of an opening pick into that gap you’ve created.
Tools Used
Step 11
As you carefully slice through the adhesive holding the back glass, remember to keep your pick no deeper than 3 mm. This will help you steer clear of any sensitive areas that might get damaged—let’s keep everything intact and working smoothly!
– Be careful—there’s a fragile cable that connects the back glass to the phone, located right next to the volume down button. It’s best to avoid inserting your pick here to keep that cable safe and sound!
– Look out for those multiple spring contacts scattered around the perimeter of the phone. They’re important, so handle with care!
Step 12
– Grab your trusty hair dryer or heat gun and warm up that right edge of the back glass until it feels nice and toasty to the touch!
Tools Used
Step 13
Keep that pick shallow, folks! Go no deeper than 3 mm to keep those spring contacts safe and sound.
Watch out for the volume buttons! Don’t slide past them, or you might just tangle with the wireless charging cable.
You’ll notice and sense the metal clip pop free as you glide past it.
– Gently glide your pick around the bottom right corner and make your way to the volume down button. This will help you loosen the adhesive and pop that metal clip right off.
– Keep that pick in place to stop the adhesive from getting all cozy again.
Step 14
– Grab a hair dryer or heat gun and give that left edge of the back glass a warm hug until it’s nice and toasty!
Tools Used
Step 15
Keep your pick no deeper than 3 mm—let’s avoid any accidental spring contact drama!
As you glide through, you’ll hear and feel those little metal clips giving way—it’s like a tiny victory dance!
– Pop in a second opening pick at the bottom edge, just like sliding in a bookmark!
– Now, glide that second pick around the bottom left corner and along the left edge of the screen. This will help you break free from the adhesive and release those sneaky metal clips.
– Keep this pick tucked in at the top left corner to stop the adhesive from playing tricks and resealing. You’re doing great!
Step 16
– Grab a hair dryer or heat gun and warm up the top edge of that back glass until it feels nice and toasty to the touch.
Tools Used
Step 17
Keep your pick to a maximum of 3 mm deep to steer clear of any spring contact mishaps!
As you glide through, you’ll notice the delightful little metal clips popping free like confetti!
– Gently glide your second opening pick around the top left corner and along the top edge to break free the adhesive and release those metal clips.
– Keep sliding that pick around the top right corner until you bump into the Action button.
– Leave this pick in place to keep the adhesive from sealing back up. You’ve got this!
Step 18
At this stage, the back glass should be ready to come off the frame. If it still feels a bit clingy, take your pick and give the edges another gentle pass to see if there are any sneaky bits of adhesive or clips holding it back.
– Gently swing that back glass over to the right side of your phone to break free from the stubborn adhesive holding it down.
– Give the back glass a solid little lift with a clean, sturdy buddy—something that won’t give up on you!
– Before you dive deeper, don’t forget to pluck out those opening picks!
Step 19
– Grab your trusty tri-point Y000 driver and get ready to tackle those two little 1 mm screws holding down the middle connector cover. You’ve got this!
Step 20
– Pop the point of your trusty spudger into one of those nifty cutouts on the middle connector cover.
– Gently slide the cover towards the left edge of the phone, freeing its hook from the logic board’s cozy slot.
– Carefully lift off the cover.
– When it’s time to put everything back together, just align that hook over its slot on the logic board. Press the cover down and slide it towards the right edge of the phone to get that hook back in action.
Tools Used
Step 21
– Grab your trusty spudger and gently nudge up that battery press connector to disconnect it. You got this!
– When you’re putting it all back together, make sure to line up the connector just right over its socket. Give it a gentle press with your fingertip—first one side, then the other—until you hear that satisfying click. No need to muscle it in; if it’s being stubborn, just adjust it a bit and give it another go. You’re doing great!
Tools Used
Step 22
– Gently use the tip of a spudger to lift and disconnect that sneaky wireless charging coil press connector!
Tools Used
Step 23
Now’s the perfect moment to give your repair a little test run before sealing everything up. Just reconnect the battery and back glass for a quick check, power on your device, and see if it’s behaving like a champ. If all is well, power it down again and let’s wrap things up nicely!
– Gently lift the back glass off the frame and set it aside.
– Now, onto reassembly:
– Follow this guide to reapply adhesive and snugly fit your back glass back in place.
Step 24
– Grab your trusty Phillips screwdriver and get ready to tackle those two 1.8 mm long screws holding the Taptic Engine bracket in place. You’ve got this!
Step 25
– Grab those tweezers or use your fingers to gently lift out the Taptic Engine bracket. You’ve got this!
Tools Used
Step 26
– Grab your trusty spudger and gently nudge the Taptic Engine press connector up to disconnect it. You’ve got this!
Tools Used
Step 27
– Grab your trusty Phillips screwdriver and let’s tackle those screws holding the Taptic Engine in place:
– One screw measuring 2.2 mm in length
– And another one that’s 1.7 mm long
Step 28
– Grab your trusty spudger and gently pry the Taptic Engine out of its cozy frame.
– Now, go ahead and remove the Taptic Engine!
Tools Used
Step 29
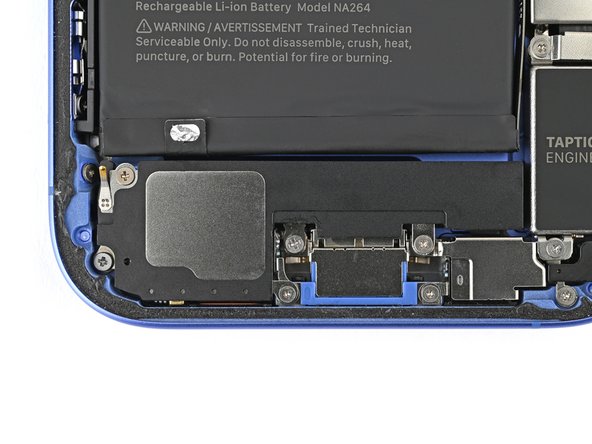
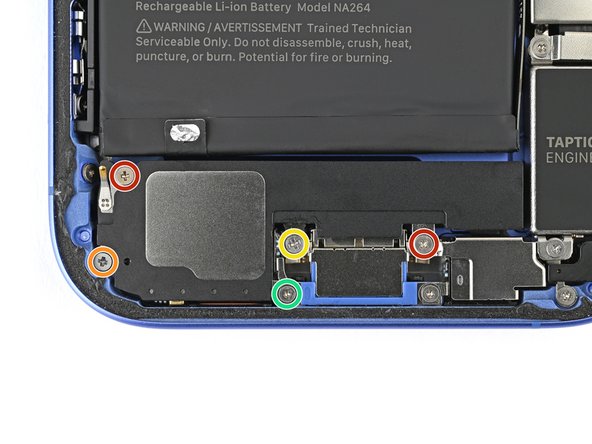
– Let’s get that loudspeaker out of the way! First, remove these five screws:
– Two Phillips screws that are 1.5 mm long
– One Phillips screw that’s 2.0 mm long
– One Phillips screw measuring 2.9 mm in length
– And finally, one tri-point Y000 screw that’s 1.2 mm long
Step 30
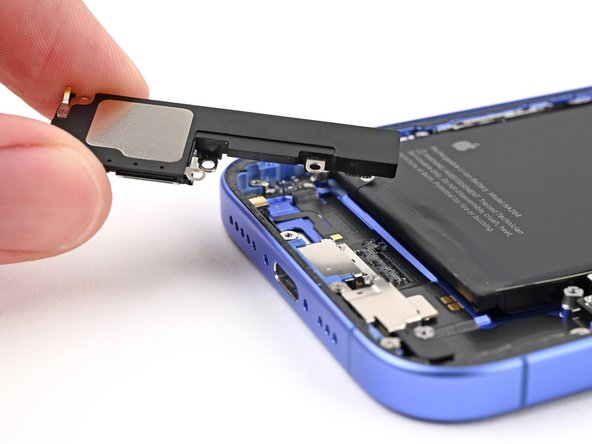
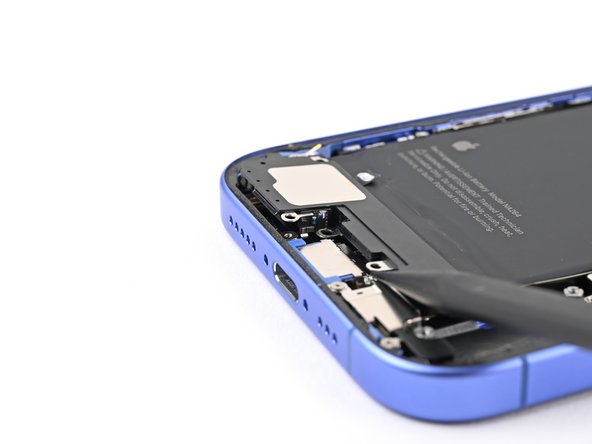
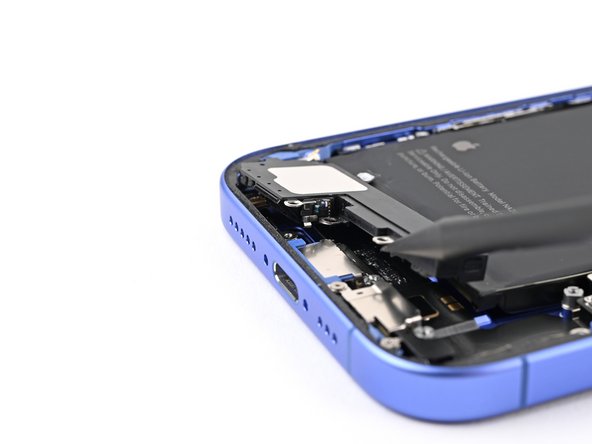
– Grab your trusty spudger and gently nudge the loudspeaker out of its cozy frame.
– Now, just go ahead and remove the loudspeaker with care.
Tools Used
Step 31
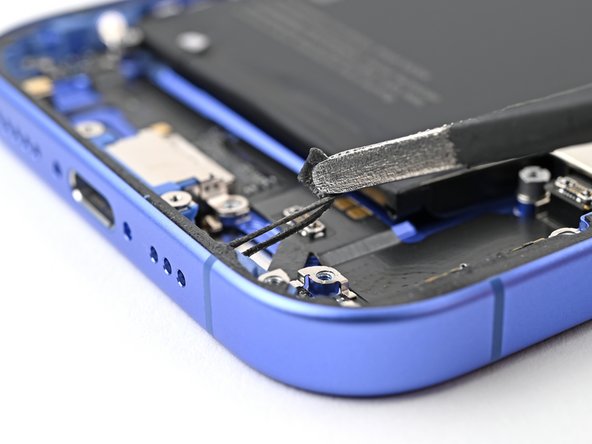
– Gently pry the microphone press connector loose using the tip of a spudger. You’ve got this!
Tools Used
Step 32
If you find yourself without a standoff driver, no worries! A slim flathead driver can save the day—just be gentle and avoid stripping those delicate notches in the screw heads.
– Let’s get started by taking off those four screws holding the microphone in place:
– Two standoff screws that are 3.3 mm long
– One tri-point Y000 screw that’s 1.1 mm long
– And one Phillips screw measuring 1.5 mm long
Step 33
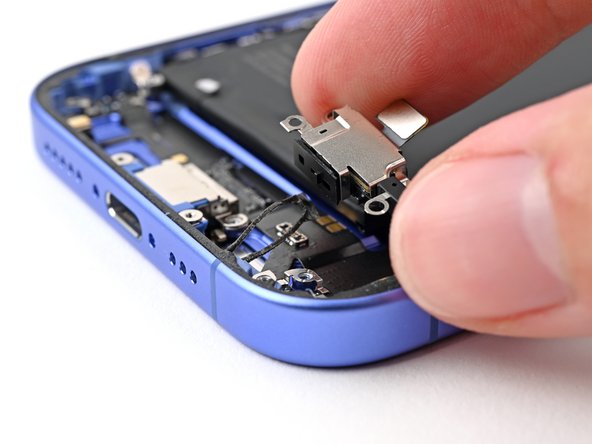
– Gently nudge the microphone up using the flat end of a spudger until you can comfortably grab it with your fingers. It’s easier than it sounds!
Tools Used
Step 34
– Gently tug the microphone away from the frame to break free from the adhesive’s grip.
– Now, go ahead and lift out the microphone.
Step 35
– Alright, it’s time to put everything back together! Get your tweezers or fingers ready to tackle that old adhesive stuck to the bottom of the frame.
– If your shiny new microphone has adhesive already attached, go ahead and peel off the liner to reveal the sticky goodness.
– In case your replacement microphone is feeling a bit bare and doesn’t have adhesive installed, just slather some fresh adhesive onto either the frame or the microphone itself.
– Now, gently reinsert the microphone at a downward angle. Once it’s in place, press it flat against the frame and keep on with the reassembly process!
Tools Used
