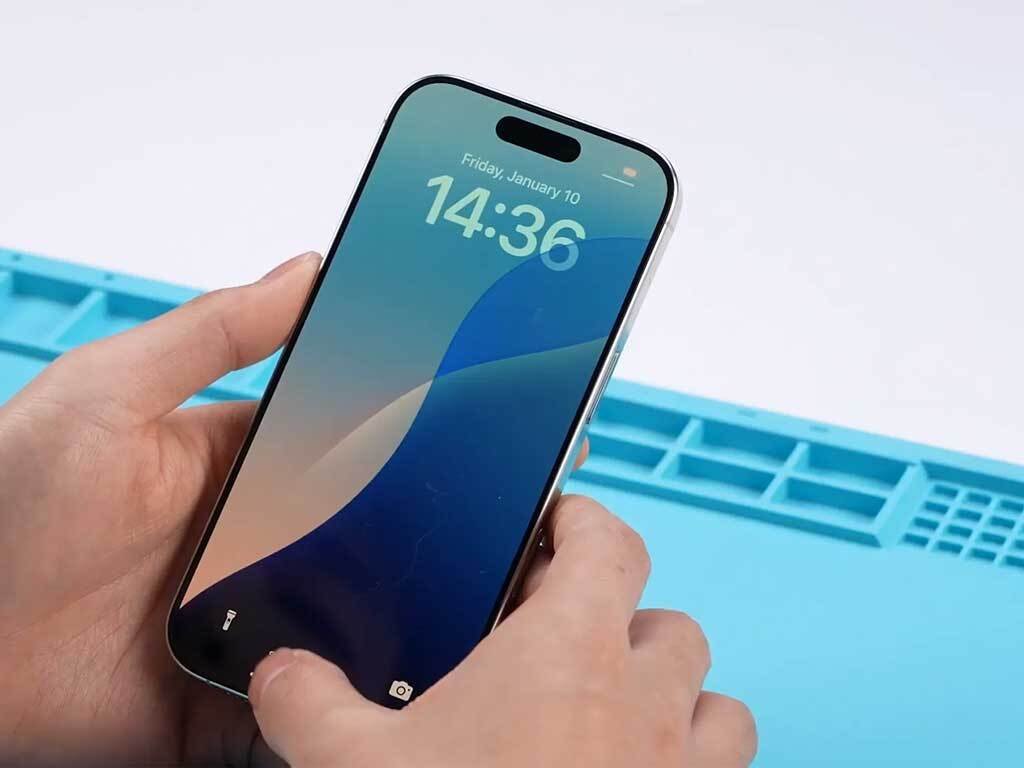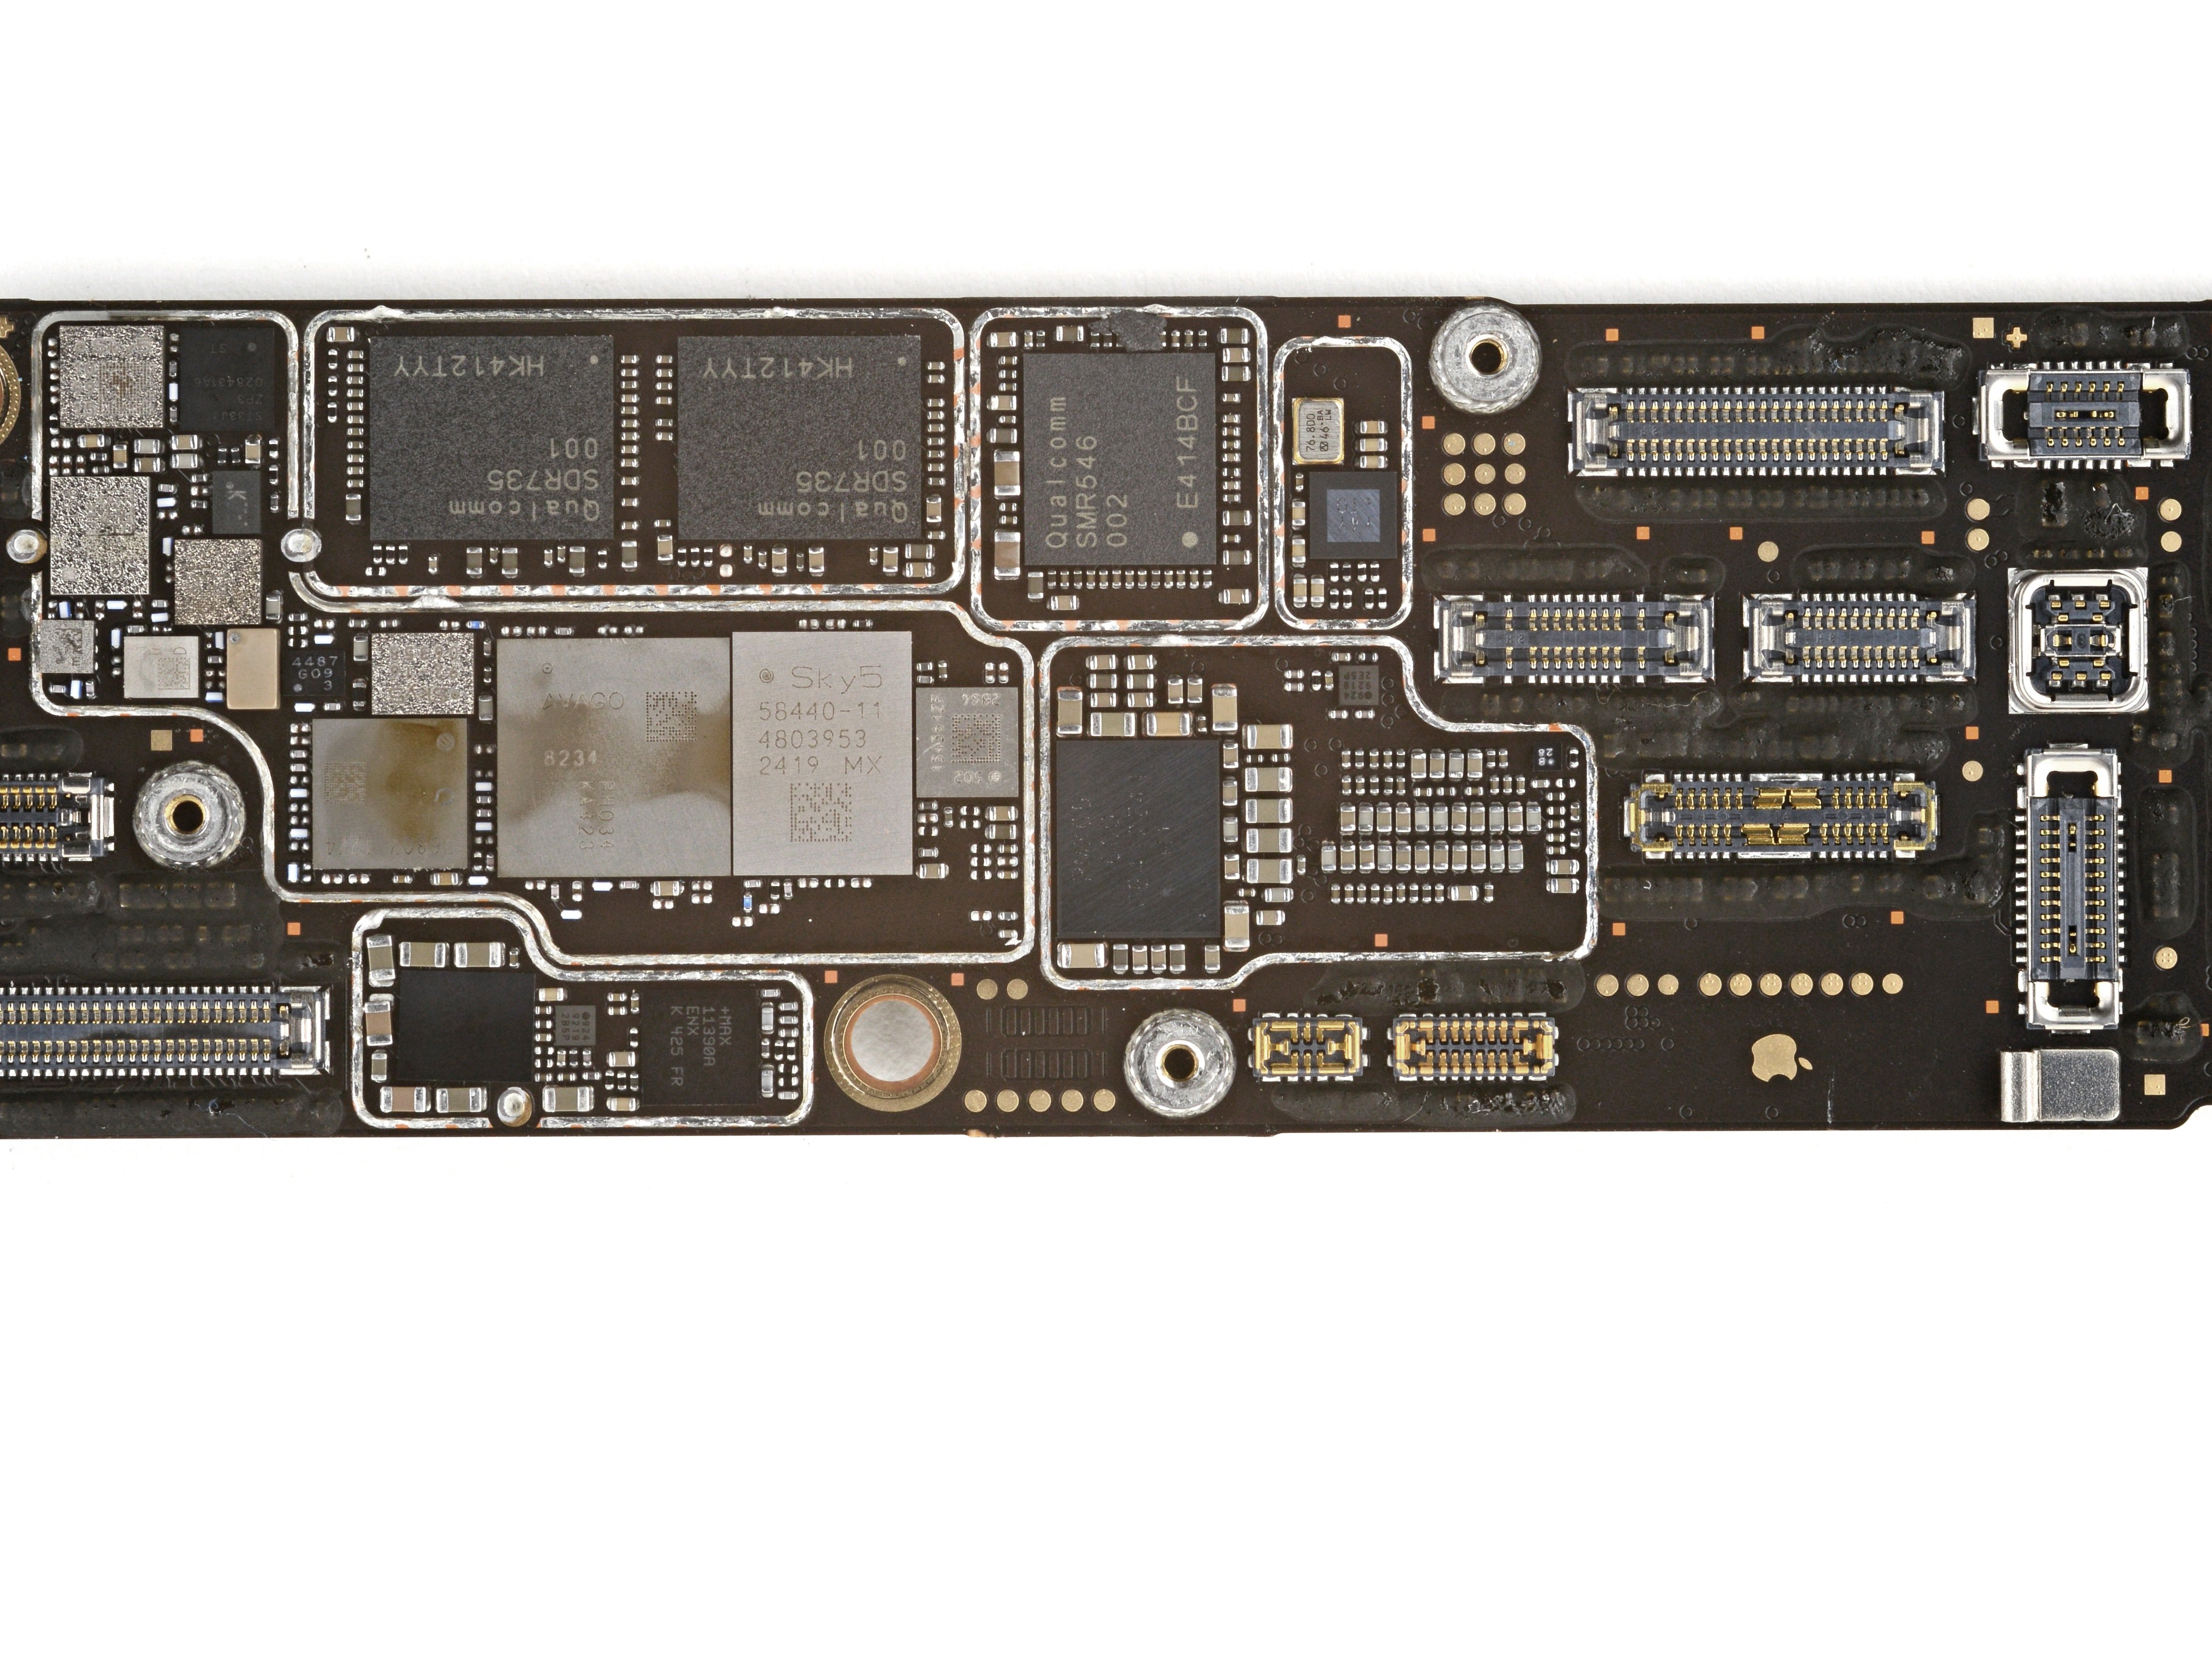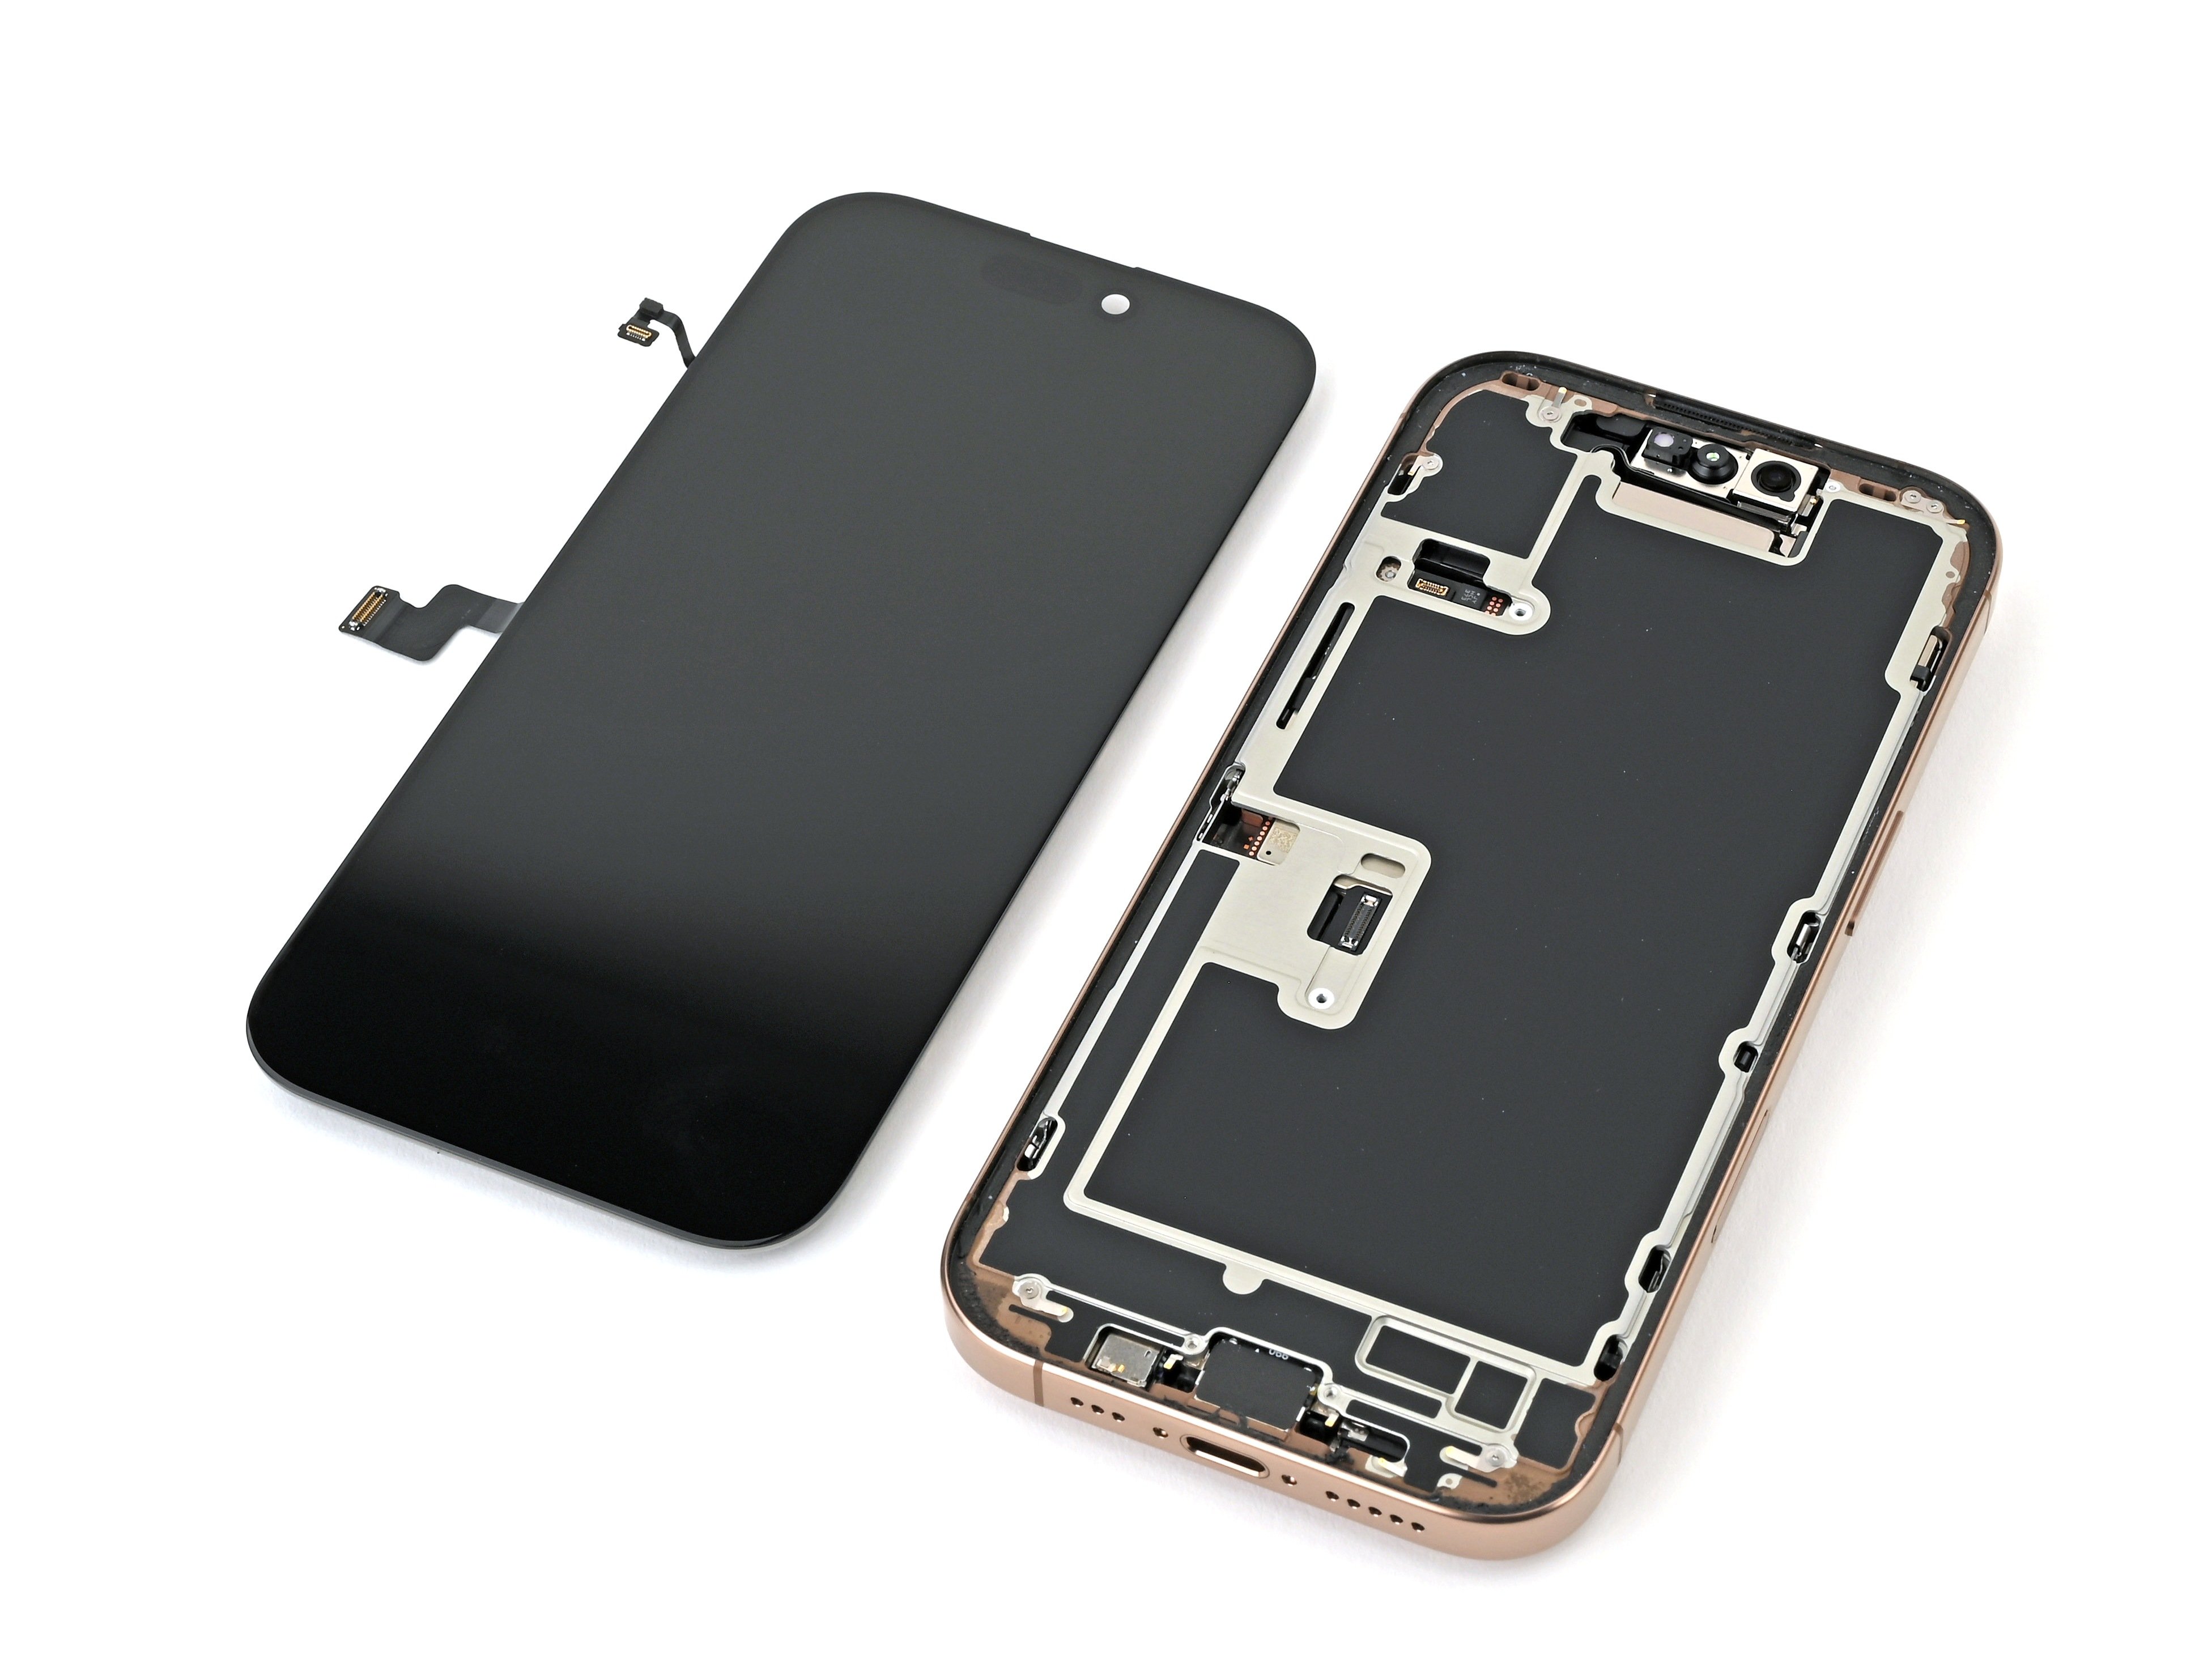
iPhone 16 Pro Battery Replacement
Duration: 45 minutes
Steps: 42 Steps
Replacing the battery in your iPhone 16 Pro is easier than you think! iPhone batteries are designed to keep about 80% of their original capacity for up to 500 charge cycles, which is about 18–24 months. If you're finding yourself charging more often or your phone’s slowing down, it might be time for a fresh battery. And hey, if your battery is swollen, be extra careful. For this repair, you'll need a replacement battery and back glass adhesive. If you're using iOS 18.1 or newer, you can use either a genuine or aftermarket battery, and it’ll still keep track of your battery health. On older versions of iOS, though, you'll need to go with a genuine Apple battery to maintain battery health functionality. After you finish, run Repair Assistant to reset your battery metrics and you’re good to go! If you need help, you can always schedule a repair.
Step 1


Let the battery run its course and drain below 25%—a fully charged lithium-ion battery can be a bit of a safety hazard. If you need a hand, you can always schedule a repair.
- First, disconnect any cables attached to your phone. Give it some breathing room!
- Now, press and hold the power button and either of the volume buttons, then slide to power it off. Take a moment to relax as you power down.
Step 2


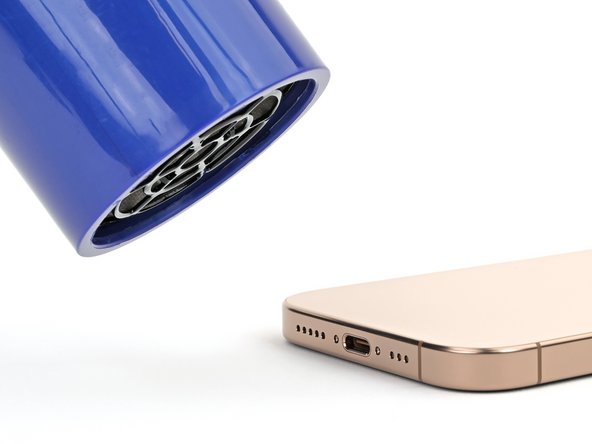
Find a nice smooth spot near the bottom edge that's just right for your suction cup to get a good grip.
- If your screen or back glass is shattered or badly cracked, lay some overlapping strips of packing tape over the glass. This not only keeps the shards contained but also makes disassembly safer and less messy. When you're ready to proceed, follow the step-by-step guide. If you need help, you can always schedule a repair.
Tools Used

Step 3

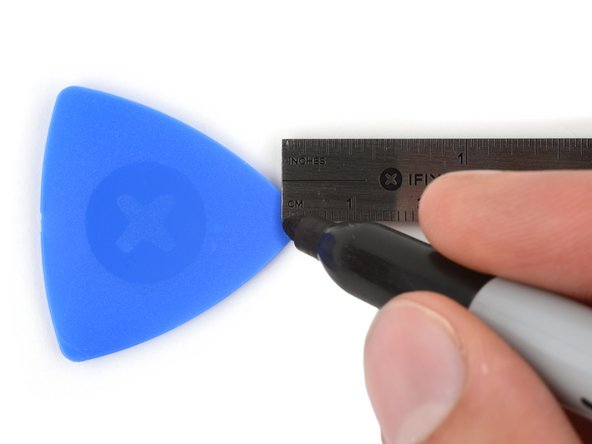
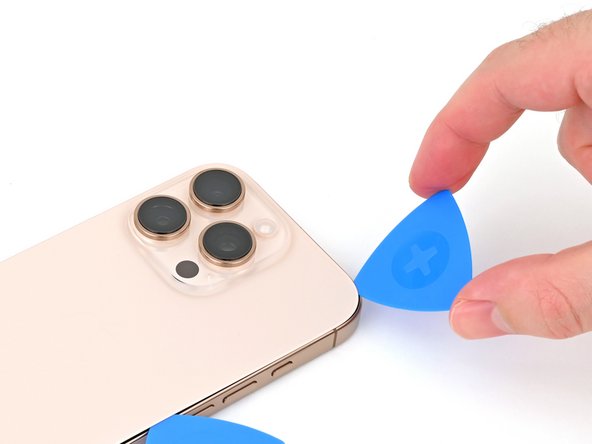
- Grab your opening pick and measure about 3mm from the tip. Mark that spot with a permanent marker so you know exactly where to start. This little prep step will save you some hassle later on.
Be careful not to insert your pick too deeply, as it could harm your device. To avoid this, mark your pick at a safe depth to keep your work gentle. You can also mark different corners of the pick with measurements to keep track. Or, for a handy trick, tape a coin 3 mm from the tip of your pick—this acts as a built-in depth stop. If you need a hand with this step, you can always schedule a repair.
Step 4


- Grab your P2 pentalobe screwdriver and gently remove the pair of 7.4 mm screws on each side of the USB-C port. Keep them safe—you'll need them later. If you run into trouble or need a hand, you can always schedule a repair to get professional help.
Step 5

Heads up: don’t crank up the heat too much—the battery isn’t a fan of high temperatures and could get damaged.
If you don’t have a fancy tool handy, a hair dryer or heat gun works great to warm up the bottom edge of the back glass until it feels nice and toasty to the touch.
- Pop that iOpener into the microwave and let it warm up for two minutes. Then, give some love to the bottom edge of the back glass with it!
Tools Used


Step 6


- Stick a suction handle right above the USB-C port at the bottom edge of the back glass.
- Give the handle a firm, steady tug upward to gently loosen the back glass from the frame.
- Slide the tip of an opening pick into the new gap you've created.
Tools Used

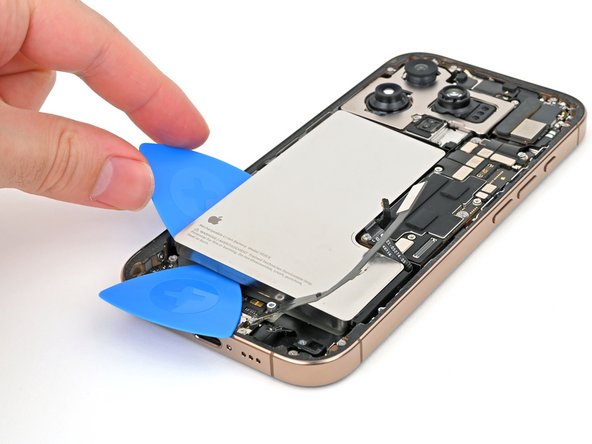
Step 7

As you carefully cut through the adhesive holding the back glass, keep an eye out for these important spots:
Oops! If you accidentally mess with the spring contacts, no worries—just gently nudge them back into place with a spudger or opening pick. You want them lined up perfectly with the gold contact pads on the back glass. It's a quick fix!
- There's a fragile cable linking the back glass to the phone, right next to the volume up button. Avoid slipping your pick here to prevent slicing the cable.
- Around the edges of the phone, you'll find several spring contacts. Be extra cautious not to insert your pick too deep in each step—that could bend these contacts. Take your time and go carefully!
Tools Used

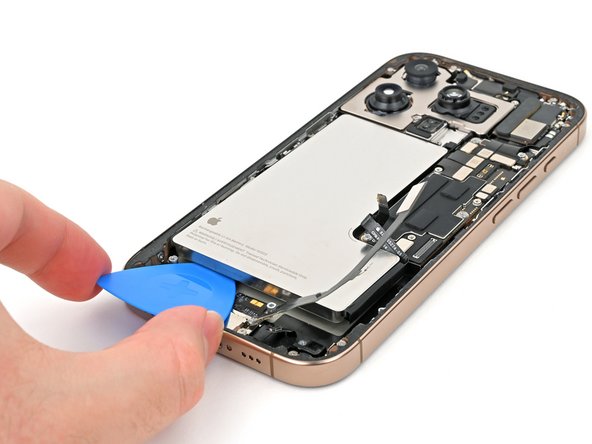
Step 8


Be careful not to push your pick in more than 5 mm on the bottom edge to avoid messing with the spring contact. It's a small move with big consequences.
- Gently slide your pick back and forth along the bottom edge to loosen the adhesive holding the device together.
- Keep that pick in the bottom right corner to prevent the adhesive from sealing back up while you work.
Step 9

- Warm up the right edge of the back glass until it feels nice and toasty to your fingers.
Step 10


Be careful around the volume buttons! A quick slice here could mess with the wireless charging or flash cable. Take your time and keep it steady.
- Gently slide your pick around the bottom right corner and up halfway along the right edge—stop when you feel a firm clip holding the back glass in place.
- Keep that pick in place to stop the adhesive from sealing itself back up. If you need help, you can always schedule a repair.
Step 11

- Warm up the left edge of the back glass until it feels nice and toasty.
Step 12


As you work your way through, you’ll hear and feel the satisfying release of the metal clips. It's like a mini victory each time!
- Slide a second opening pick into the bottom edge and get ready for some action!
- Gently move the pick around the bottom left corner and along the left edge to break through that adhesive and release those pesky metal clips.
- Keep that pick in place at the top left corner to stop the adhesive from sealing back up. You’re on the right track!
Step 13

- Warm up the top edge of the back glass, making sure to get around the volume buttons too, until it feels nice and toasty. It's just like giving your phone a little spa treatment.
Step 14

- Gently slide your opening pick along the top edge, making your way around the top-right corner, and then head towards the volume up button. This will help you break the adhesive seal like a pro.
Be gentle with those spring contacts—don't slide your pick more than 3 mm along the top edge. Too much force could cause some unwanted damage. Take it slow and steady, and if you need a hand, you can always schedule a repair.
You'll hear a satisfying click and feel a little resistance as those top clips pop right off.
Step 15


Hold tight on removing that back glass just yet—it's still hanging on with a fragile ribbon cable. Follow the upcoming steps carefully to get it off safely.
If the back glass isn’t swinging open like a charm, don’t force it—just circle around the edge again with your pick to hunt down any sneaky adhesive or clips still holding on tight.
Think about using polyimide tape to shield the rear camera lenses while you’re diving inside the phone. Be gentle—avoid pressing on the lenses so you don’t mess with those delicate stabilizers.
Sometimes the back glass needs a little lift before it’s ready to swing open fully and release all its clips.
- Gently swing the back glass open, moving it towards the volume buttons—no need to force it.
- Support the back glass with a clean, sturdy object like a small box to keep everything steady and avoid stressing the cable.
- Carefully remove the opening picks and keep them handy for the next step.
Tools Used

Step 16


- Grab your tri-point Y000 screwdriver and carefully unscrew the three screws holding down the lower connector cover:
- Two screws are 1.2 mm‑long
- One screw is 1.0 mm‑long
Tools Used

Step 17

- Grab your tweezers or just use your fingers to gently lift and peel off the lower connector cover.
Tools Used

Step 18


- Use the point of a spudger to gently lift and disconnect the battery press connector. Easy does it, no need to rush!
- When you're putting everything back together, take your time and line up the connector just right. Press it down with your fingertip or the flat end of your spudger—start on one side, then work your way to the other. It should click into place with ease, but don't force it! If it's being stubborn, just reposition and give it another go.
Tools Used
Step 19


- Grab your trusty tri-point Y000 screwdriver and let's get those four screws out of the upper connector cover:
- First up, we've got two screws that are 1.0 mm long.
- Next, there's one screw that's 1.2 mm long.
- And finally, don't forget the one that's 1.6 mm long.
Tools Used
Step 20

- Grab your trusty tweezers or just your fingers and carefully lift off that upper connector cover. You've got this!
Tools Used
Step 21

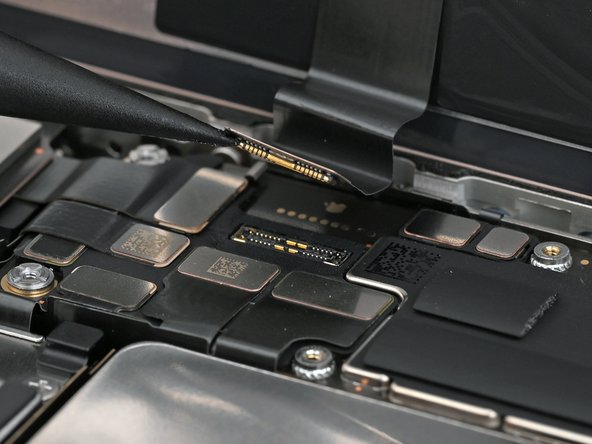
- Gently use the pointy end of your spudger to lift and unplug the back glass press connector. Take it slow and steady!
Tools Used
Step 22

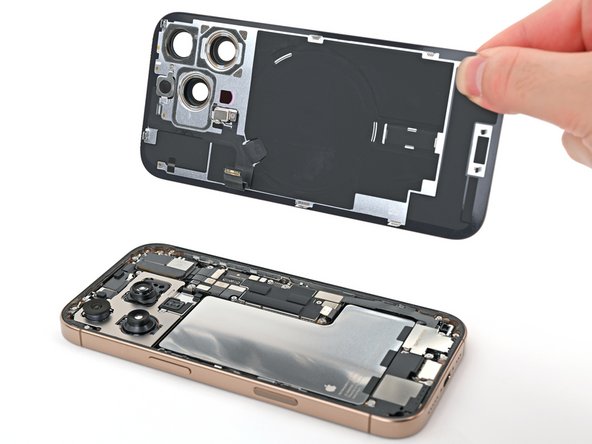
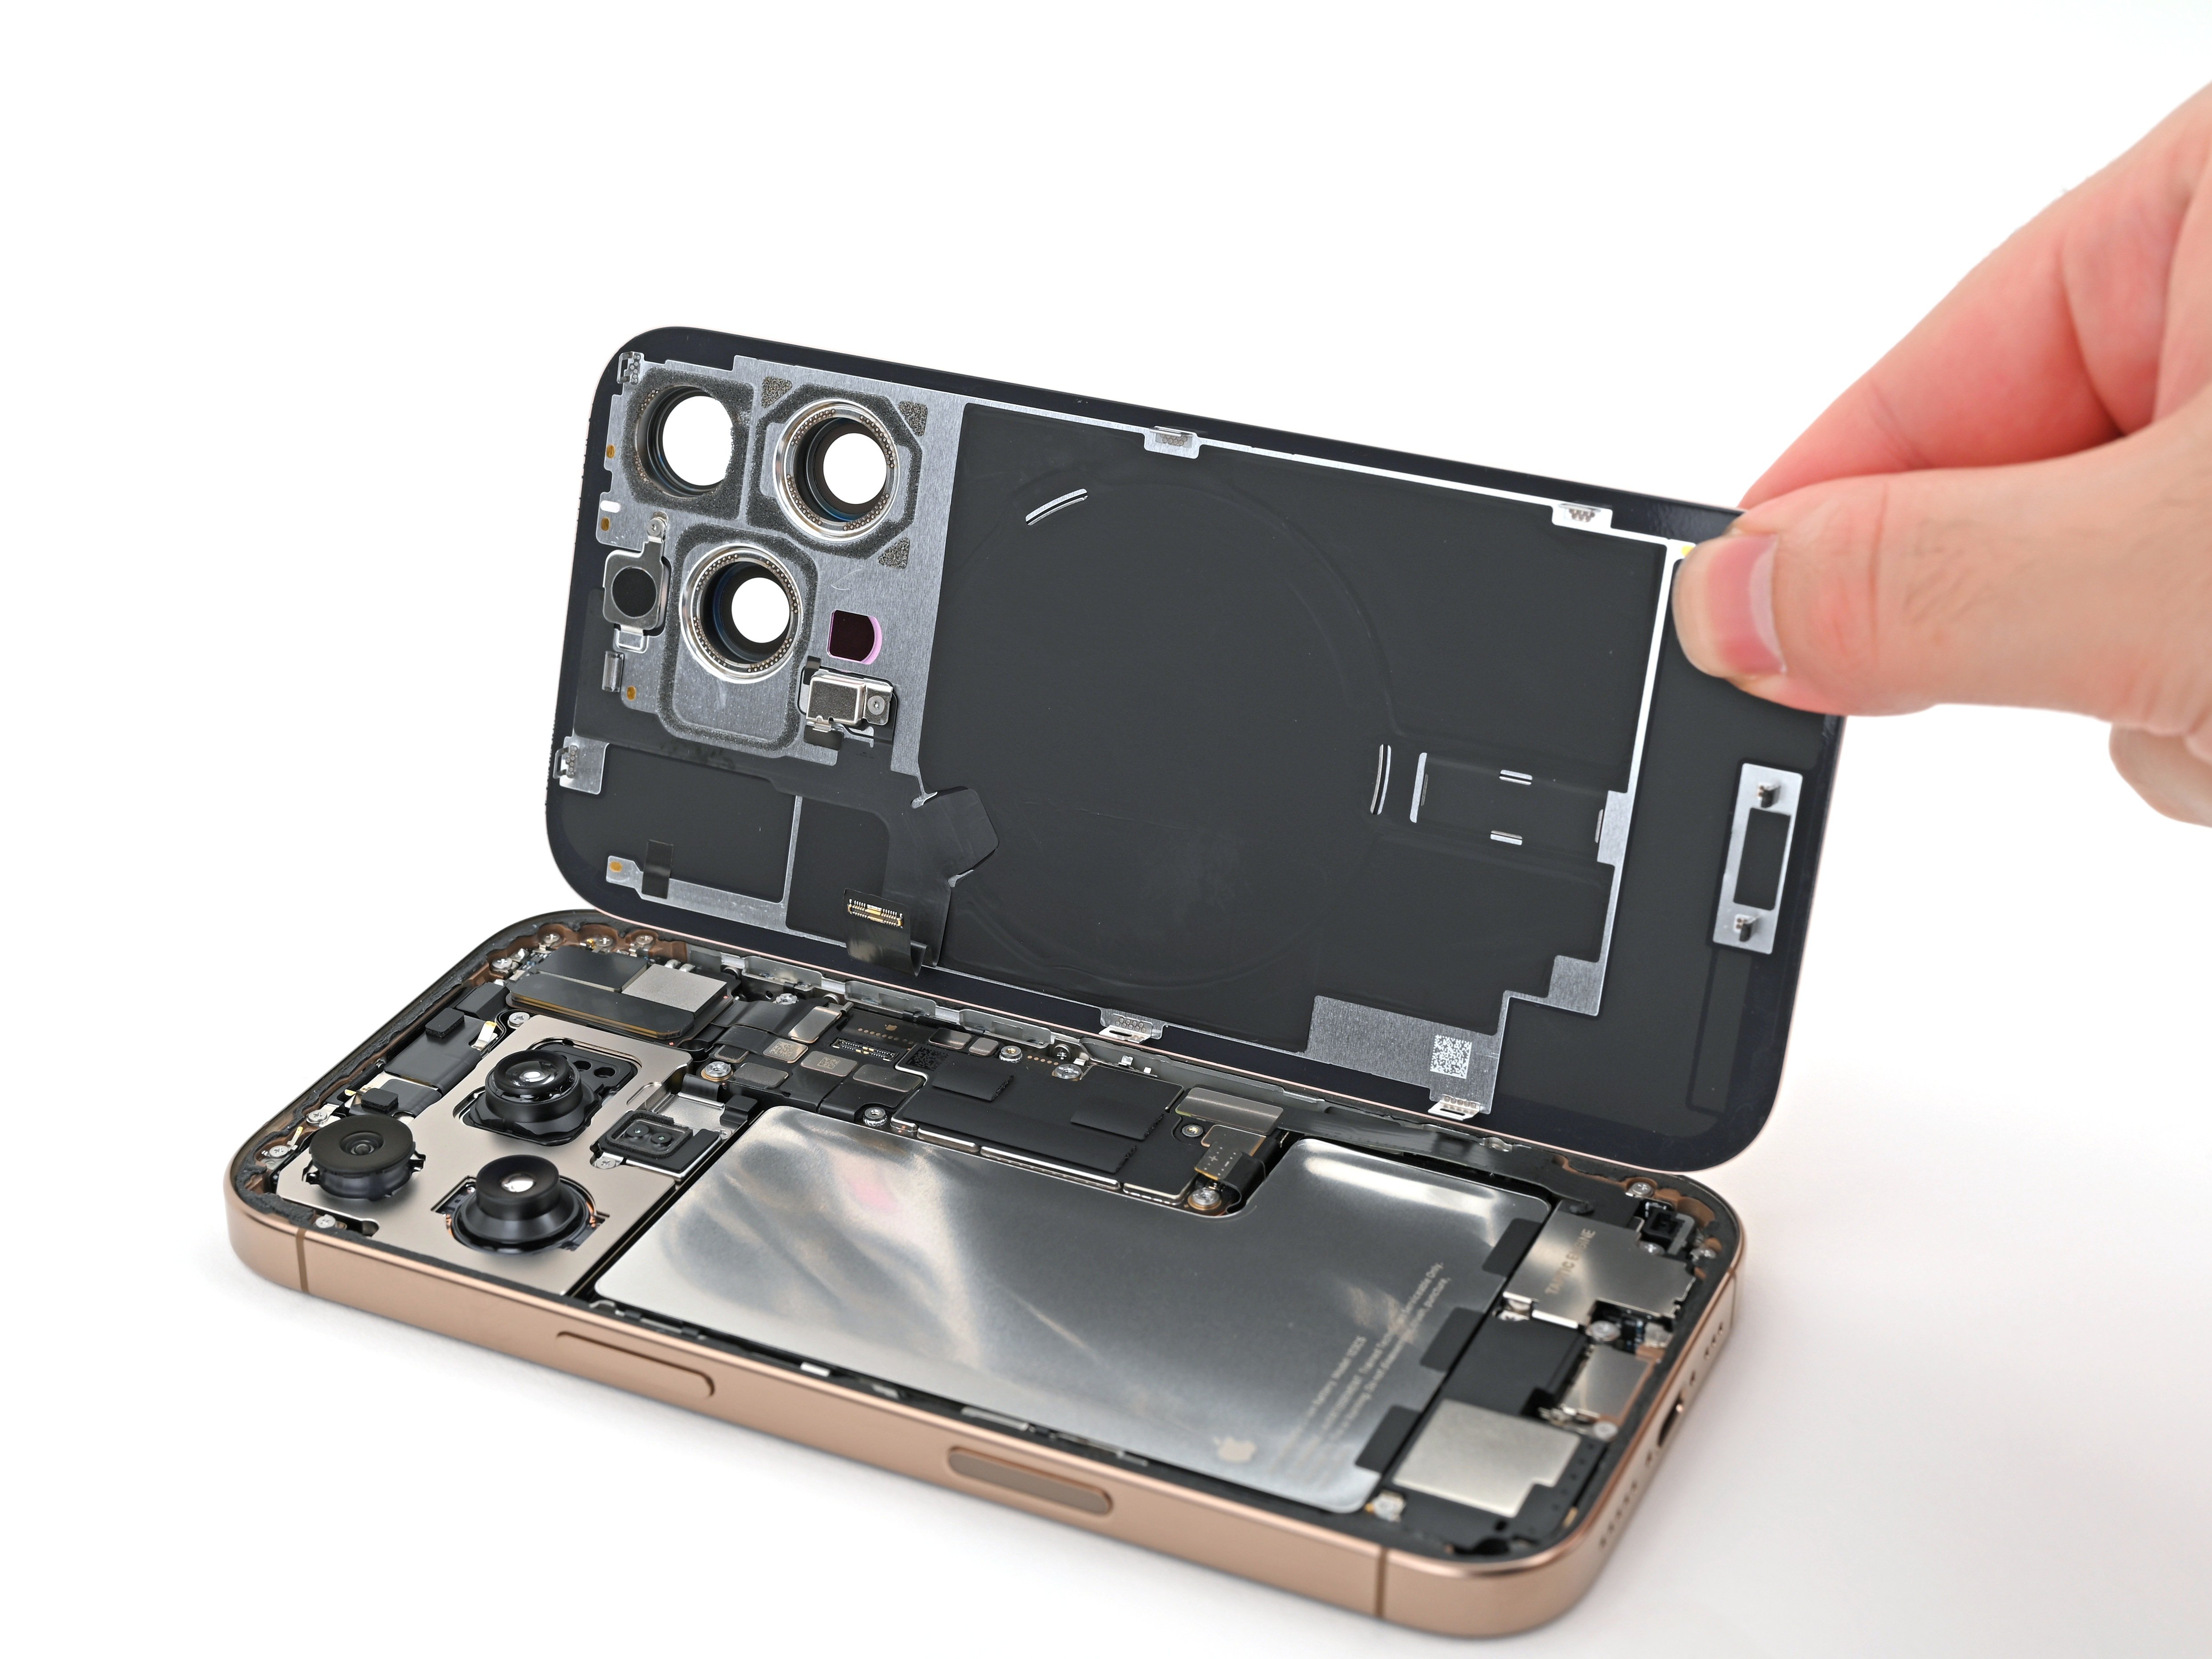
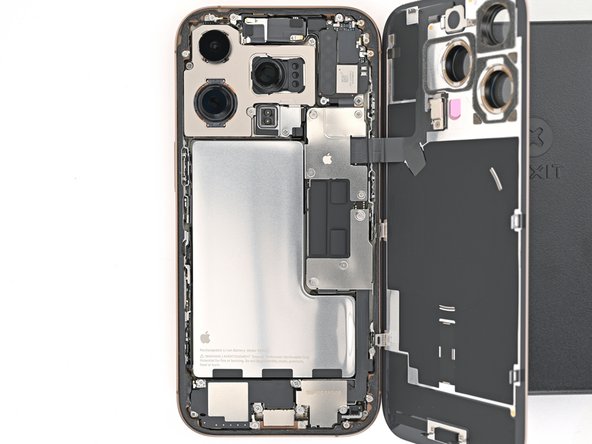
- Carefully lift the back glass away from the frame and set it aside.
- When putting everything back together:
- Now’s a great moment to check your handiwork before sealing things up. Temporarily reconnect the battery and back glass (hold off on the adhesive for now), power on your device, and make sure everything’s running smoothly. Once confirmed, power it down, disconnect the battery again, and finish reassembling.
- Follow this guide to apply new adhesive and reinstall the back glass securely.
Step 23


- Grab your Phillips screwdriver and unscrew the three screws holding down the Taptic Engine cover:
- One screw measuring 3.0 mm in length
- Two screws each 1.7 mm long
Step 24


- Grab some tweezers or use your fingers to gently lift up the top edge of the Taptic Engine cover.
- Once the bottom edge pops free from the frame, go ahead and remove the Taptic Engine cover completely.
- When putting things back together, make sure the bottom edge of the cover clicks securely into place on the frame.
Tools Used
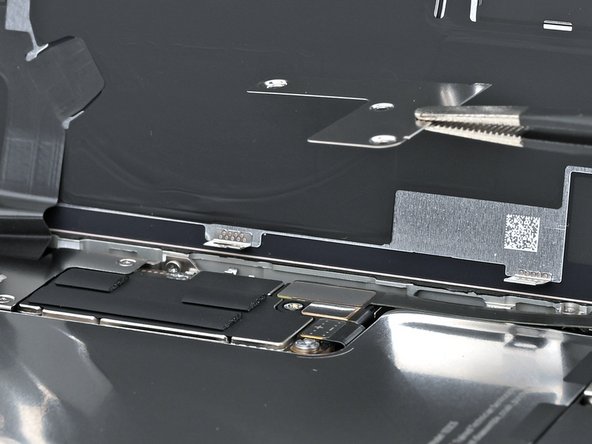
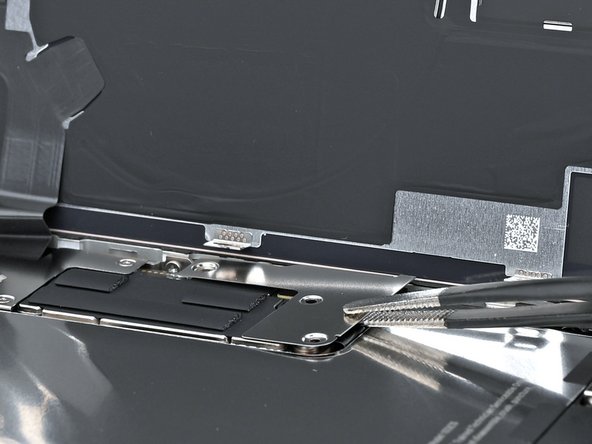
Step 25


- Grab your spudger and gently pry up the lower assembly cable press connector from the logic board to disconnect it. Easy does it—just a little lift and it's free. If you need help, you can always schedule a repair.
Tools Used
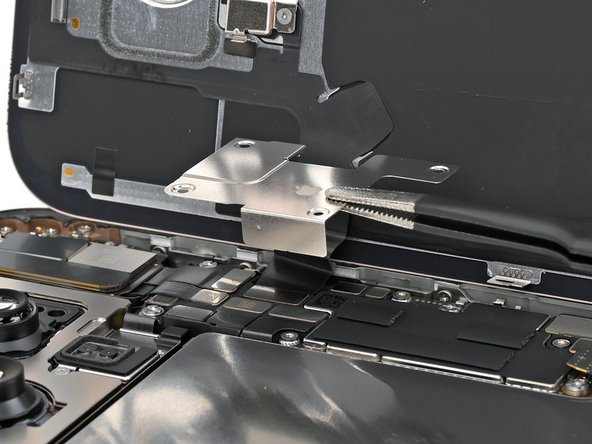
Step 26


- Grab your trusty spudger and gently pop up those two press connectors hanging out near the bottom right corner of the frame. Careful does it!
Tools Used
Step 27

- Grab your trusty tri-point Y000 screwdriver and let's tackle that 1.0 mm-long screw holding down the lower assembly cable. You've got this!
Tools Used
Step 28


- Grab an iOpener or a hair dryer and gently warm up the lower assembly cable area right on top of the Taptic Engine until it feels nice and toasty to the touch.
Tools Used
Step 29

- Gently slide an opening pick beneath the lower assembly cable to free it from the Taptic Engine. You've got this!
- Carefully nudge the cable aside so you can easily reach the Taptic Engine. You're making great progress!
Step 30


- Grab your Phillips screwdriver and carefully remove the tiny 1.9 mm screw holding the Taptic Engine in place. Keep it safe—you'll need it later. If you need a hand, you can always schedule a repair.
Step 31

- Gently slide the opening pick along the top edge of the Taptic Engine to loosen the plastic buffer strip that's stuck on it. Take your time – we want to keep everything in one piece!
Step 32


Be gentle around the battery to avoid any accidental damage. Keep it cool and careful—your device will thank you!
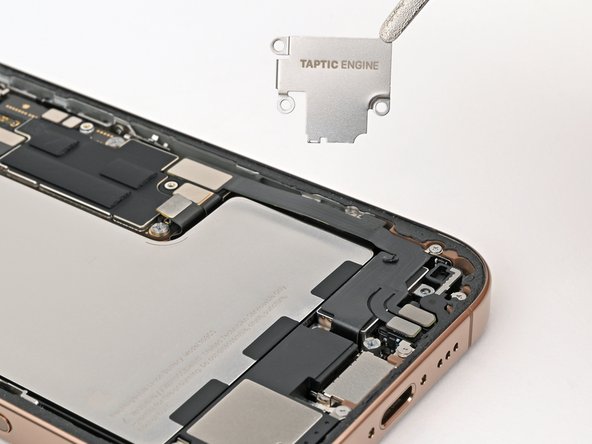
- Grab your spudger and gently use its point to lift the Taptic Engine from its top-right corner. A little nudge, and it should start to come up.
- Once you've got it loose, carefully remove the Taptic Engine. You're almost there!
Tools Used
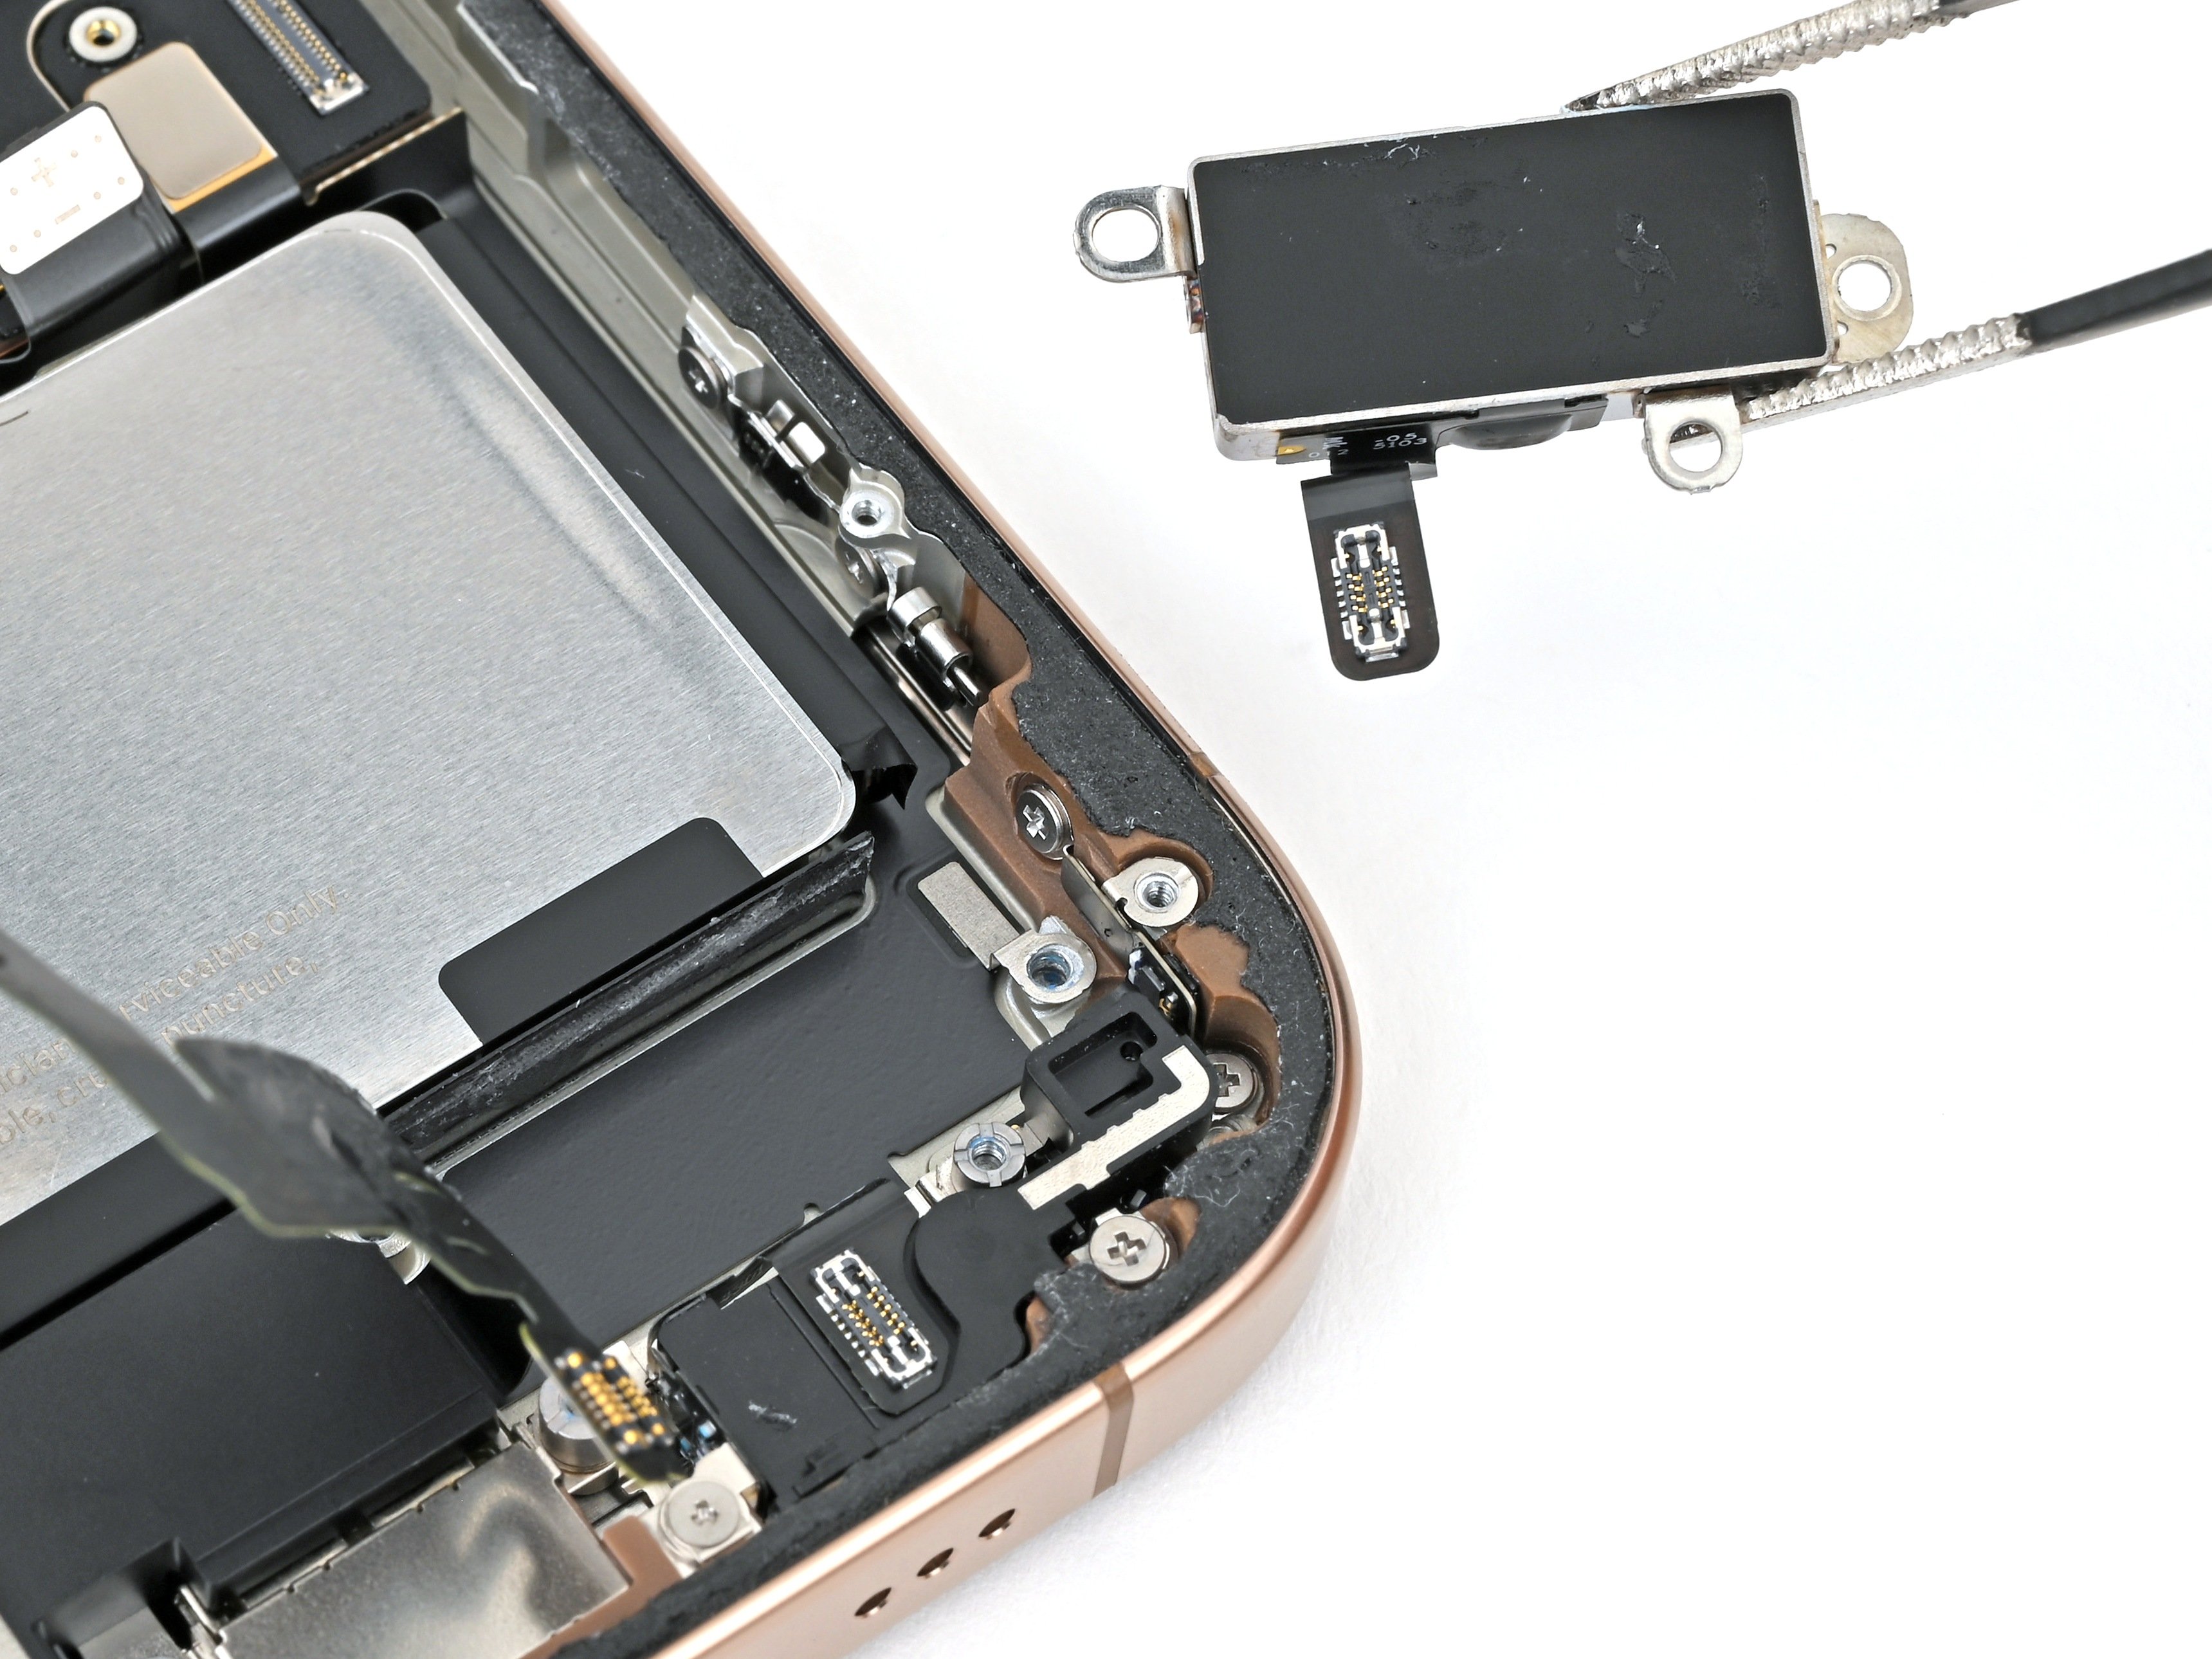
Step 33

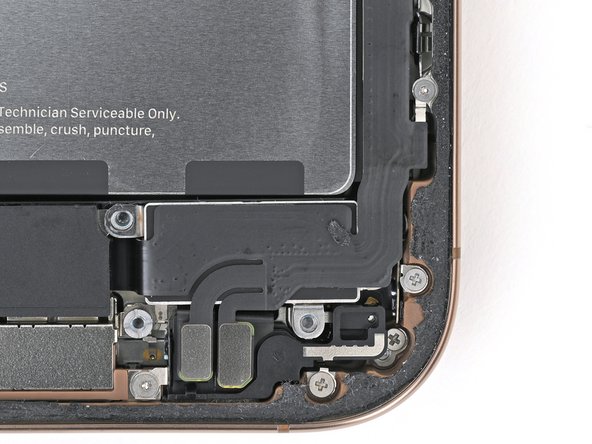
- Start by removing the four screws that keep the loudspeaker in place:
- Two of these are 1.6 mm-long Phillips screws
- One is a 2.0 mm-long Phillips screw
- And there's a 1.3 mm-long tri-point Y000 screw holding things tight
Step 34


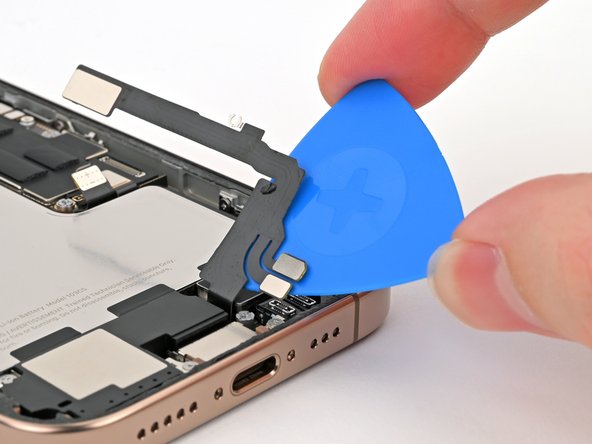
- Gently slide the tip of a spudger into the bottom-right screw hole of the loudspeaker area.
- Carefully pry up and lift out the loudspeaker to free it.
Tools Used
Step 35

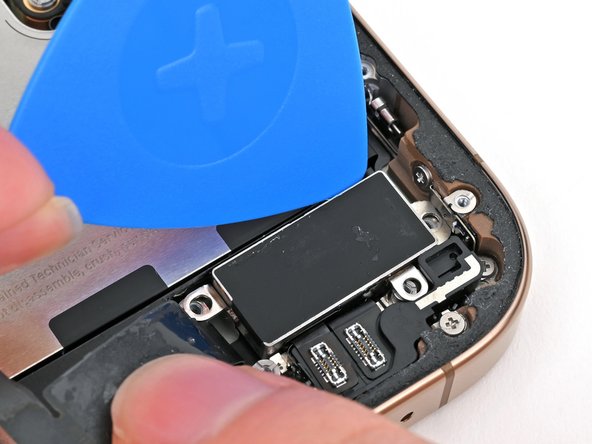
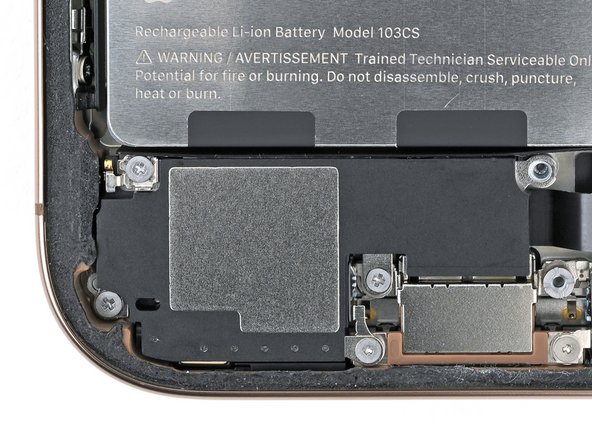
Handle the battery carefully—avoid dents or punctures, as even with its metal case, damaging it could lead to a fire. If you're unsure or need assistance, you can always schedule a repair.
The battery is held in place by three stretchy release adhesive strips. The next four steps will guide you through popping them off and setting the battery free.
Step 36


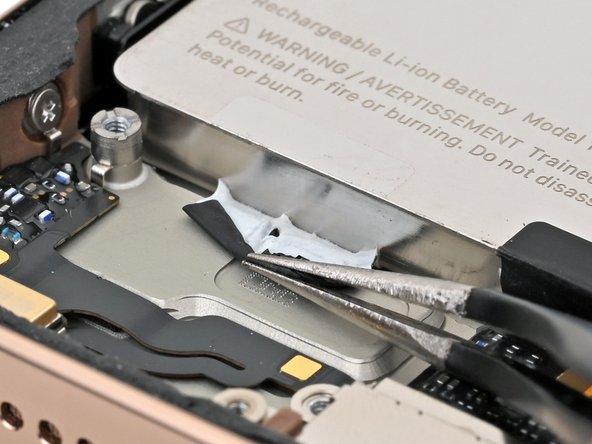
- Gently slide the tip of your angled tweezers beneath one of the black pull tabs.
Tools Used
Step 37


Hold off on pulling that tab from under the battery for now. We'll get to that soon enough!
- Grab your tweezers and gently slice through the black tab, then peel it away from the top of the battery. Keep it careful and steady—you're almost there. If you need help, you can always schedule a repair.
Tools Used
Step 38


If the strip snaps off, don't stress—see if you can fish it out from under the battery. If it’s playing hard to get, just move on to the next strip.
Give the strip some time to stretch out, and re-grip it whenever needed. When it gets too long, wrap it around your tweezers and keep pulling.
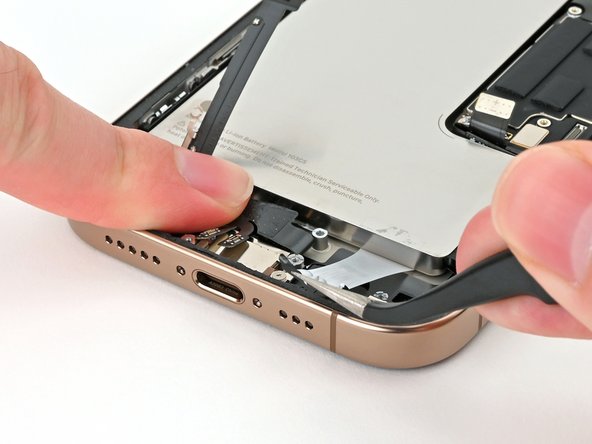
- Grab the pull tab with tweezers or your fingers and gently pull it down until it lies flat against the frame.
- Carefully peel back the adhesive from under the battery, keeping the angle as low and gentle as possible to avoid damage.
Tools Used
Step 39

Gently maneuver the lower assembly cable out of the way, bending it carefully as needed to give yourself access to those stubborn adhesive strips. No rush—just a smooth, steady move to keep everything intact. If you need help, you can always schedule a repair.
- Now, go ahead and tackle the next two adhesive strips just like you did before! You've got this!
Step 40
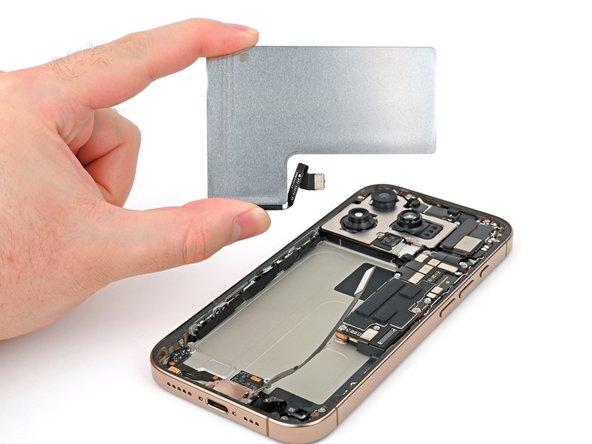

- Great job if you've peeled away all three stretch release adhesive strips—time to lift and slide out that battery. When installing a new one, start by cleaning the frame with some isopropyl alcohol and a lint-free cloth—wait until the alcohol fully evaporates before proceeding. Before sticking down the new adhesive, place it in its slot to make sure it fits and that the cable can reach the socket on the logic board without any fuss. No need to reconnect the battery just yet—double-check everything first. If you need help, you can always schedule a repair.
If some adhesive strips decide to give up during removal, just skip ahead to the next step and wipe away any residue with isopropyl alcohol. When installing a new battery that doesn’t come with adhesive, you can either follow this guide to apply stretch release adhesive strips for a clean, easy peel or opt for some thin, double-sided tape to hold it in place. We suggest using stretch release adhesive because it makes future removals less of a hassle. If you need a hand with any of these steps, you can always schedule a repair.
Step 41

If those stubborn adhesive strips gave up on you, these next two steps will show you how to free the battery like a pro.
- Gently tilt the phone by lifting the bottom edge of the frame to get things started.
- Grab a pipette or syringe and carefully squeeze out 2–3 drops of high-concentration (>90%) isopropyl alcohol along the bottom edge of the battery, right where those stubborn adhesive strips popped out.
- Give it a minute for the alcohol to seep under the battery and loosen up that sticky adhesive. Patience pays off!
Step 42

- Slide the tip of your trusty opening pick between the bottom of the battery and the frame. Let's get this party started!
- Now, take a second opening pick and gently insert it between the left edge of the battery and the frame. With a steady hand, pry the battery upwards. Remember, slow and steady wins the race—give that adhesive a moment to let go!
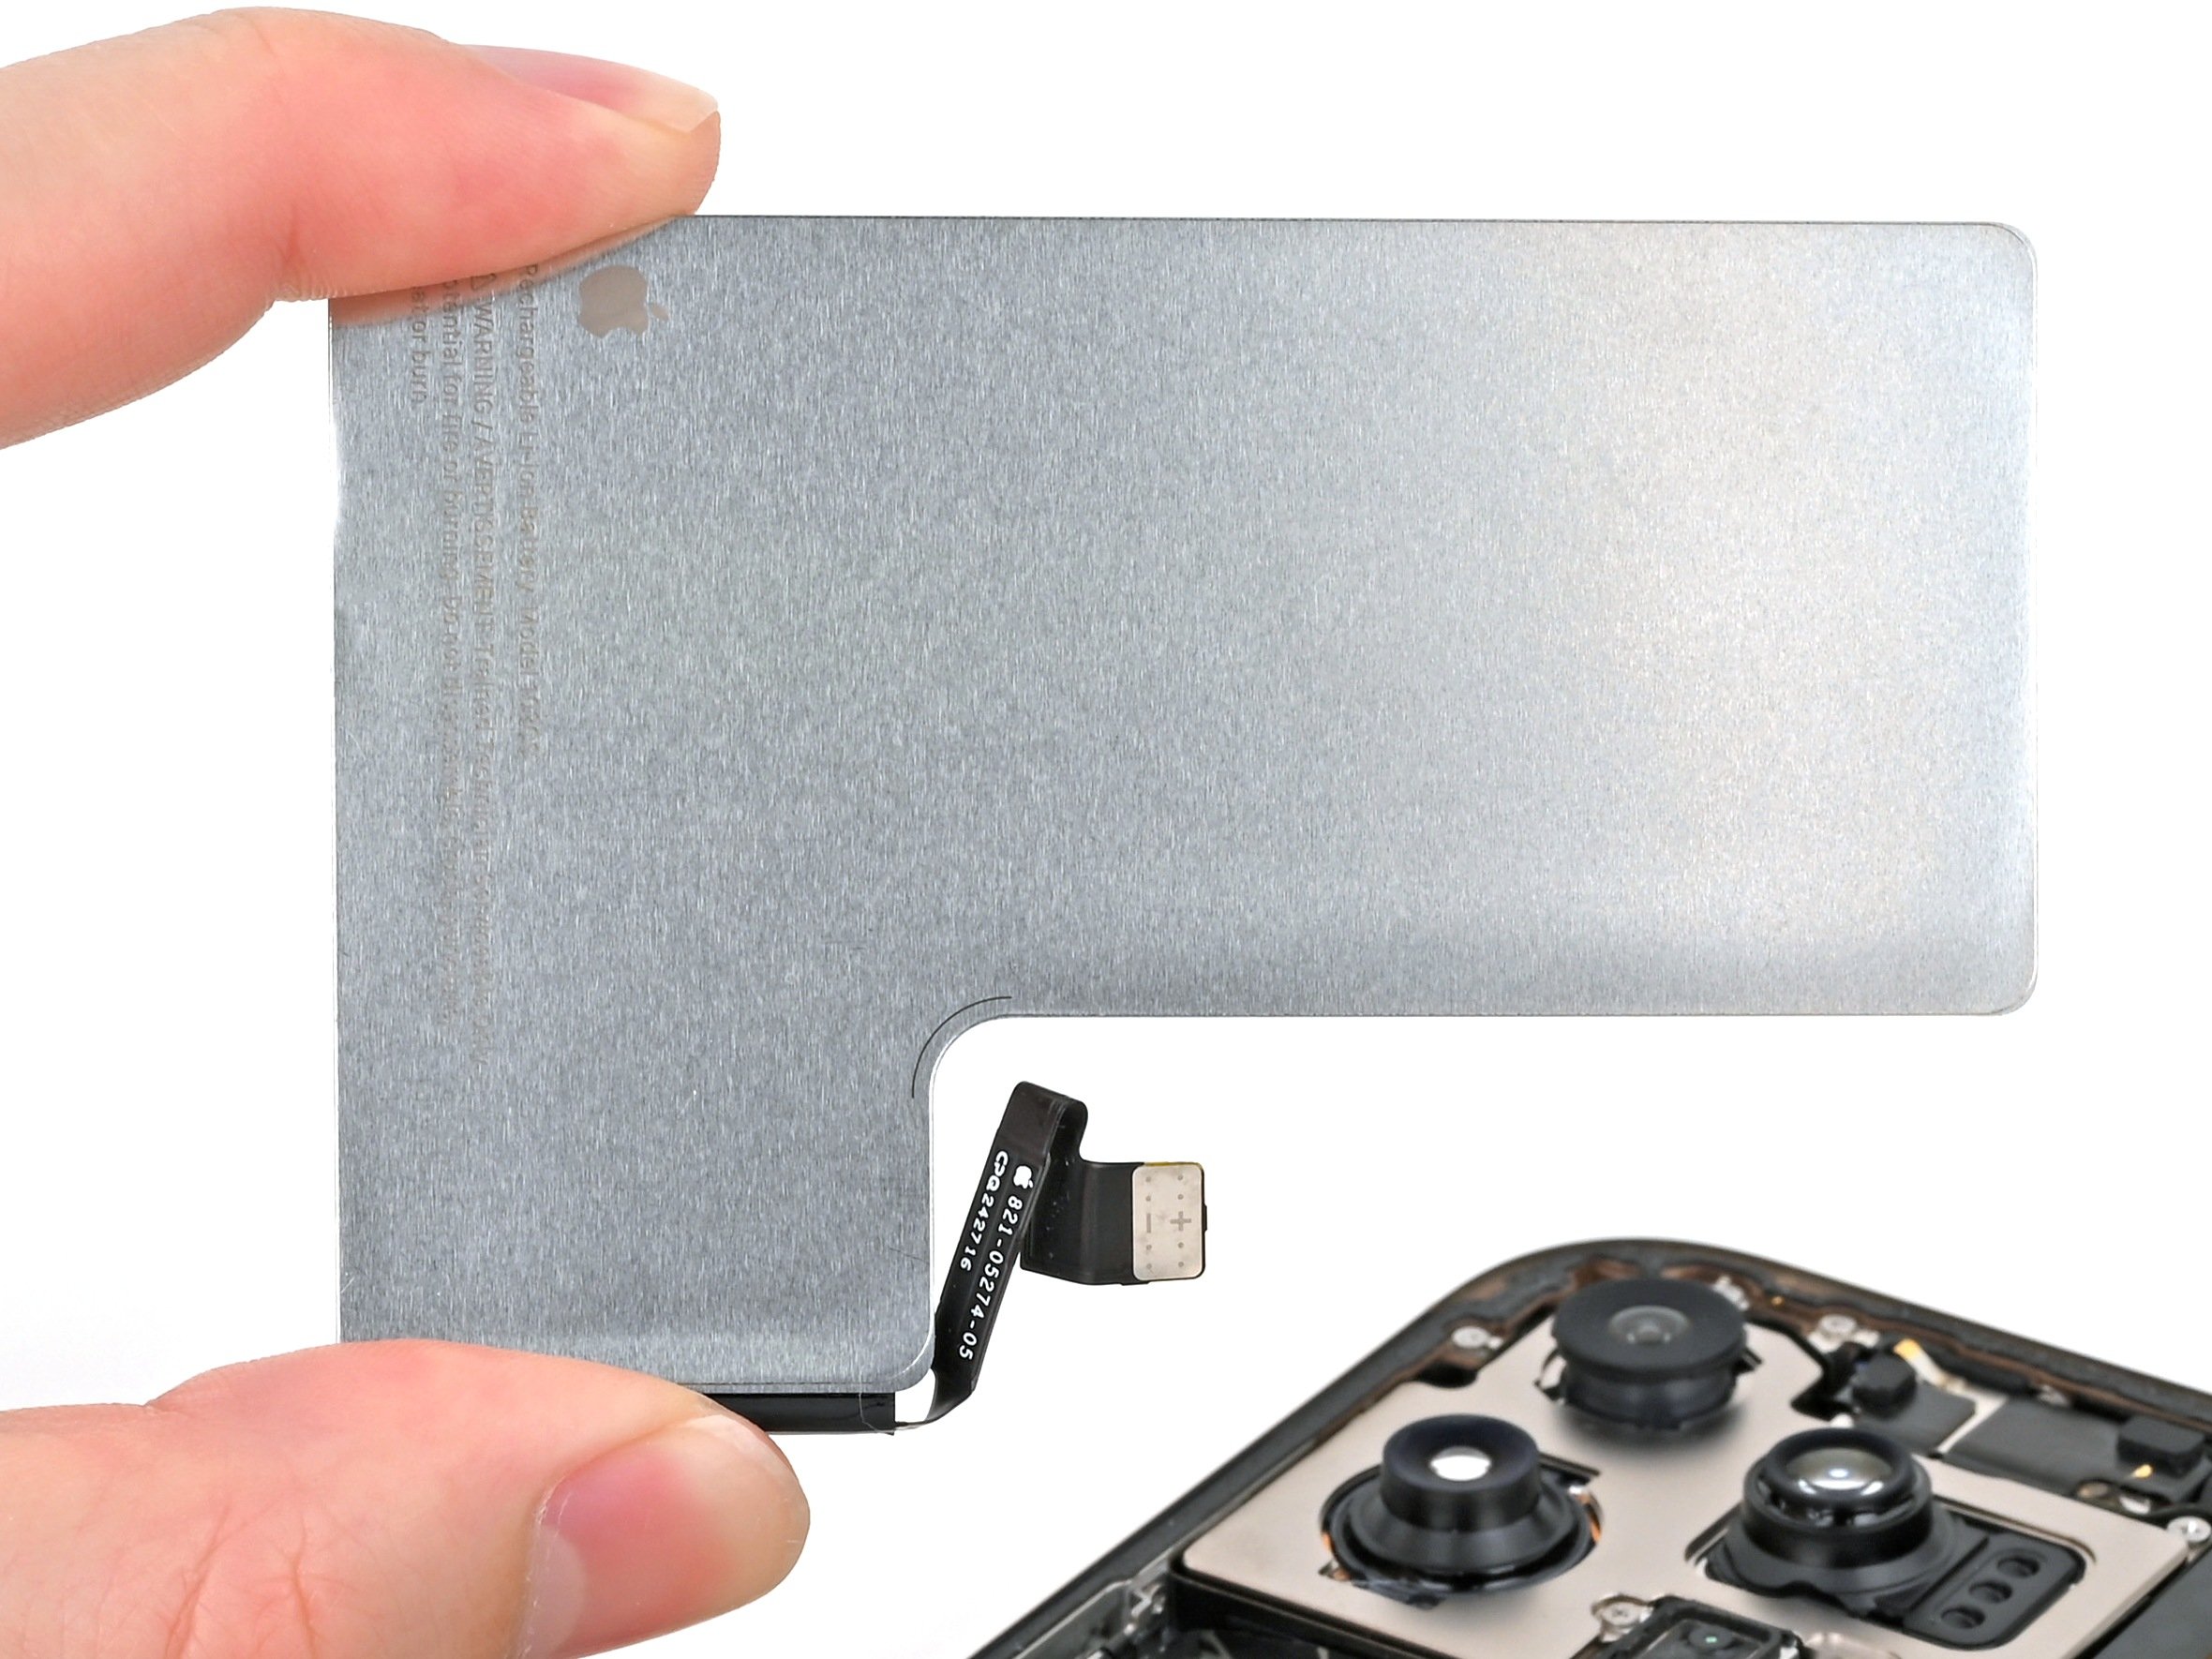
- Once you feel the adhesive loosen up, grab the battery and carefully pull it out. You've got this!
- Time to bring in the new battery:
- First, give the frame a quick clean with some isopropyl alcohol and a lint-free or microfiber cloth. Make sure to let the alcohol evaporate completely before introducing the new battery to its new home.
- Before you go slapping on any adhesive, double-check that the battery fits snugly in its spot and that the cable can easily reach its socket on the logic board. Hold off on reconnecting the battery just yet.
Be gentle with the battery – no bending or creasing allowed! If it's being stubborn, a couple more drops of isopropyl alcohol should do the trick. Take it slow and steady!
If your new battery doesn't come with adhesive, no worries! Just follow this guide to apply some fresh stretch release adhesive strips, or use thin double-sided tape to keep it in place. We suggest going with stretch release adhesive, as it makes future removals a breeze!