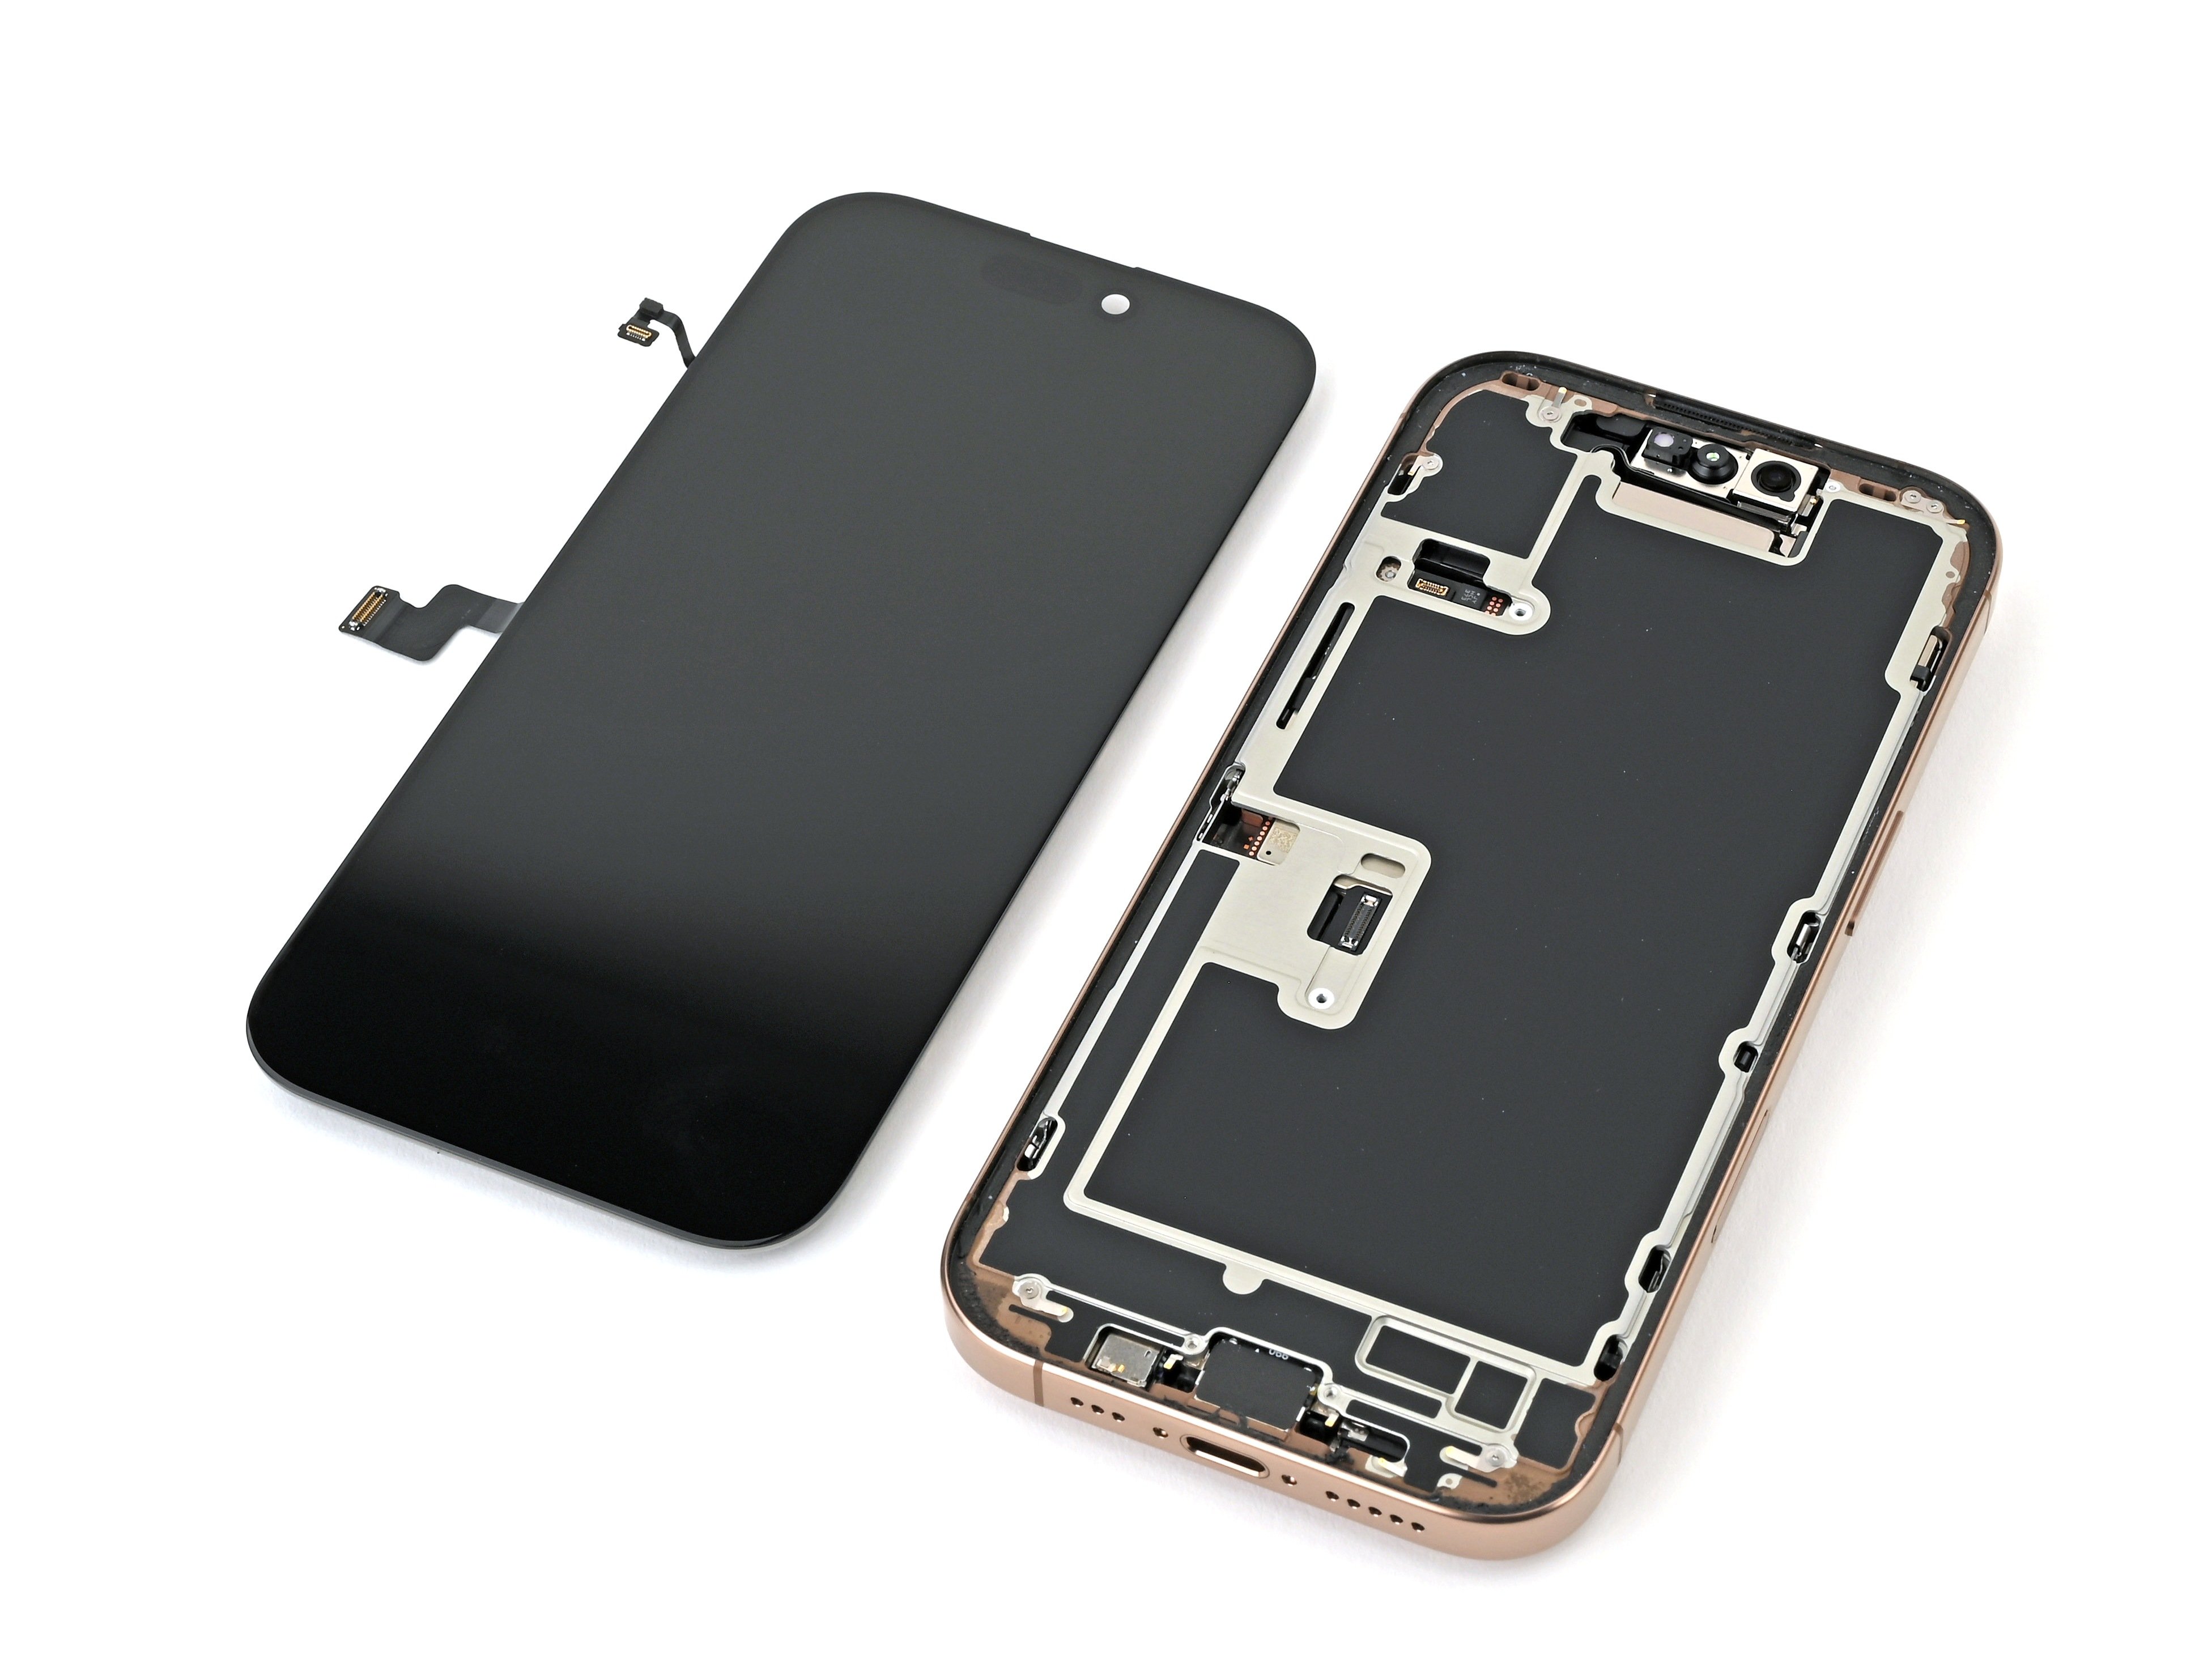
iPhone 16 Pro Charging Port Replacement
Duration: 45 minutes
Steps: 48 Steps
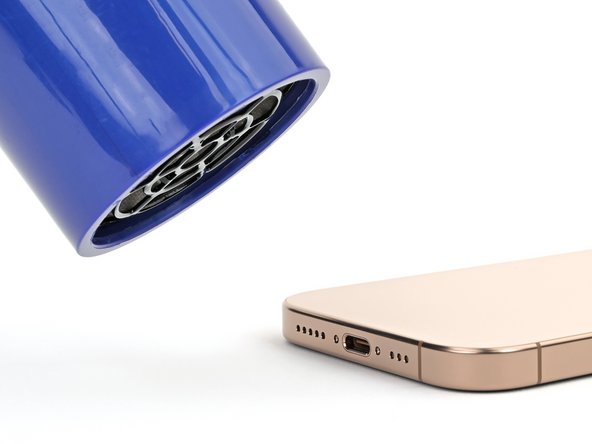
Before diving into this repair,
give the port a quick clean-up first.
Get ready to tackle the replacement of the USB-C charging port in your iPhone 16 Pro! If your charging port is feeling a bit wobbly or you're having some trouble with connectivity or charging, it might be time for a change. But before diving in, why not give that port a good clean? Sometimes it's just a case of a little dirt causing the trouble! Make sure you have your replacement back glass and some charging port adhesive handy for this task. And if your new port doesn’t come with adhesive, don’t fret—thin, double-sided tape will do the trick!
Step 1


Let the battery run down below 25%—a fully charged lithium-ion battery can be a safety concern, so giving it a little drain helps keep things safe. If you need a hand, you can always schedule a repair.
- Disconnect all cables from your phone to start fresh.
- Press and hold the power button along with either volume button, then slide to turn off the device and keep it chill.
Step 2


Ensure there's a nice, smooth spot near the bottom edge that's large enough for a suction cup to grab onto.
- If your screen or back glass looks like it's been through a battle, no worries! Just grab some packing tape and lay down overlapping strips over the glass. This will keep you safe and make the disassembly process a breeze!
Tools Used

Step 3

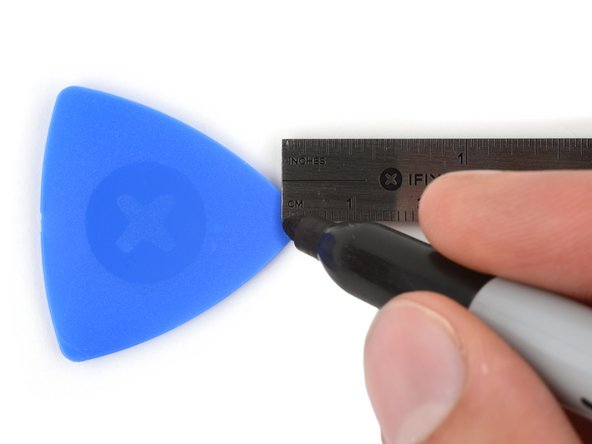
Be careful not to push your opening pick in too far, as it could harm your device. A little marking goes a long way in protecting your tech!
Feel free to mark the other corners of your pick with various measurements for extra precision.
Another fun option is to tape a coin 3 mm from the tip of your pick. It's a quirky little hack!
- Grab your opening pick and measure about 3mm from the tip. Mark it with a permanent marker so you know exactly where to make your move.
Step 4


- Grab your P2 pentalobe screwdriver and carefully remove the two 7.4 mm screws on each side of the USB-C port. If you run into any trouble, remember you can always schedule a repair with Salvation Repair for a helping hand.
Step 5

Heads up: don’t let the phone get too toasty—batteries aren’t fans of heat and can get damaged easily.
Alternatively, warm things up a bit with a hair dryer or heat gun at the bottom edge of the back glass until it feels comfortably warm. This helps loosen the adhesive and makes the removal process smoother. If you need help, you can always schedule a repair.
- Gently place a heated iOpener on the bottom edge of the back glass and hold it there for about two minutes. This will help loosen things up and make your job easier. If you need a hand along the way, you can always schedule a repair.
Tools Used


Step 6


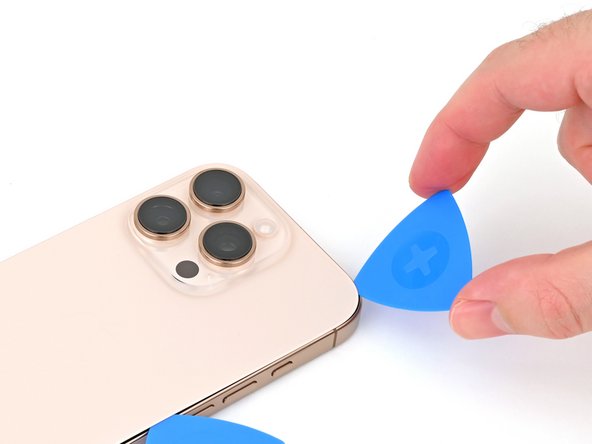
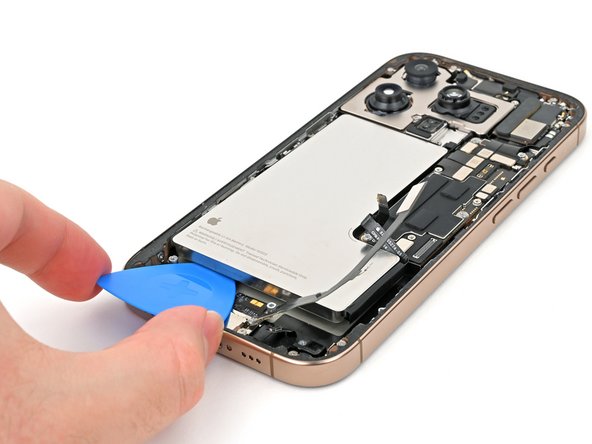
- Grab a suction handle and stick it to the bottom edge of the back glass, right above the USB-C port.
- Now, pull up on the handle with a steady and firm motion—this will create a gap between the back glass and the frame.
- Slip the tip of your opening pick into that gap to keep things moving.
Tools Used

Step 7

As you carefully cut through the adhesive holding the back glass in place, keep an eye out for these areas:
If you happen to tweak those spring contacts, no worries! Just gently coax them back into place with a spudger or opening pick so they can line up nicely with their shiny gold contact pads on the back glass. You've got this!
- There's a delicate cable connecting the back glass to the phone, right next to the volume up button. Be gentle here—avoid inserting your pick directly into this area to prevent slicing the cable.
- Around the edges of the phone, you'll find several spring contacts. Take your time and be extra cautious not to insert your pick too deep in each step, as bending these contacts can cause issues later on.
Tools Used

Step 8


Be gentle when inserting your pick at the bottom edge—no more than 5mm deep—to avoid messing up the spring contact. Go slow and steady!
- Gently wiggle your pick back and forth along the bottom edge to loosen that stubborn adhesive.
- Keep your pick wedged in the bottom right corner so the adhesive doesn't sneak back together.
Step 9

- Warm up the right edge of the back glass until it feels nicely heated to the touch.
Step 10


Be careful around the volume buttons! You don't want to accidentally cut into the wireless charging/flash cable. Take it slow and steady, and you'll be golden!
- Gently slide your pick along the bottom right corner and halfway up the right edge until you hit the clip holding the back glass in place.
- Keep that pick in there to stop the adhesive from snapping back together.
Step 11

- Warm up the left edge of the back glass until it feels comfortably hot to the touch.
Step 12


As you make your way through, you'll feel and hear the satisfying click as the metal clips release. Keep going, you're doing great!
- Pop a second opening pick in at the bottom edge.
- Carefully slide that second pick around the bottom left corner and up along the left side of the screen to loosen the adhesive and free those sneaky metal clips.
- Keep this pick wedged in at the top left corner so the adhesive doesn’t sneak back and seal itself.
Step 13

- Warm up the top edge of the back glass and the area around those volume buttons until it feels nice and toasty.
Step 14

Be gentle when inserting your pick along the top edge—no more than 3 mm deep—to avoid putting too much pressure on those spring contacts. A light touch keeps everything working smoothly!
You'll hear and feel satisfying clicks as the top two clips give way and release. Just a gentle press, and they'll pop right off—easy as that.
- Gently slide your opening pick along the top edge, curving around the top right corner until you reach the volume up button to loosen the adhesive. Keep it steady and patient—you're just peeling back the layers. If you need a hand, you can always schedule a repair.
Step 15


- Gently swing the back glass open towards the volume buttons, easing it out of place. To keep things steady and avoid stressing the cable, support the back glass with a clean, sturdy object like a small box. Once it's free, carefully remove the opening picks to finish the process. If you need a hand, you can always schedule a repair.
Hold off on fully removing that back glass for now—it's still hanging on by a delicate ribbon cable. Just follow the next few steps to safely get it off without a hitch.
If the back glass isn't popping open easily, don't yank on it—go back around the edges with your pick to double-check for any missed spots of adhesive or stuck clips. To keep the camera lenses safe while you're inside, consider placing some polyimide tape over them—no need to push against those delicate stabilizers. Sometimes, a gentle lift of the back glass before swinging it open helps to fully disengage the clips and makes the process smoother. Remember, patience and a gentle touch go a long way—if you need help, you can always schedule a repair.
Tools Used

Step 16


- Grab your tri-point Y000 screwdriver and let's tackle those pesky screws holding the lower connector cover in place:
- First up, two tiny screws measuring 1.2 mm long are waiting for you.
- And don't forget the one little 1.0 mm long screw that wants to join the party!
Tools Used

Step 17

- Grab your trusty tweezers or just your fingers and gently lift off that lower connector cover. You've got this!
Tools Used

Step 18


- Use the spudger's point to gently lift and disconnect the battery press connector. Take your time—this isn't a race.
- When you're putting things back together, carefully position the connector over its socket. Press down with your finger or the flat end of the spudger—start on one side, then the other—until you hear that satisfying click. Don't rush it! If things aren't lining up, just reposition and try again. No force needed. If you're feeling stuck, feel free to schedule a repair.
Tools Used
Step 19


- Grab a tri-point Y000 screwdriver and gently loosen those four screws holding down the upper connector cover.
- Two of these screws are 1.0 mm long, so keep an eye on their size.
- One screw measures 1.2 mm in length—don't mix it up!
- And there's a single 1.6 mm screw to complete the set.
Tools Used
Step 20
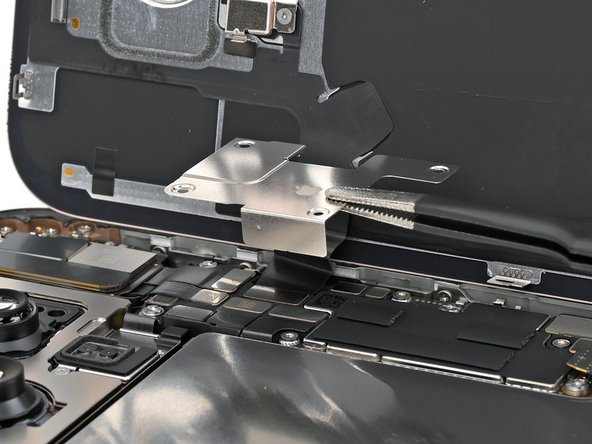

- Grab a pair of tweezers or use your fingers to gently lift off the top connector cover. Easy does it—just a light touch to get the job done.
Tools Used
Step 21

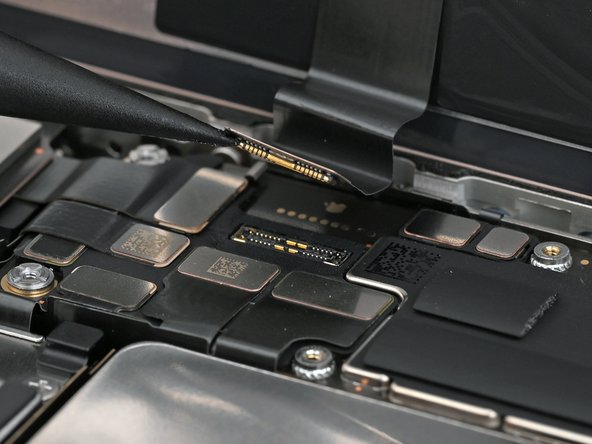
- Grab your trusty spudger and carefully use its point to lift up and disconnect the back glass press connector. A little patience goes a long way here!
Tools Used
Step 22

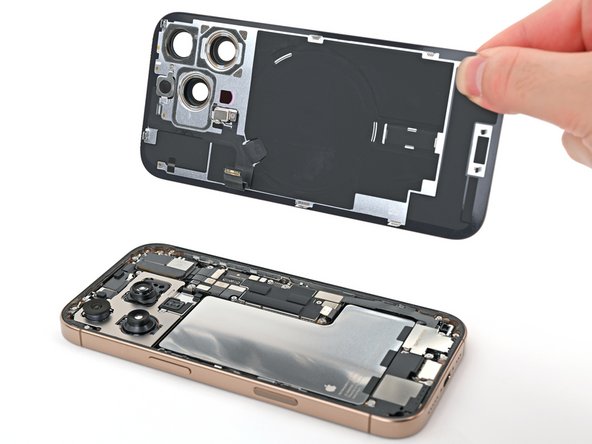
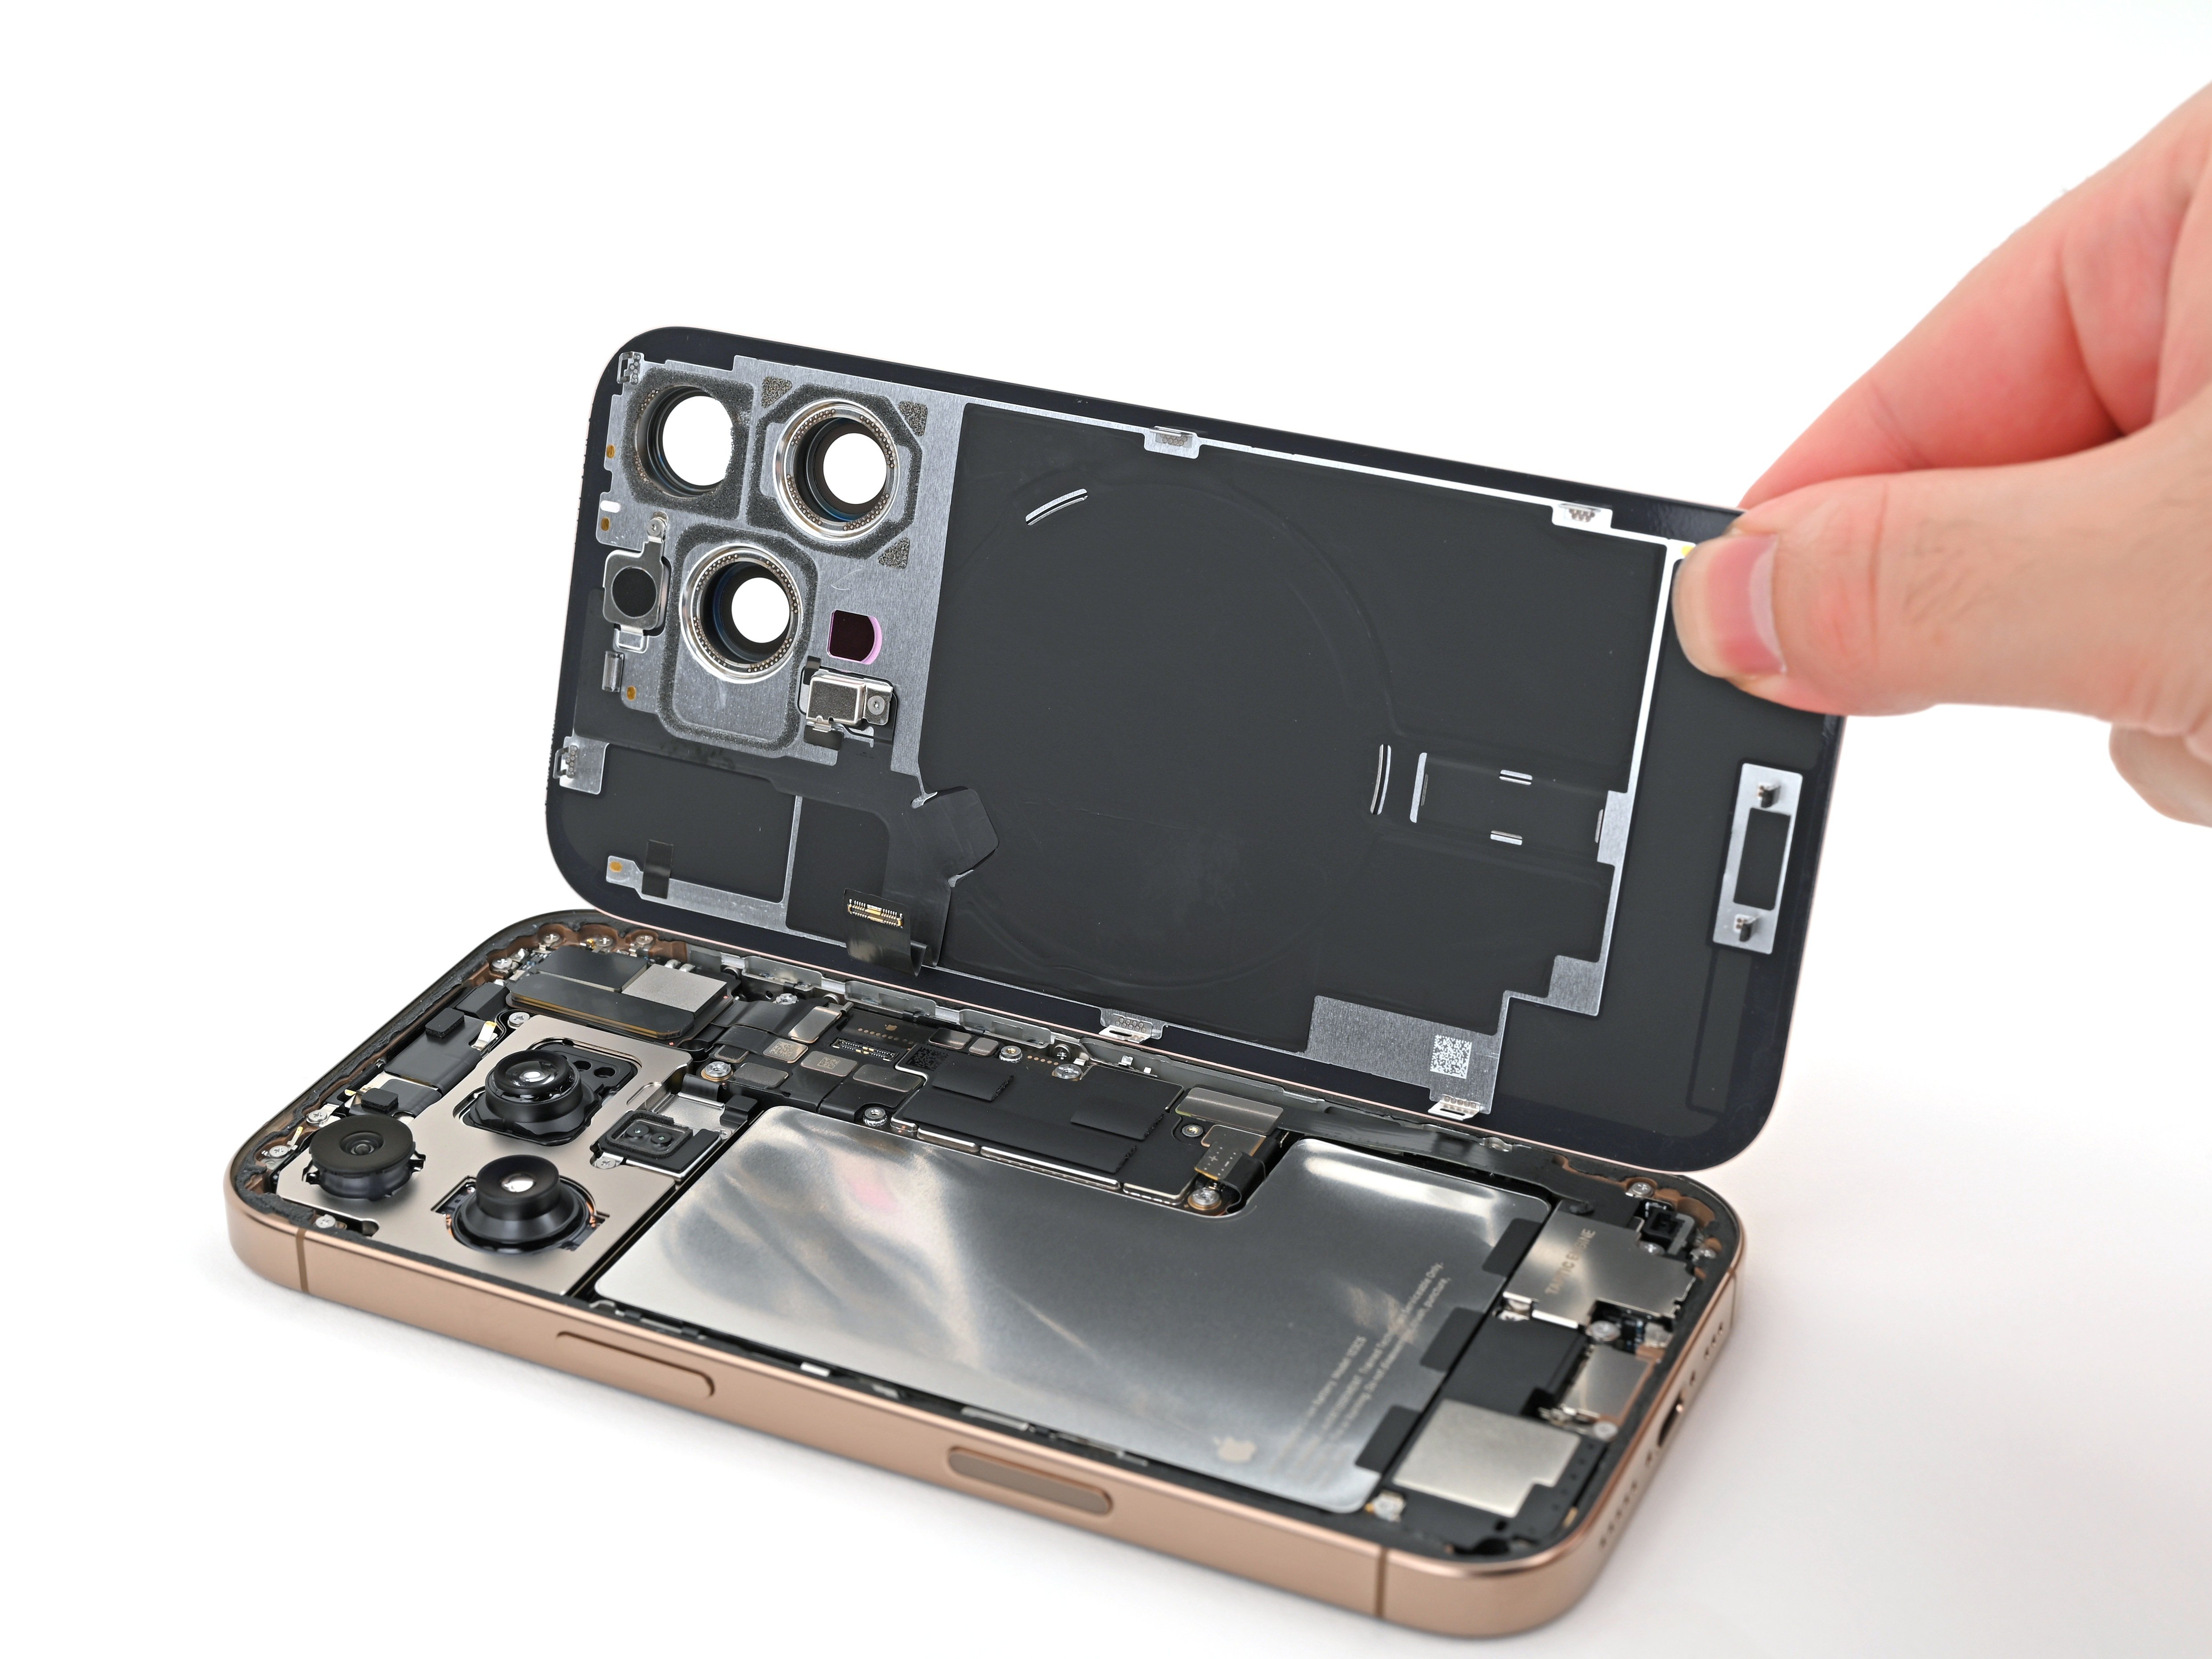
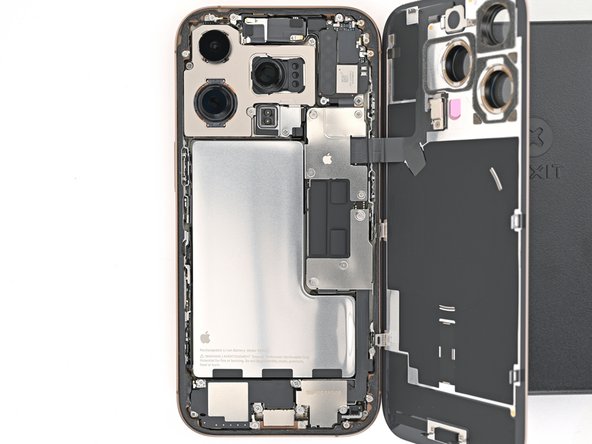
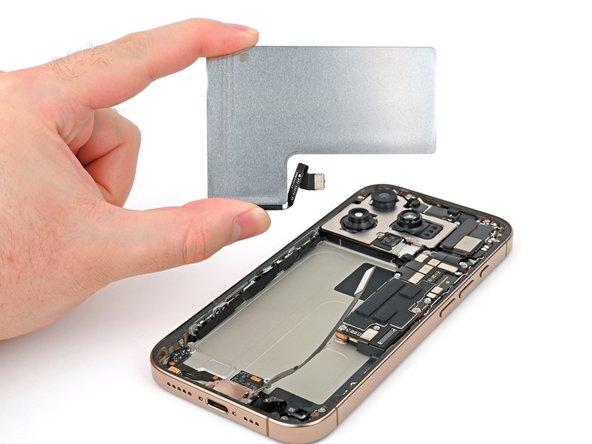
- Carefully lift the back glass off the frame and set it aside.
- When putting everything back together:
- Now’s a perfect moment to test your handiwork before sealing things up. Temporarily reconnect the battery and back glass (without applying new adhesive yet), power on the phone, and check that it’s working properly. Then power it down, disconnect the battery, and continue reassembling.
- Follow this guide to add fresh adhesive and reinstall the back glass.
Step 23


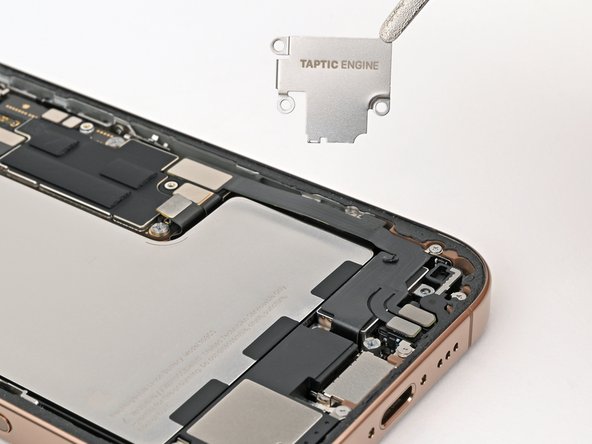
- Grab your Phillips screwdriver and gently remove the three screws holding down the Taptic Engine cover: one 3.0 mm-long screw and two 1.7 mm-long screws. Keep them handy—you'll need them to put everything back together. If you run into any trouble, remember you can always schedule a repair with Salvation Repair to get professional help.
Step 24


- Grab your tweezers or just use your fingers to gently lift the top edge of the Taptic Engine cover.
- Once the bottom edge pops free from the frame, go ahead and remove the Taptic Engine cover completely.
- When putting it back together, double-check that the bottom edge of the cover snaps securely into the frame.
Tools Used
Step 25


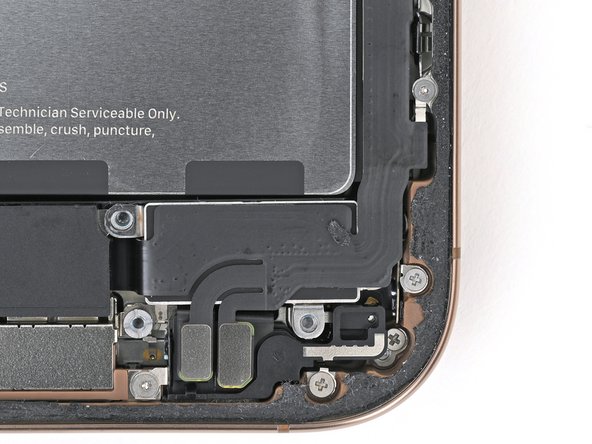
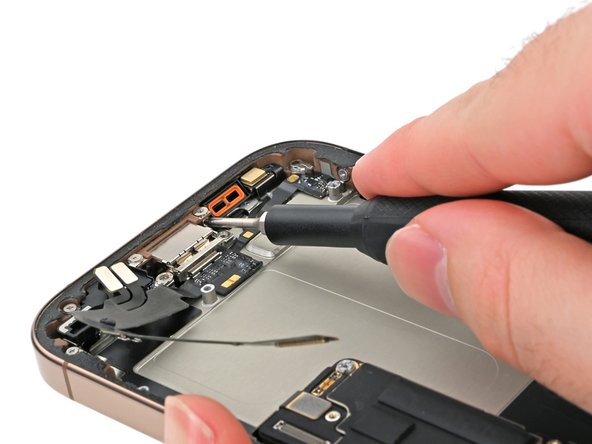
- Gently use the pointy end of a spudger to lift and unplug the lower assembly cable press connector from the logic board.
Tools Used
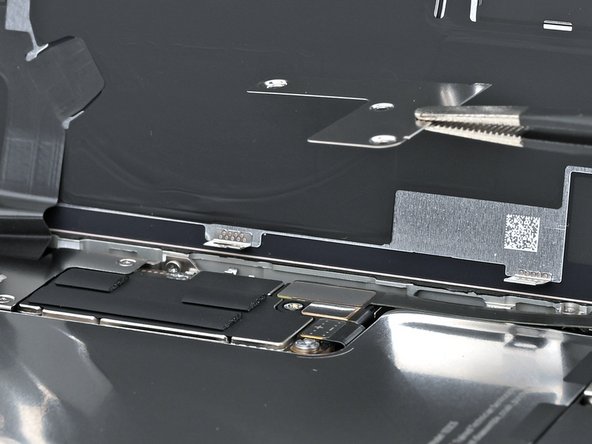
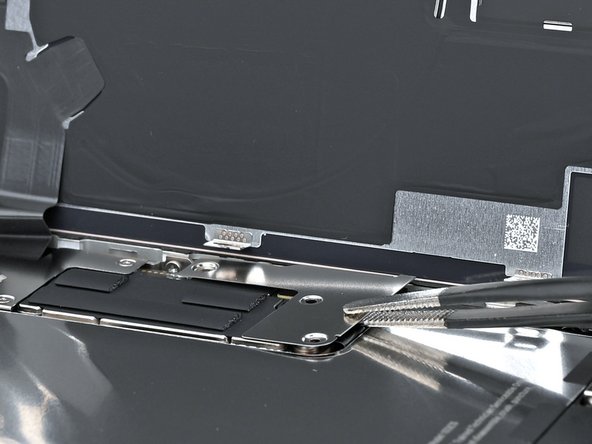
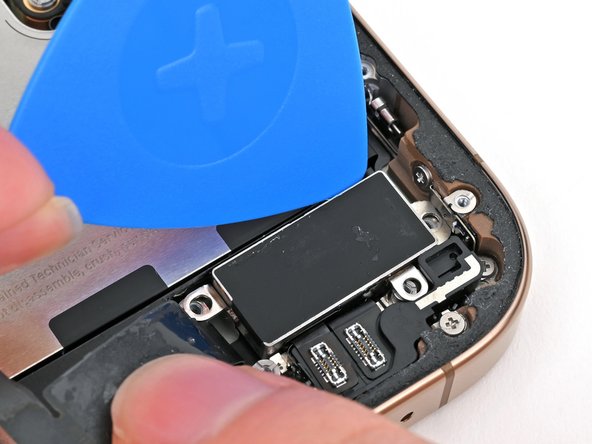
Step 26


- Take your trusty spudger and gently slide the tip underneath the two press connectors located near the bottom right edge of the frame. Give them a little nudge to disconnect them, and you're one step closer to success!
Tools Used
Step 27

- Grab your tri-point Y000 screwdriver and carefully remove the tiny 1.0 mm screw holding down the lower assembly cable. Keep it safe—you'll need it later! If you need help along the way, remember you can always schedule a repair.
Tools Used
Step 28


- Grab an iOpener or a hair dryer and gently warm up the lower assembly cable area right on top of the Taptic Engine until it feels nice and toasty to the touch.
Tools Used
Step 29

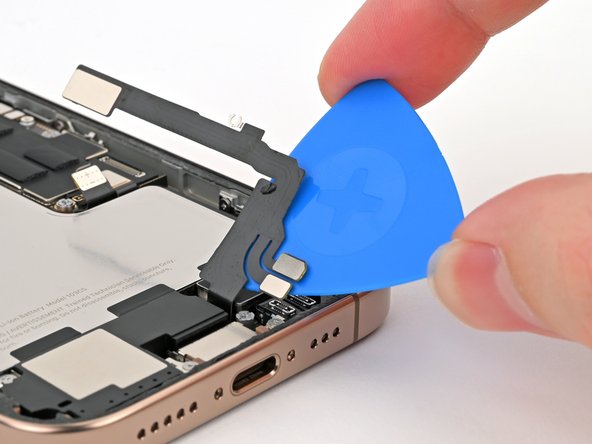
- Gently slide an opening pick under the lower assembly cable to loosen it from the Taptic Engine.
- Carefully nudge the cable aside to give yourself clear access to the Taptic Engine.
Step 30


- Grab your Phillips screwdriver and remove the 1.9mm-long screw that’s holding the Taptic Engine in place.
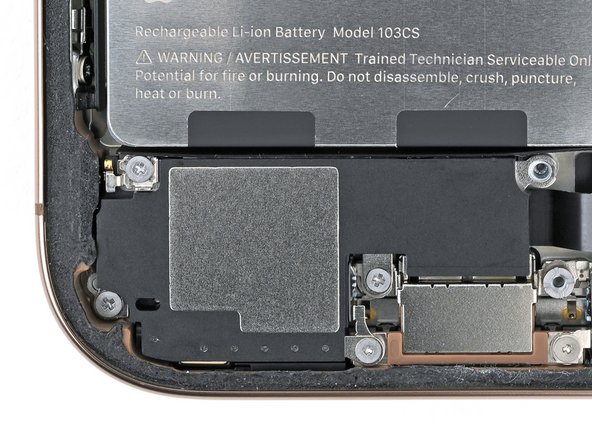
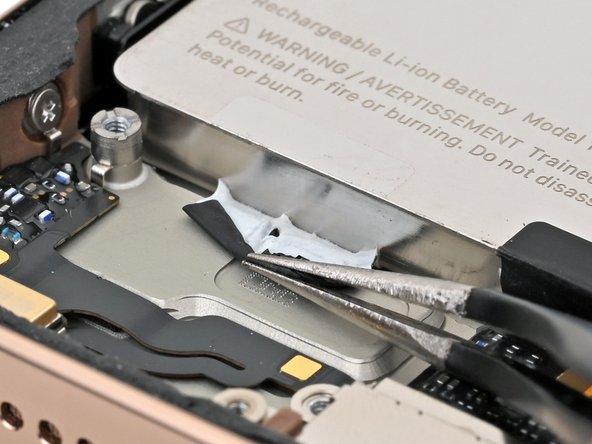
Step 31

- Gently slide the tip of an opening pick along the top edge of the Taptic Engine to peel away the plastic buffer strip stuck to it. Stay patient and steady—this step is all about careful separation. If you need a hand, you can always schedule a repair.
Step 32


Watch out! Avoid prying around the battery area, it's a no-go zone.
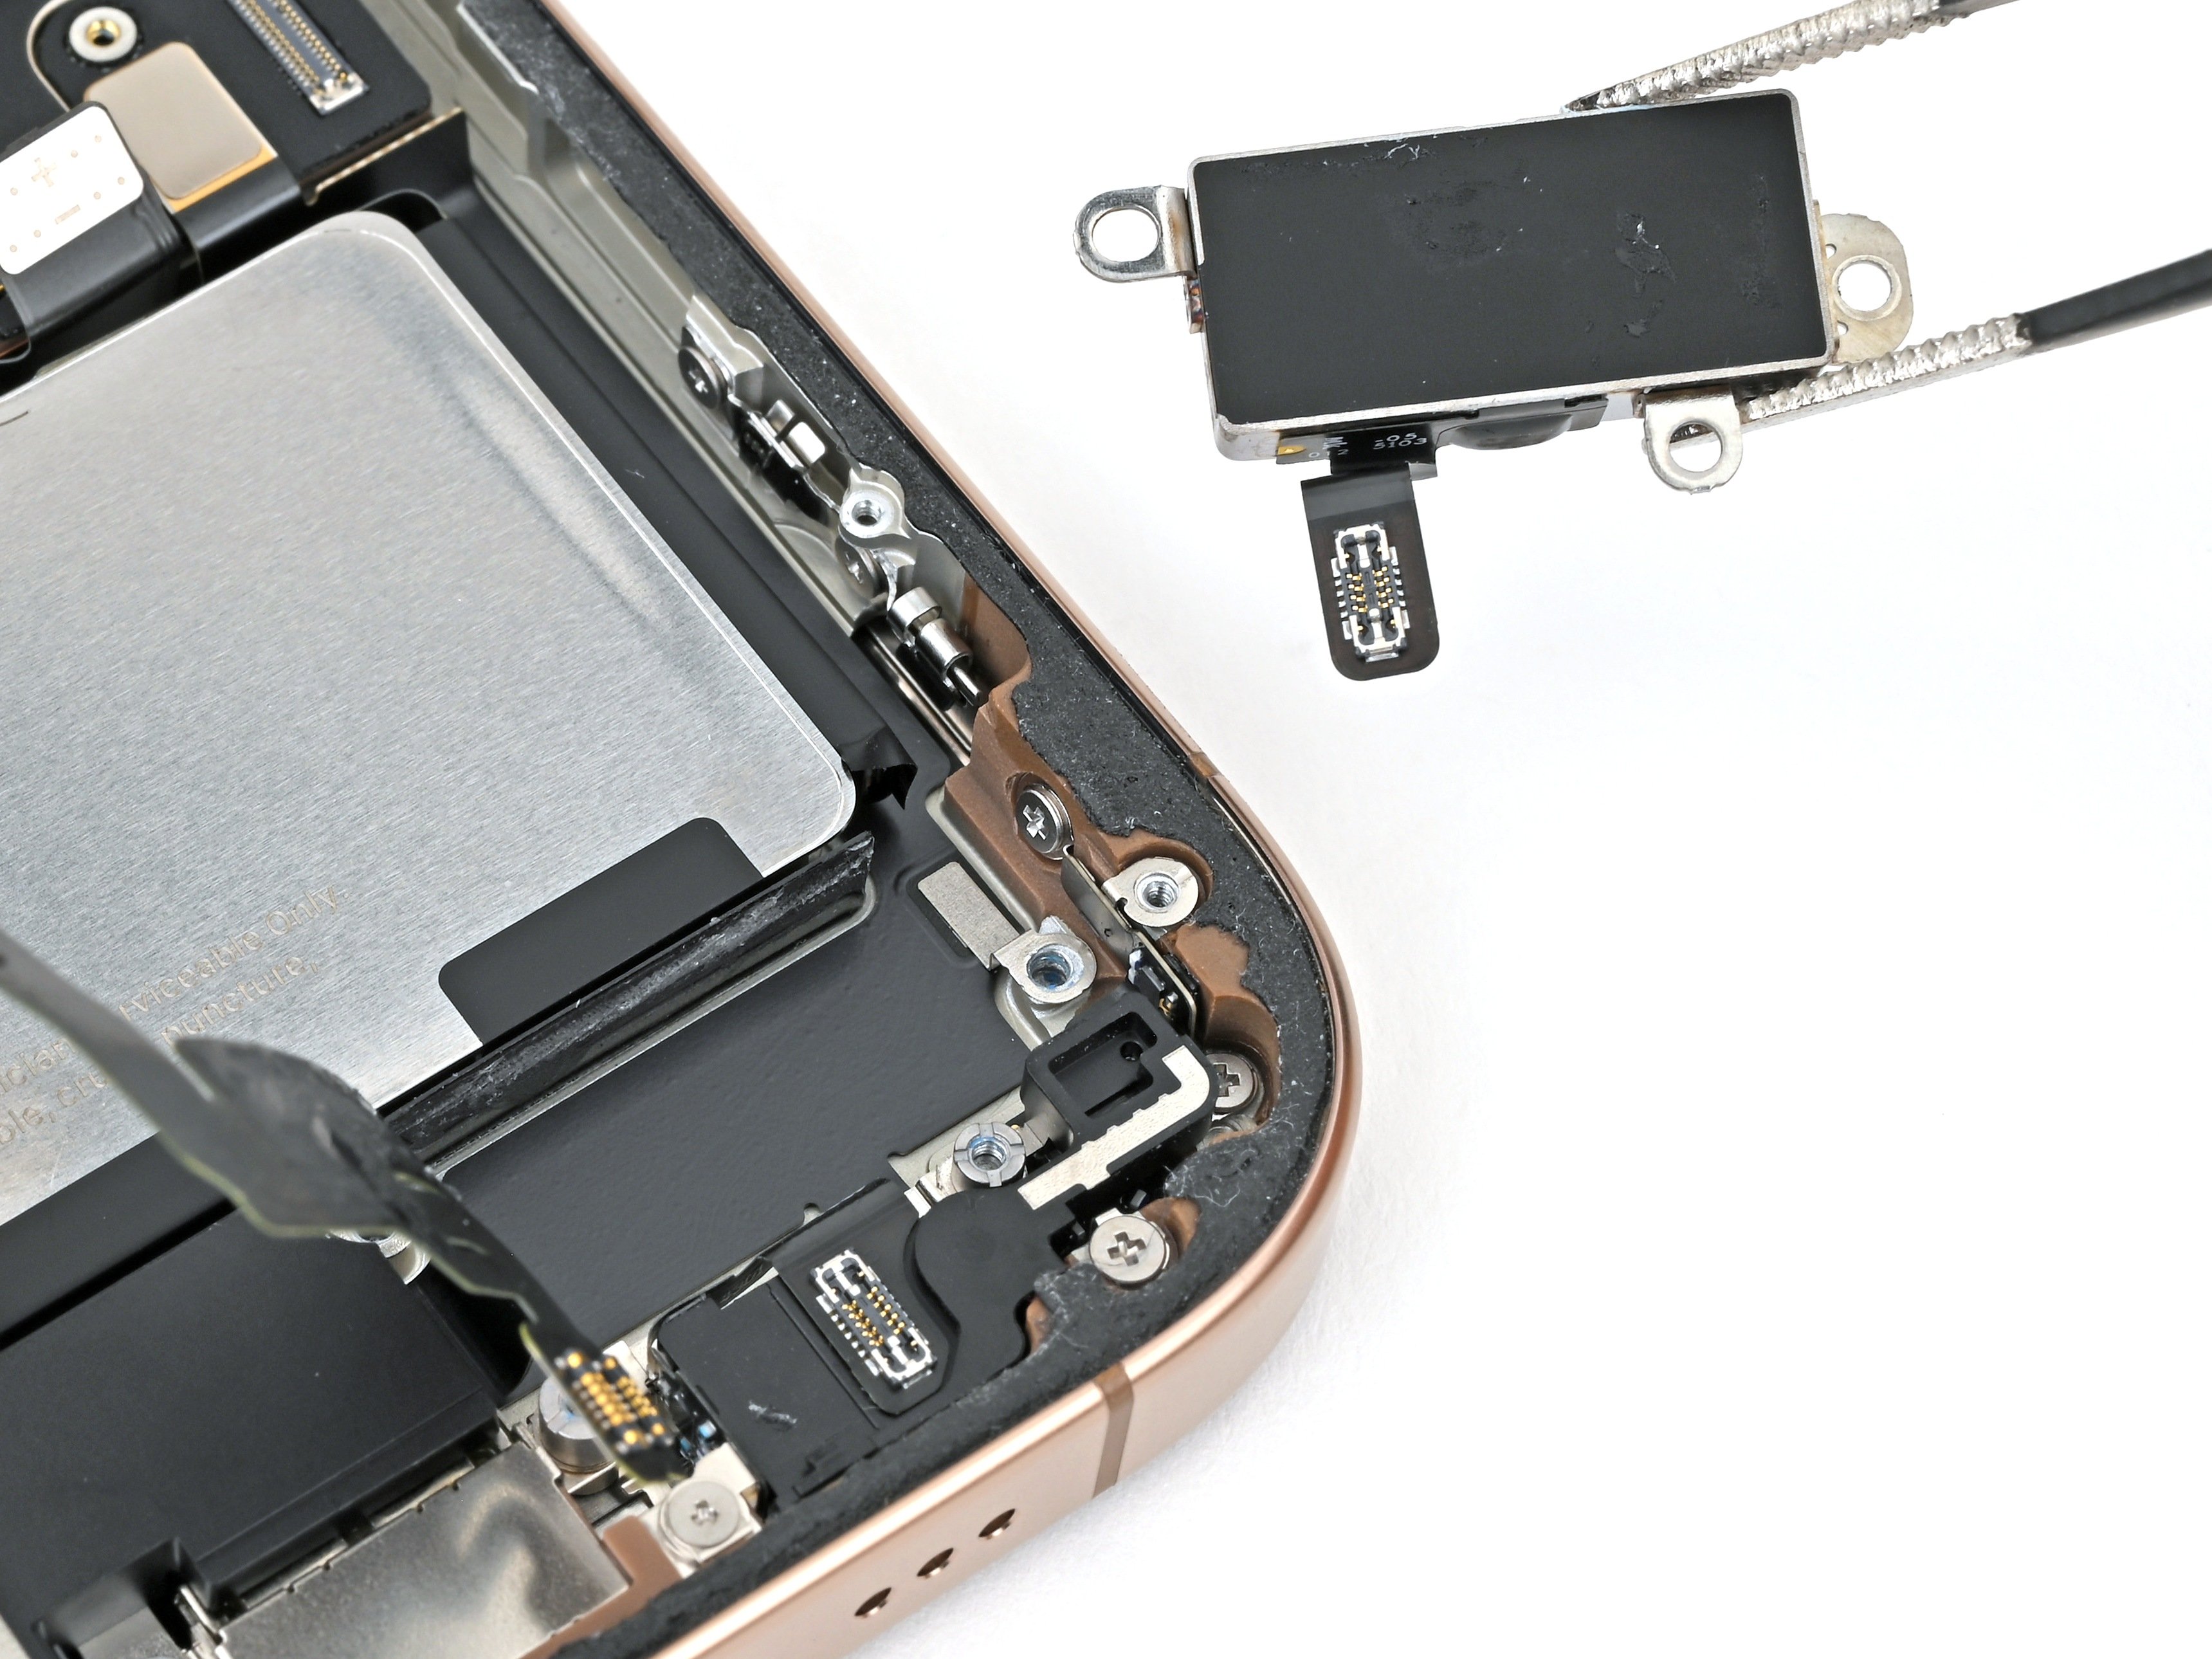
- Gently wedge the point of a spudger under the top-right corner of the Taptic Engine to lift it up.
- Take out the Taptic Engine carefully.
Tools Used
Step 33

- Start by removing the four screws holding down the loudspeaker:
- Two Phillips screws that are 1.6 mm in length
- One Phillips screw measuring 2.0 mm
- And one tri-point Y000 screw that's just 1.3 mm long
Step 34


- Use the spudger to gently slide it under the bottom-right screw hole of the loudspeaker.
- Now, carefully pry up and remove the loudspeaker.
Tools Used
Step 35

Handle the battery with care—avoid any dents or punctures. Even with its cool metal case, a damaged battery can still spark a fire, so take it easy during the process.
The battery is held in place by three stretch-release adhesive strips. The next four steps will guide you through removing them and freeing the battery with ease.
Step 36


- Gently slide the tip of your angled tweezers beneath one of the black pull tabs to get things moving.
Tools Used
Step 37


Hold off on yanking that tab out from beneath the battery for now. Patience, it’s all part of the process!
- Grab your trusty tweezers and gently slice through that black tab. Once you're done, peel it away from the top of the battery like a pro!
Tools Used
Step 38


If the strip snaps off, no worries—try fishing it out from under the battery. If it’s hiding too well, just move on to the next strip without stress.
Give the strip some time to stretch out, and grab it again if needed. When it gets a bit too long, wrap it around your tweezers and keep on pulling.
- Grab the pull tab with tweezers or your fingers and gently pull it down, making sure it's nice and flat against the frame.
- Now, carefully pull the adhesive from under the battery, keeping the angle as low as possible to avoid any sudden moves.
Tools Used
Step 39

Gently fold the lower assembly cable aside to get a clear shot at those adhesive strips.
- Go ahead and tackle those two remaining adhesive strips just like you did before! You've got this!
Step 40

If one or more of those adhesive strips decided to go on strike, no worries! Just move on to the next step and use some isopropyl alcohol to help remove them.
If your shiny new battery is missing its adhesive, check out this guide to get some fresh stretch release adhesive strips on there, or you can opt for some thin, double-sided tape to keep it snug. We totally recommend stretch release adhesive for a hassle-free removal down the line!
- Nice work! If you managed to peel off all three stretch release adhesive strips, go ahead and lift the battery out.
- When you're ready to pop in the new battery:
- Give the frame a good clean with some isopropyl alcohol and a lint-free or microfiber cloth. Let it dry completely before moving on.
- Before sticking down the adhesive, test fit it in its spot to make sure it sits right and the cable can reach the logic board socket. Hold off on reconnecting the battery for now.
Step 41

If the adhesive strips give way and the battery refuses to budge, don't worry—these next two steps show you how to remove the battery safely and smoothly. Keep at it, and you'll have it out in no time. If you need a hand, you can always schedule a repair.
- Gently lift the bottom edge of the frame to give the phone a little tilt.
- Grab a pipette or syringe and carefully drip 2–3 drops of strong (>90%) isopropyl alcohol along the bottom edge of the battery, right where those stubborn adhesive strips used to be.
- Give it a minute to let the alcohol sneak under the battery and loosen up that adhesive.
Step 42
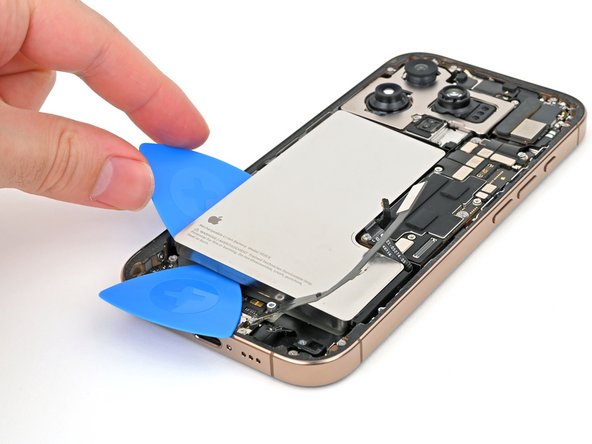

- Slide the tip of an opening pick between the bottom of the battery and the frame. Easy peasy!
- Next, slide in a second opening pick between the left edge of the battery and the frame. Gently pry the battery upwards with steady, even pressure, working your way along the edge. Give that adhesive a moment to let go!
- Once you feel that adhesive loosening up, go ahead and lift the battery out. You've got this!
- Now, for the fun part—installing your new battery:
- Start by giving the frame a good clean with some isopropyl alcohol and a lint-free or microfiber cloth. Let it dry completely before you pop in that shiny new battery.
- Before you stick on any adhesive, check that the battery fits snugly in its spot and that the cable reaches the logic board's socket. Just a heads up—don’t reconnect the battery yet!
Be gentle with the battery—don't bend or crease it. If it's being stubborn, just add a few more drops of isopropyl alcohol and give it another try. Stay patient, and if you need help, you can always schedule a repair.
If your new battery isn't pre-loaded with adhesive, no worries—just follow this guide to apply some new stretch release adhesive strips, or opt for a thin double-sided tape to hold it in place. We suggest using stretch release adhesive since it makes future removal a breeze. Need a hand? You can always schedule a repair for extra help.
Step 43

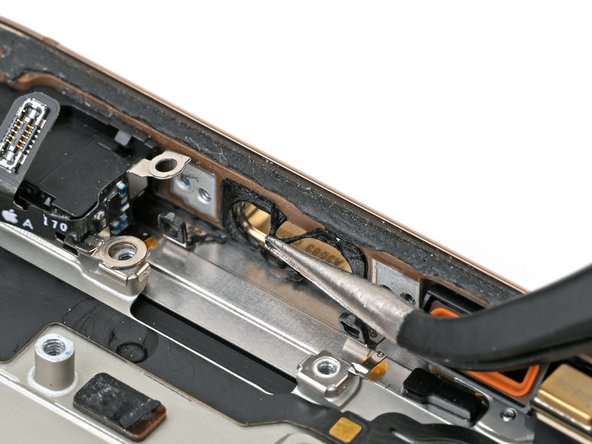
- Grab your standoff screwdriver and twist out the 3.6 mm screw holding the charging port to the frame. Easy does it!
Step 44

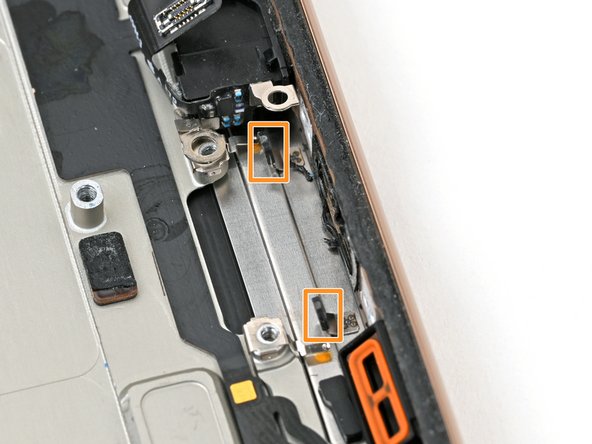
Don’t forget to remove the pentalobe screws first—if you leave them in, you won’t be able to get the back glass off later. Keep those screws safe so you can reassemble without a hitch!
These screws are snug and a bit shy to reach. Tilt your screwdriver as flat as possible to get a good grip and twist away!
- Grab your Phillips screwdriver and unscrew the pair of 3.4 mm screws that hold the charging port to the frame. When installing the new port, temporarily pop in the two external P2 pentalobe screws to help line everything up. Once aligned, tighten the port in place with the Phillips screws. If you need a hand, you can always schedule a repair.
Step 45

- Grab your tri-point Y000 screwdriver and gently remove the tiny 1.3 mm screw holding the charging port in place on the frame. If you run into any trouble, remember you can always schedule a repair with Salvation Repair to get professional help.
Tools Used
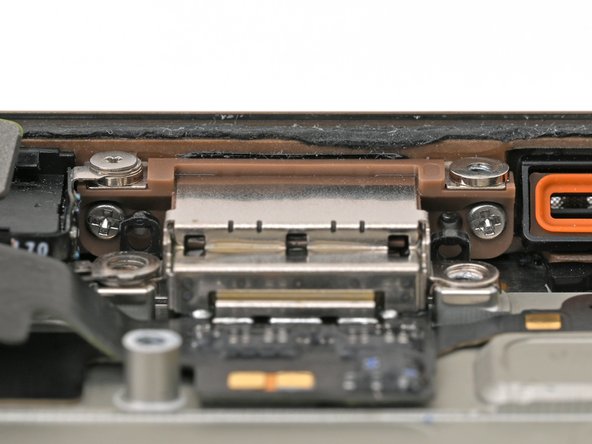
Step 46


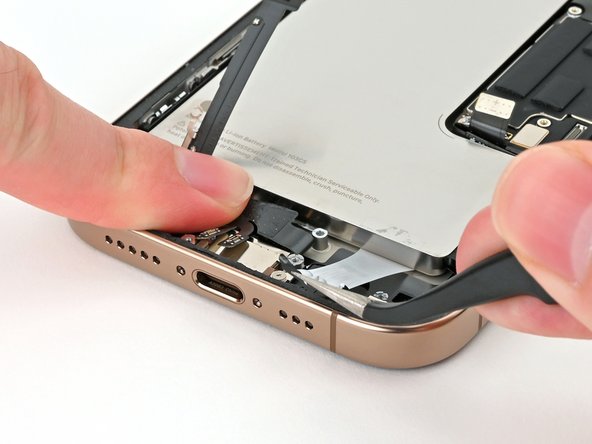
- Slide the tip of your spudger gently under one edge of the charging port.
- Carefully pry it up to loosen the gasket and lift the port out.
The charging port is sealed in place with a snug adhesive gasket that sticks against the bottom and edge of the frame. Plus, it's held behind a couple of prongs, which keep it from being pulled out easily. Take your time to carefully work around these features to free the port without damage. If you need help, you can always schedule a repair.
Tools Used
Step 47
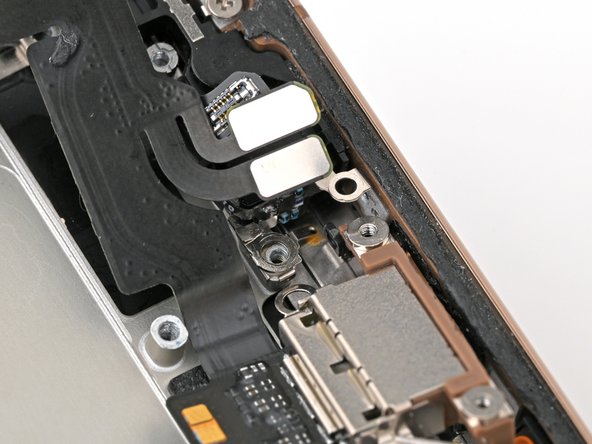
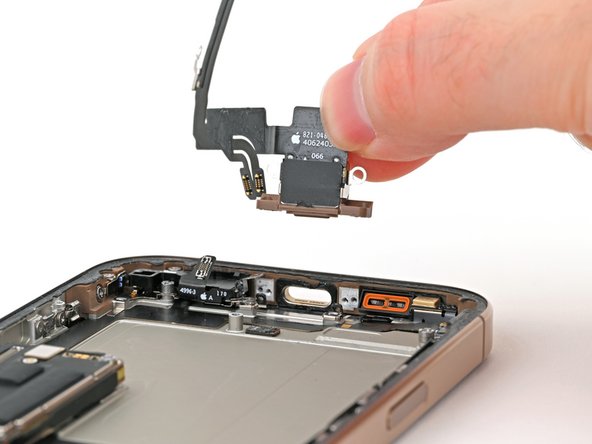

Hey there! When you're working with the port, remember not to yank it straight out from its cozy spot in the frame. It’s got two little prongs keeping it snug in place. Give it a gentle nudge instead!
- Gently nudge that charging port away from the microphone, giving it a little wiggle.
- Now, go ahead and carefully lift off the charging port. You've got this!
Step 48

- Ready to bring your iPhone back together? Just reverse the steps we went through, and you'll be all set!
- Got some old gadgets lying around? Don’t forget to drop them off at an R2 or e-Stewards certified recycler. Let’s keep our planet happy!
- If things didn’t quite go as expected, no worries! Give some basic troubleshooting a shot or check in with our awesome iPhone 16 Pro Answers community for a helping hand.
- Remember, you’ve got this!