iPhone 16 Pro Max Charge Port Replacement
Duration: 45 minutes
Steps: 84 Steps
Hey there! Before diving into this repair adventure, why not give that port a little clean-up love first?
This guide walks you through swapping out the USB-C charge port on your iPhone 16 Pro Max. If your charging port feels wobbly or your phone struggles to charge or connect, it might be time for a replacement. Before diving in, give the port a good clean—you might just save yourself some hassle if it’s only dirty. To complete this repair, make sure you have replacement adhesives for the microphone and back glass handy.
Step 1


Let that iPhone battery dip below 25%! A fully charged lithium-ion battery can be a bit of a drama queen when it comes to safety.
- Disconnect all cables from your iPhone to keep things safe and tidy.
- Press and hold the side (power) button along with either volume button, then slide to turn off your iPhone. If you need some help, you can always schedule a repair.
Step 2


Find a nice, flat spot on the lower edge that's big enough for a suction cup to get a good grip. You got this!
- If your screen or back glass is on the struggle bus with cracks galore, grab some packing tape and lay down some overlapping strips over the glass. This will help keep you safe from glass shards and make the disassembly a breeze.
Tools Used

Step 3


- Grab your P2 pentalobe screwdriver and carefully remove the two 7.4 mm screws on each side of the charge port. Easy does it—just a gentle twist and they’ll come right out. If you need a hand, you can always schedule a repair.
Step 4


- Grab your opening pick and mark a spot 3 mm from the tip using a permanent marker. This little guide mark will keep you on track!
Be careful not to insert your opening pick too deep, as it could harm your device. To avoid this, mark your pick with a measurement, like a small line or dot, so you know when you've gone far enough. You can also mark different corners of the pick with different measurements for extra precision. Alternatively, tape a coin about 3 mm from the tip of the pick to act as a depth stop. Taking these steps helps keep your device safe during the process. If you need assistance, you can always schedule a repair.
Tools Used

Step 5

Ready to dive in? The next couple of steps will show you how to make that crucial first gap using a handy suction handle. Let's get started!
Want to warm things up a bit? An iOpener can help heat up the back glass. Just follow these simple instructions to get it warmed properly and make your repair journey smoother.
- Grab your trusty hair dryer or heat gun and warm up the bottom edge of that back glass until it's nice and toasty!
Tools Used


Step 6


No visible gap? No worries—just warm up the edge a bit more and give it another go. Keep at it, you're doing great!
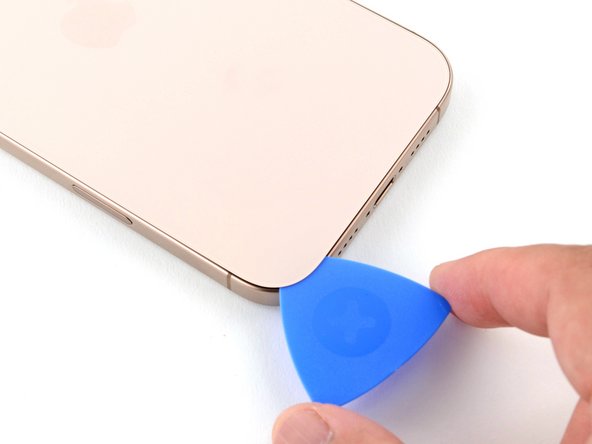
- Stick a suction cup onto the bottom edge of the back glass, giving it a good grip.
- Pull gently but firmly on the handle to loosen the back glass from the frame, creating a small gap.
- Carefully slide the tip of an opening pick into that gap to start lifting the back panel.
Tools Used
Step 7

As you carefully cut through the adhesive holding the back glass in place, remember to keep your pick no deeper than 3 mm to steer clear of any sensitive areas below. You've got this!
- Here's a heads-up: there's a delicate cable connecting the back glass to the iPhone, right next to the volume up button. Be gentle—avoid inserting your pick here to prevent slicing the cable. Also, keep an eye out for the multiple spring contacts around the perimeter of the iPhone—they might want to give you a little handshake when you're working. Take your time and handle each component carefully. If you need help, you can always schedule a repair.
Step 8

If you're finding it tough to slice through that adhesive, give the edge a little heat for about a minute and then give it another go!
- Gently glide the opening pick along the bottom edge to cut through that sticky adhesive like a pro.
- Once you've made some progress, tuck that pick into the bottom-left corner to keep the adhesive from sneaking back into place.
Step 9

- Grab that hair dryer or heat gun and warm up the left side of the back glass until it feels nice and toasty!
Tools Used
Step 10


Be careful not to push your pick in more than 3 mm—let's keep those spring contacts safe and sound!
As you glide through, you'll hear and feel those little metal clips popping free!
- Pop a second opening pick into the bottom-left corner, right next to the first one, to help pry things apart.
- Gently slide your pick along the left edge to separate the adhesive and unclip the metal tabs.
- Keep that pick in the top-left corner to stop the adhesive from sticking back together.
Step 11

- Grab a hair dryer or heat gun and gently warm up the top edge and top-right corner of the back glass until they feel nice and warm to the touch.
Tools Used
Step 12


Be gentle when inserting your pick—no more than 3 mm deep—to keep those spring contacts safe and sound. Go slow and steady, and if in doubt, schedule a repair for extra help.
- Gently slip a third opening pick into the top-left corner to get things started.
- Carefully slide the pick along the top edge, navigating around the top-right corner, stopping just above the volume up button.
- Keep this pick in place to hold the adhesive back and prevent it from sealing back up. If you need help, you can always schedule a repair.
Step 13

- Grab a hair dryer or heat gun and gently warm up the right edge of the back glass until it feels nicely warm to the touch. Keep it moving to avoid overheating any one spot. If you need a hand, you can always schedule a repair.
Tools Used
Step 14


Keep your pick no deeper than 3 mm to steer clear of any damage to the spring contacts. A little goes a long way!
- Pop a fourth opening pick into the bottom-right corner like a pro.
- Gently slide that pick around the corner and cruise up the right edge, stopping just below the volume down button.
- Keep this pick in place to hold back the adhesive from sealing up on you.
Step 15


- Gently swing the back glass open to the right to break free the last bits of adhesive holding it down.
- Prop up the back glass with a clean, sturdy object to keep it safe and steady.
By now, the back glass should be loosened from the frame. If it still feels like it's sticking, gently go around the edges with your pick again to check for any stubborn adhesive spots or clips that might have been missed. Keep at it—patience is key, and if you need a hand, you can always schedule a repair.
Step 16

- Grab a tri-point Y000 screwdriver and gently remove the three screws holding down the battery connector cover. You'll find two screws measuring 1.3 mm and one smaller screw at 1.0 mm. Take your time and keep track of these tiny fasteners—you're doing great! If you need a hand, you can always schedule a repair to get professional help.
Step 17


- Gently lift off the cover that protects the battery connector. Get ready to dive in!
Step 18


- Gently use the point of a spudger to lift and unplug the battery press connector.
Tools Used

Step 19

- Grab your tri-point Y000 screwdriver and gently unscrew the four screws holding down the back glass connector cover:
- Two screws are 1.3 mm long
- Two screws are 1.0 mm long
Step 20


- Gently pop the back glass connector cover straight up and set it aside like a pro!
Step 21


- Gently use the tip of your spudger to lift and disconnect that back glass connector. You've got this!
Tools Used
Step 22

- Carefully pop off the back glass to expose the inner magic.
Step 23


- Grab your trusty Phillips screwdriver and remove the three screws holding the Taptic Engine cover in place:
- One screw that’s 2.9mm long
- One screw that’s 1.3mm long
- One screw that’s 2.4mm long
Step 24


- Grab those tweezers or just your trusty fingers and gently lift the top edge of the Taptic Engine cover. You've got this!
- Once the bottom edge pops free from the frame, go ahead and take off the Taptic Engine cover like a pro.
Tools Used

Step 25


- Gently wedge the tip of a spudger under the lower assembly cable and lift it off the logic board to unplug it.
Tools Used
Step 26


- Grab your spudger and gently pry up to disconnect the two connectors near the bottom right corner of the frame. Keep it steady and careful—you're almost there!
Tools Used
Step 27


- Start by removing the two screws holding down the lower assembly cable: a tiny 1.0 mm tri-point Y000 screw and a slightly longer 1.3 mm Phillips screw. Keep these screws safe—they’re small but mighty! If you need a hand, you can always schedule a repair to get expert help.
Step 28

- Grab a hair dryer and gently warm up the lower assembly cable area on top of the Taptic Engine until it feels warm to the touch. This helps soften the adhesive and makes the next steps easier. If you need any assistance, you can always schedule a repair.
Tools Used
Step 29


- Gently slide an opening pick under the lower assembly cable to lift it away from the Taptic Engine.
- Carefully fold the cable aside so you have clear access to the Taptic Engine.
Step 30

- Grab a Phillips screwdriver and unscrew the tiny 2.1 mm screw holding in the Taptic Engine. You've got this—just a small turn to free it up. If you need a hand, you can always schedule a repair.
Step 31


- Grab your spudger and gently pry the corner bracket up, using the point to get underneath it. Keep it steady and lift it away—you're on your way! If you need a hand with tools or steps, you can always schedule a repair.
Tools Used
Step 32


- Carefully slide the tip of your opening pick along the top edge of the Taptic Engine to gently peel away the plastic buffer strip stuck to it.
Step 33


Watch out for the battery while you're at it! We don't want any accidental prying here.
- Gently nudge the Taptic Engine upwards with the pointed end of a spudger.
- Carefully take out the Taptic Engine.
Tools Used
Step 34


- Start by removing the four screws holding down the loudspeaker. You'll find one 1.7 mm Phillips screw, one 1.5 mm Phillips screw, a 4.1 mm standoff screw, and a 1.3 mm tri-point Y000 screw. Keep track of each screw as you go—these tiny fasteners are sneaky! If you need a hand, you can always schedule a repair to get professional help.
Step 35


- Use the spudger to gently slip underneath the bottom-right screw hole of the loudspeaker.
- Once you've got it in, carefully pry up and lift out the loudspeaker.
Tools Used
Step 36

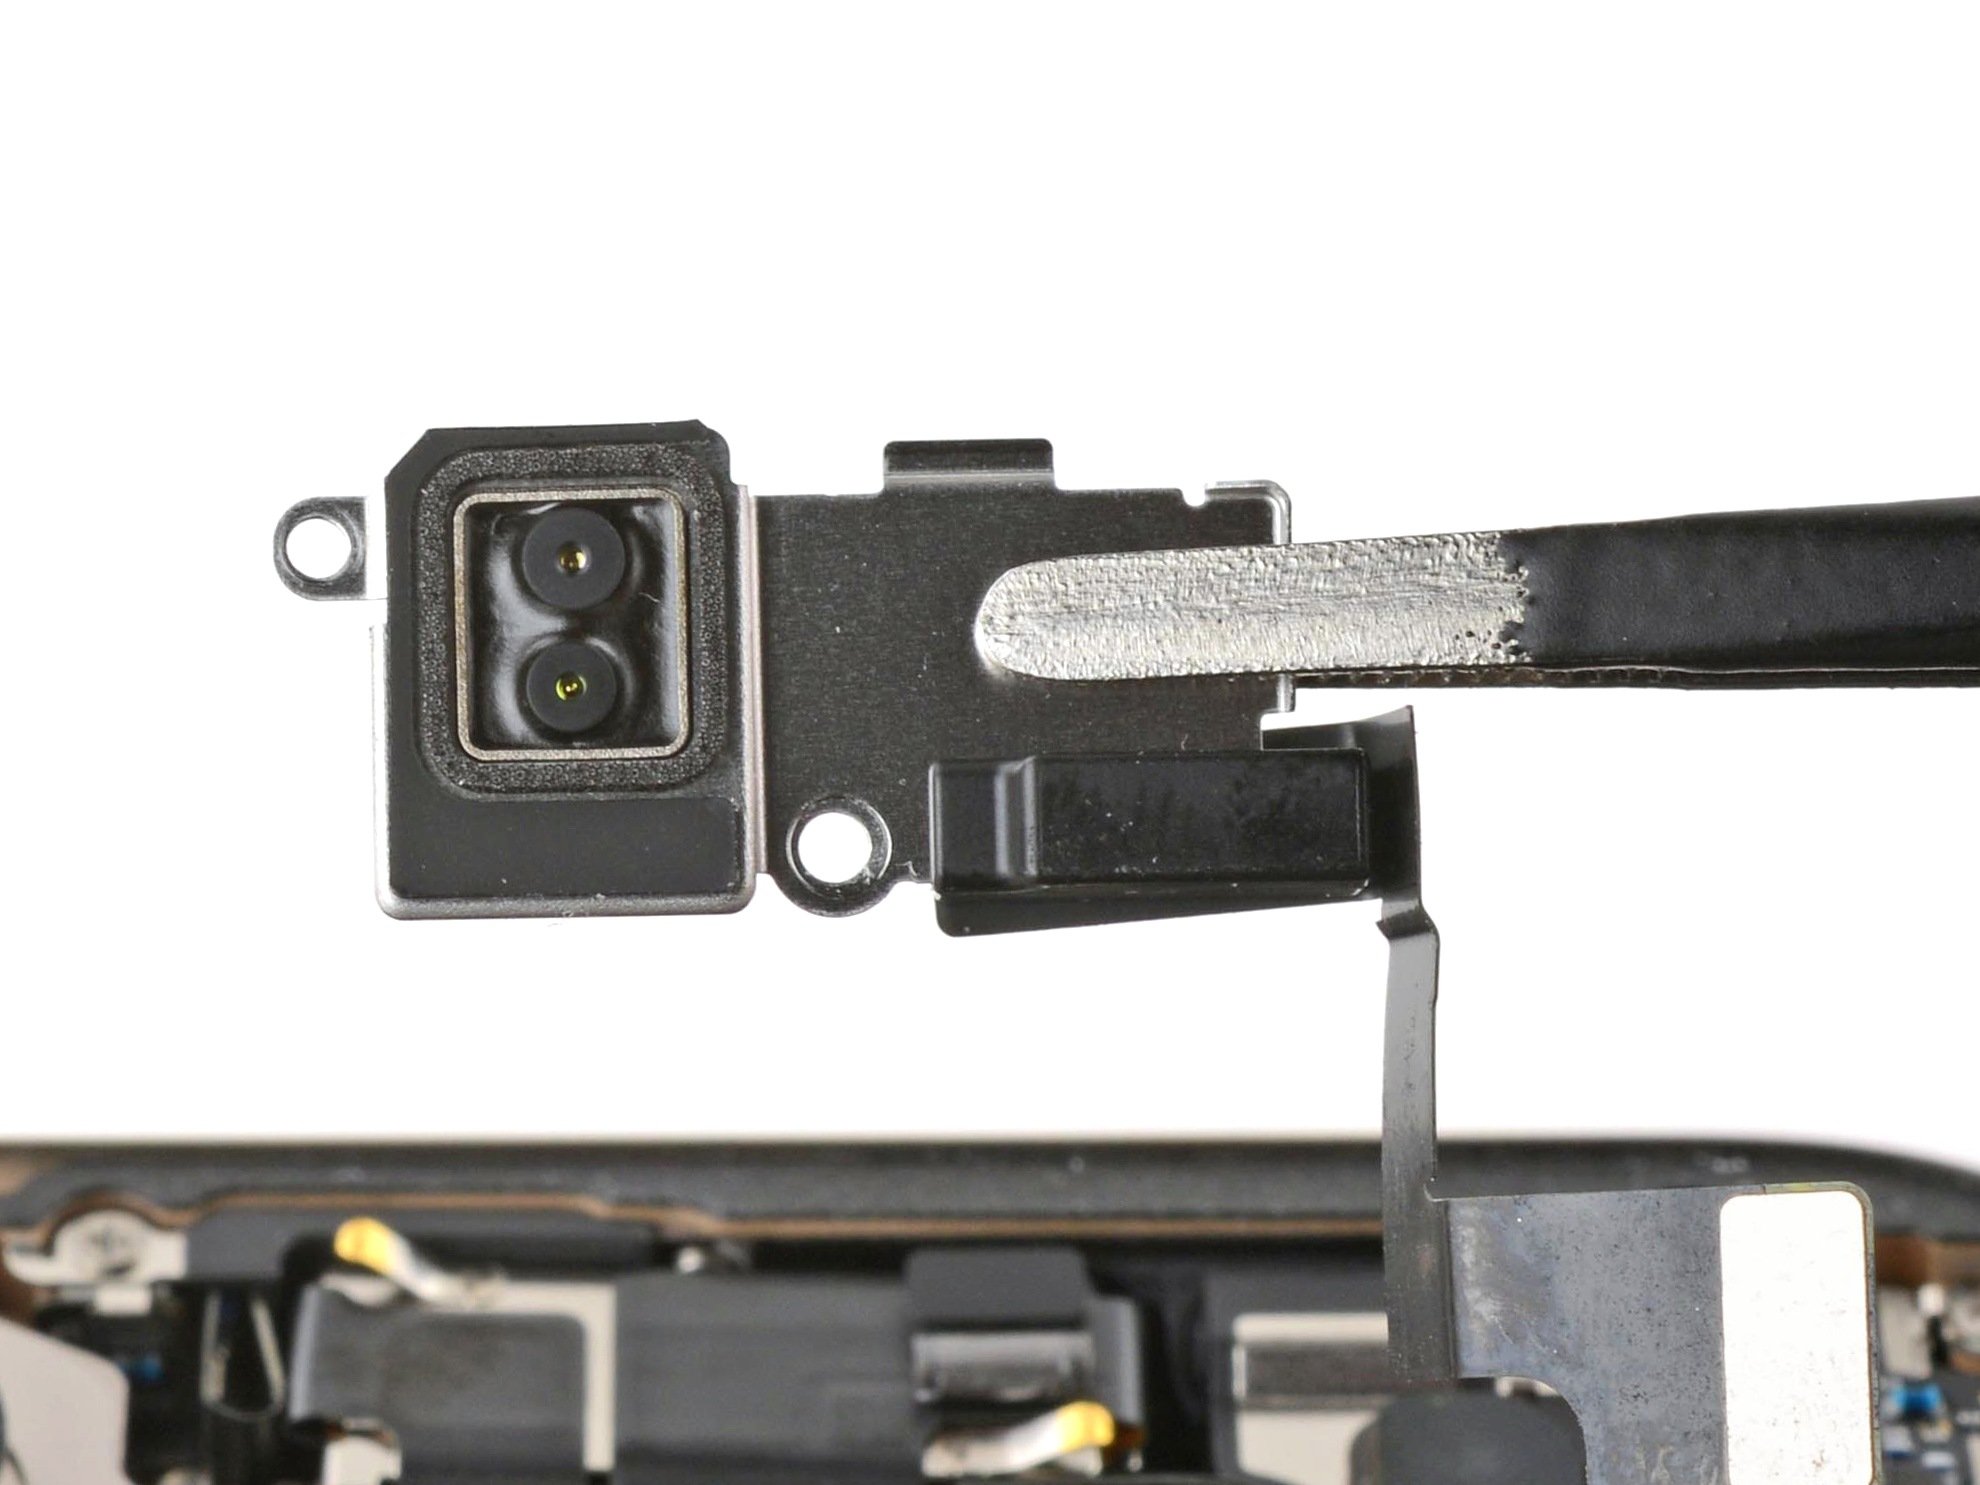
- Start by removing the trio of screws holding down the bottom microphone: first, the 3.4 mm‑long standoff screw, then the 3 mm‑long standoff screw, and finally the tiny 1.4 mm‑long tri-point Y000 screw. Keep track of these small fasteners—they're the key to getting everything back together smoothly. If you hit a snag or need a hand, you can always schedule a repair.
Step 37


Avoid prying on the battery—it’s delicate and could get damaged if you’re too rough.
As you tackle this step, you might notice a bit of pushback as the microphone breaks free from its sticky home. Keep at it, you've got this!
- Grab your trusty spudger and gently nudge up that bottom microphone. It's like giving it a little lift!
- Once it’s up, go ahead and detach the bottom microphone. You've got this!
Tools Used
Step 38

- Grab your trusty tweezers or just your fingers, and gently peel away the old adhesive gasket from the bottom of the frame. It's like unwrapping a present, but way less exciting!
Tools Used
Step 39


These screws can be pretty stubborn and tricky to get to. Try angling your screwdriver as flat as you can, but remember to avoid pressing against the battery. You've got this!
- Grab your Phillips screwdriver and carefully unscrew the two 3.3 mm-long screws holding the charge port in place on the frame.
Step 40


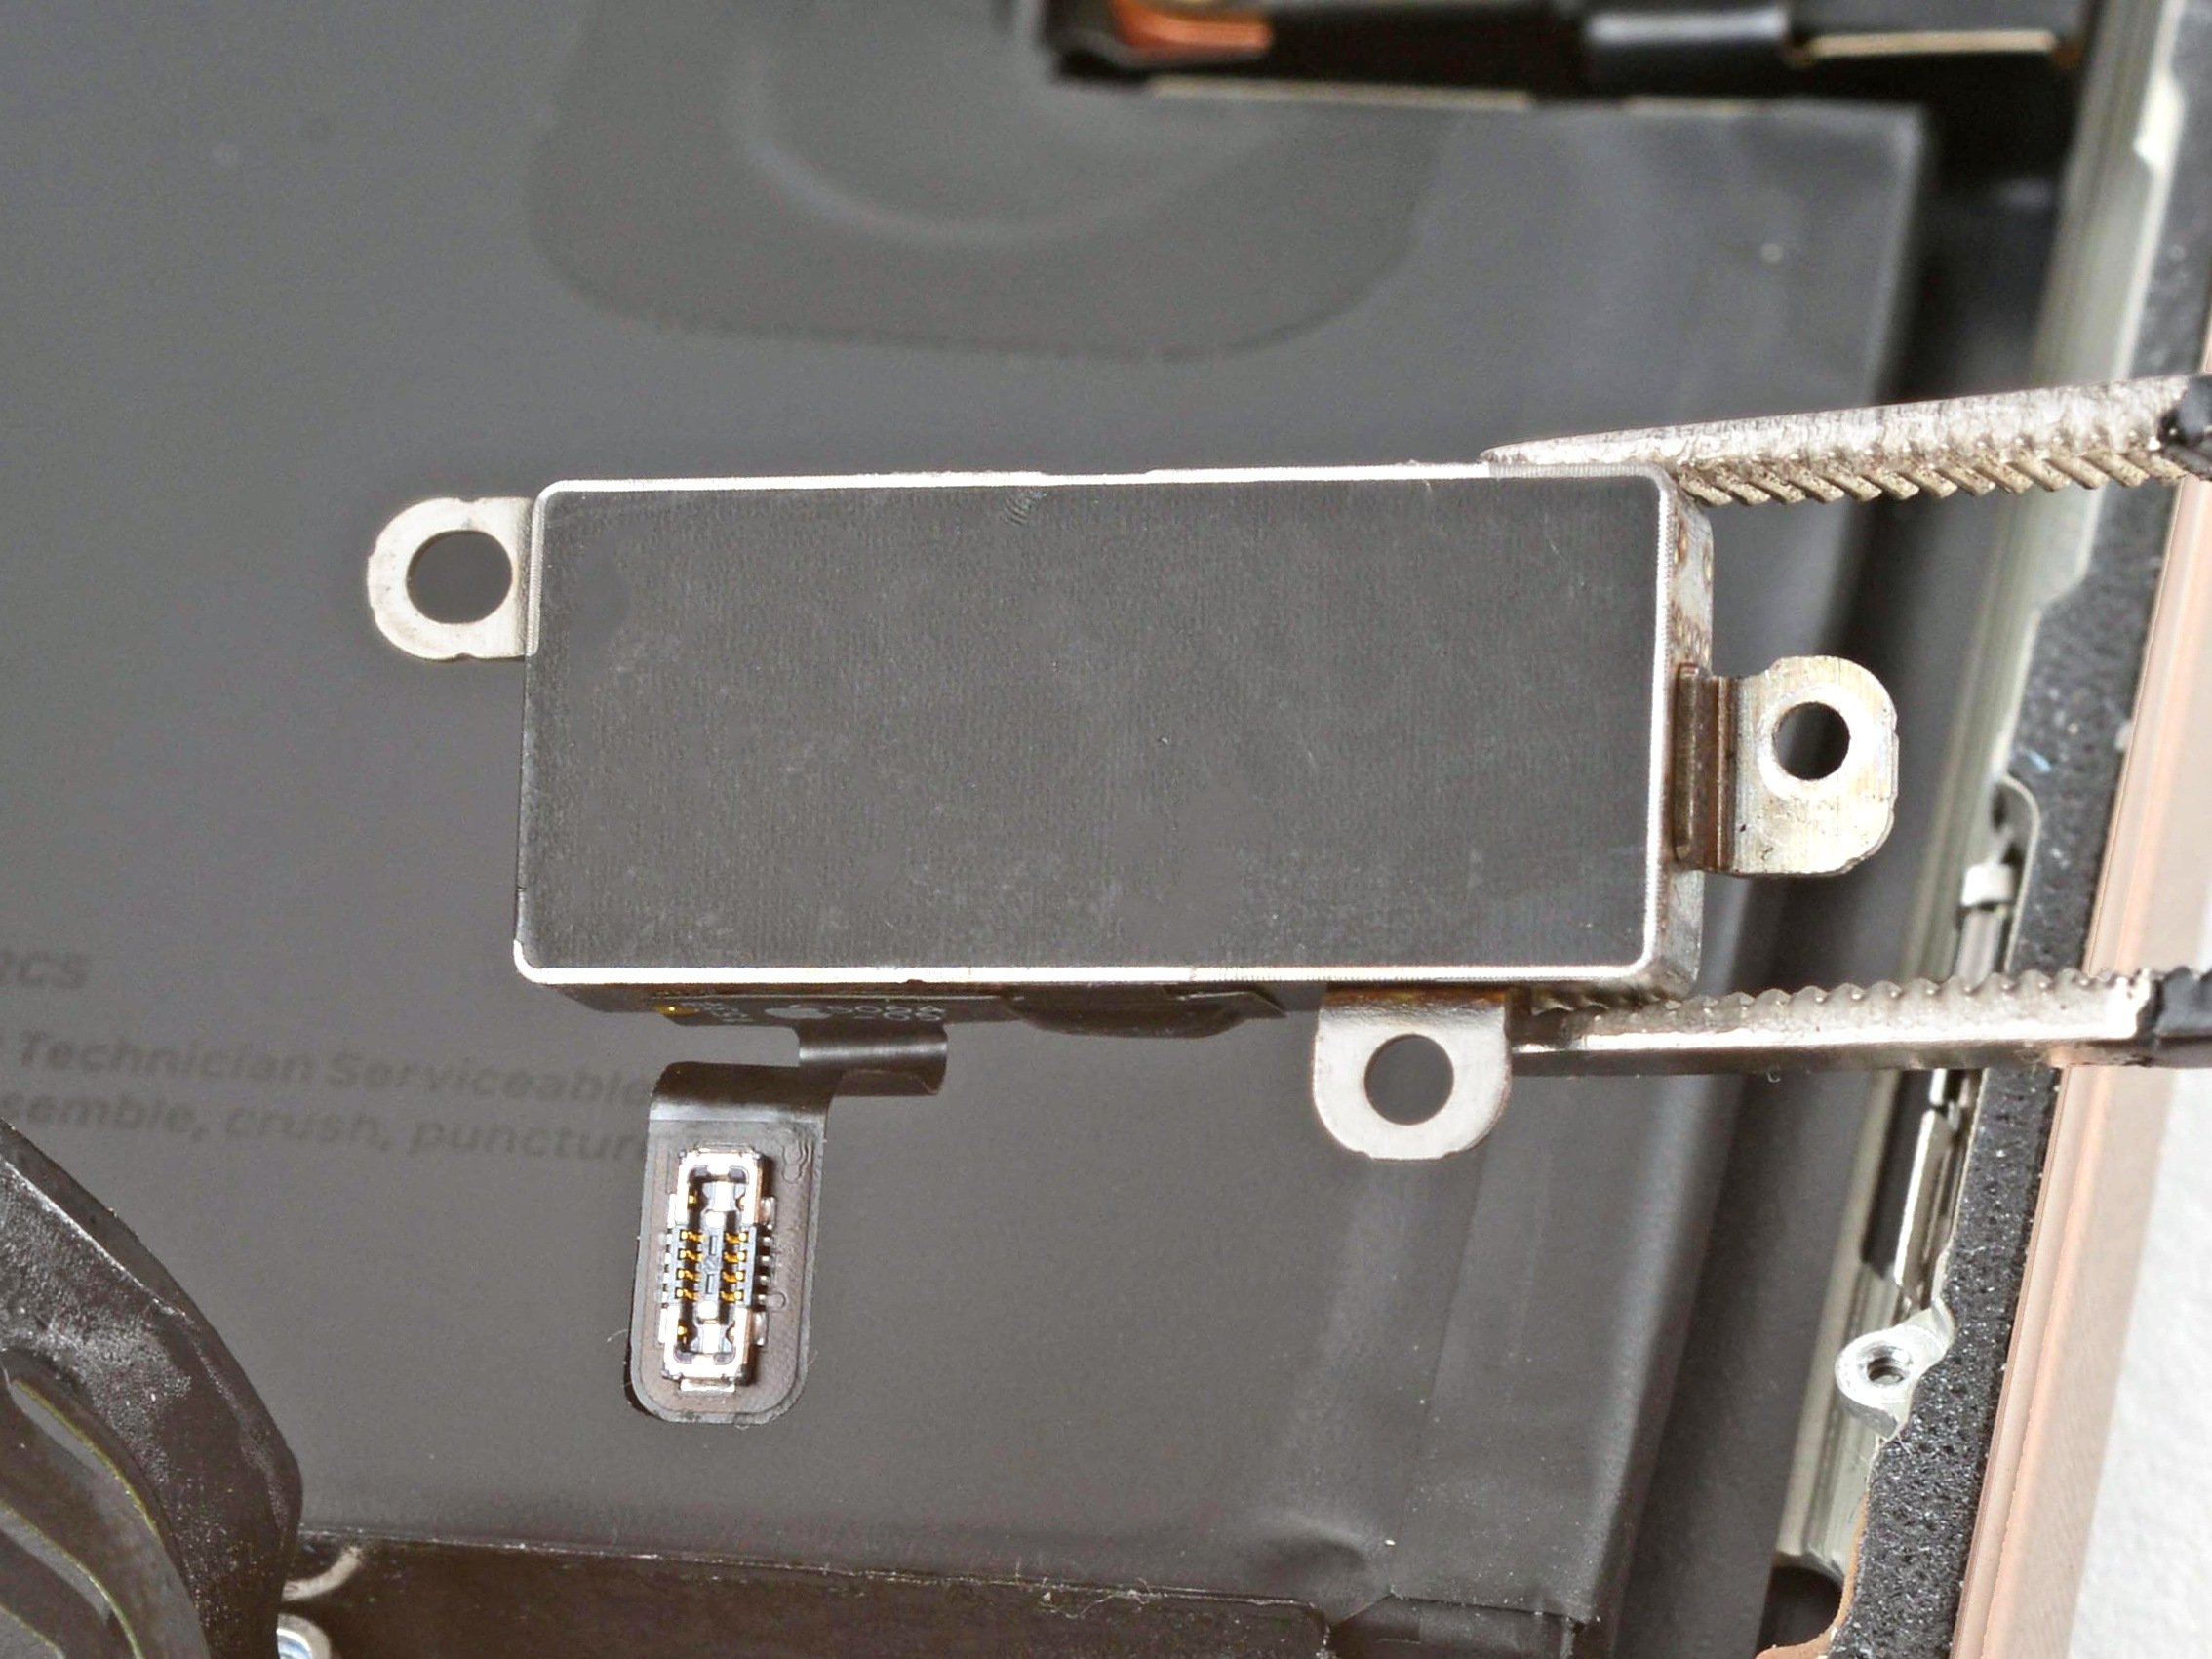
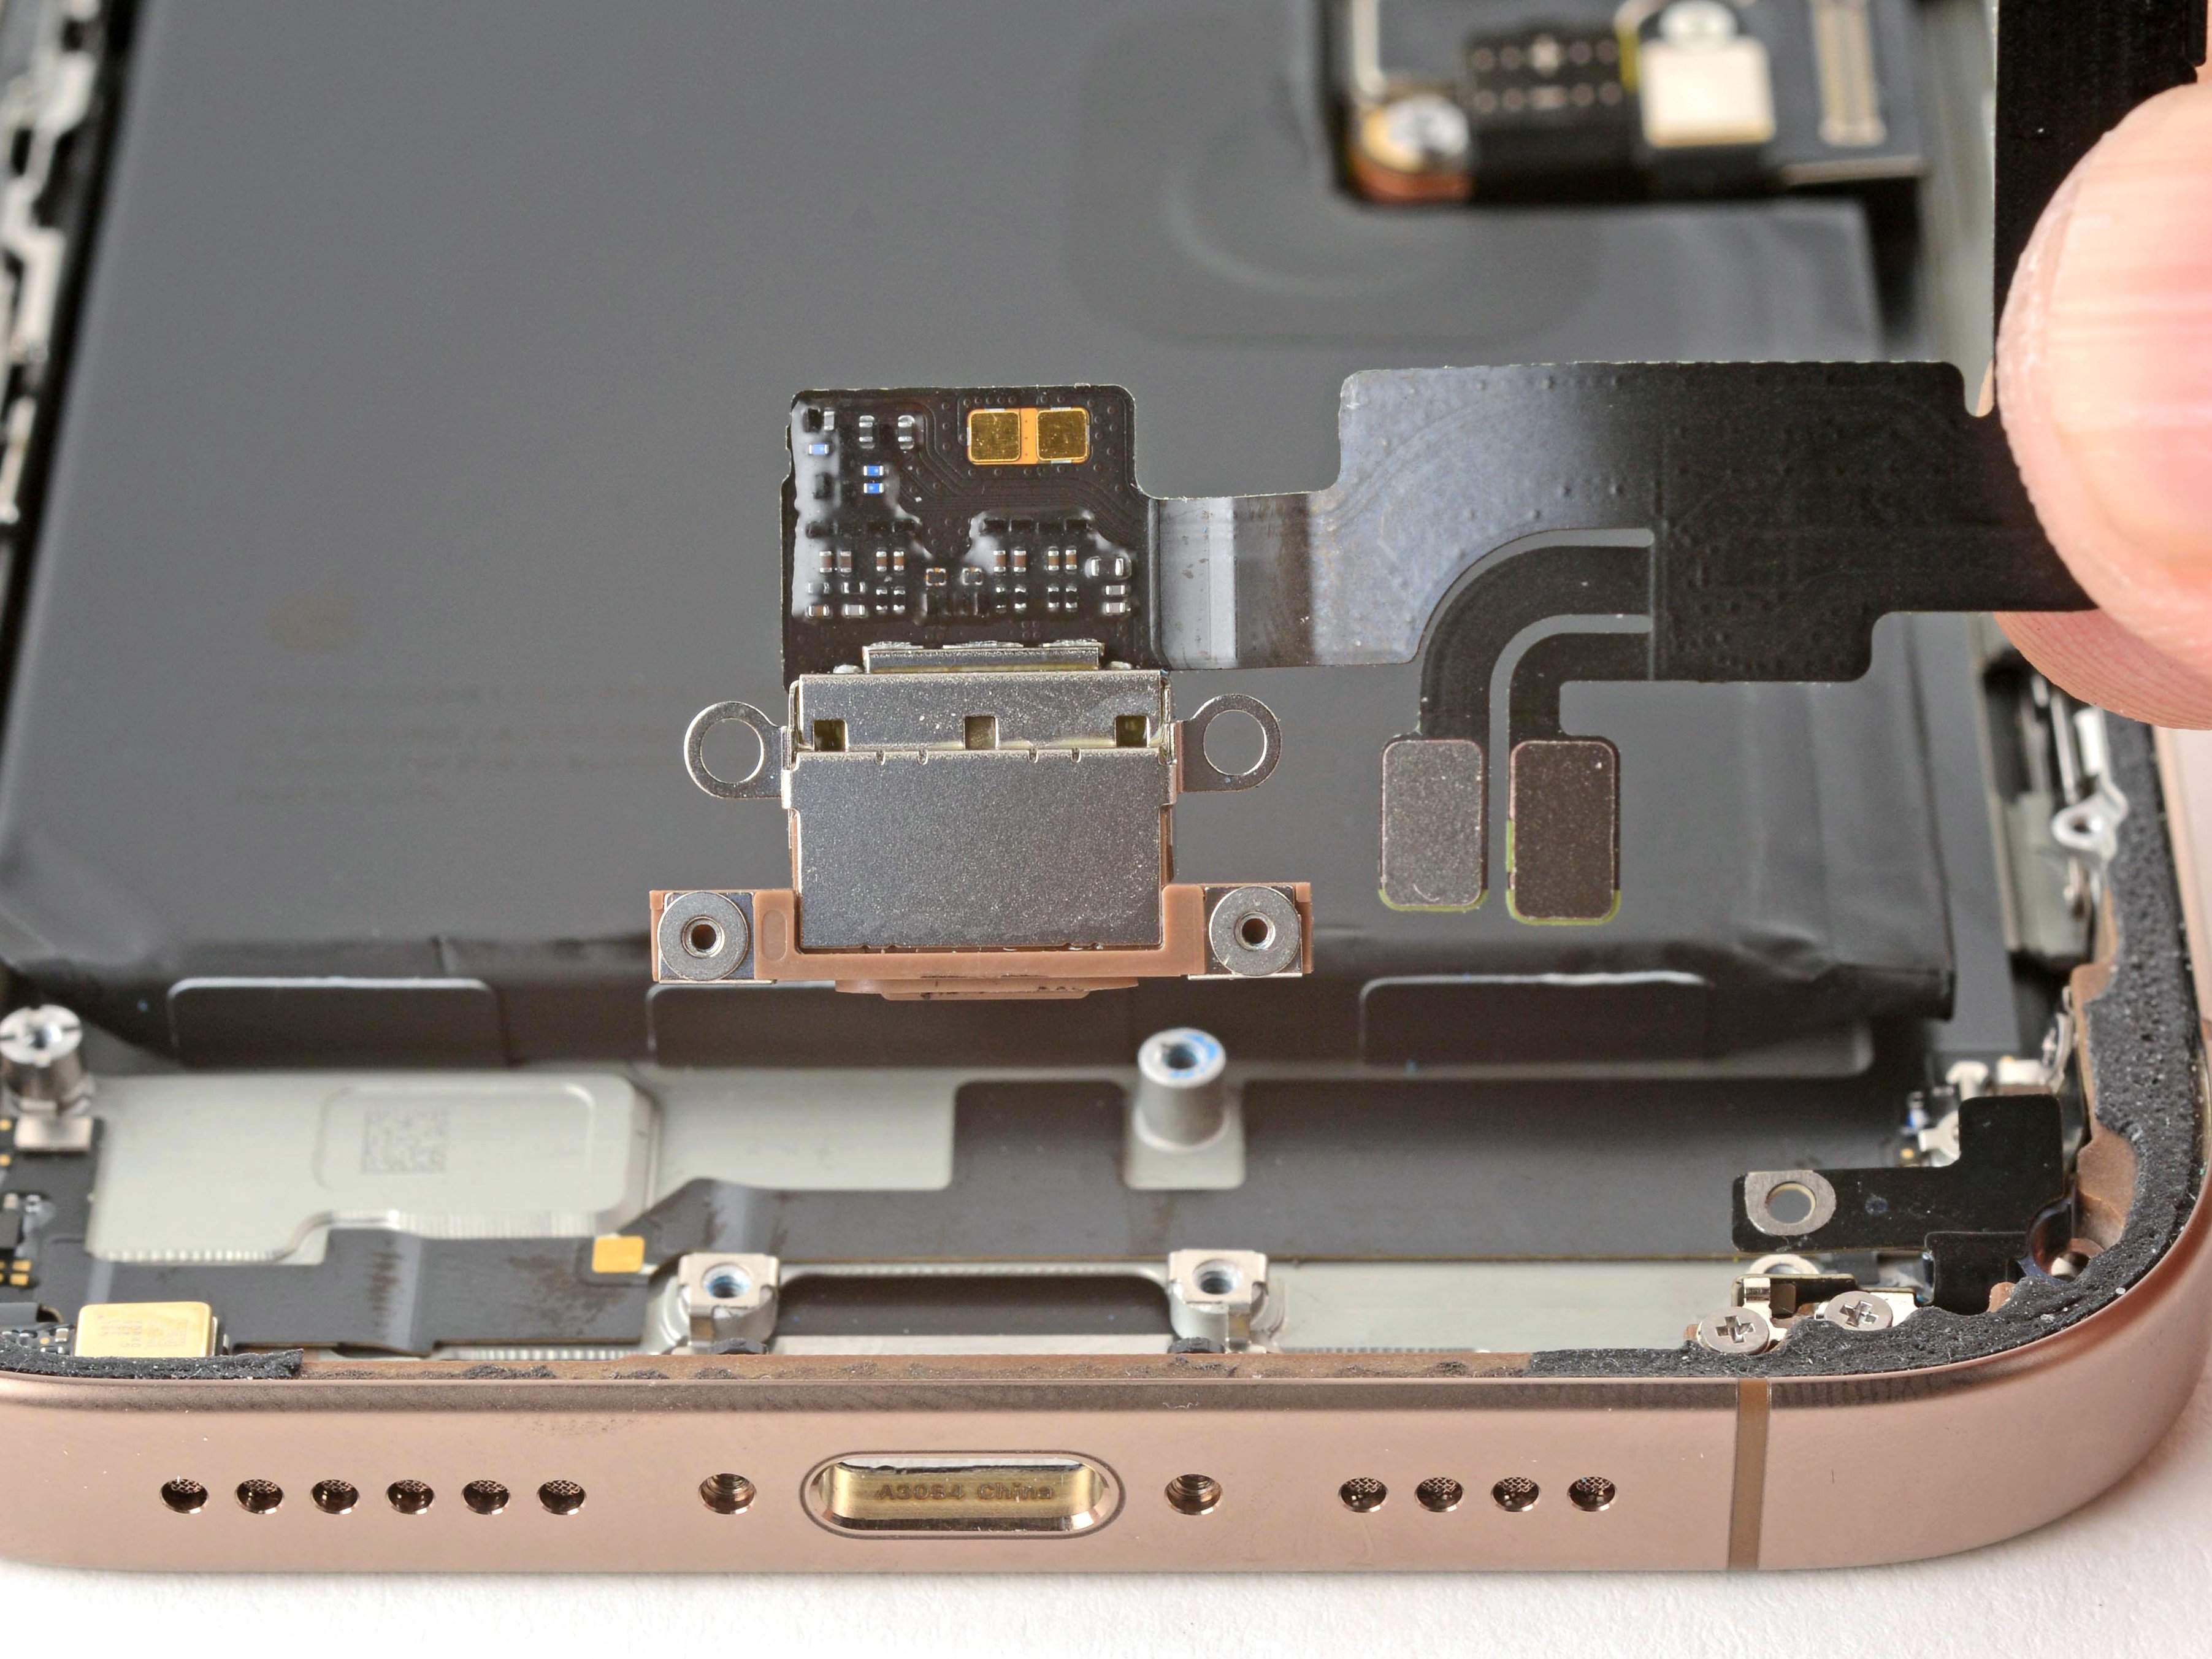
The charge port is sealed to the bottom of the frame with a sticky adhesive gasket. Plus, it’s cleverly tucked behind two prongs, making it tricky to just pull the port away from the frame without a little finesse.
- Slide the tip of a spudger underneath one edge of the charge port.
- Gently pry upward to loosen the gasket and lift the port out.
- Repeat on the opposite side to fully free the port.
Tools Used
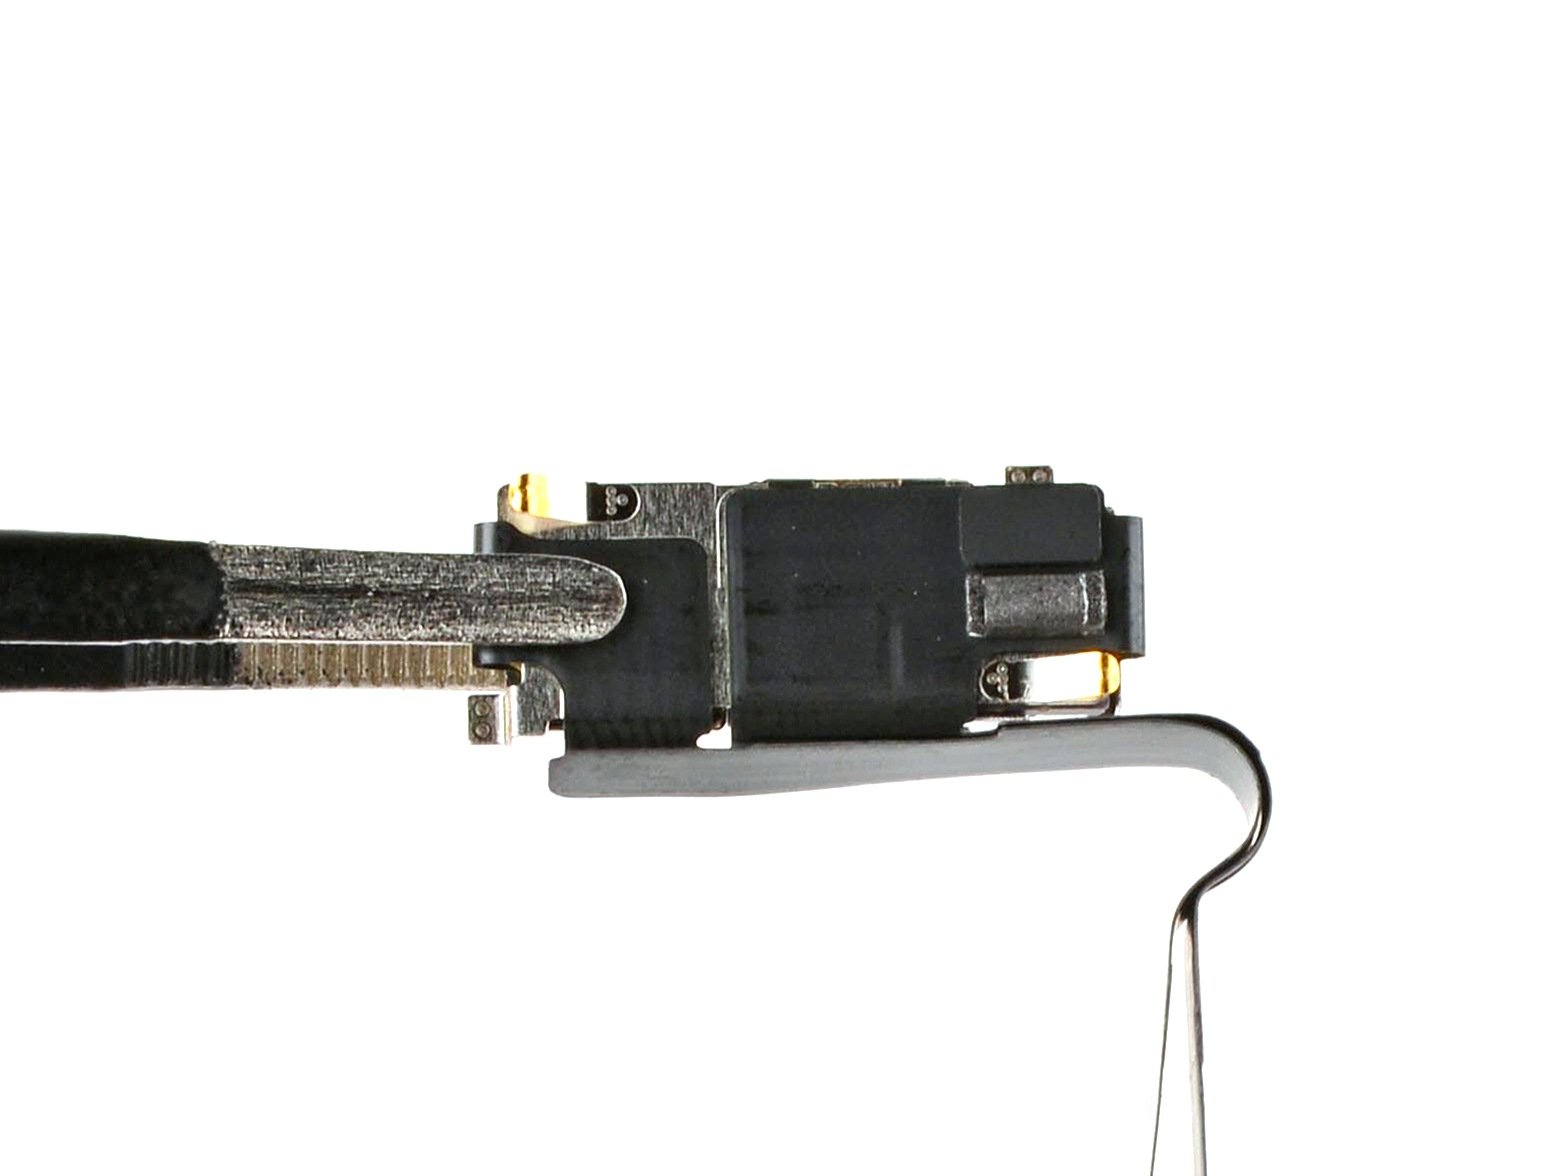
Step 41


- Take out the charge port. Easy peasy!
- Underneath the charge port, you'll see two screw posts. These posts have grounding clips on them. If the clips happened to fall off, don't worry—just pop them back onto the posts. The clips should face down, towards the bottom of the device, to keep everything grounded.
Step 42

Way to go on finishing the disassembly! Now, let’s dive into the fun part: reassembling your trusty iPhone.
Keep in mind, depending on your model, some pictures might look a little different, but don’t sweat it—the steps will still work perfectly for your iPhone.
Step 43

- Get those two black prongs standing tall and proud! If they took a little tumble during the charge port removal, grab the tip of your spudger and gently nudge them back into shape. You've got this!
Tools Used
Step 44


- Tilt the bottom edge of the charge port into its slot and gently push it down until it snaps into place.
Step 45

Gently nudge the loose charge port back into its proper spot, aligning it perfectly. Think of it as giving the port a little friendly push to get it sitting right where it belongs. If you need a hand, you can always schedule a repair.
- Grab your trusty pentalobe P2 driver and let's get those two external pentalobe screws in place for now. You've got this!
Step 46
Watch out for that screwdriver! Keep it away from the battery to avoid any sparks flying.
- Grab your Phillips screwdriver and tighten down those two 3.3 mm screws that hold the charge port snug to the frame. Easy peasy—just a couple of turns to keep everything secure. If you need help along the way, you can always schedule a repair.
Step 47

Don't forget to take out those screws, or your back glass might throw a little fit and refuse to sit right!
- Grab a pentalobe P2 screwdriver and carefully remove those two temporary pentalobe screws to get started.
Step 48


- Gently peel off the white backing from the microphone adhesive gasket, revealing the sticky side.
- Carefully line up the gasket with the microphone opening on the frame, then use a spudger to press it in snugly.
- Remove the remaining backing from the adhesive to secure the gasket firmly in place.
Tools Used
Step 49


- Gently slide the microphone into its slot at a slight downward angle, then press it flat against the frame to secure it in place.
Step 50
- Let's start by securing the bottom microphone—grab those three screws and get them in place:
- - The first is a 3.4 mm-long standoff screw, ready to hold things steady.
- - Next up, a 3 mm-long standoff screw to keep everything snug.
- - Finally, a 1.4 mm-long tri-point Y000 screw to finish it off.
Step 51

- Tilt the bottom edge of the loudspeaker towards the frame like it's ready to make its grand entrance.
- Gently press the loudspeaker into its cozy little spot.
Step 52
- Time to lock in the loudspeaker with four trusty screws. Here's the lineup:
- One 1.7 mm Phillips screw (it’s the short and sweet one)
- One 1.5 mm Phillips screw (another quick little guy)
- One 4.1 mm standoff screw (a bit longer, but it knows its place)
- One 1.3 mm tri-point Y000 screw (small but mighty, with a unique twist)
Step 53

- Place the Taptic Engine carefully into its spot, making sure it fits snugly.
Step 54

- Gently use your finger to snap the corner bracket back into place, giving it a little push until it clicks. Keep at it—you’re almost there! If you need help, you can always schedule a repair.
Step 55
- Grab your trusty Phillips screwdriver and let's get that 2.1 mm-long screw in place to secure the Taptic Engine. You've got this!
Step 56

- Gently press the lower assembly cable onto the top of the Taptic Engine using your finger—think of it as giving it a little nudge in the right direction.
Step 57

- Secure the lower assembly cable by installing two screws: one 1.0 mm tri-point Y000 screw and one 1.3 mm Phillips screw. If you need any assistance along the way, remember you can always schedule a repair.
Step 58


- Give that spudger or your trusty finger a little workout by pressing and connecting those two lower assembly cable connectors. You've got this!
Tools Used
Step 59

- Set the Taptic Engine cover back in place and line it up with its screw holes. Make sure the bottom edge clicks into the frame securely. If you need help, you can always schedule a repair.
Step 60
- Grab your Phillips screwdriver and get ready to unscrew the Taptic Engine cover. You'll be removing three screws: one 2.9 mm-long screw, one 1.3 mm-long screw, and one 2.4 mm-long screw. Keep track of each screw so you know where they go when reassembling. If you need a hand, you can always schedule a repair to get expert help.
Step 61

- Gently press the assembly cable connector onto the logic board using your finger or a spudger, making sure it's seated properly. If you need help, you can always schedule a repair.
Tools Used
Step 62


Careful around those delicate grounding clips while cleaning the frame! If one gets a little bent out of shape, no worries—just nudge it back gently with your fingers or tweezers.
- Grab some blunt nose tweezers or just use your fingers to peel off the big chunks of adhesive hanging around the frame edges.
- Next, take a spudger and gently scrape away the sticky remnants clinging to the frame.
- If that adhesive is being stubborn and won’t budge, warm it up a bit with a hair dryer or heat gun, then give it another go.
Tools Used
Step 63


- If you're reusing your back glass, start by dabbing a few drops of high-concentration isopropyl alcohol (over 90%) onto a microfiber or lint-free cloth. Then, gently wipe around the edges to get the surface ready for fresh adhesive. This helps everything stick nice and snug!
Step 64

Take your time with this step. A clean frame helps the new adhesive stick better, giving you a stronger hold for that perfect finish.
- Grab a lint-free cloth or a coffee filter and wrap it snugly around the tip of your spudger. Now, let's get a little fancy: add a few drops of high-octane isopropyl alcohol (the good stuff, over 90%) onto that cloth.
- Now, gently glide it along the edge of the frame in one smooth motion, working to banish all that pesky adhesive residue away.
Tools Used
Step 65

Check out the camera cutout and those little notches along the top and bottom edges to get a clear picture of how the adhesive will fit snugly into the frame.
- Position the adhesive sheet on the frame to check that it's lined up just right.
Step 66


The sticky stuff is quite clingy! Keep it away from anything until you're ready to stick it onto the frame—that way, things stay clean and simple.
If your adhesive has multiple layers, peel off the liner that reveals the sticky side that will attach to the frame. Keep it smooth and steady—no wrinkles or bubbles.
- Find the little tab in the corner of the adhesive sheet and carefully peel back the liner to reveal about a third of the sticky side.
Step 67


Once the adhesive is in place, you're committed! No going back—you'll need to start fresh with new adhesive if you need to adjust it.
- Gently line up the sticky edge with the corresponding part of the iPhone's frame, making sure everything lines up just right.
- Once it's in the right spot, softly press down the exposed adhesive strip onto the frame to secure it in place.
Step 68


No extra adhesive strips? No problem! You can snap your iPhone back together and keep using it, just remember it won't be water-resistant until you replace the adhesive.
When the adhesive is lined up right, the edges should sit perfectly in place—like they were meant to be there.
Slightly off? No stress—gently tug the long edges into place and you'll be golden.
Uh-oh, a wrinkle? Peel it off and try again with a fresh strip for a smooth, clean fit.
- Keep peeling back the liner from the sticky stuff, and gently press that adhesive into its new home. You're doing great—just take your time and make sure it stays flat and smooth as you go. If you need help, you can always schedule a repair.
Step 69


- Grab a spudger and gently run it around the entire edge of your iPhone to loosen that stubborn adhesive.
Handle those delicate grounding clips with care. If one gets bent out of shape, gently coax it back into place using your fingers or some tweezers. Keep at it—they're tough but not invincible. If you need a hand, you can always schedule a repair.
Be gentle—pressing too hard can stretch and warp the adhesive, making your job trickier. Take it slow and steady for the best results. If you need a hand, just schedule a repair.
Step 70


At this stage, you might still see some tiny release liners around the edges, keeping the adhesive from sticking before you're ready. Don't rush to peel them off just yet—it's all about keeping things neat and tidy during reassembly. If you need a hand, you can always schedule a repair.
- Grab your trusty spudger or your fingers and gently lift the pull tab that's hanging out with the large front liner. You'll usually find this pull tab chilling in a corner of the liner.
- Now, give that pull tab a little tug and peel off the large front liner from the sticky adhesive. It's as easy as pie!
Tools Used
Step 71

- Gently lift the back glass at the right edge of your iPhone like you're unveiling a surprise gift.
Step 72

- Gently use your finger or the flat end of a spudger to snugly press the back glass connector onto the logic board. You've got this!
Tools Used
Step 73

- Give that battery press connector a little nudge with your finger or a spudger, and make sure it clicks snugly onto the logic board. You've got this!
This is a great moment to give your iPhone a quick test drive before sealing it back up. Power it on and check that everything's running smoothly. If all looks good, go ahead and power it down to finish reassembling. If your iPhone refuses to turn on, plug it into a power source and try again—sometimes a little juice is all it needs. And if you've swapped out the logic board but the display stays dark, you'll want to follow the screen connection steps in the guide to manually reconnect the display connector. Need a hand? You can always schedule a repair with Salvation Repair.
Tools Used
Step 74

- Line up the back glass connector cover with its screw holes and gently set it in place. Keep it aligned, and you're all set to move forward. If you need help, you can always schedule a repair.
Step 75

- Grab a tri-point Y000 screwdriver and carefully remove the four screws holding in the back glass connector cover: two screws are 1.3 mm long, and two are 1.0 mm long. Take your time and keep track of each screw's length for reassembly. If you need help, you can always schedule a repair.
Step 76

- Line up the battery connector cover with its screw holes and gently lay it back in place. If you need help, you can always schedule a repair.
Step 77

- Grab a tri-point Y000 screwdriver to remove the three screws holding down the battery connector cover: two 1.3 mm‑long screws and one 1.0 mm‑long screw. If you need a hand, you can always schedule a repair.
Step 78


While you're peeling off those liners, just keep a little distance between them and the sticky adhesive. We want to avoid any accidental messes!
- Grab your fingers or a spudger and gently peel away all the perimeter liners to reveal the adhesive underneath.
- Take a close look at the frame and back glass for any stray liners hiding out and remove them. Make sure there's no liner left behind before moving on.
Tools Used
Step 79


If you're feeling some resistance, it might mean a perimeter clip got a bit out of shape and is causing a jam with the frame. Take a closer look at where the resistance is and gently straighten any bent clips to keep everything in harmony!
- Gently lay the back glass onto the frame, starting at the top edge to get it aligned just right.
- Press around the edges of your iPhone until the back glass sits snug and flush against the frame—think of it as giving it a friendly tap to settle in place.
Step 80

Heating things up loosens the adhesive, making it stick better and easier to work with.
- Grab a hair dryer, heat gun, or an iOpener and warm up the back glass edges until they're just on the verge of being too hot to handle.
Tools Used
Step 81


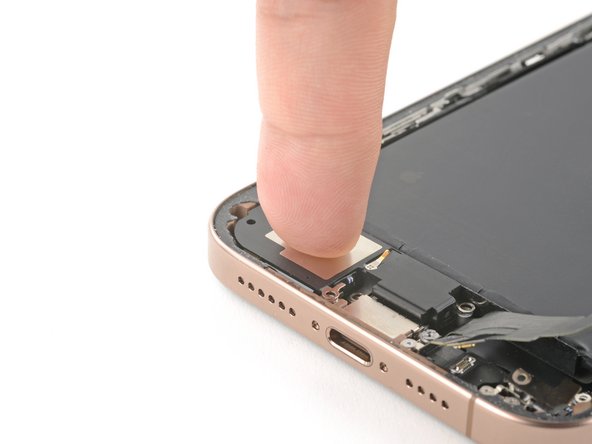
- Give that iPhone a little love by gently squeezing around its edges. You're just making sure everything is snug and secure!
Step 82


As an alternative, you can wrap some vise clamps around the edges of your device to help secure that new adhesive in place.
- Flip your iPhone over so the screen is facing down on a clean, flat surface—let’s make sure it’s nice and cozy for the next steps.
- Wrap a strip of tape all around the edge of the back glass to give it some extra love and protection. We want that finish to stay pristine.
- Now, start stacking coins around the edge of the back glass. Build a little wall that’s as tall as those rear camera bumps. It’s like a mini fortress for your phone!
Tools Used
Step 83


Be aware that the coins might leave a little mark on the bottom cover of your book, so it's best to stick with the spare change and leave the precious stuff aside.
A little pressure goes a long way in getting that adhesive to stick!
- Stack 3-4 heavy books right on top of your iPhone to give it a little extra weight.
- Keep the books in place for about half an hour to help out.
Tools Used

Step 84
- Drop off your e-waste at an R2 or e-Stewards certified recycler to keep things green.
- If the repair didn’t quite hit the mark, give some basic troubleshooting a whirl, or reach out to our Answers community for a hand. And remember, if it’s getting tricky, you can always schedule a repair!