iPhone 16 Pro Max Rear Camera Assembly Replacement
Duration: 45 minutes
Steps: 58 Steps
Ready to give your iPhone 16 Pro Max a little TLC? This guide will walk you through replacing the rear camera assembly—because when those three cool cameras are all bundled up together, if one of them goes on the fritz, the whole assembly needs a swap! If your snaps and videos are looking a bit blurry or your cameras are playing hard to focus, it might just be time for a replacement. Don’t forget to grab some replacement back glass adhesive to get the job done right. And once you're finished, let’s make sure those authentic Apple rear cameras are all set by calibrating them with Repair Assistant. If you find yourself needing a hand, you can always schedule a repair!
Step 1


Let that iPhone battery run down to under 25%! A fully charged lithium-ion battery can be a bit of a drama queen when it comes to safety.
- First, disconnect any cables connected to your iPhone. Then, press and hold the power button along with either volume button, and slide to turn off your iPhone. If you need a hand, you can always schedule a repair.
Step 2


Ensure there's a flat, accessible spot near the bottom edge big enough for a suction cup to grab onto—think of it as the perfect little docking station for your tool to get started.
- If your screen or back glass is looking a bit worse for wear with some serious cracks, grab some packing tape and lay down overlapping strips over the glass. This will keep you safe and make the disassembly process a breeze.
Tools Used

Step 3


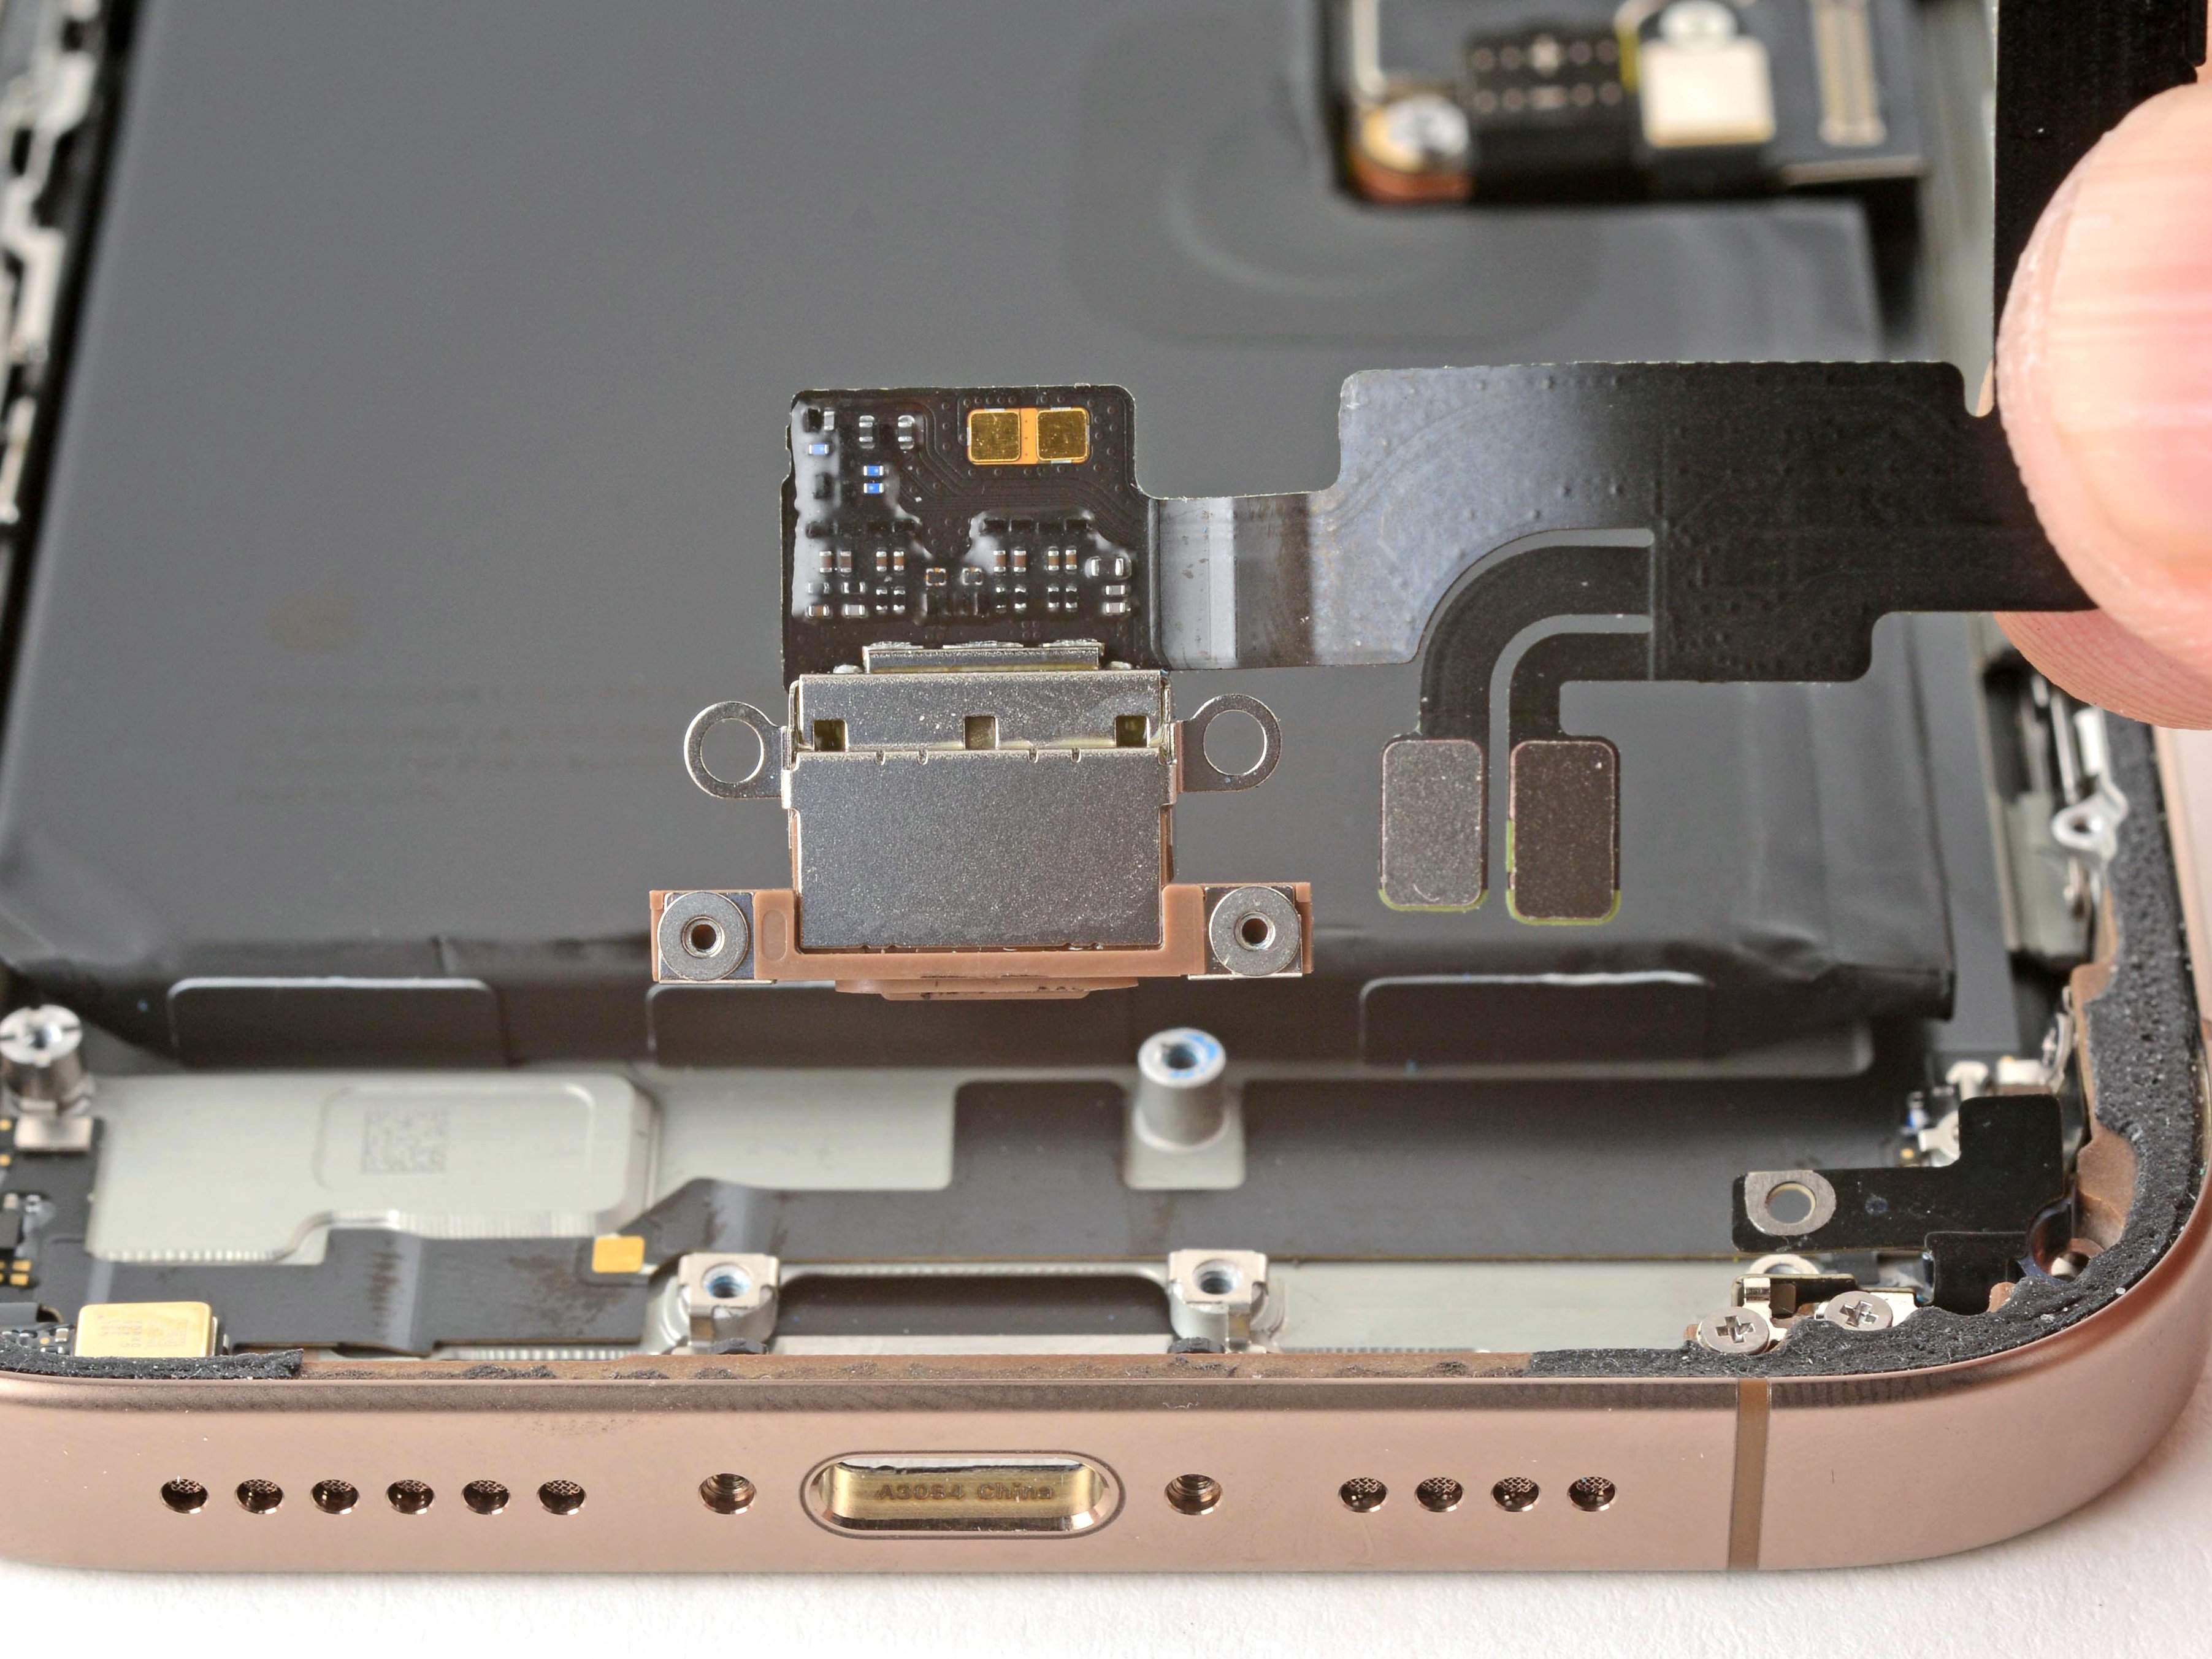
- Grab a P2 pentalobe driver and pop out the two 7.4 mm screws flanking the charge port.
Step 4


Pushing your opening pick in too far can cause harm to your device—let's avoid that! Mark your pick to keep your repair mission safe and sound.
Feel free to mark the other edges of your pick with different measurements to keep things precise.
Or, get creative and tape a coin about 3 mm from the tip of your pick as a handy depth guide.
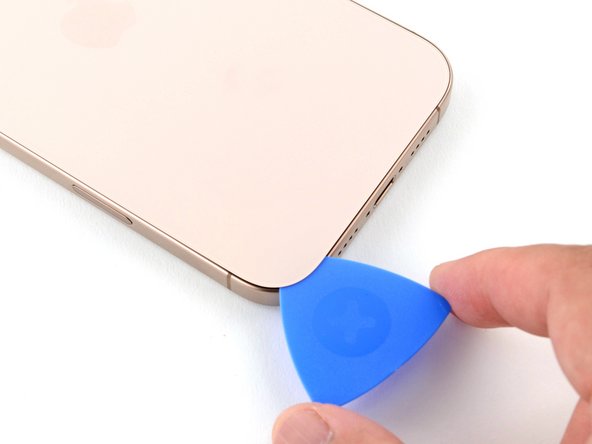
- Take a moment to find the 3 mm mark from the tip, and give your opening pick a little love tap with a permanent marker to make it shine!
Tools Used

Step 5

- Grab your trusty hair dryer or heat gun and warm up the bottom edge of that back glass until it's nice and toasty to the touch. Just enough to make it feel like it’s been sunbathing!
The following steps guide you through creating a starting gap with a suction cup. Alternatively, you can use an iOpener to gently heat the back glass. Simply follow these instructions to warm it up and apply the iOpener correctly. If you need a hand along the way, remember you can always schedule a repair for expert assistance.
Tools Used


Step 6


If a gap isn't popping up, no worries! Just add a little more heat to the edge and give it another go.
- Grab a suction handle and stick it to the bottom edge of that back glass.
- Give it a good pull with some steady strength to pop open a little gap between the back glass and the frame.
- Now, take the tip of an opening pick and slide it right into that gap.
Tools Used
Step 7

As you carefully cut through the adhesive holding the back glass, keep your pick no deeper than 3 mm to avoid accidentally messing up the parts underneath.
- A fragile cable runs from the back glass to the iPhone, right next to the volume up button. Be careful not to insert your pick here to avoid slicing through the cable.
- Multiple spring contacts line the perimeter of the iPhone.
Step 8

If the adhesive isn’t giving easily, try reheating the edge for about a minute and then give it another shot. Sometimes a little warmth makes all the difference in easing that stubborn glue.
- Gently glide that opening pick along the bottom edge to cut through the adhesive like a pro.
- Keep the opening pick snug in the bottom-left corner to stop that adhesive from resealing itself. You're doing great!
Step 9

- Grab a hair dryer or heat gun and gently warm up the left edge of the back glass until it feels comfortably hot to the touch. Keep the heat source moving to avoid overheating any one spot. If you need a hand, you can always schedule a repair.
Tools Used
Step 10


Be gentle with your pick—don't go deeper than 3 mm to keep those spring contacts happy and intact. A little patience goes a long way in avoiding damage!
You'll notice and feel the metal clips pop free as you slide past them.
- Pop in a second opening pick at the bottom-left corner, right next to the first one. Think of it as giving your device a gentle nudge to start the separation.
- Glide that pick along the left edge to loosen up the adhesive and unclip those metal tabs. Keep things moving smoothly and steadily.
- Leave this pick sitting snug in the top-left corner to keep the adhesive from sealing back up. It’s like holding the door open for your device to breathe.
Step 11

- Grab your trusty hair dryer or heat gun and give the top edge and top-right corner of that back glass a warm hug until it’s toasty enough to touch.
Tools Used
Step 12


Keep your pick within 3 mm to steer clear of any accidental damage to those spring contacts. You've got this!
- Gently tuck a third opening pick into the top-left corner to start loosening things up.
- Carefully slide that pick along the top edge, curving around the top-right corner, stopping right above the volume up button.
- Keep this pick in place to hold the adhesive apart and prevent it from sealing back up as you work.
Step 13

- Grab a hair dryer or heat gun and gently warm up the right edge of the back glass until it feels warm to the touch. Keep it moving to avoid overheating any one spot and make the glass a little more friendly to separation.
Tools Used
Step 14


Be gentle with your pick—don’t push it more than 3 mm deep to keep those spring contacts happy and intact!
- Pop in a fourth opening pick at the bottom-right corner.
- Carefully slide that pick around the corner and glide it up the right edge, stopping just below the volume down button.
- Keep this pick in place to stop the adhesive from sticking back together.
Step 15


At this stage, the back glass should be happily detached from the frame. If it seems to be playing hard to get, take a moment to revisit the edges with your pick to see if there are any sneaky bits of adhesive or clips that need a little extra attention.
- Gently lift the back glass on the right side of the iPhone to loosen the remaining adhesive. Support the glass with a sturdy, clean tool or object to keep it steady as you work.
Step 16

- Grab your trusty tri-point Y000 driver and loosen the three screws holding down that battery connector cover:
- Two screws measuring 1.3 mm each
- One screw measuring 1.0 mm
Step 17


- Carefully lift out the battery connector cover to reveal the connection underneath. If you need a hand with this step, you can always schedule a repair.
Step 18


- Grab your spudger and gently pry up to disconnect the battery press connector. Easy does it—just lift it free and you're on your way. If you need a hand, you can always schedule a repair.
Tools Used

Step 19

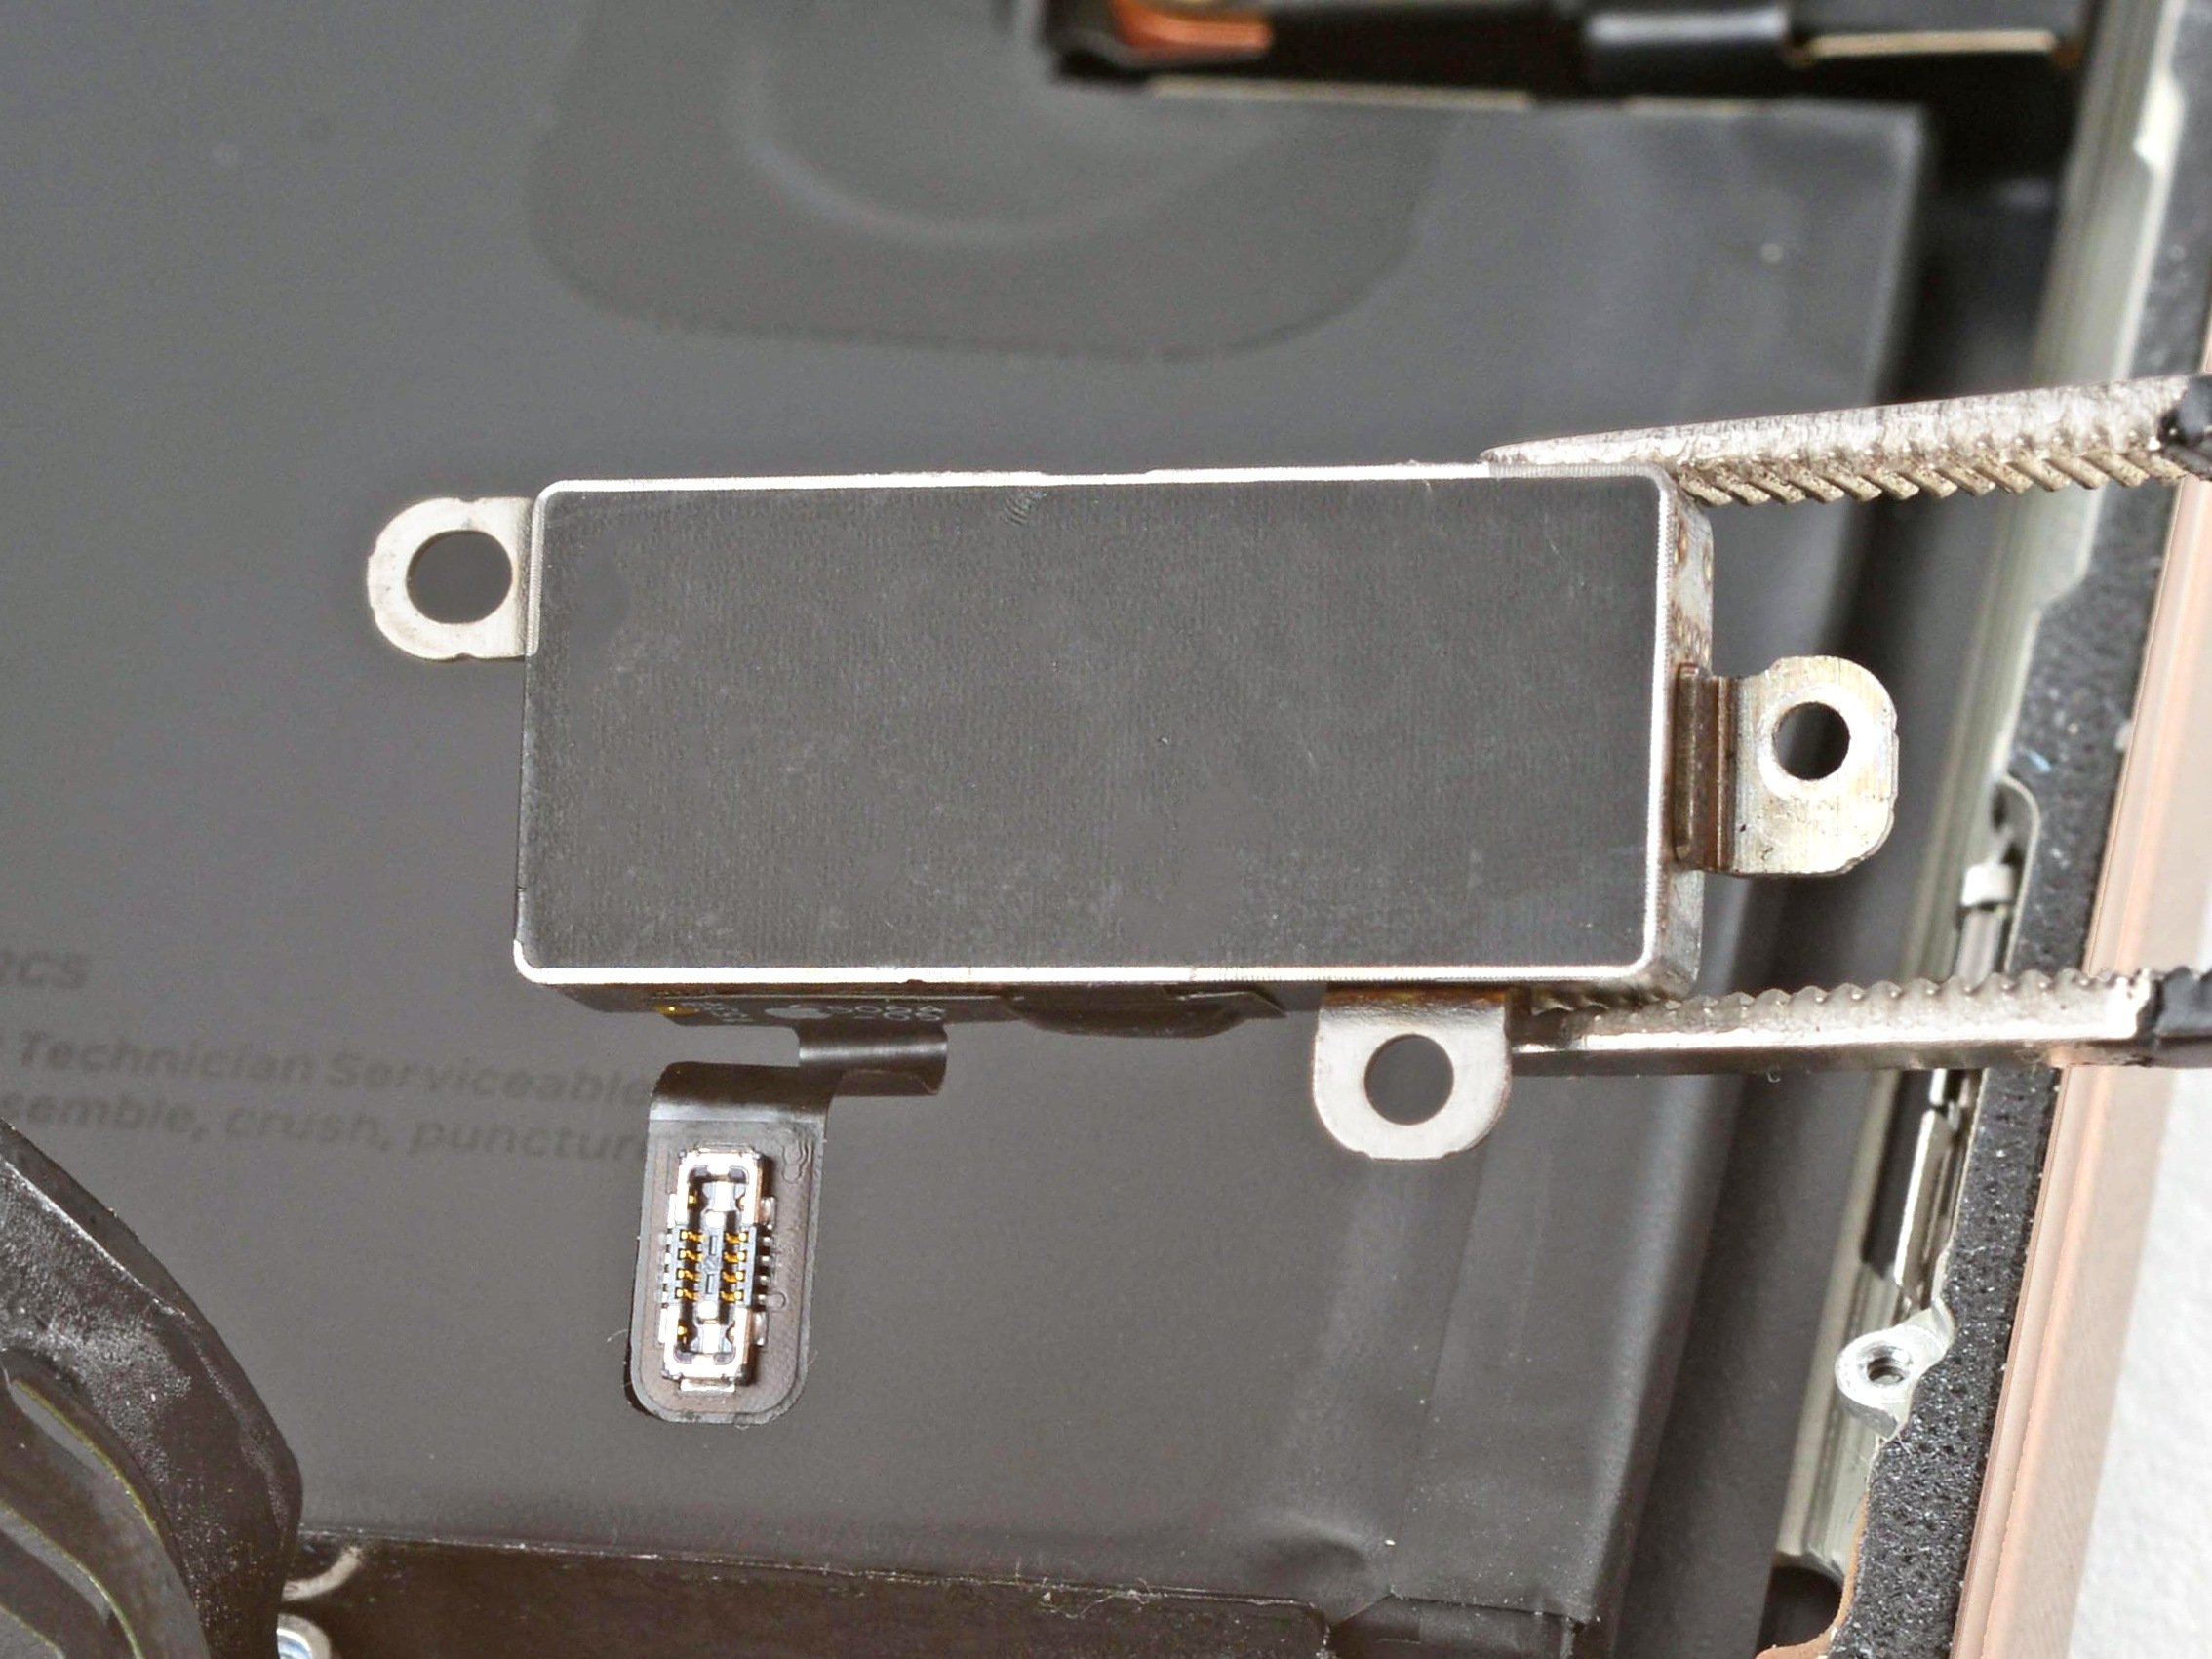
- Grab your trusty tri-point Y000 driver and carefully take out the four screws holding the back glass connector cover in place:
- Two screws measuring 1.3 mm in length
- Two screws measuring 1.0 mm in length
Step 20


- Gently lift the back glass connector cover straight up and pop it off like a pro!
Step 21


- Gently use the tip of a spudger to lift up and unplug the back glass connector.
Tools Used
Step 22

- Carefully detach the back glass panel to get things started. If you run into any trouble along the way, remember you can always schedule a repair with Salvation Repair for a helping hand.
Step 23


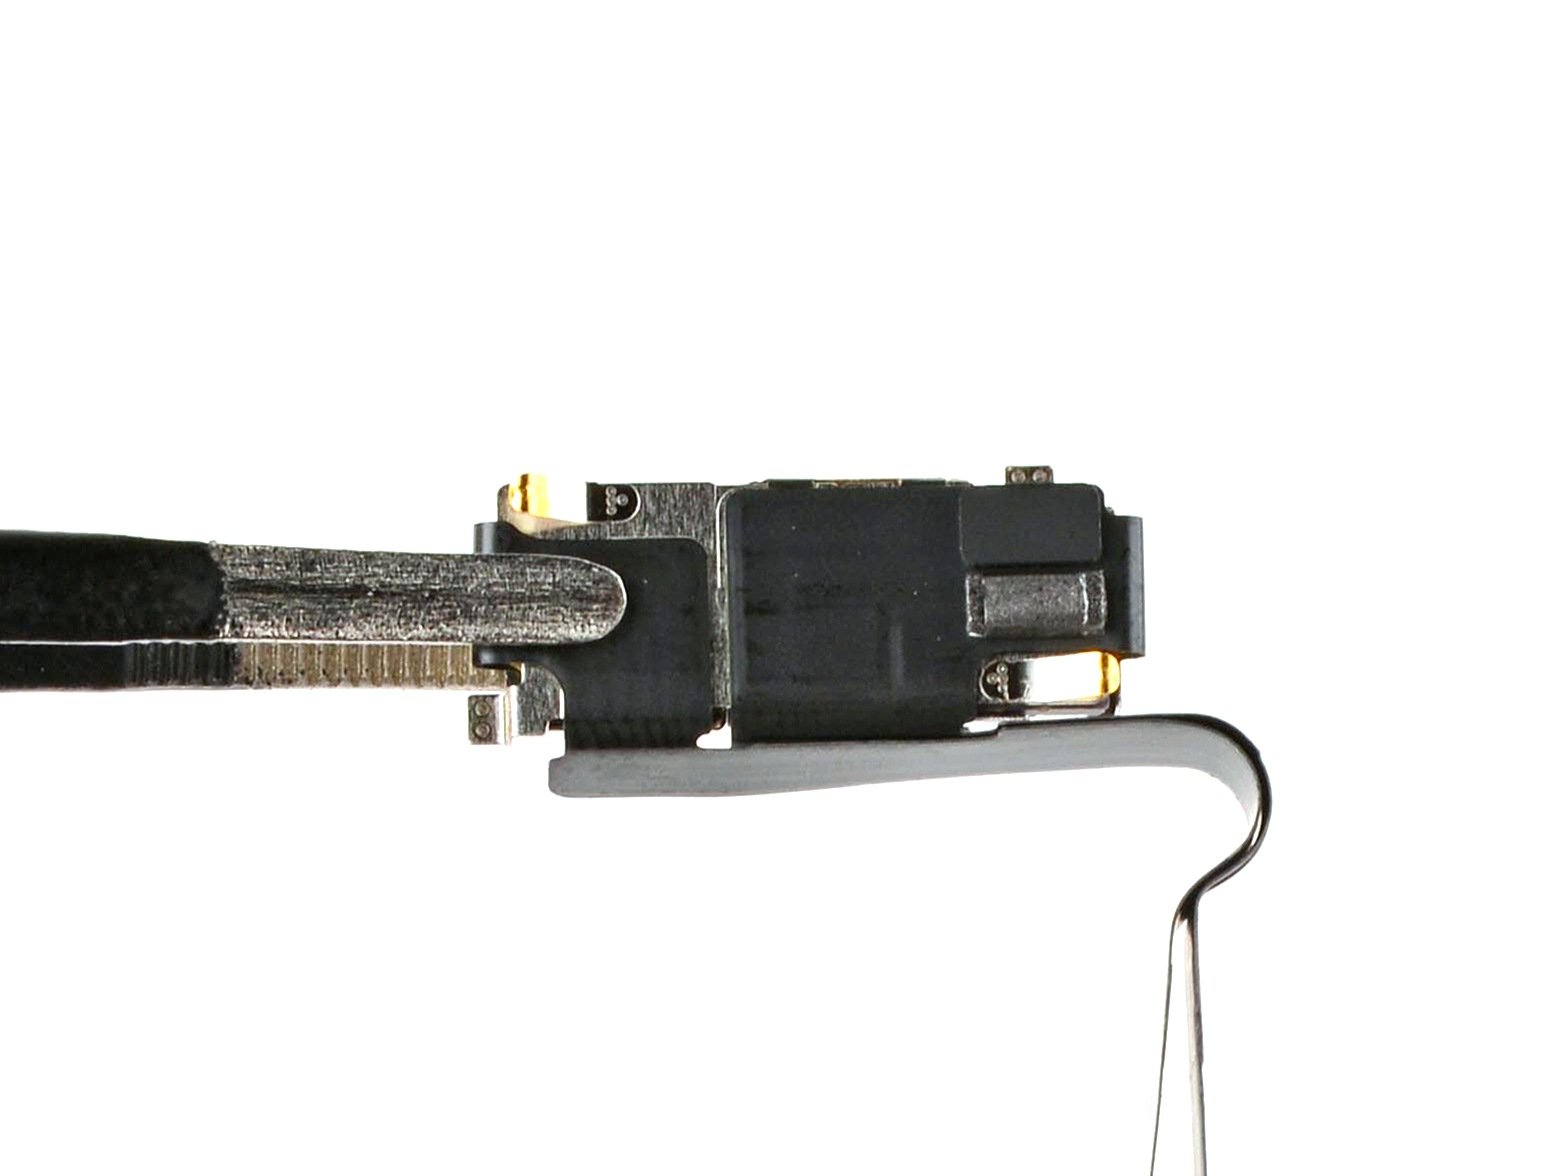
- Grab a spudger and gently pry up the connector for the LiDAR sensor to disconnect it. Easy does it—just a gentle lift to keep everything safe and sound. If you need help along the way, you can always schedule a repair.
Tools Used
Step 24


- Grab your Phillips screwdriver and gently unscrew the pair of screws holding the LiDAR sensor in place. One is a short 1.6 mm screw, and the other is a slightly longer 2.9 mm screw. Take your time and keep track of which screw goes where. If you need help along the way, you can always schedule a repair.
Step 25


- Grab your fingers (or tweezers if you're fancy) and gently lift out the LiDAR sensor. Keep it careful and steady—you're almost there! If you need a hand, remember you can always schedule a repair with Salvation Repair.
Tools Used

Step 26


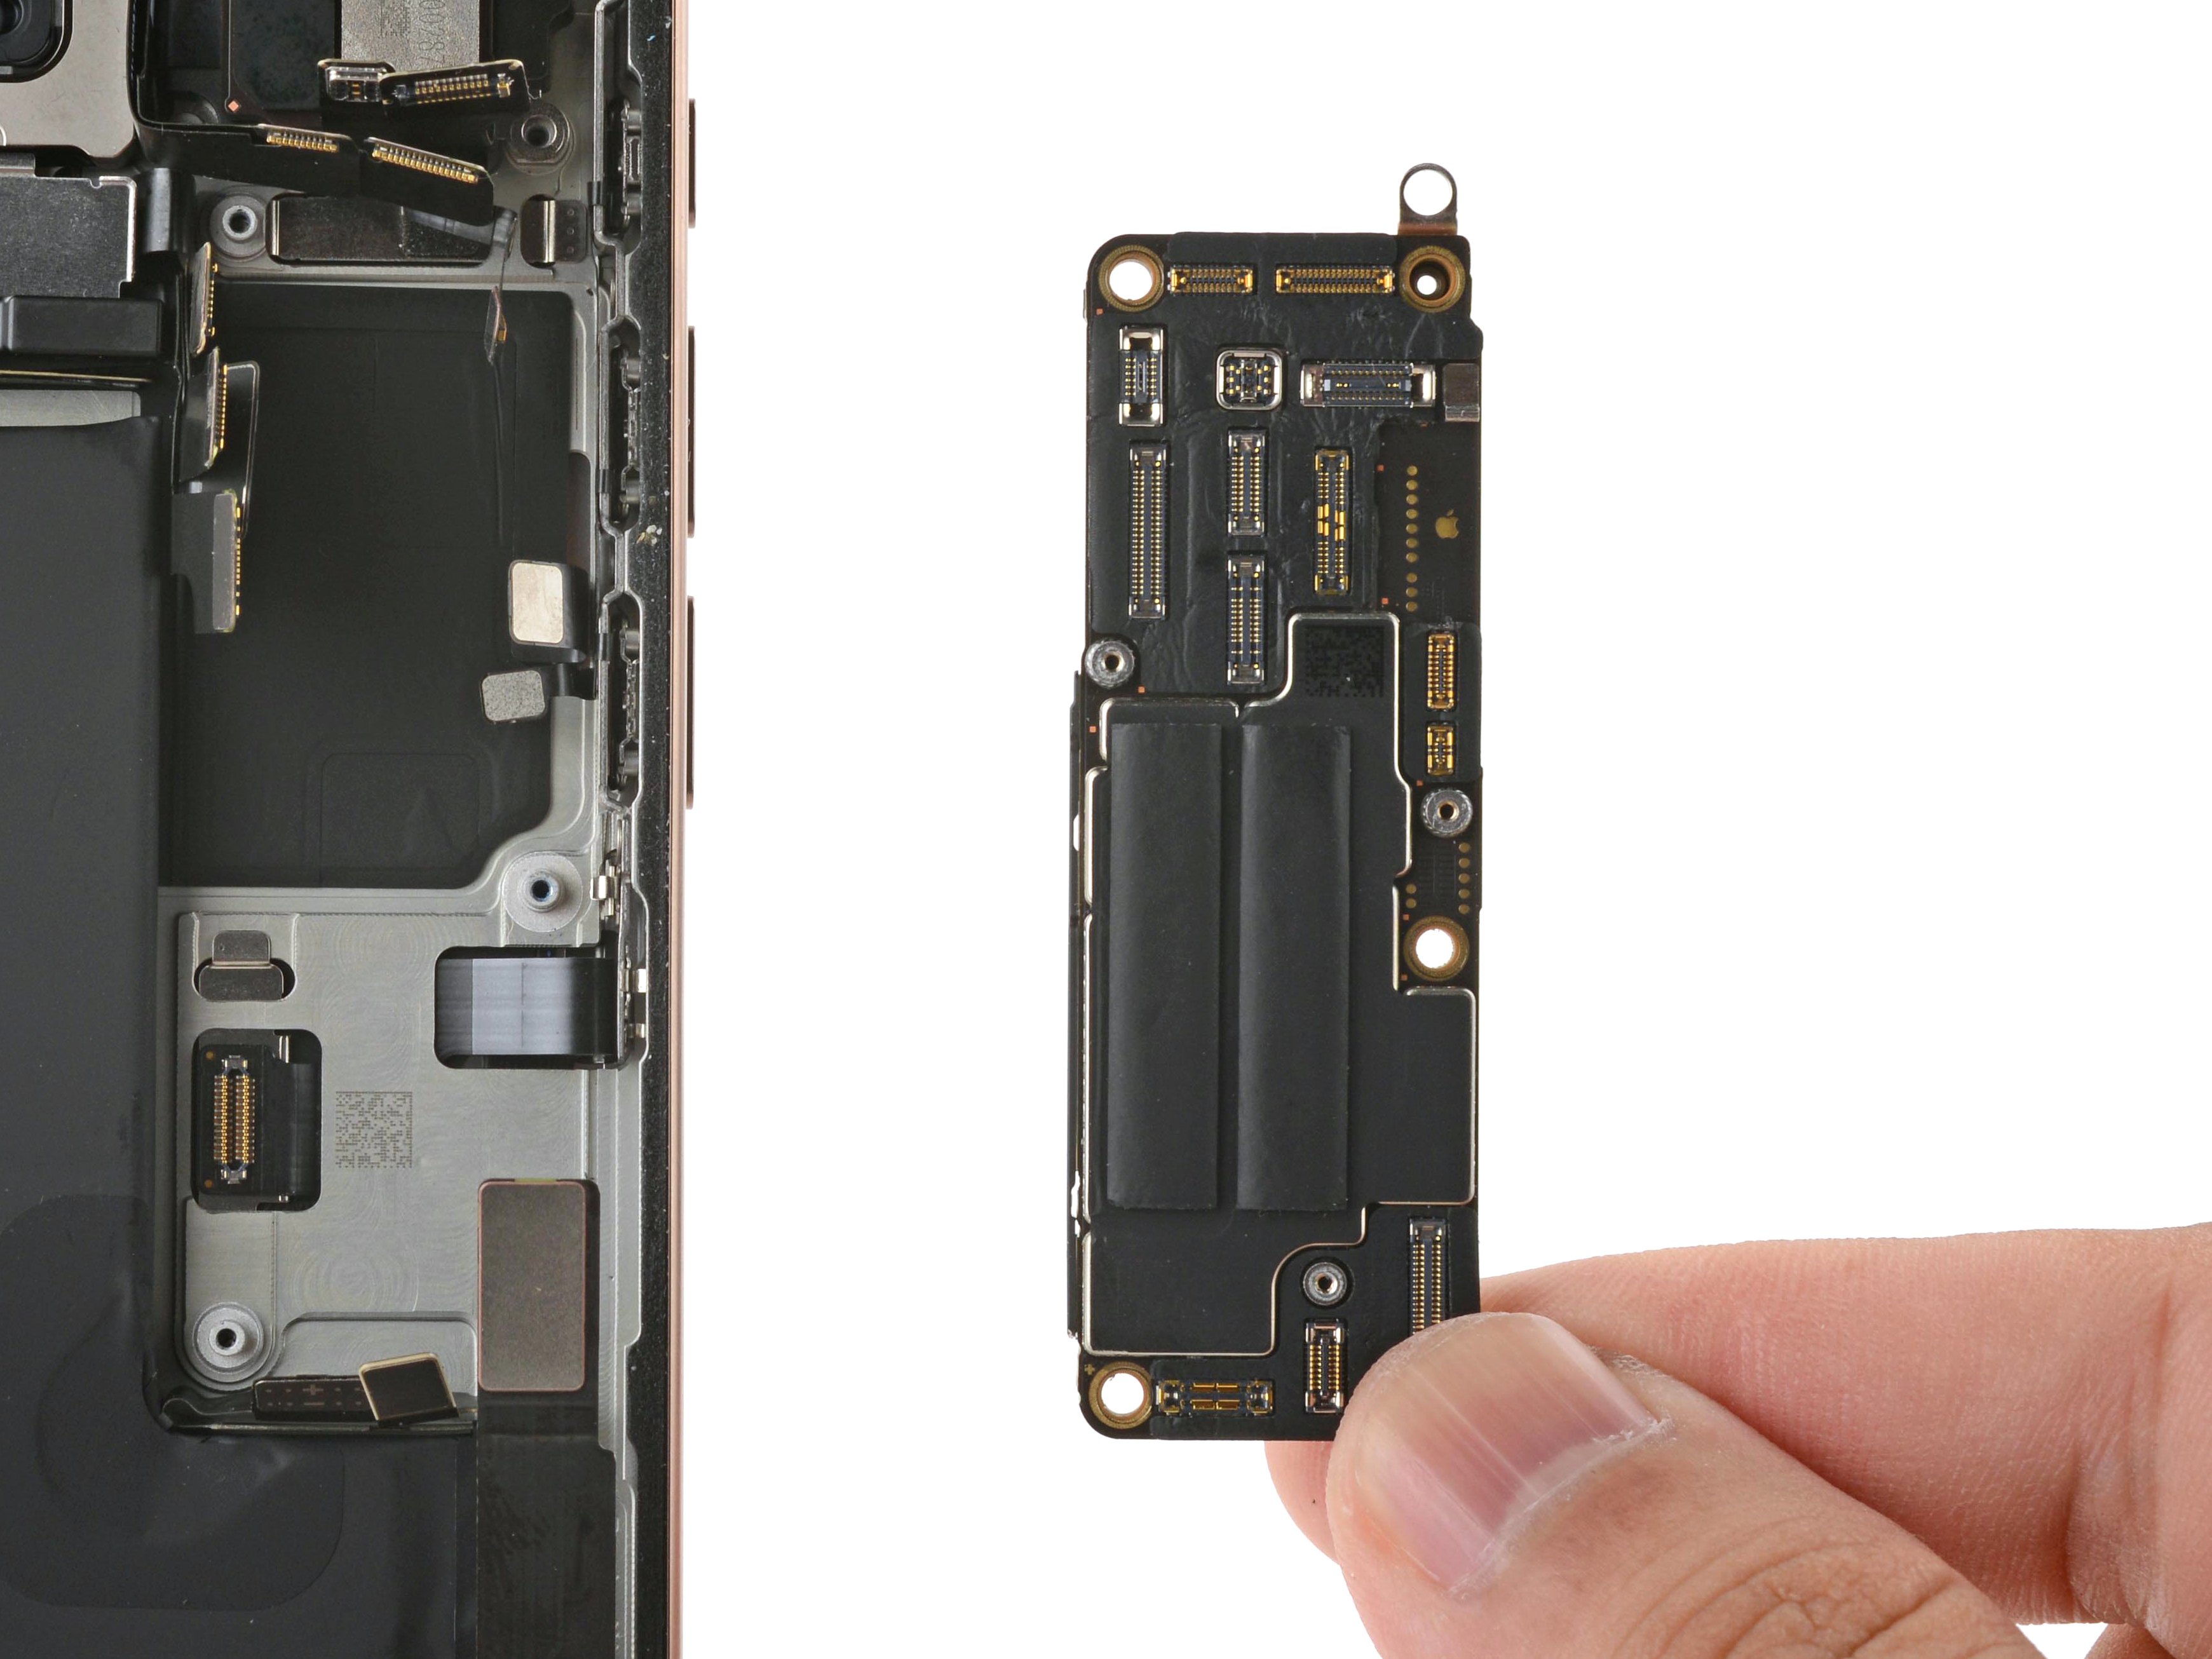
- Grab your trusty spudger and gently pry up to disconnect the first rear camera connector—easy does it!
- Next up, locate the second camera connector hiding underneath the first, and carefully disconnect it to free things up.
Tools Used
Step 27

- Grab your Phillips screwdriver and loosen those two 2.9 mm screws holding the rear camera assembly in place. Keep at it until they’re free, and you’re one step closer to the repair.
Step 28


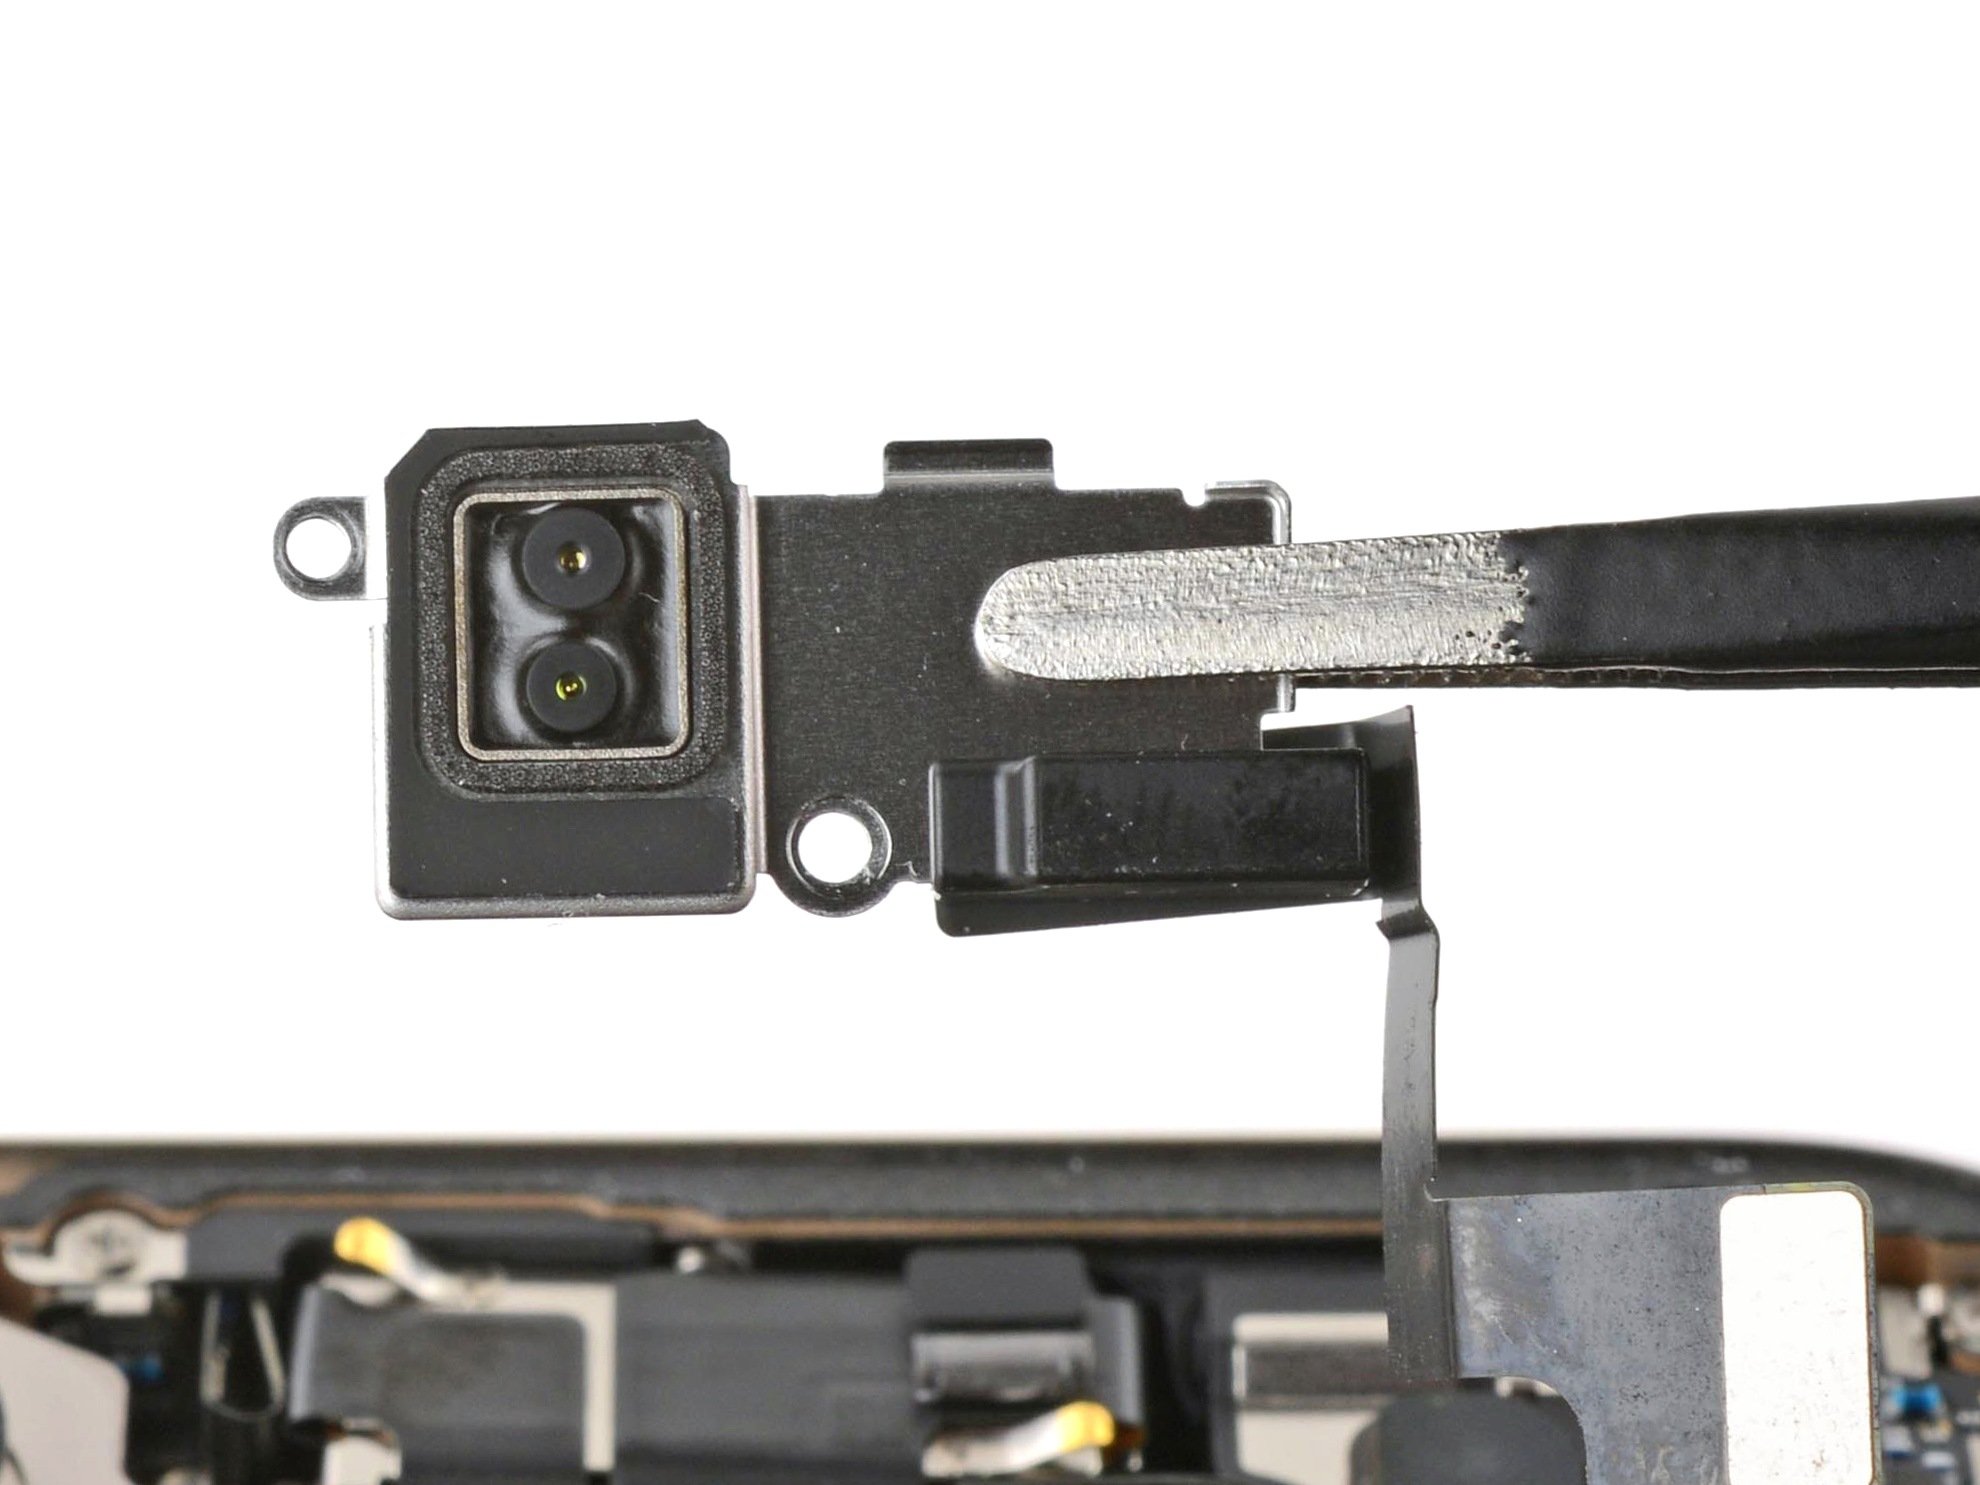
Handle with care around the camera lens — avoid touching it! If you do happen to smudge the glass, just give it a gentle wipe with a lint-free cloth to keep things crystal clear. And remember, if you need a hand at any point, you can always schedule a repair.
- Slide the tip of your trusty spudger under the top edge of the rear camera assembly.
- Gently pry it up to give it a little wiggle and loosen it from the frame.
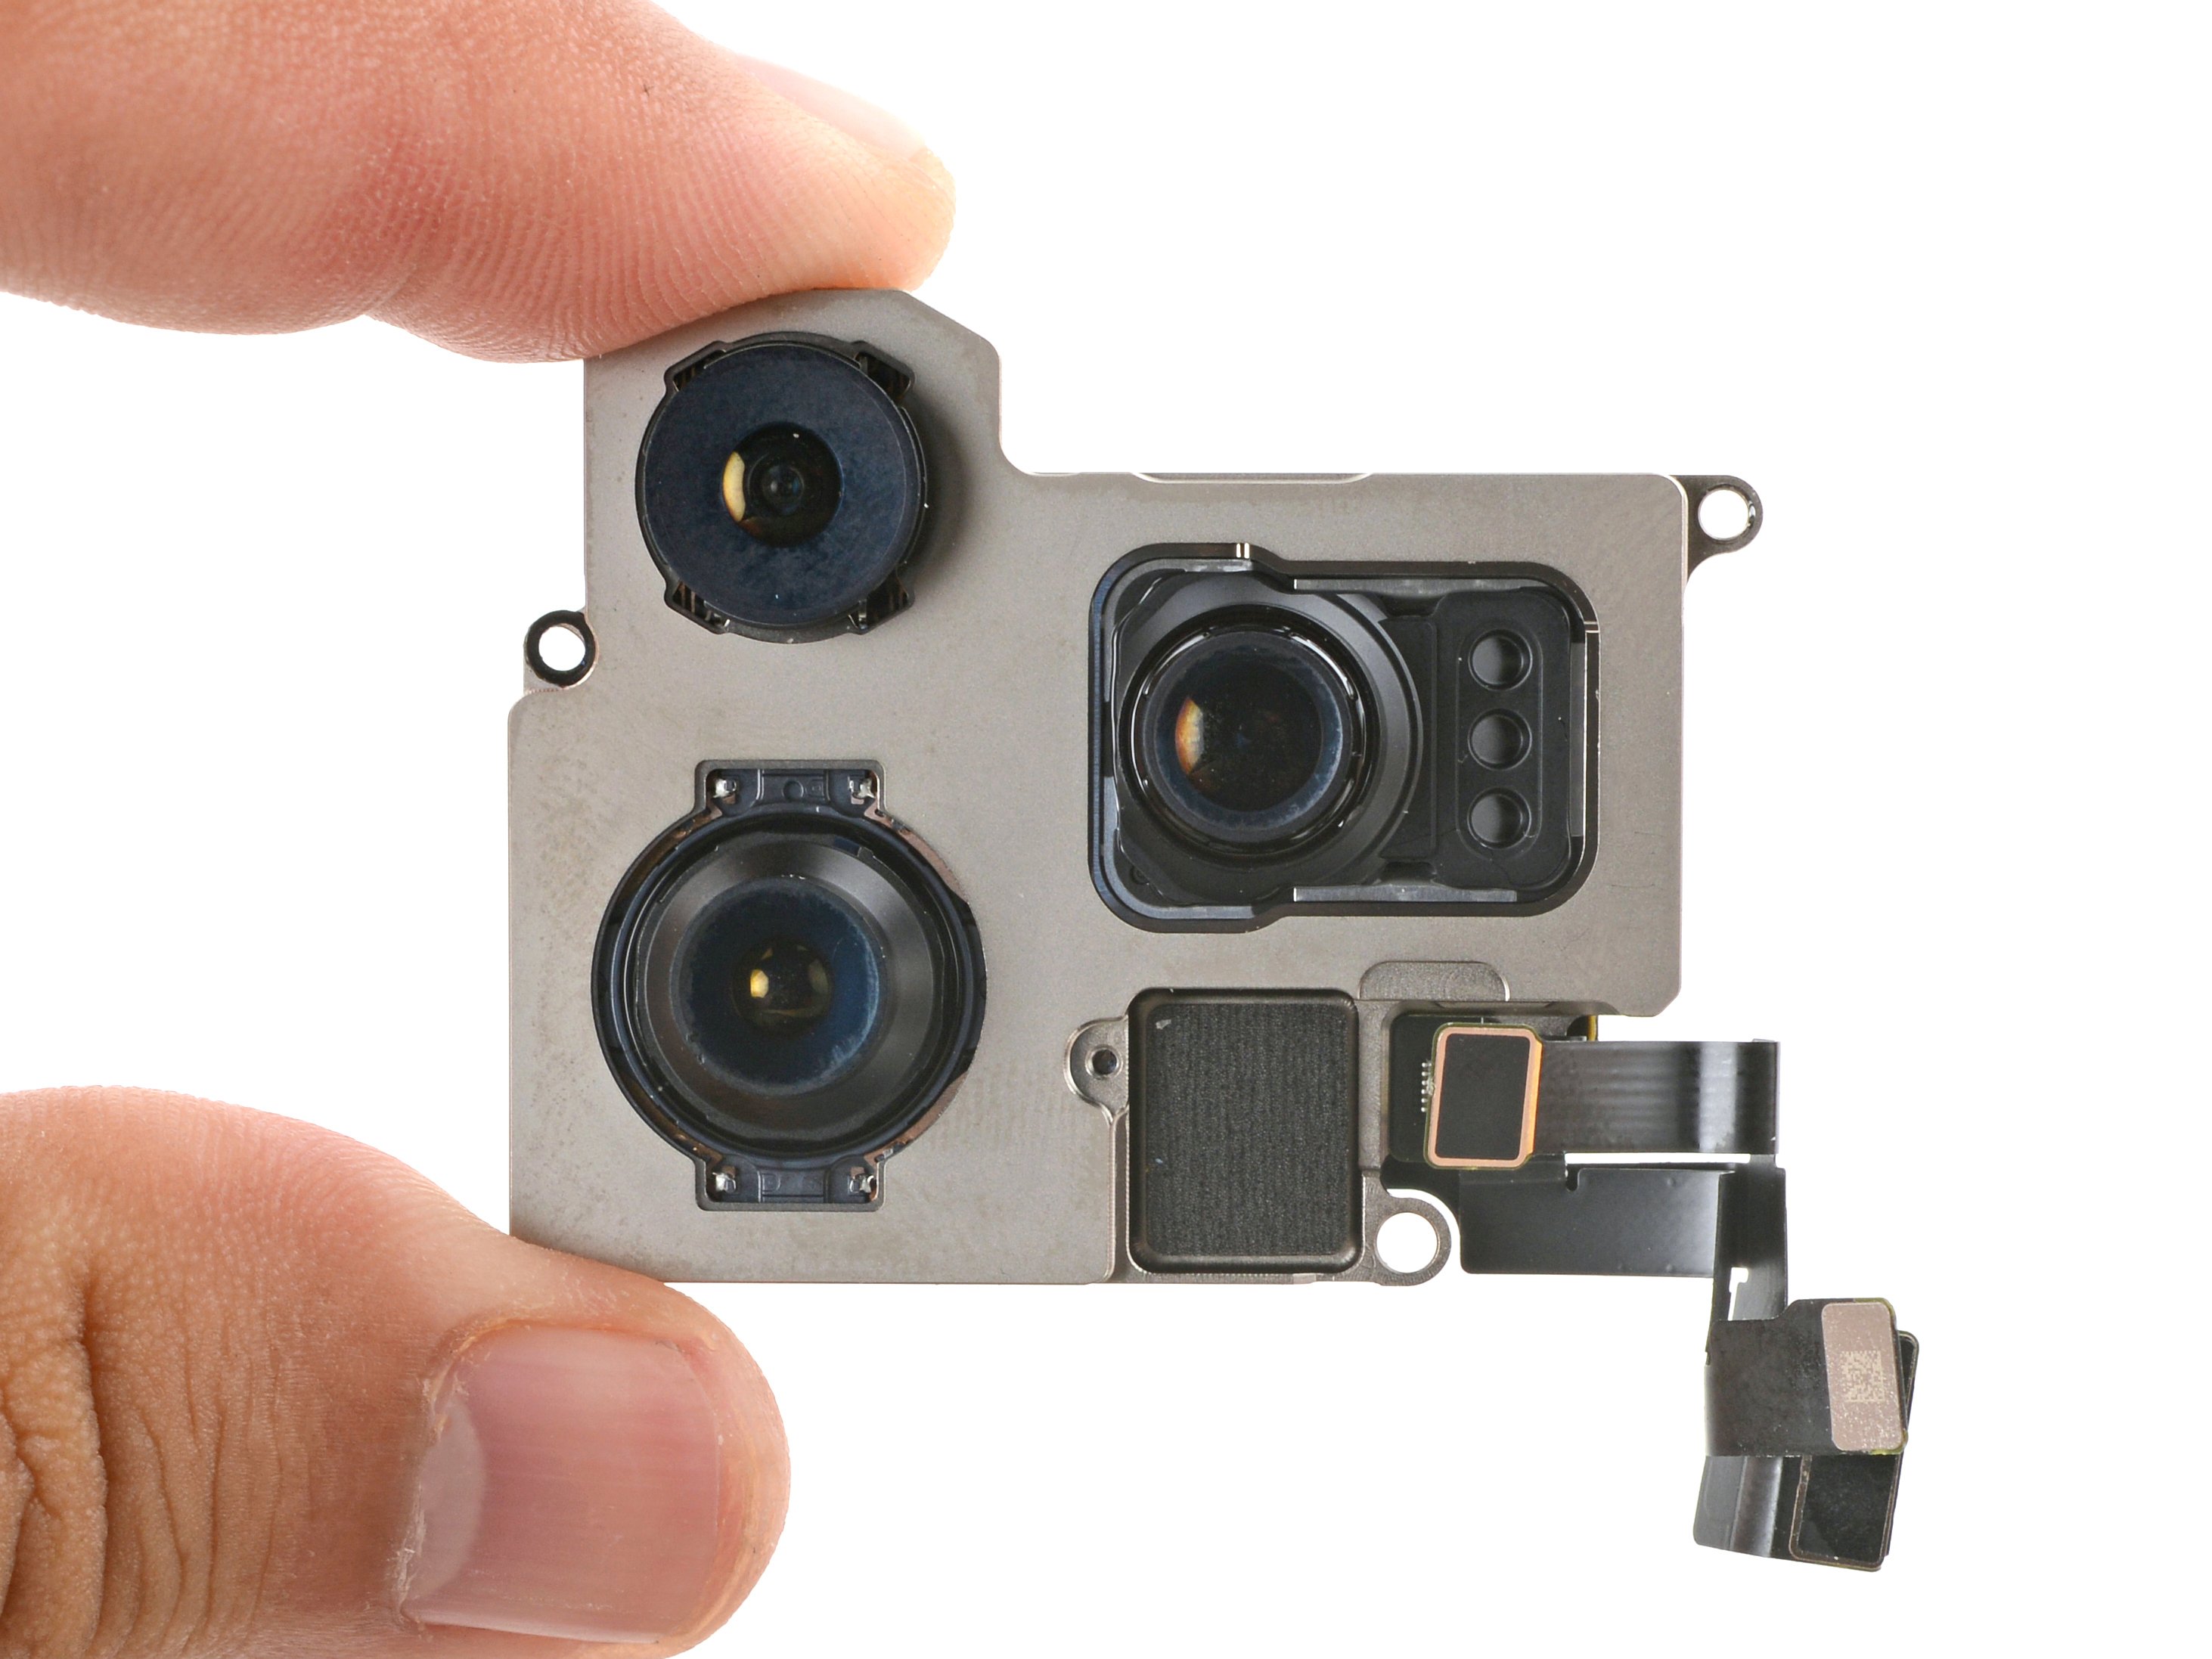
- Now, go ahead and lift out the rear camera assembly like a pro!
Tools Used
Step 29

Nice work getting your iPhone all taken apart! Up next, we’ll guide you through putting it back together piece by piece.
Keep in mind, depending on your exact iPhone model, some reassembly images might look a bit different, but the steps will still be spot on for your device.
Step 30

- Gently place the rear camera assembly back into its designated spot, making sure it fits snugly in its recess. Keep it friendly, keep it simple—that's how we do repairs at Salvation Repair. If you hit a snag, remember you can always schedule a repair for the pros to handle the tricky stuff.
Step 31
- Grab your trusty Phillips screwdriver and pop in the two 2.9 mm screws to lock down the rear camera assembly. Easy does it!
Step 32

When re-attaching press connectors like this one, line it up carefully and press down on one side until you hear a click, then do the same on the other side. Avoid pressing in the middle, as a misaligned connector can bend the pins and cause permanent damage.
- Grab your finger or a spudger and gently press to reconnect the two camera connectors onto the logic board. Easy does it—just a light touch to secure the connections. If you need a hand, you can always schedule a repair.
Tools Used
Step 33
- Gently place the LiDAR sensor snugly into its spot.
Step 34
- Grab a Phillips screwdriver and pop in the two screws to hold the LiDAR sensor in place:
- One screw that's 1.6 mm long
- One screw that's 2.9 mm long
Step 35

- Give that LiDAR sensor connector a gentle nudge with your finger or a trusty spudger to snugly connect it to the logic board. You're doing great!
To reconnect press connectors like this one, gently line up the pins and press down on one side until it clicks, then do the same on the other side. Avoid pressing in the middle, as misaligning the pins can bend them and cause permanent damage. If you run into trouble, you can always schedule a repair for expert help.
Tools Used
Step 36


Be gentle with those delicate grounding clips as you clean the frame. If one gets bent out of shape, just carefully bend it back with your fingers or some tweezers—no big deal!
- Grab some blunt nose tweezers or use your fingers to gently lift away the big chunks of adhesive around the frame.
- Next, take a spudger and carefully scrape off any leftover sticky residue from the frame’s surface.
- If the adhesive is being stubborn and won’t give up easily, warm it up a bit with a hair dryer or heat gun, then give it another shot.
Tools Used
Step 37


- If you're reusing your back glass, dampen a microfiber or lint-free cloth with a few drops of highly-concentrated isopropyl alcohol (over 90%) and gently wipe around the edges to prep the surface for fresh adhesive.
Step 38

Take your time with this step. A spotless frame helps the replacement adhesive spread out smoothly, giving you a stronger, longer-lasting bond. Rushing can lead to uneven adhesion, so go slow and steady for the best results.
- Start by wrapping a lint-free cloth or a coffee filter around your spudger tip, then give it a few drops of highly-concentrated isopropyl alcohol (over 90%).
- Gently wipe along the edge of the frame in a single, steady motion to remove any stubborn adhesive residue.
Tools Used
Step 39

Keep an eye on the camera cutout and the notches along the top and bottom edges—that's your visual cue for how the adhesive will sit in the frame. It’s a handy way to make sure everything lines up perfectly during reassembly.
- Place the adhesive sheet on the frame to check its orientation. Make sure it fits snugly and looks just right!
Step 40


The adhesive you've got on hand is super sticky! Make sure it doesn't get friendly with anything else until you're all set to stick it to the frame.
If your adhesive has a bunch of liners, go ahead and peel off the one that reveals the side ready to stick onto the frame.
- Pick up the tab at the corner of the adhesive sheet and peel back the liner to reveal one-third of the sticky part. Keep going—you're on your way to a successful repair! If you need help along the way, you can always schedule a repair.
Step 41


Once the adhesive is set in place, there's no going back—you'll need to remove it and start fresh with new adhesive. So, make sure you're ready before you press down!
- Line up the sticky strip's exposed edge with the frame of your iPhone, making sure it's straight and ready to go.
- Once it's in the right spot, gently press down on the exposed adhesive to stick it firmly onto the frame.
Step 42


- Keep peeling back the liner from the adhesive, and gently press the sticky part into place as you go. Easy does it—no rush needed!
No adhesive strips on hand? No worries—just pop your iPhone back together and keep on using it as usual. Just remember, the water resistance won’t be what it used to until you swap out the adhesive. When you line up the adhesive correctly, the edges will sit nicely into place. If it’s just a tad off, gently pull the edges into alignment with the frame. And if the adhesive starts to crease or wrinkle, it’s best to remove it and start fresh with new adhesive to get a clean, secure fit. For more help, you can always schedule a repair.
Step 43


- Grab your trusty spudger and gently press down the adhesive all around the edges of your iPhone.
Be gentle with those delicate grounding clips. If one gets bent out of shape, just carefully bend it back into place using your fingers or a pair of tweezers. Stay patient and steady—it's all about finesse. If you need a hand, you can always schedule a repair.
Be gentle—pressing too hard can stretch and mess up the adhesive. Treat it like a delicate dance, and you'll avoid any unwanted deformations. If you need a hand, remember you can always schedule a repair.
Step 44


At this stage, you might still have those little liners hugging the edges, keeping the adhesive from accidentally making friends with anything while you’re putting your iPhone back together. So, hold off on peeling those tiny release liners for now!
- Grab a spudger or your trusty fingers and gently lift the pull tab attached to the big front liner. You'll usually find that pull tab tucked into a corner of the liner, waiting for you.
- Use that pull tab to carefully peel away the large front liner from its adhesive grip. Take your time and enjoy the process!
Tools Used
Step 45

- Gently lift the back glass along the right edge of your iPhone like you're unveiling a secret compartment. You've got this!
Step 46

- Grab your finger or the flat end of a spudger and gently press to reconnect the back glass connector onto the logic board. Easy does it—just make sure it's seated properly. If you need help, you can always schedule a repair.
Tools Used
Step 47

Before sealing up your iPhone, it's a smart move to give it a quick test run. Power it on and confirm everything looks good—no surprises! Then, power it down and continue the reassembly. Think of it as a check-up before the final step.
If your iPhone isn't turning on, plug it into a power source and give it another shot. Sometimes, a little juice is all it needs to wake up and show it's healthy.
If you've swapped out the logic board and the display still won't light up, you'll need to follow the screen connection steps carefully to manually reconnect the display connector. For tricky parts, if you need help, you can always schedule a repair.
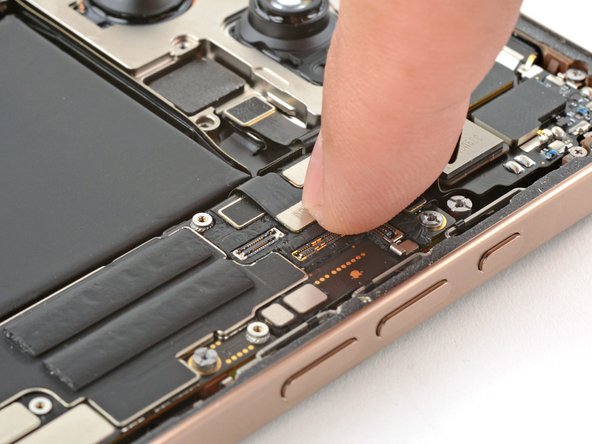
- Gently press the battery press connector onto the logic board using your finger or a spudger. Keep it snug and make sure it's seated properly. If you need a hand, you can always schedule a repair.
Tools Used
Step 48

- Line up the back glass connector cover with its screw holes and gently lay it down in its proper spot. Keep it aligned and steady—you're almost there! If you need a hand, you can always schedule a repair.
Step 49

- Grab your tri-point Y000 driver and carefully screw in the four screws holding down the back glass connector cover:
- Two screws that are 1.3 mm long
- Two screws that are 1.0 mm long
Step 50

- Line up the battery connector cover with its screw holes and gently lay it back in place. If you need a hand, you can always schedule a repair.
Step 51

- Grab your tri-point Y000 driver and get ready to unscrew the battery connector cover. There are two screws, each 1.3 mm long, and one that’s just 1.0 mm. Keep track of these tiny but important fasteners—once you’re done, you’ll be one step closer to a successful repair. If you need a hand, you can always schedule a repair.
Step 52


As you peel back the liners, keep a close eye so nothing touches that sticky exposed adhesive—it's delicate territory out here!
- Gently use your fingers or a spudger to lift and remove all the liners around the edges, revealing the sticky adhesive underneath.
- Give the frame and back glass a once-over to spot any leftover liner bits and clear them out. You want it squeaky clean with no liners left behind.
Tools Used
Step 53


If you hit resistance, a clip around the edge might be bent out of shape and getting squished by the frame. Check where it's tight and gently bend those clips back into line. If you need help, you can always schedule a repair.
- Gently lower the back glass onto the frame, starting with the top edge to get it seated properly.
- Press along the edges of the iPhone until the back glass is flush against the frame, making sure it's snug and secure.
Step 54

Heating up the adhesive makes it softer and helps it stick better. It’s like giving it a warm hug to improve the bond.
- Grab your trusty hair dryer, heat gun, or an iOpener and warm up that back glass perimeter until it's just a smidge too hot to handle. You got this!
Tools Used
Step 55


- Grab your fingers and give the iPhone's edges a good, confident squeeze all around. Keep it firm but gentle—you're just giving it a friendly hug to loosen things up.
Step 56


Or, for a steady hand, try clamping your device around the edges with vise grips to keep the new adhesive in place. Just make sure to apply even pressure and avoid squeezing too hard. If you need help, you can always schedule a repair.
- Set your iPhone face-down on a clean, flat surface to get ready for the repair.
- Gently tape around the edges of the back glass to keep it protected as you work.
- Build a little wall around the back glass using stacked coins until it’s as tall as the camera bump—this will help keep everything stable.
Tools Used
Step 57


Using coins might leave a tiny mark on the bottom cover, so avoid using anything too precious.
Applying some pressure will do the trick to get that adhesive working its magic.
- Grab 3-4 hefty books and stack them right on top of your iPhone like a cozy little fort.
- Let those literary giants chill there for about 30 minutes, giving your device some quality time.
Tools Used

Step 58
- Grab your P2 pentalobe screwdriver and carefully tighten the two 7.4 mm screws on each side of the charge port. Keep at it until they're snug—you're almost there! If you need help, you can always schedule a repair.