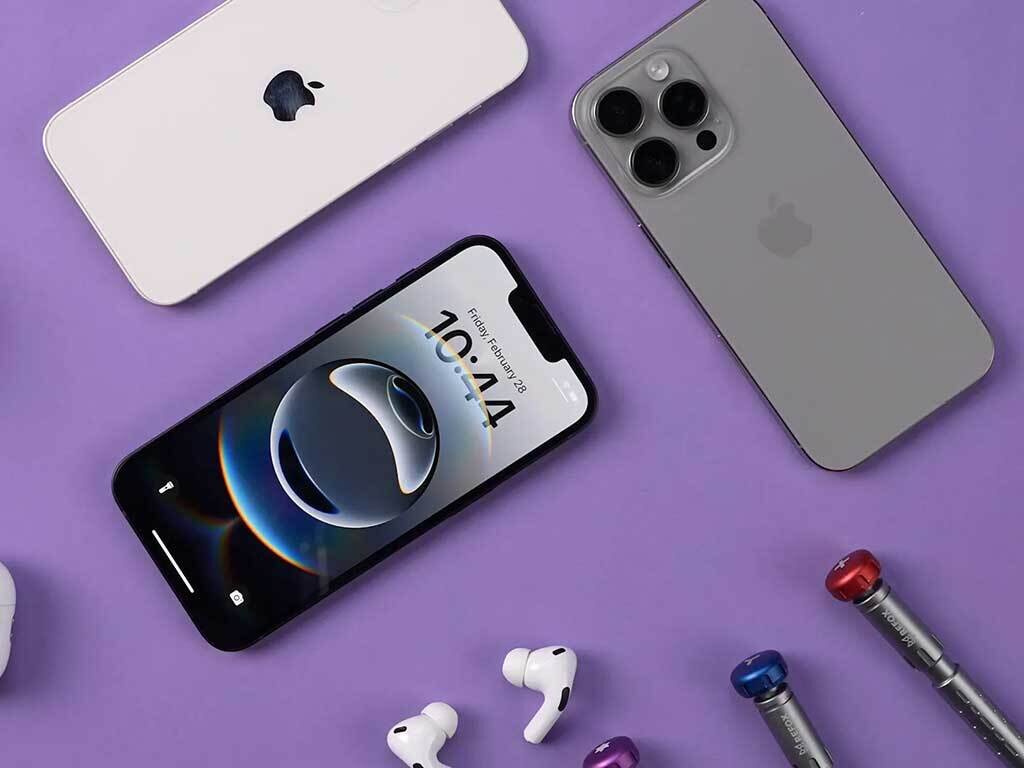
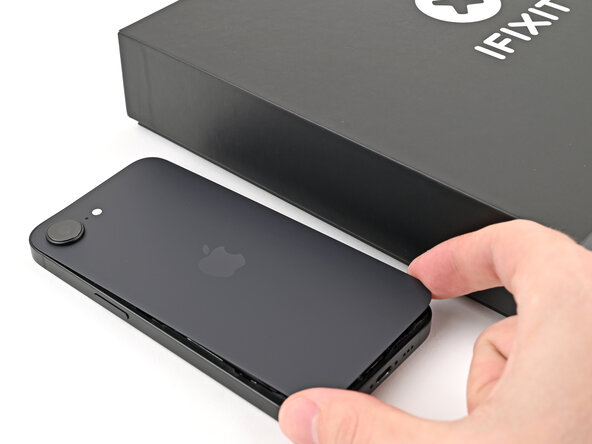
iPhone 16e Microphone Replacement
Duration: 45 minutes
Steps: 71 Steps
Ready to give your iPhone 16e a voice makeover? If your phone can't hear you, keeps cutting out, or only picks up your best Darth Vader impression, the main microphone could be the culprit. This guide walks you through swapping out the primary mic—one of three in the iPhone 16e. (The other two are chilling with the charging port and power button assemblies.) Grab some fresh back glass adhesive to seal things up when you're done, and make sure your new microphone has adhesive—if not, you'll want to add some. Heads-up: a few pictures might look a little different than your phone, but don’t sweat it—the steps are all the same. If this gets tricky or you need a pro, you can always schedule a repair.
Step 1

Let your phone's battery dip below 25%. A fully charged lithium-ion battery can be a bit of a diva when it comes to safety. Let's play it safe and give it a little space to breathe.
- Time to unplug those cables from your phone and set them aside, no distractions here!
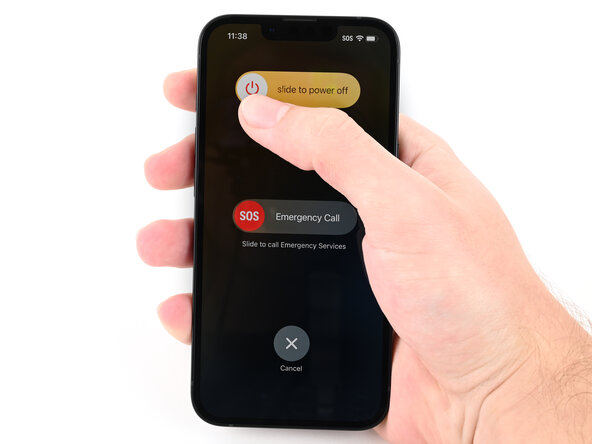
- Now, hold down the power button and one of the volume buttons. Once you see the power-off slider, slide it to turn off your phone. It's like giving your phone a quick nap!
Step 2
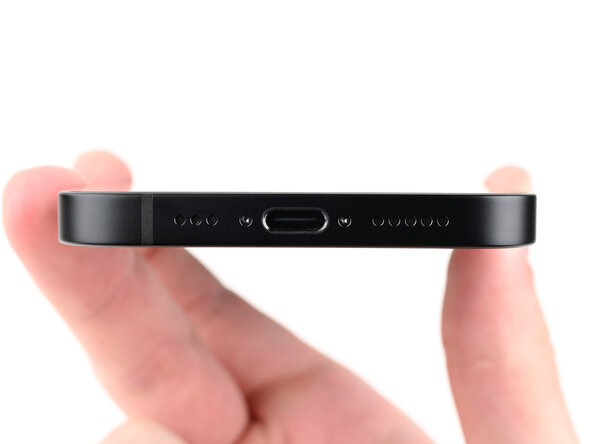
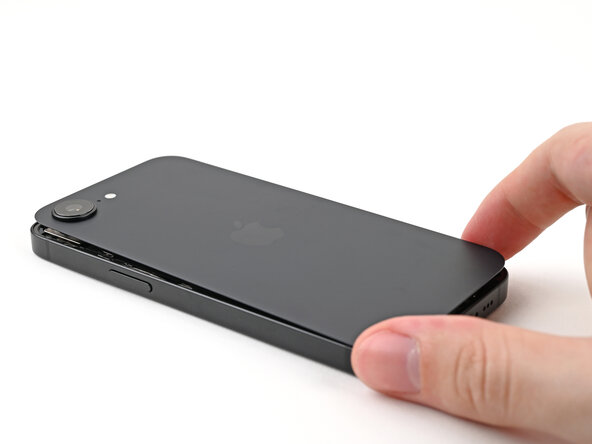
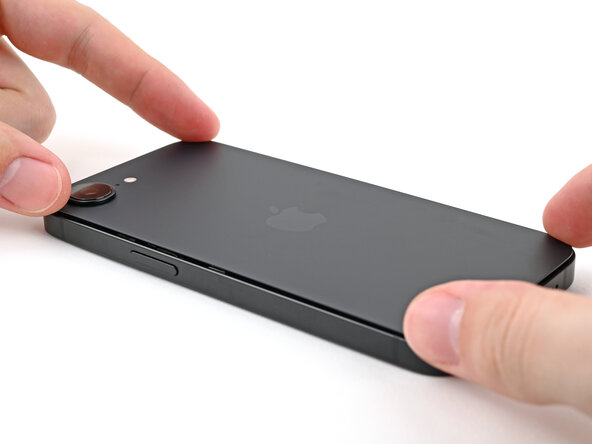
Ensure there's a nice, flat area near the bottom edge that's spacious enough for a suction cup to attach to.
- If your screen or back glass has seen better days and is sporting some serious cracks, grab some packing tape and lay down overlapping strips over the glass. This little trick will keep you safe and make the disassembly process a breeze!
Tools Used

Step 3
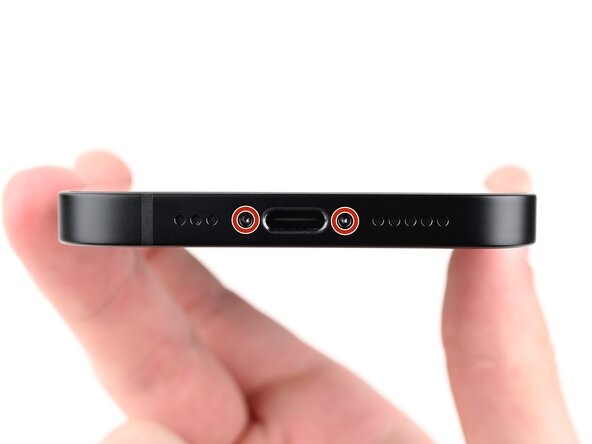
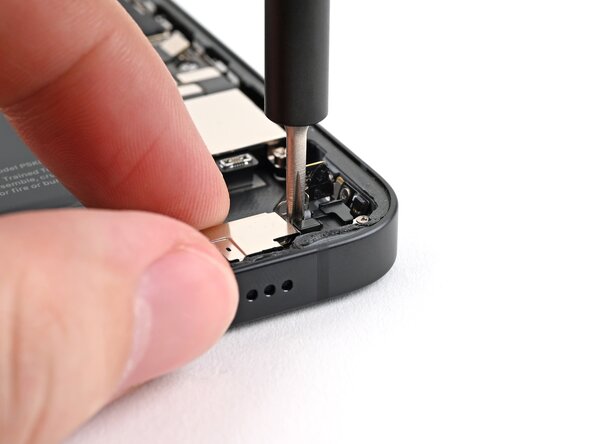
- Grab your P2 pentalobe screwdriver and carefully unscrew the two 7.8 mm screws flanking the charging port. Keep these little guys safe—they're key to moving forward!
Step 4


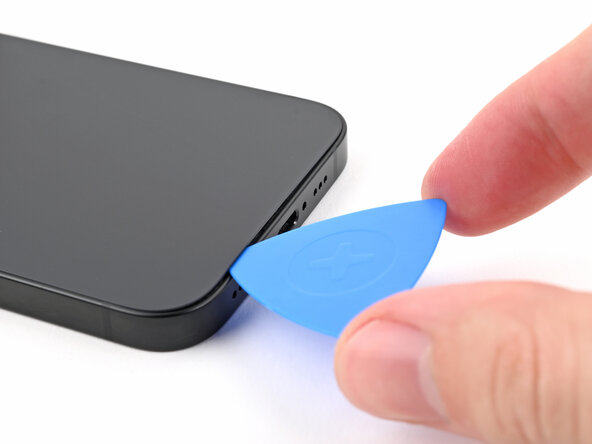
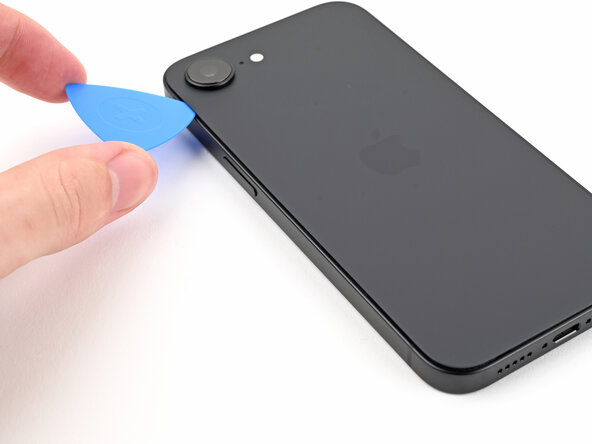
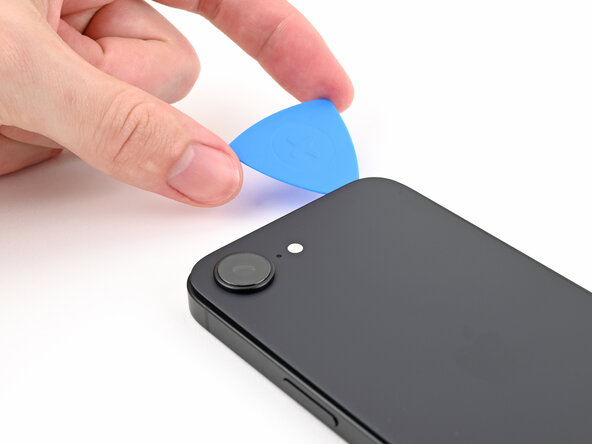
Be careful not to push the opening pick too far in—it can cause some unwanted damage. Mark your pick to keep things in check and avoid any mishaps.
Feel free to mark other corners of the pick with different measurements to give you a bit more control.
Another easy trick: tape a coin about 3 mm from the tip of your pick to act as a buffer.
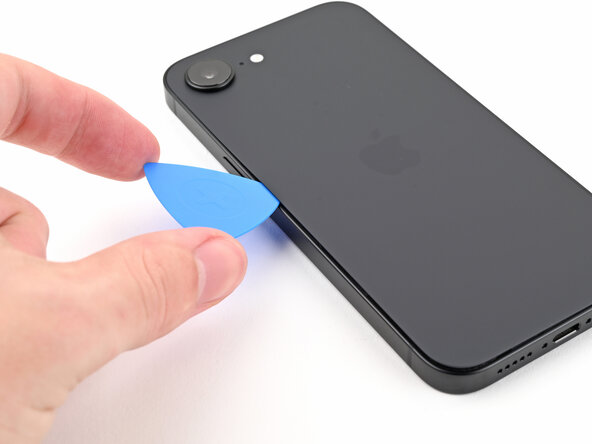
- Grab your measuring tool and measure 3 mm from the tip. Use a permanent marker to mark the opening pick at that spot.
Step 5
Heads up! Don’t heat the phone beyond this point—its battery isn’t a fan of too much heat and could get damaged.
Alternatively, grab a hair dryer or a heat gun and give the bottom edge of that back glass a warm hug until it’s nice and toasty!
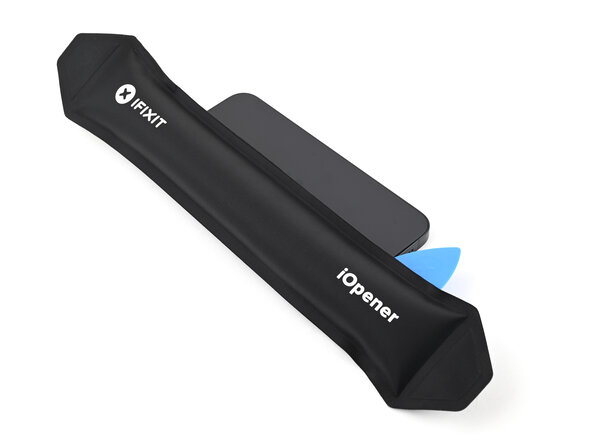
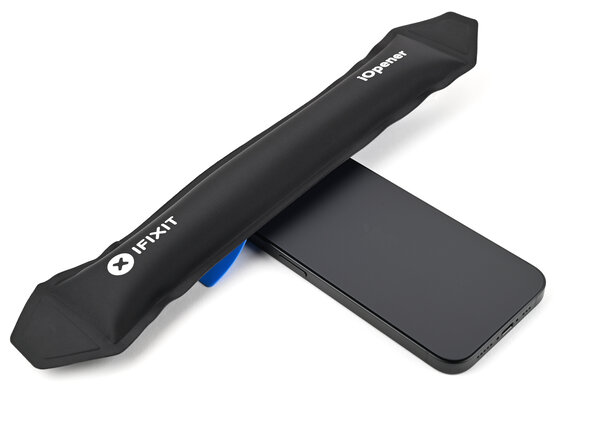
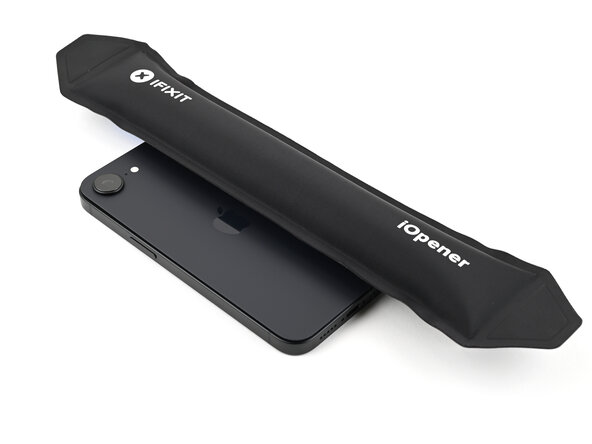
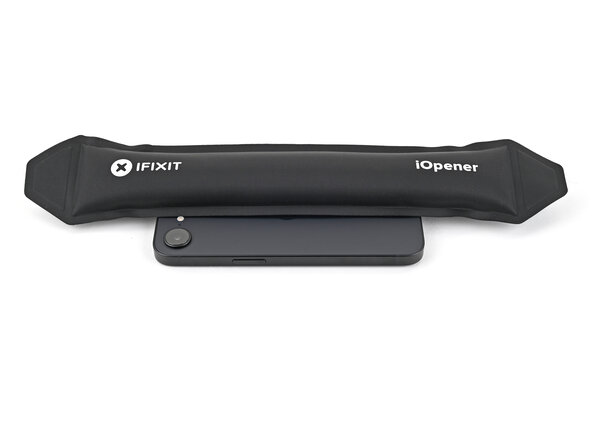
- Place a heated iOpener on the bottom edge of the back glass and let it work its magic for 90 seconds.
Tools Used


Step 6
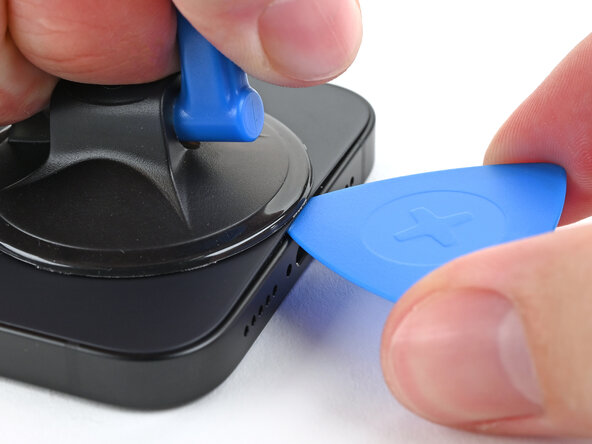
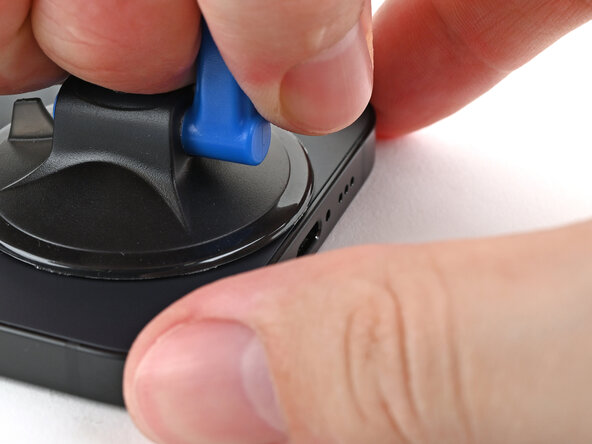
- Stick a suction handle right at the bottom edge of the back glass.
- Give the handle a firm, steady tug upward to gently pry a gap between the back glass and the frame.
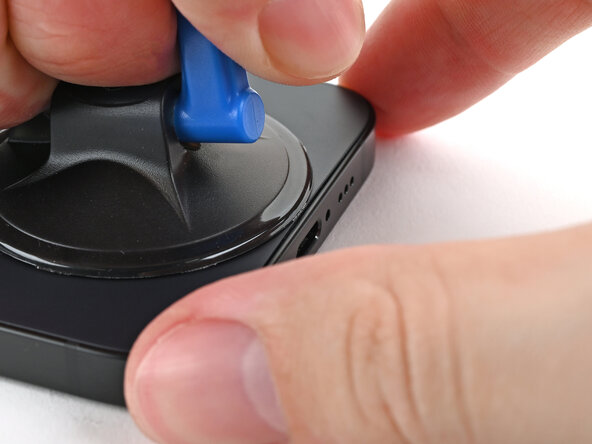
- Slide the tip of an opening pick into that gap you just created.
Tools Used

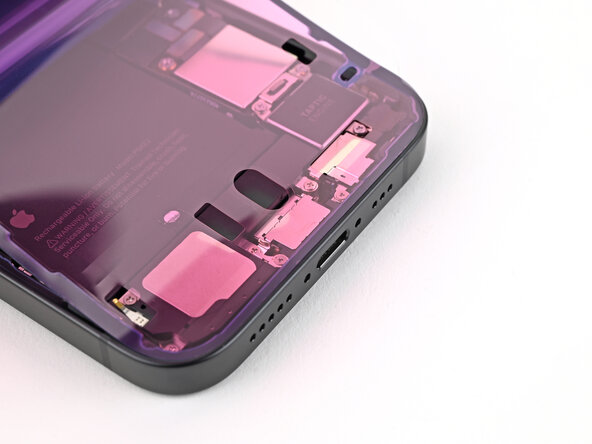
Step 7
As you carefully cut through the adhesive holding the back glass in the upcoming steps, remember to keep your pick no deeper than 3 mm. We don't want any accidental damage to those sensitive areas below!
- You've got a slender little cable that links the back glass to your phone, snugly sitting next to the volume up button. Handle it with care!
- Look out for a bunch of spring contacts hugging the edges of your phone. They're all around, ready to spring into action!
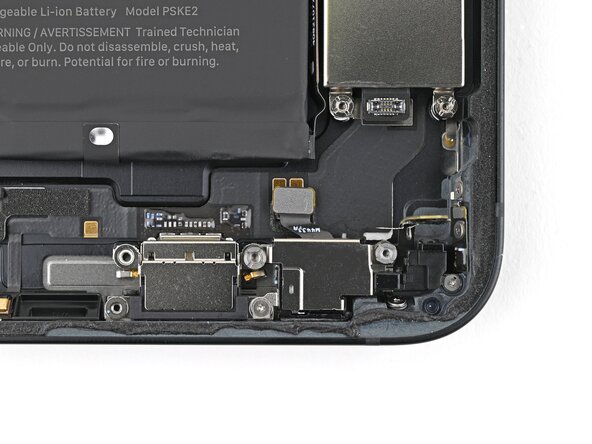
Step 8
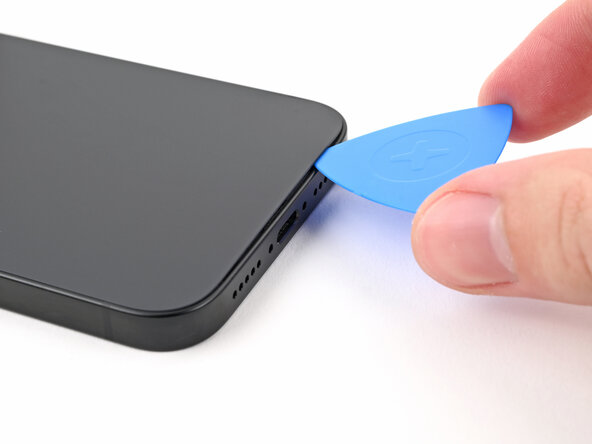
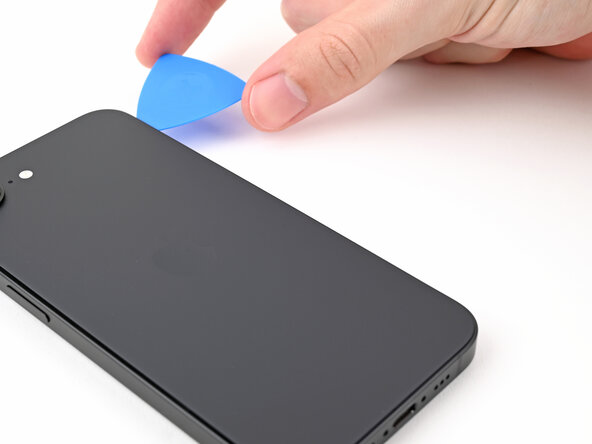
- Glide the opening pick along the bottom edge of the back glass—think of it as slicing through invisible glue.
- Keep that pick chillin' near the lower left corner for now.
Step 9
Grab a hair dryer or heat gun and warm up the back glass until it's toasty to the touch. Just make sure it’s not too hot to handle—don’t burn yourself!
- Place a heated iOpener on the left edge of the back glass and hold it there for about 90 seconds. This gently softens the adhesive, making the glass easier to lift. If you need a hand, you can always schedule a repair.
Tools Used
Step 10
As your tool slides along, you'll hear those metal clips snap free—it's like your device is cheering you on.
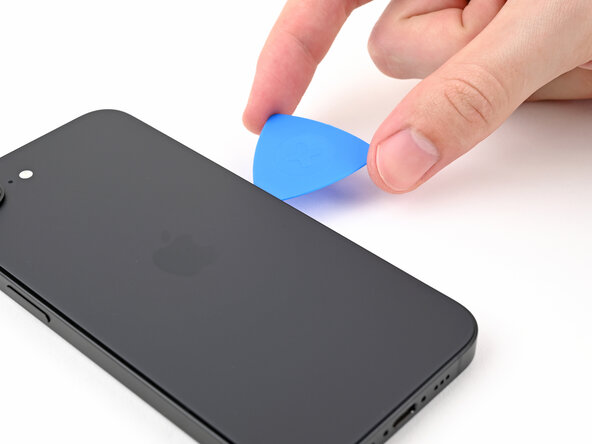
- Grab your opening pick and gently rotate it around the bottom left corner. Slide it along the left edge to break that adhesive seal and release those metal clips. Smooth and easy!
- Keep that opening pick close to the top left corner – you’re almost there!
Step 11
Grab your hair dryer or heat gun and warm up the back glass until it feels nice and toasty to the touch.
- Heat up an iOpener and apply it to the top edge of the back glass for 90 seconds. This will make things a lot easier to work with, so take your time and let the heat do its magic!
Tools Used
Step 12
As you slide past, you'll both hear and feel those metal clips pop free.
- Take your opening pick and gently rotate it around the top left corner. Slide it along the top edge to break through the adhesive and loosen those pesky metal clips.
- Keep that pick in place in the top right corner while you move on to the next step.
Step 13
Warm things up a bit! Use a hair dryer or heat gun to gently warm the back glass until it feels comfortably hot to the touch. This helps loosen things up for the next step.
- Warm up that trusty iOpener and give the right edge of the back glass a cozy 90 seconds of heat. Let's get that glass ready for action!
Tools Used
Step 14

Keep your pick shallow—no more than 3 mm deep—so you don't accidentally slice into any hidden cables. Better safe than sorry!
As you slide past, you'll catch the satisfying click and feel of the metal clip popping free.
- Gently work the opening pick around the top right corner, then slide it along the right edge to carefully detach the last bit of adhesive and metal clip. Take your time and be patient – you're almost there!
Step 15
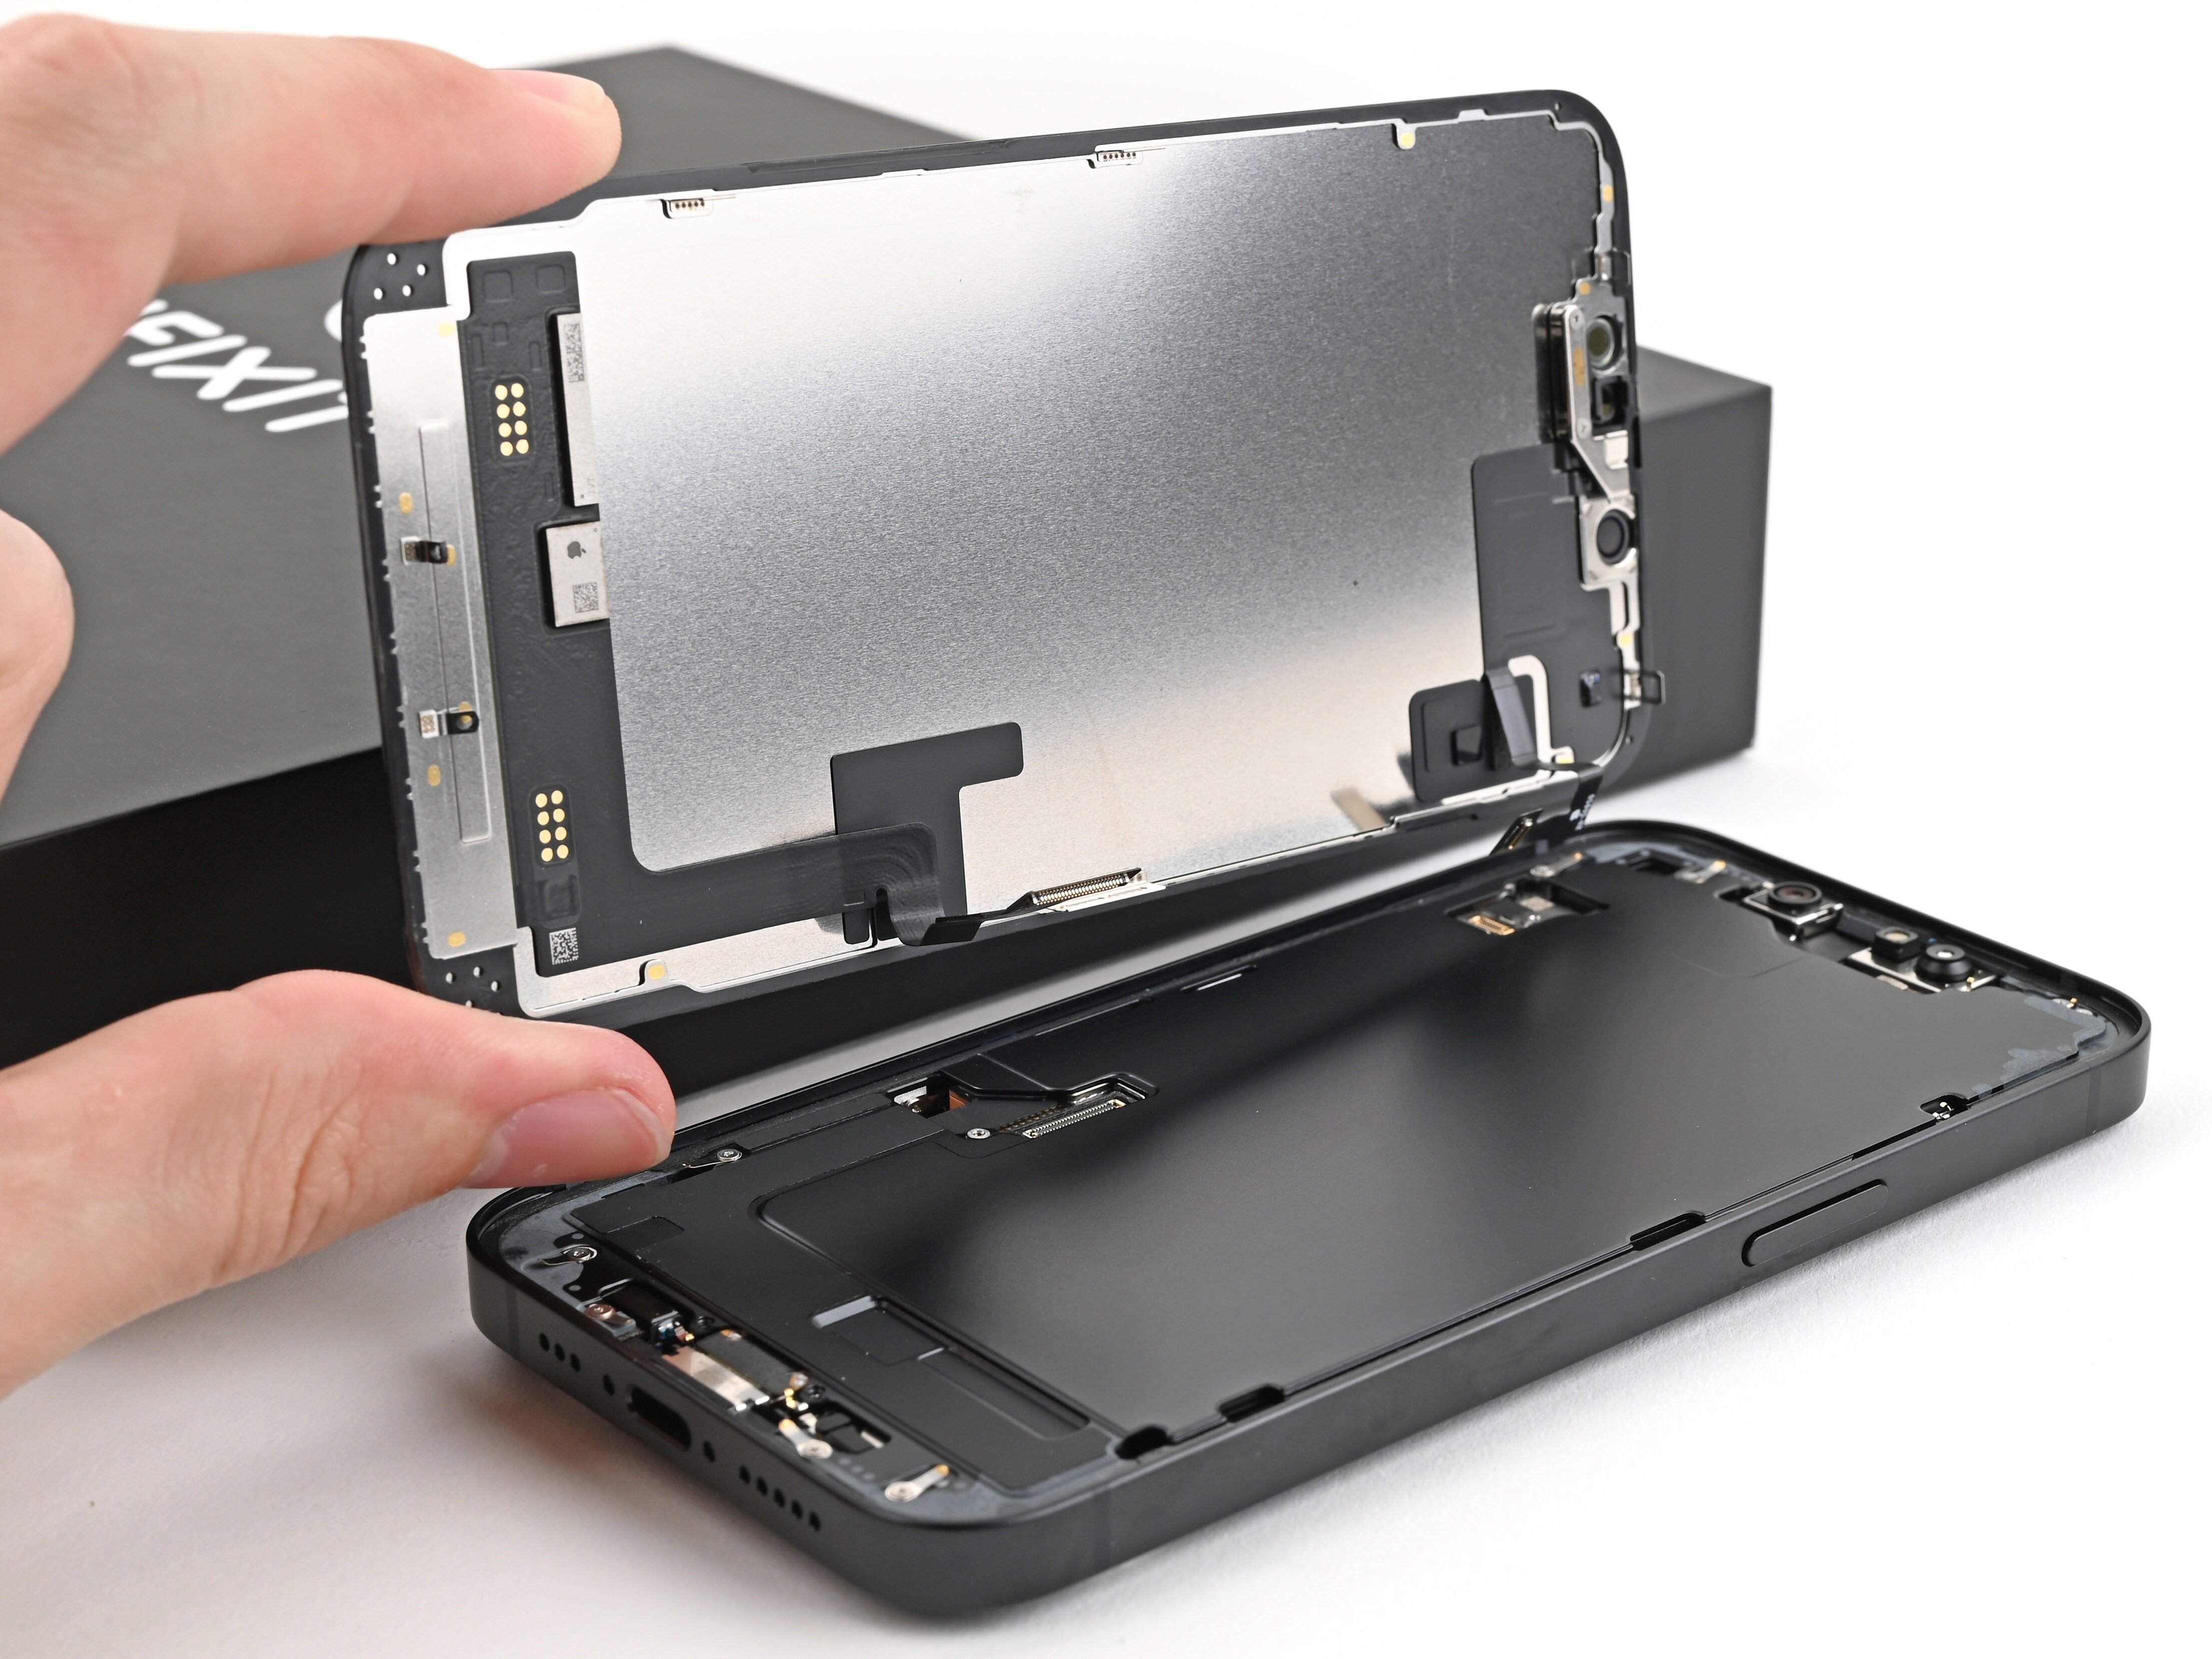
Your back glass adhesive should be fully separated at this point. If you spot any stubborn bits still hanging on, just glide your opening pick around the edges to finish the job.
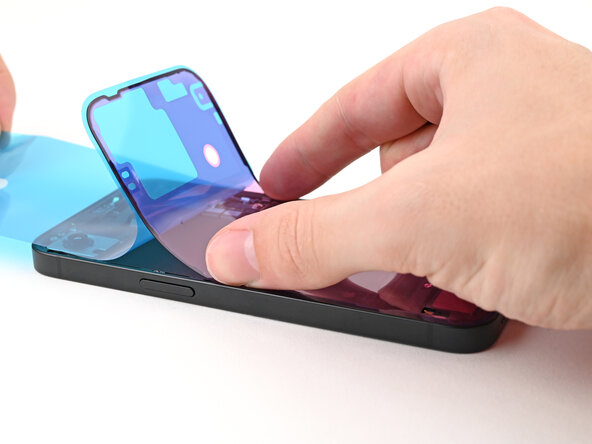
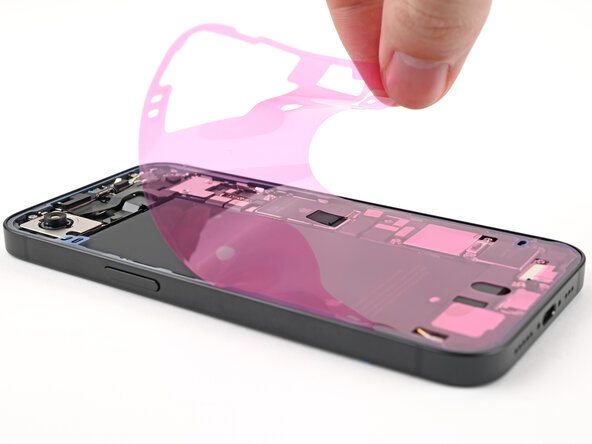
- Gently swing the back glass open toward the right side of the phone, then prop it up safely on a clean, sturdy surface so it stays put.
Step 16
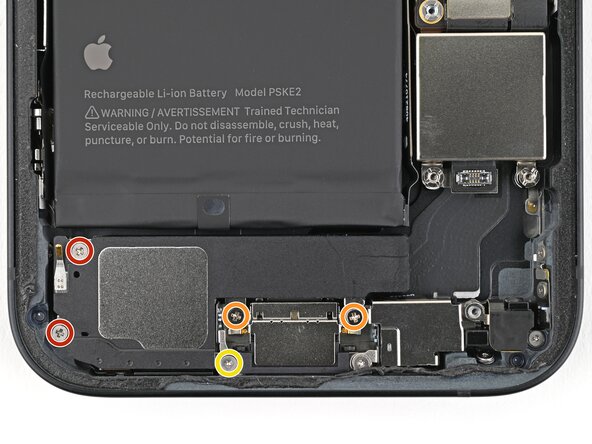
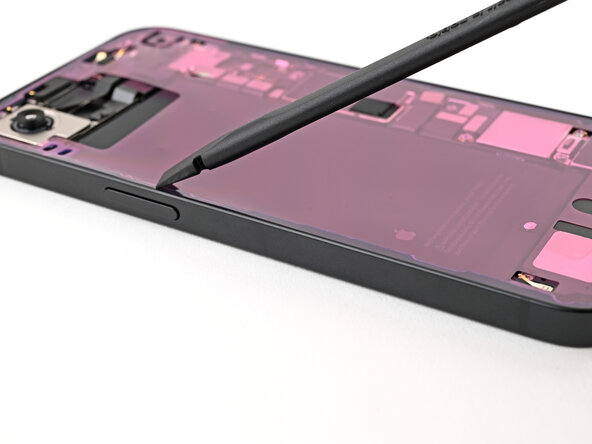
- Grab your trusty tri-point Y000 screwdriver and let's tackle those two tiny 1.3 mm screws holding down the lower connector cover. You've got this!
Tools Used

Step 17
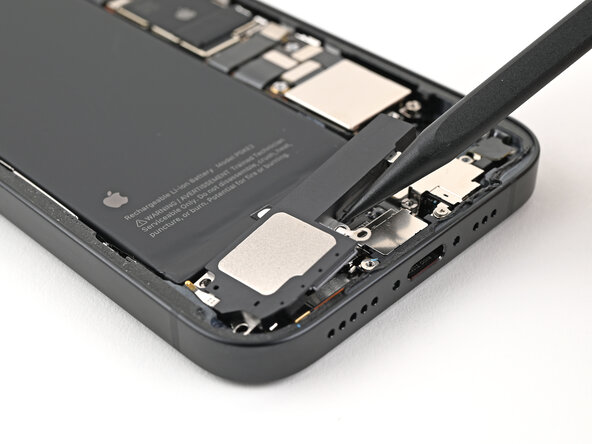
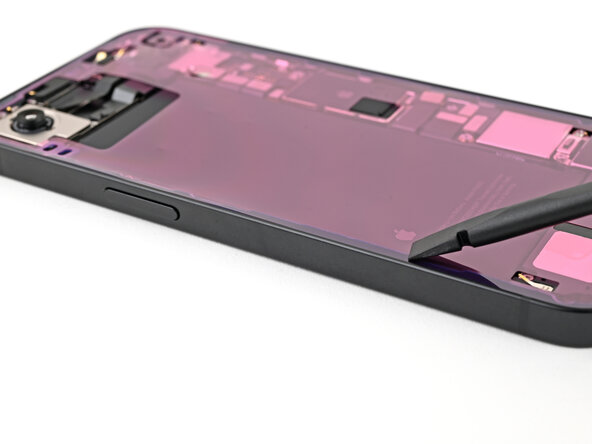
- Grab your tweezers or use your fingers like a pro to lift up the lower connector cover. Gently slide it toward the top of the phone—think of it as helping it make a smooth getaway from its metal clip.
- Take off the lower connector cover and set it aside for its well-deserved break.
Tools Used

Step 18
- Grab your spudger and gently pry up the battery press connector to disconnect it. Take your time—patience is key here! If you need help along the way, remember you can always schedule a repair.
Tools Used

Step 19
- Grab your tri-point Y000 screwdriver and carefully remove the tiny 1.0 mm screw holding down the middle connector cover. Keep it safe!
Tools Used
Step 20
The middle connector cover fits snugly into two metal clips, one at the top and the other at the bottom. A quick press and it's secure!
Step 21
- Gently use the tip of a spudger to lift and unplug the wireless charging coil press connector.
Tools Used
Step 22
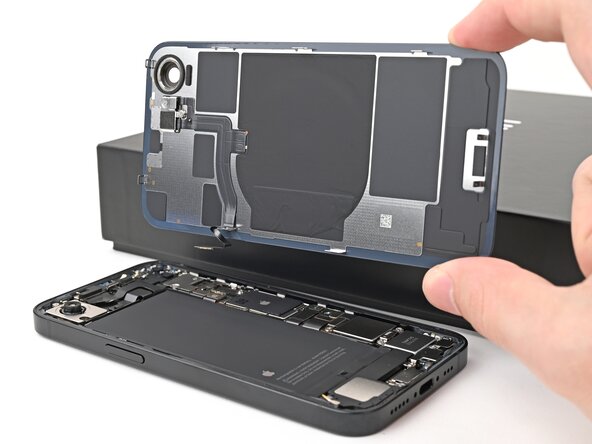
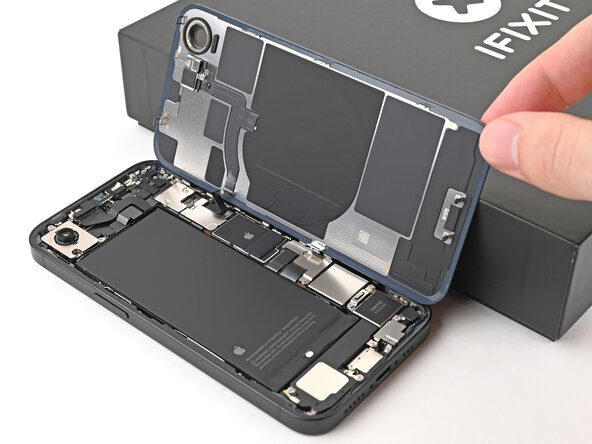
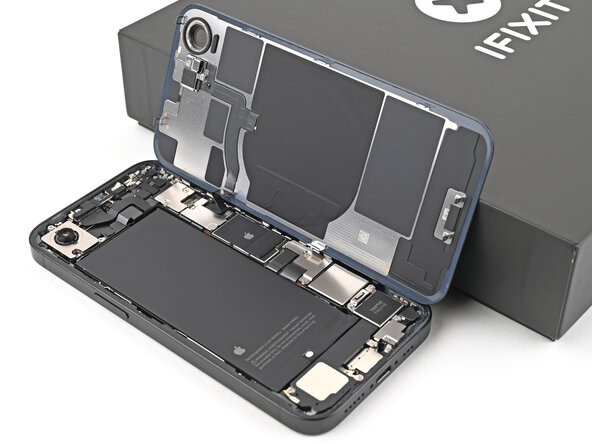
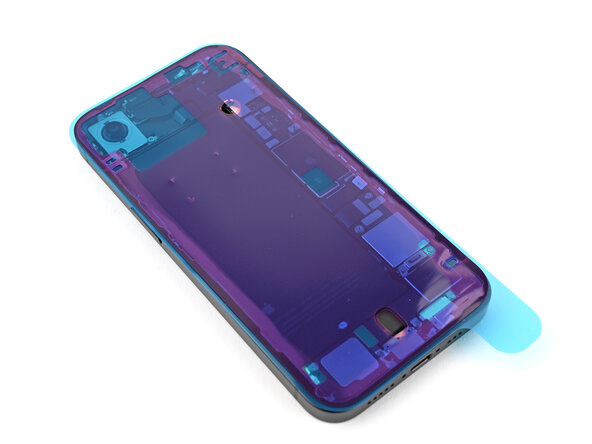
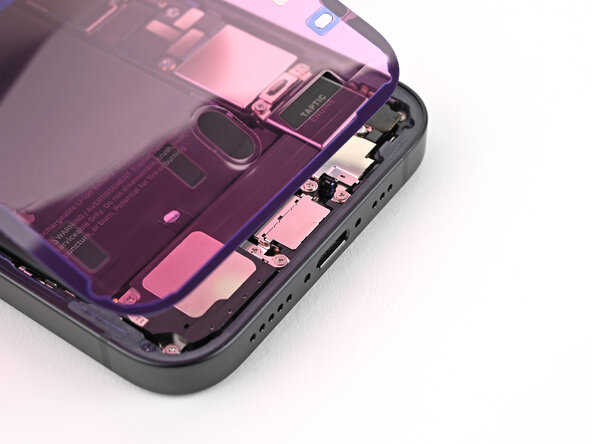
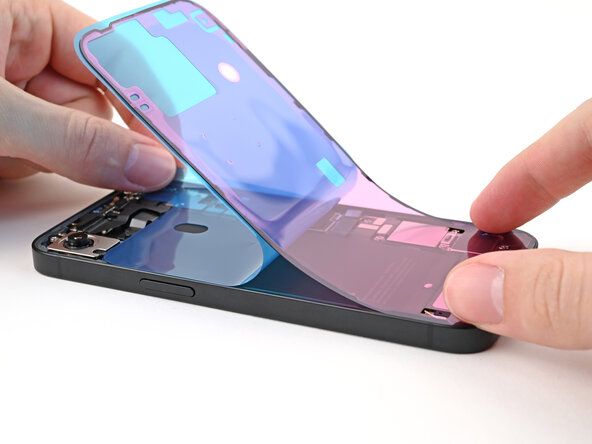
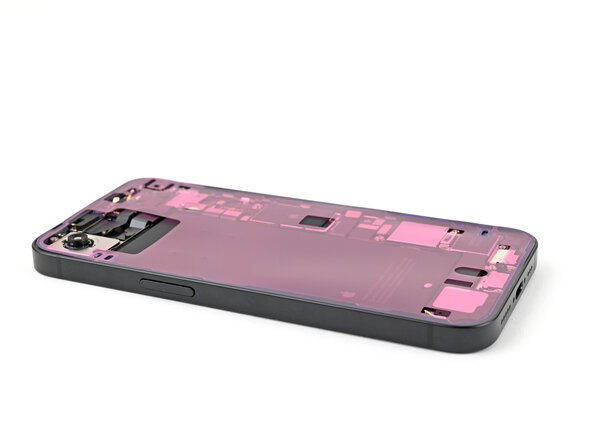
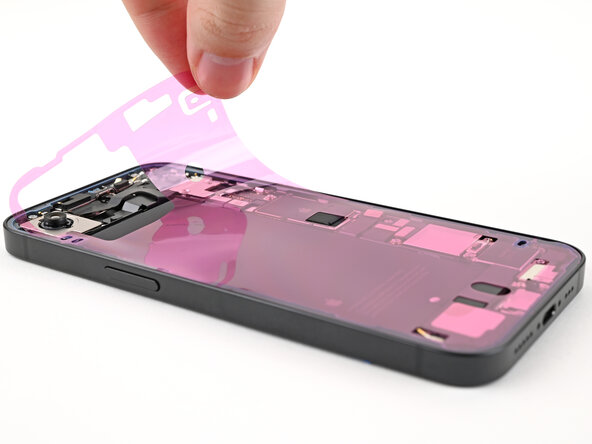
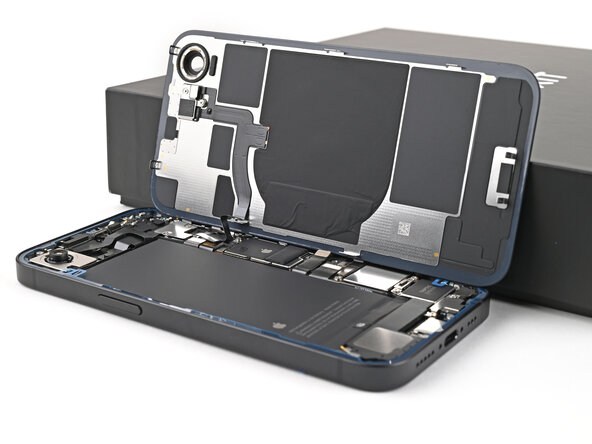
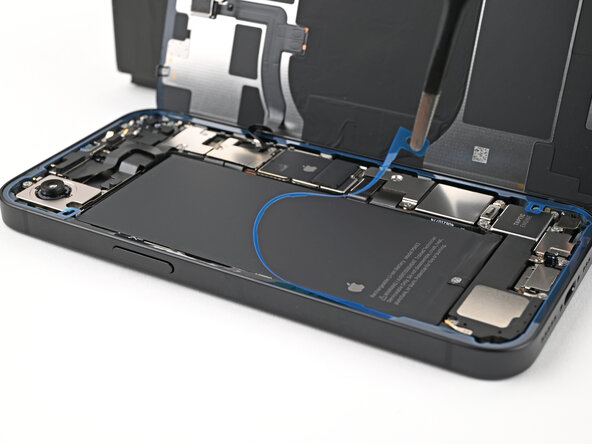
- Gently pop the back glass away from the frame and lift it off.
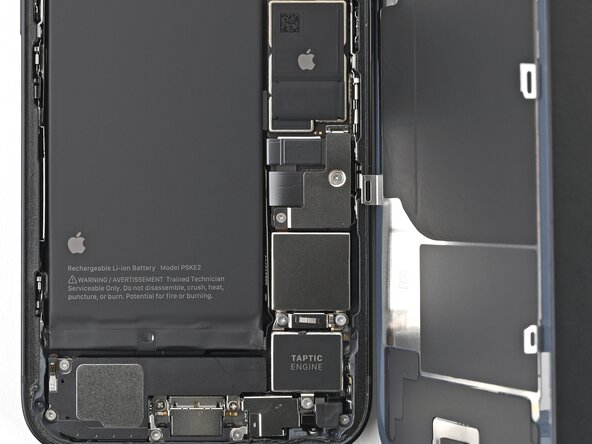
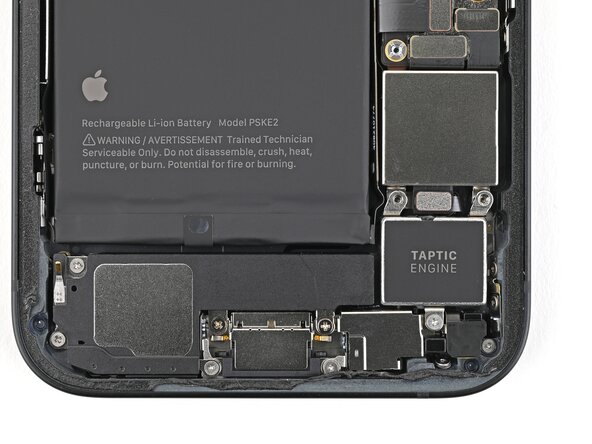
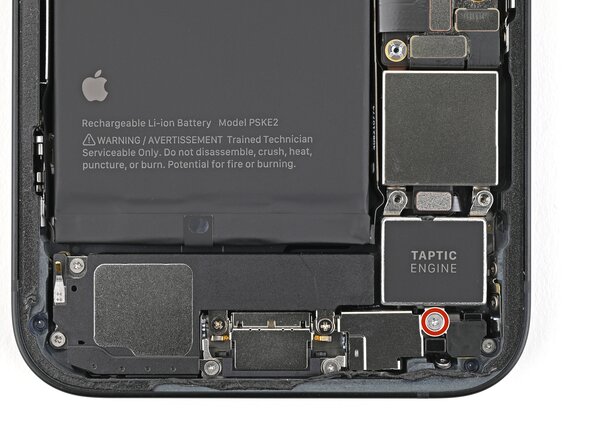
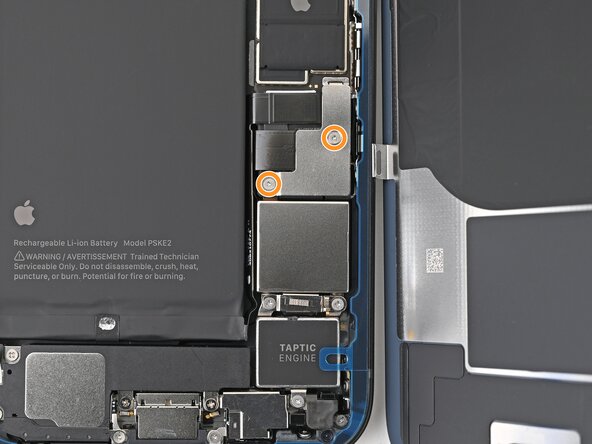
Step 23
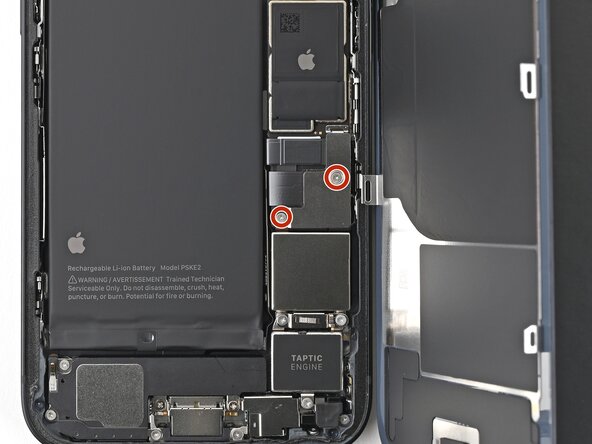
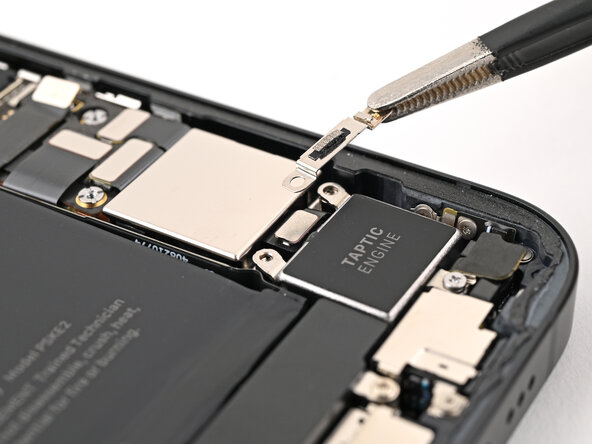
- Grab your trusty Phillips screwdriver and carefully take out the two 2.2mm screws holding the Taptic Engine connector cover in place. Easy does it!
Step 24
- Gently use tweezers or your fingers to lift off the Taptic Engine connector cover.
Tools Used
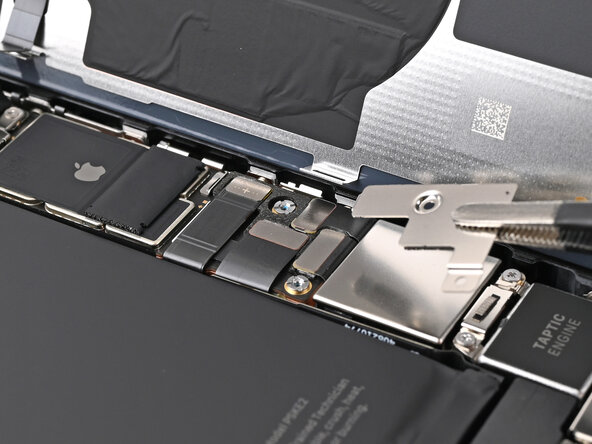
Step 25
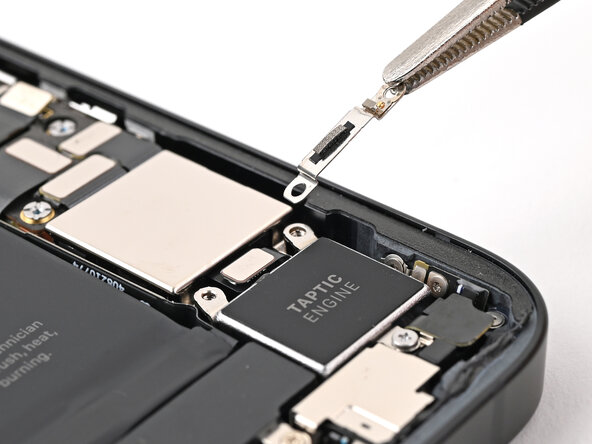
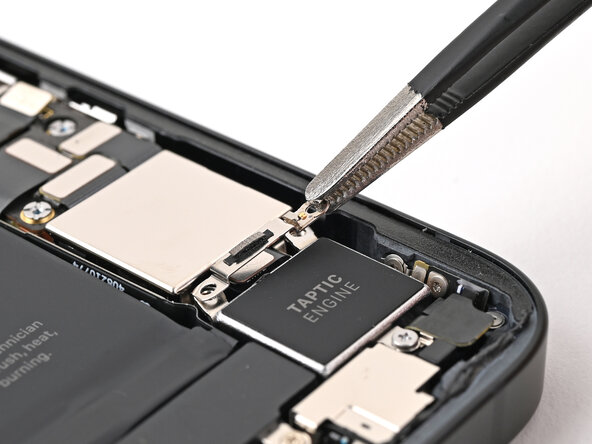
- Grab a spudger and gently pry up the tip to disconnect the Taptic Engine press connector. Keep it light—you're just teasing it loose.
Tools Used
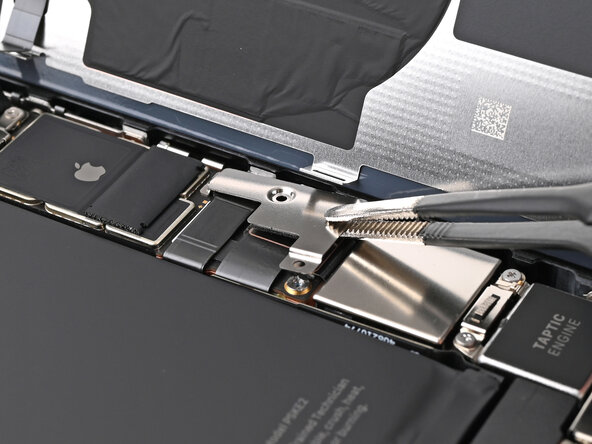
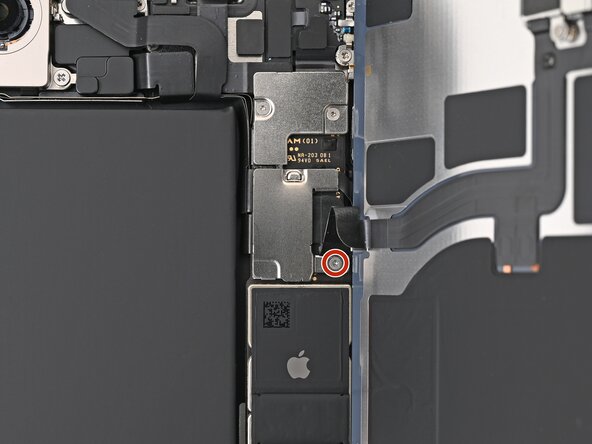
Step 26
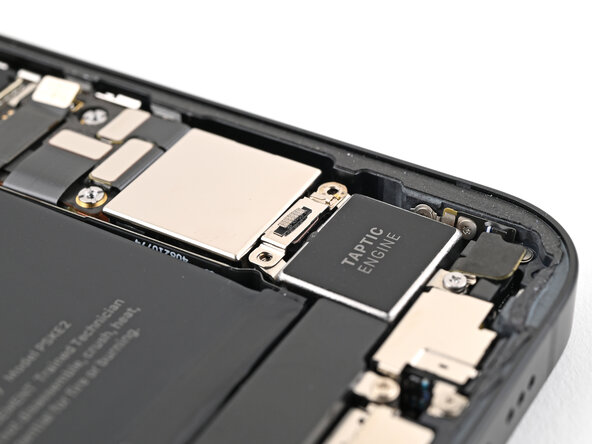
- Grab your trusty Phillips screwdriver and carefully unscrew the 2.1mm-long screw that’s keeping the Taptic Engine in place.
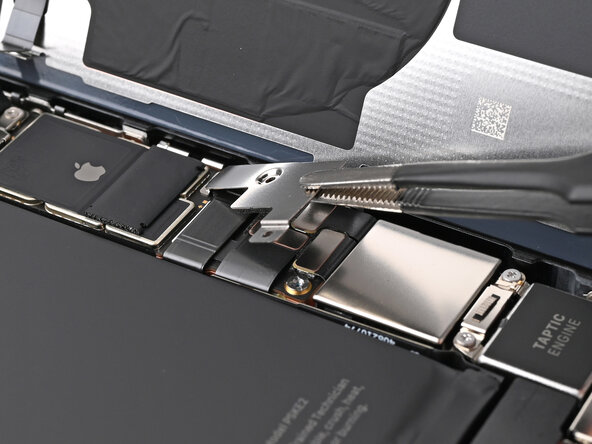
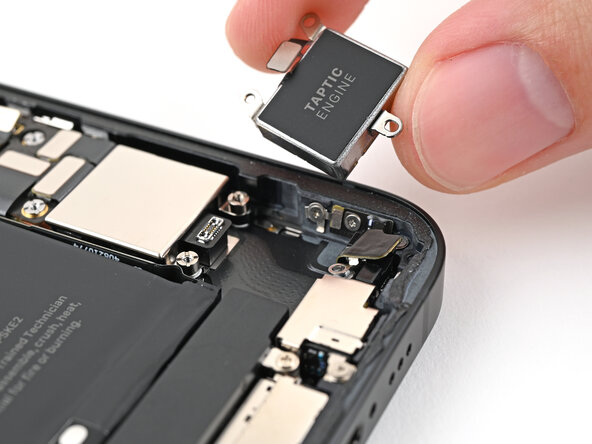
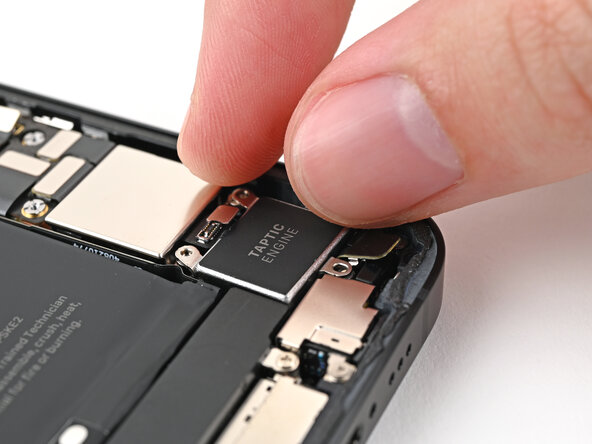
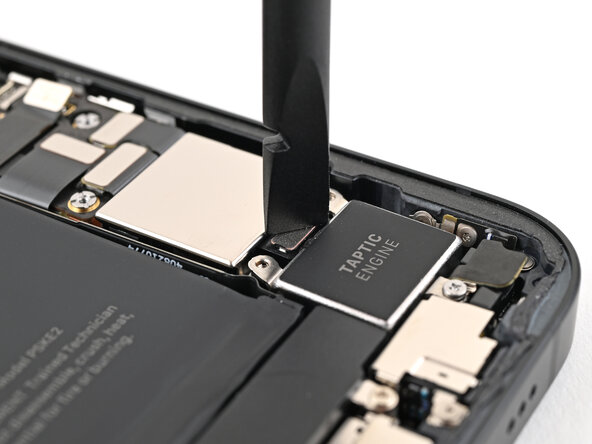
Step 27

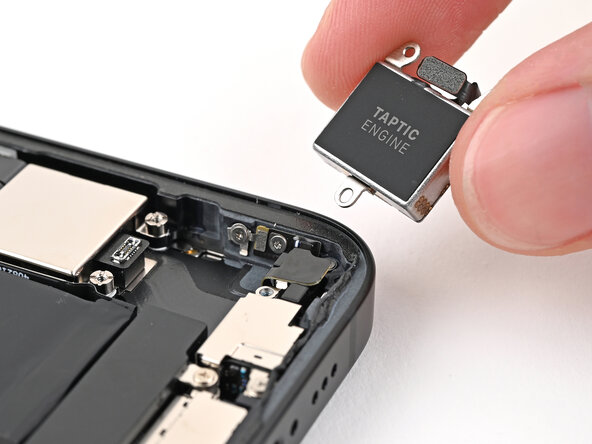
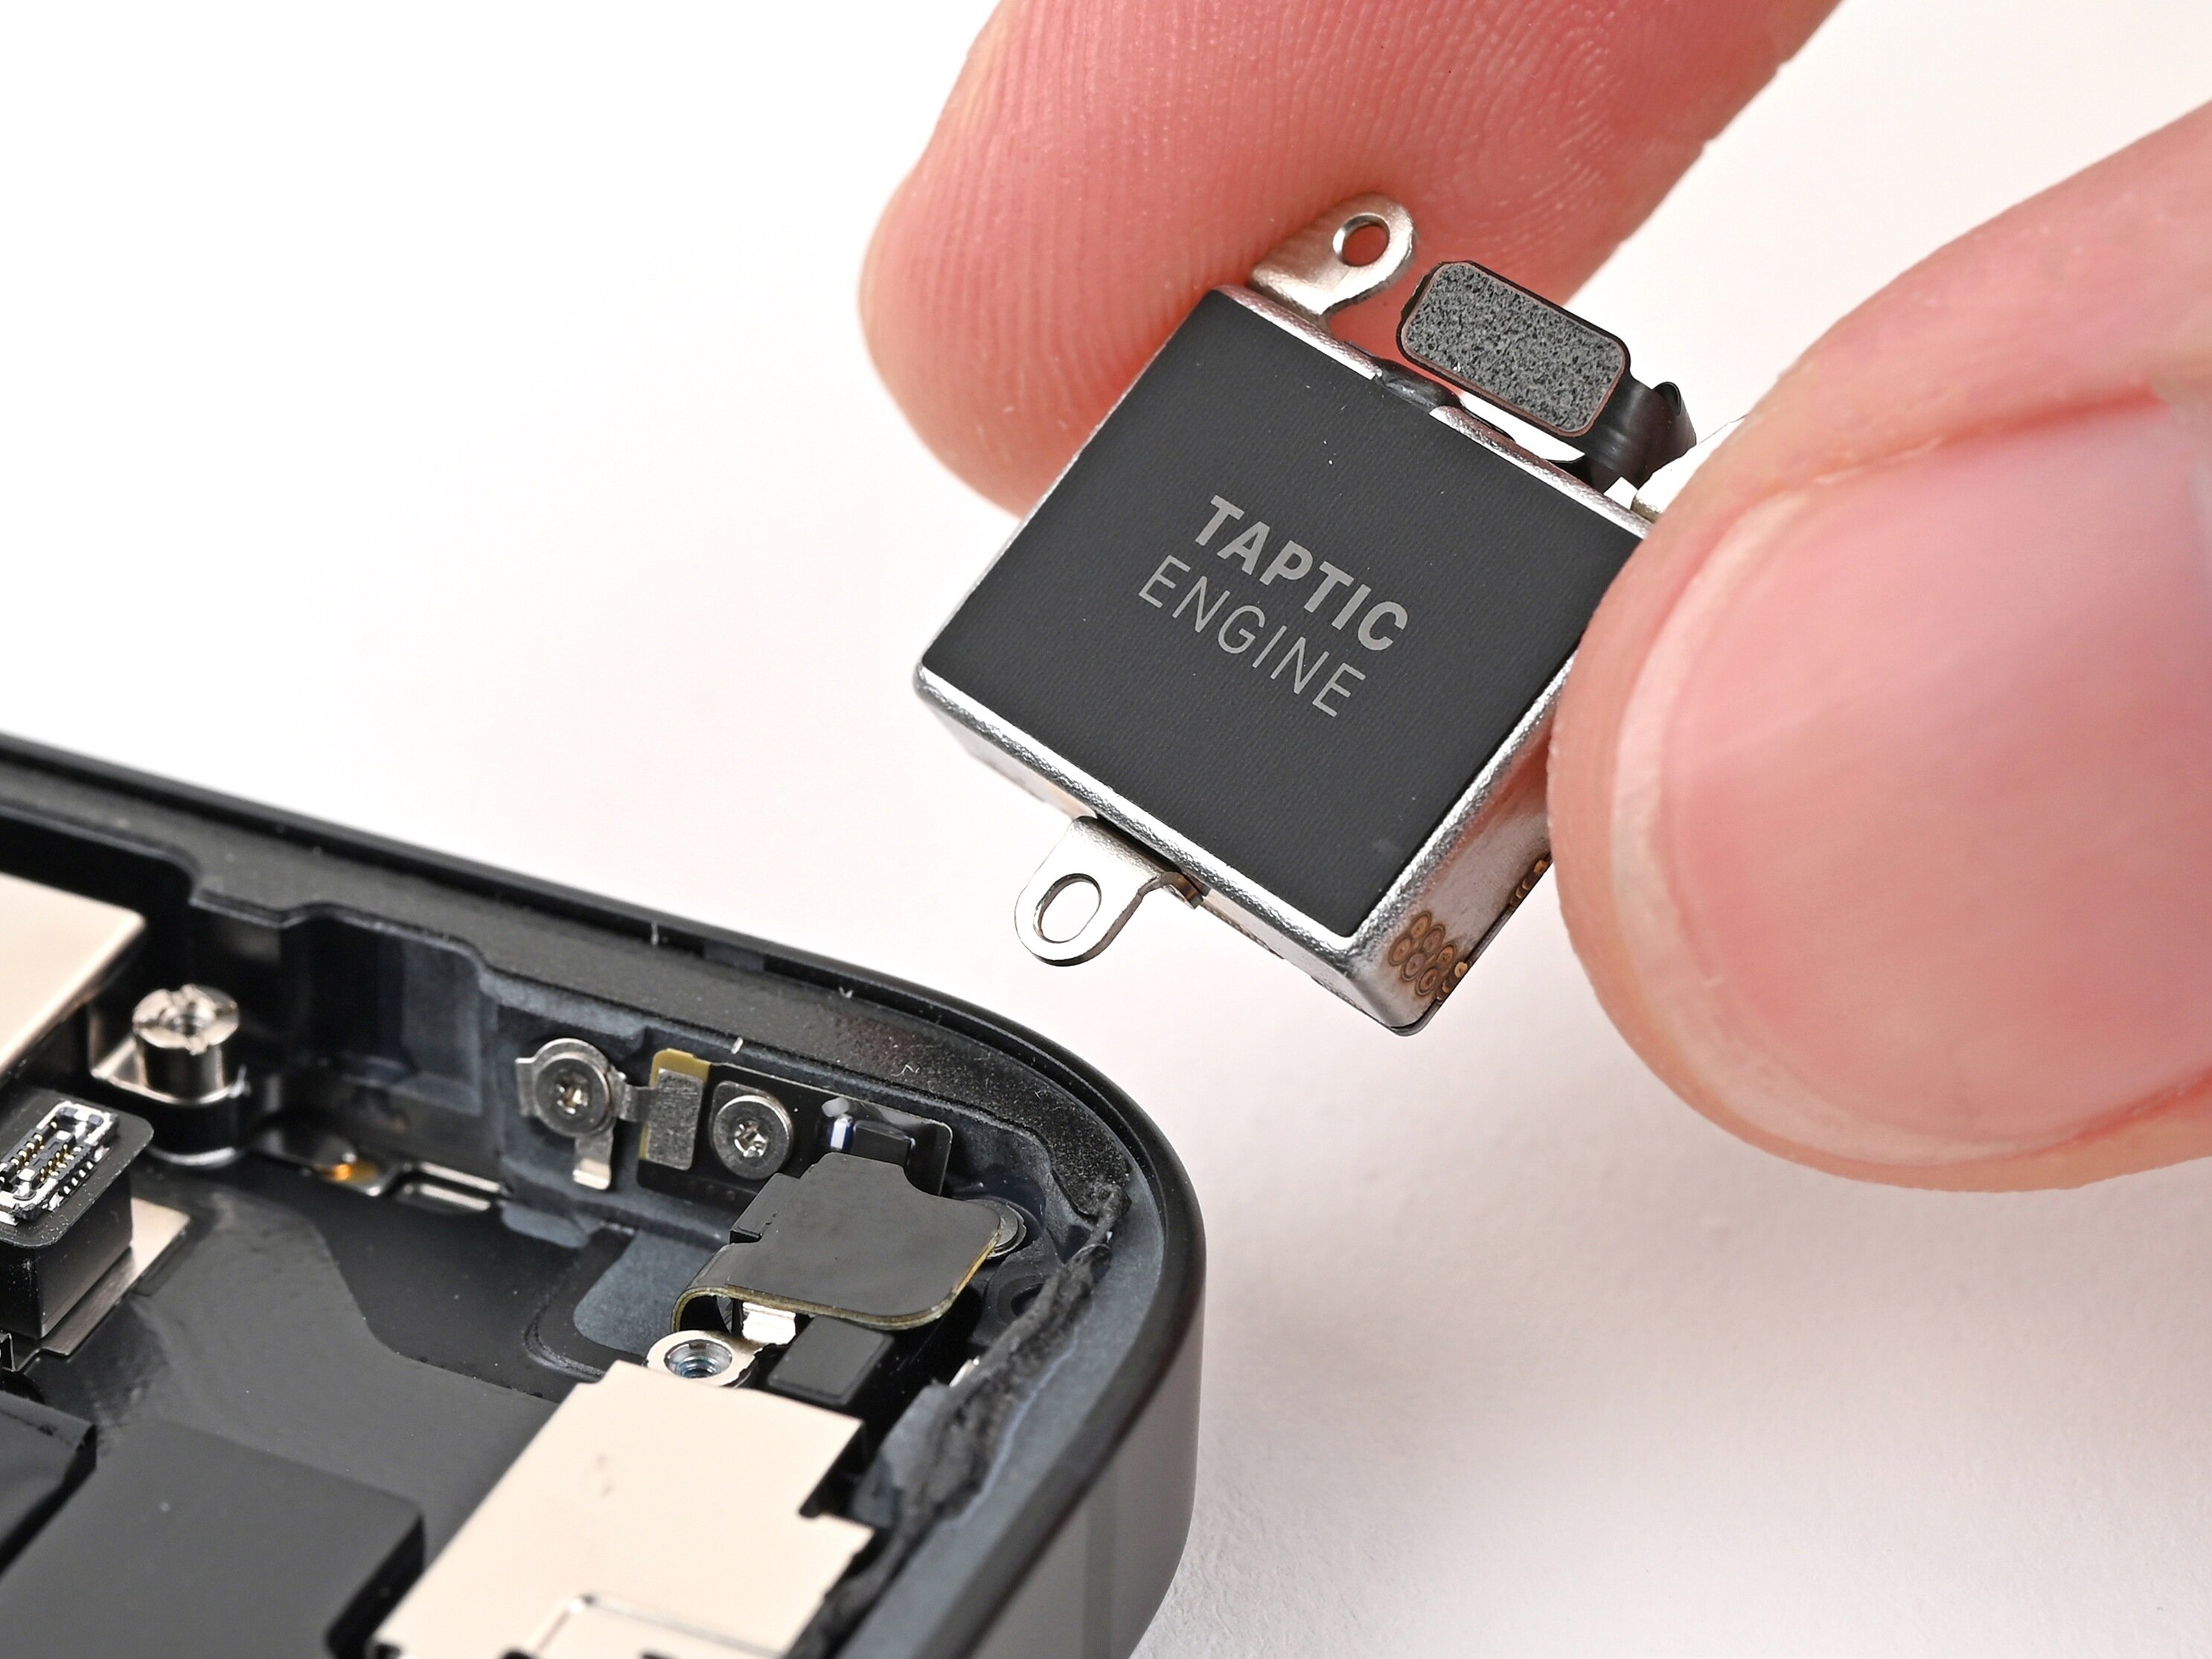
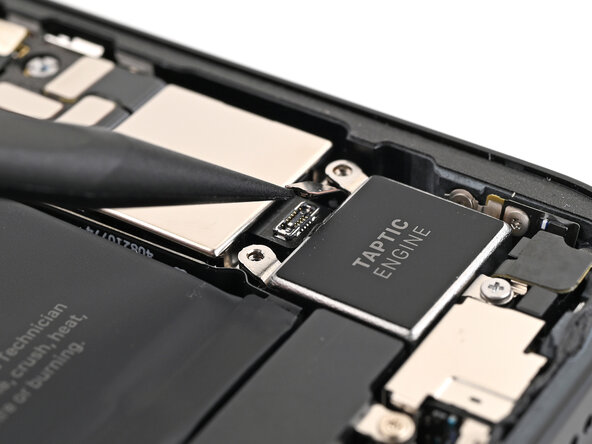
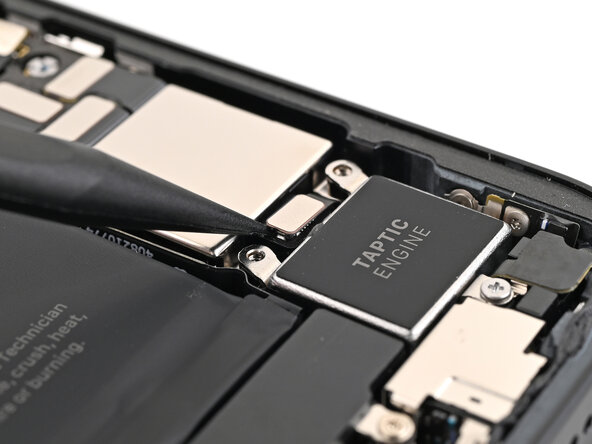
- Gently pop up the Taptic Engine using the tip of your spudger—think of it as giving the engine a little nudge to stand up and say hello.
- Once it’s up, grab it with your fingers and lift it out. Taptic Engine, meet freedom.
Tools Used
Step 28

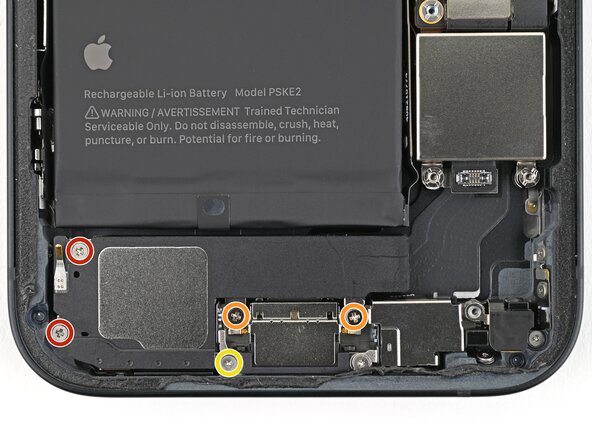
- Grab your trusty Phillips screwdriver and let's get those four screws holding the loudspeaker out of there!
- Now, switch it up with a tri-point Y000 screwdriver to tackle that 1.3 mm-long screw.
- Next up, you'll need to find two 1.4 mm-long screws to remove.
- And don't forget about those two 1.7 mm-long screws waiting to be set free!
Tools Used
Step 29


- Gently nudge the loudspeaker out of its cozy little home in the frame using the spudger's pointy end, and then give it a warm farewell as you lift it out.
Tools Used
Step 30
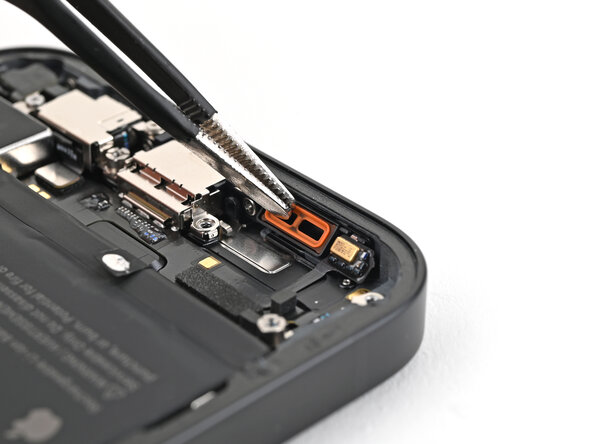
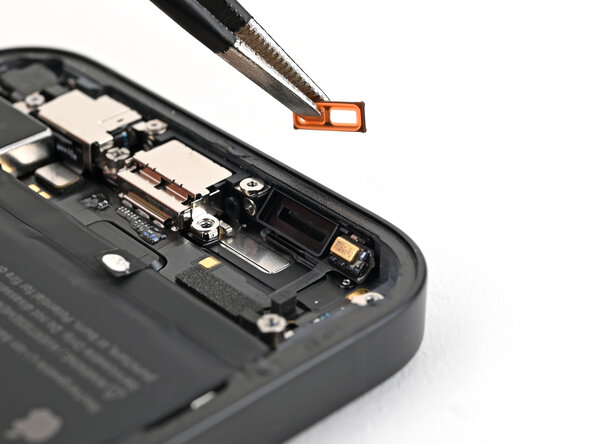
- If that orange loudspeaker gasket decided to take a quick vacation during disassembly, grab your tweezers and pop it back into the sound channel where it belongs.
Tools Used
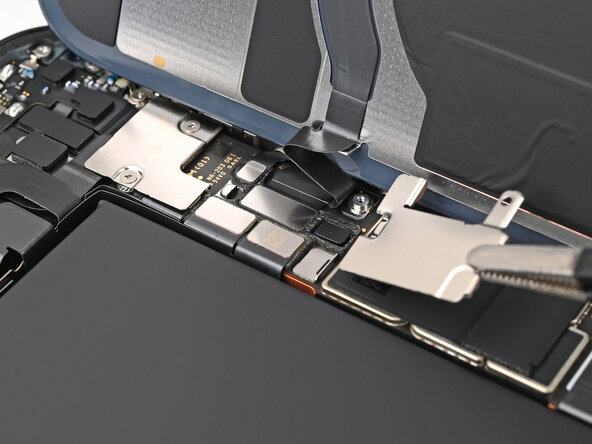
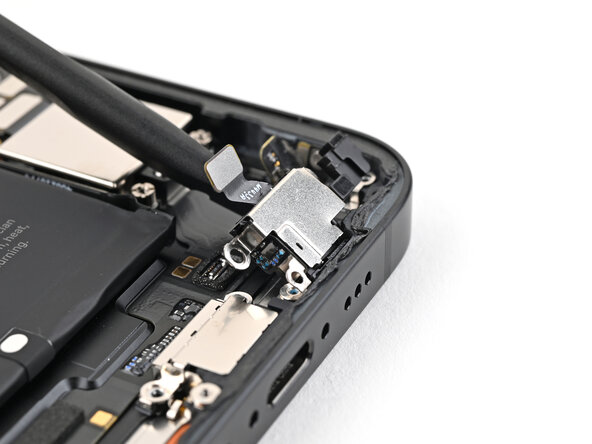
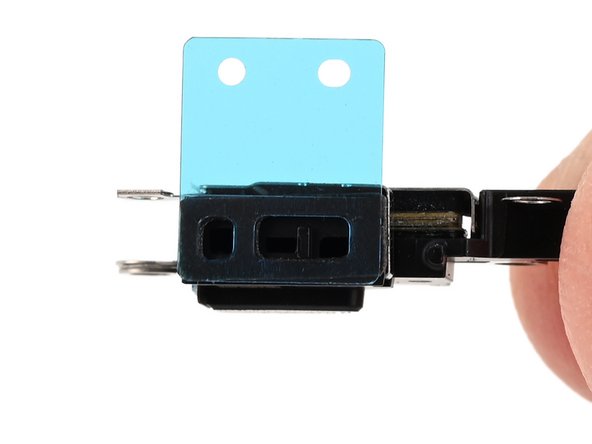
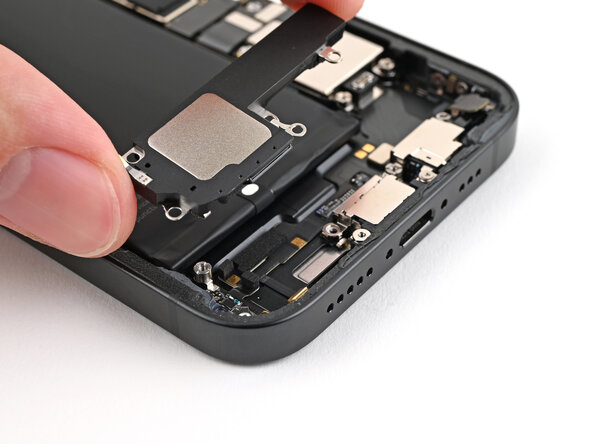
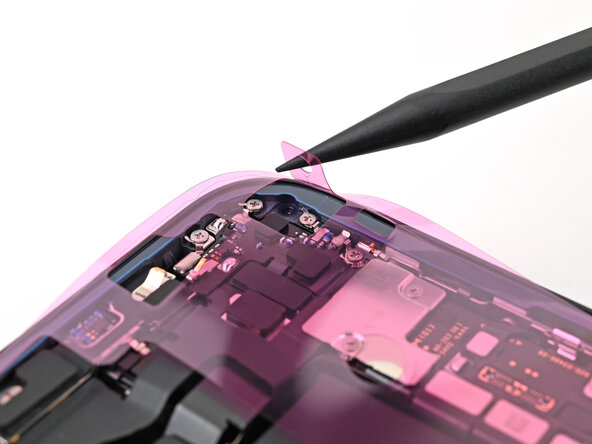
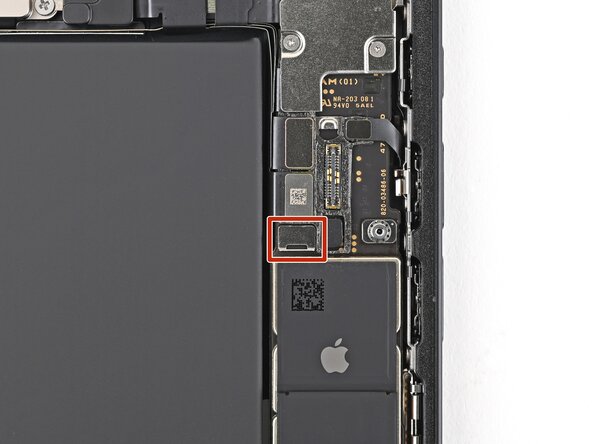
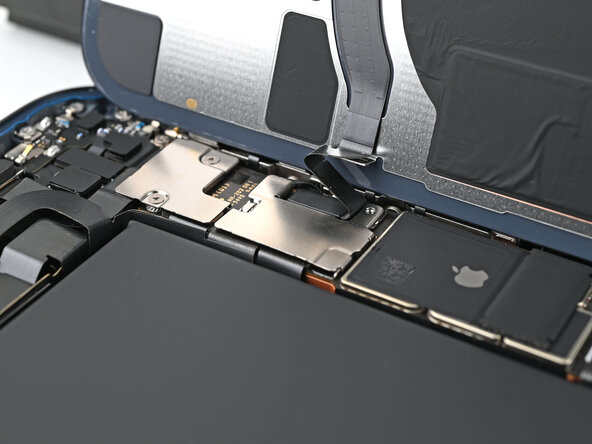
Step 31
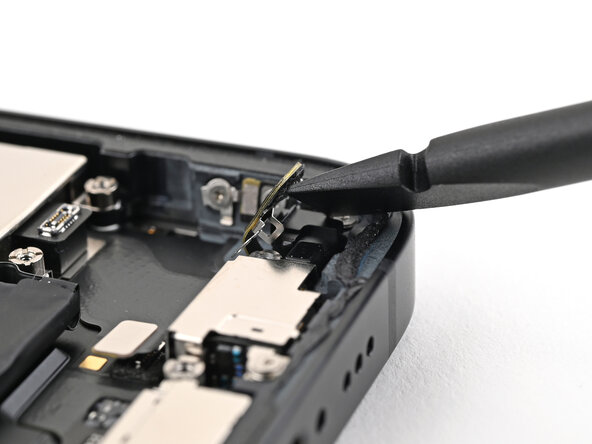
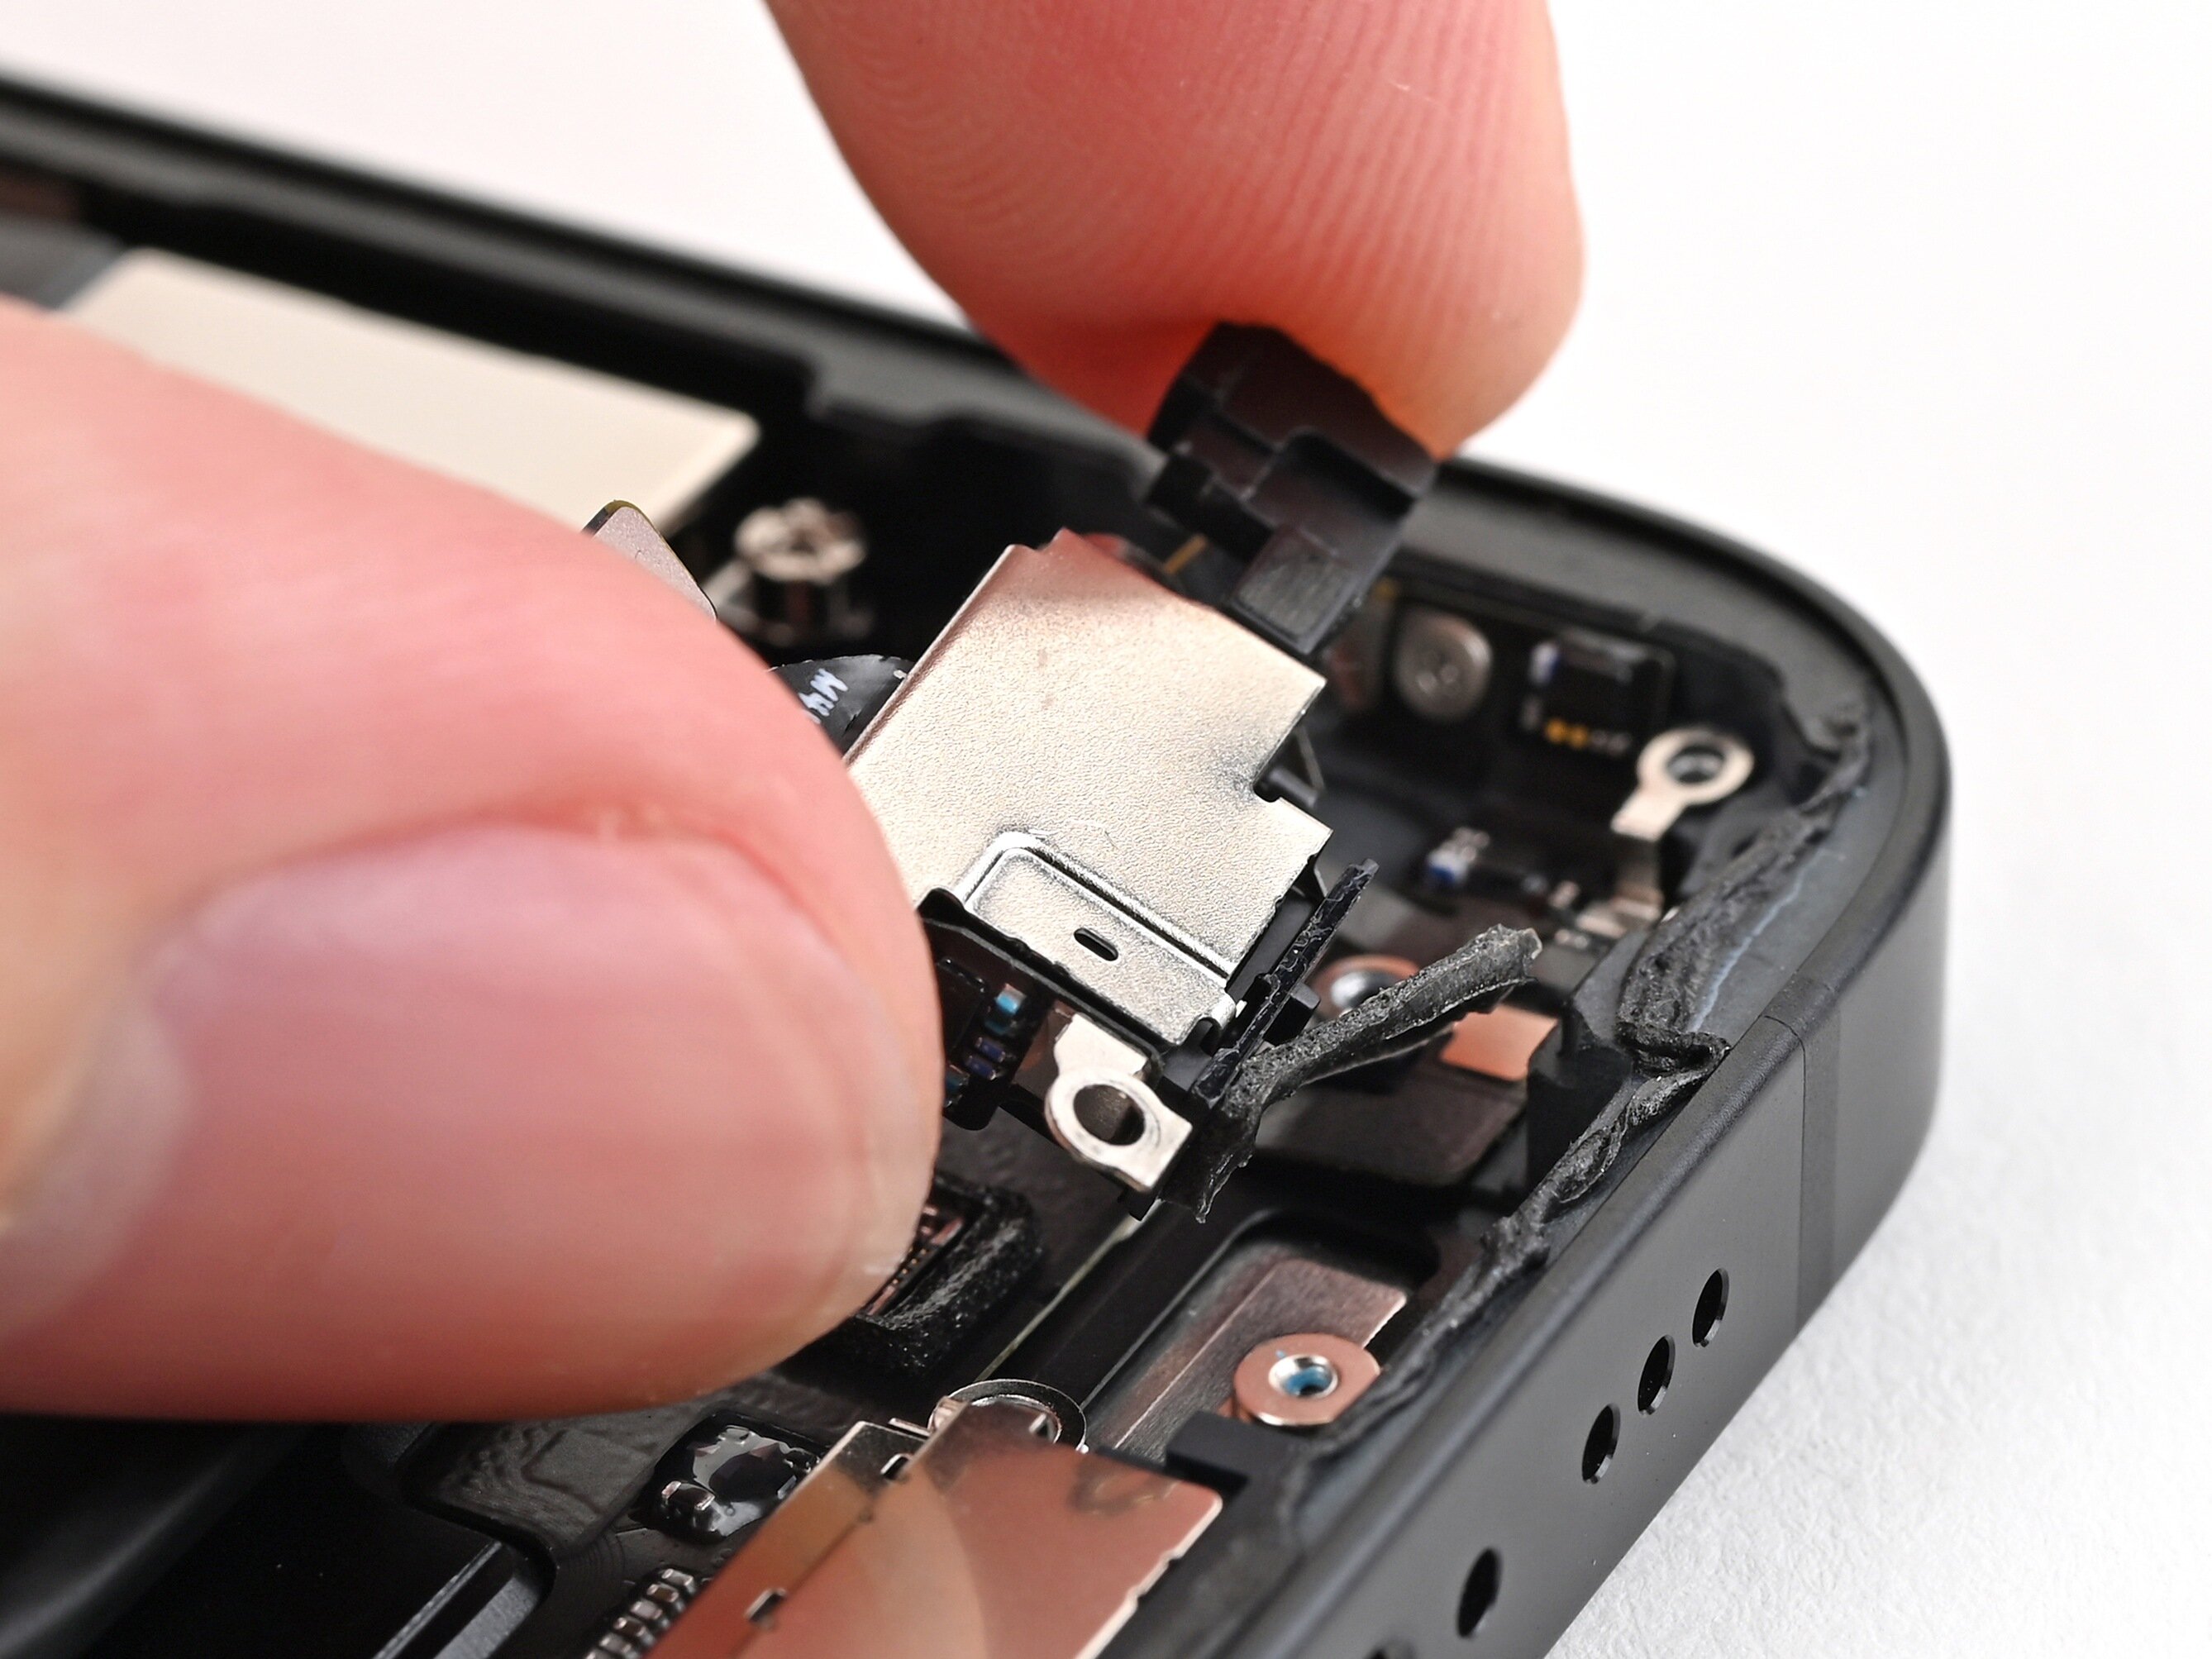
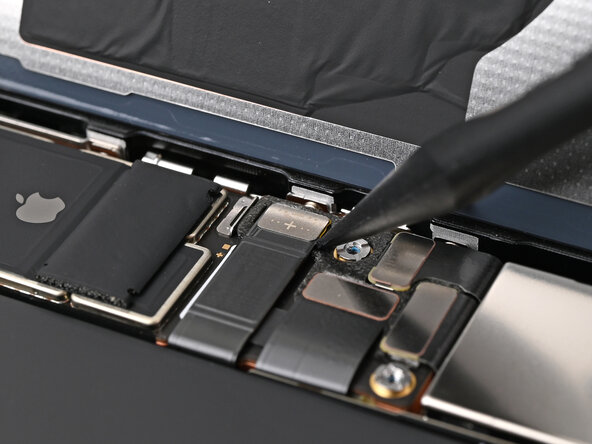
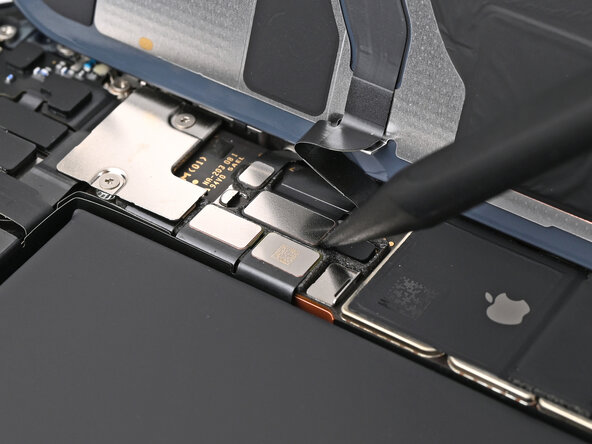
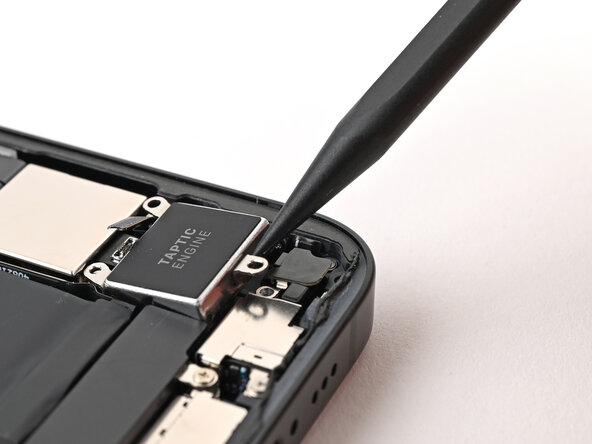
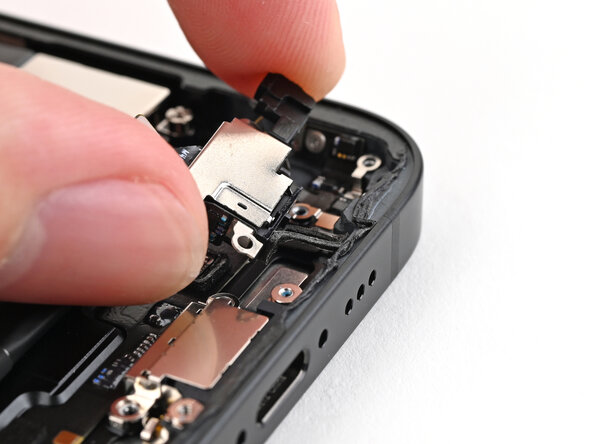
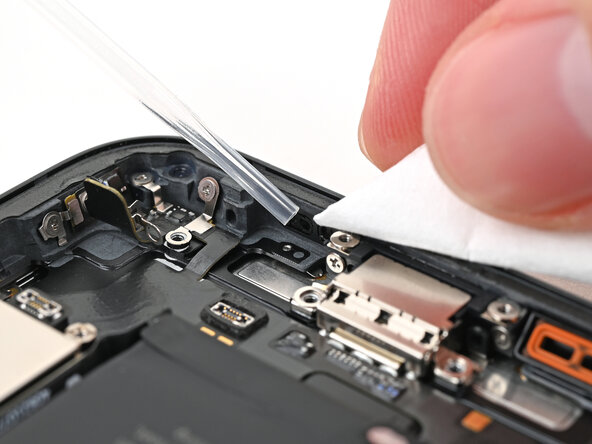
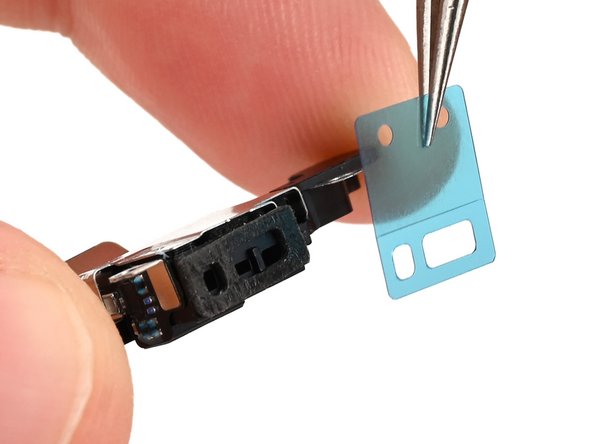
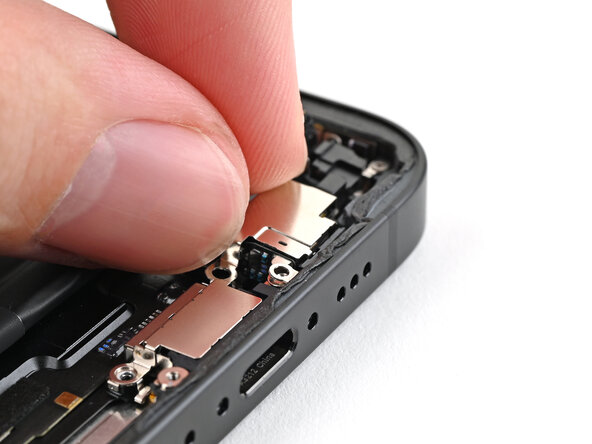
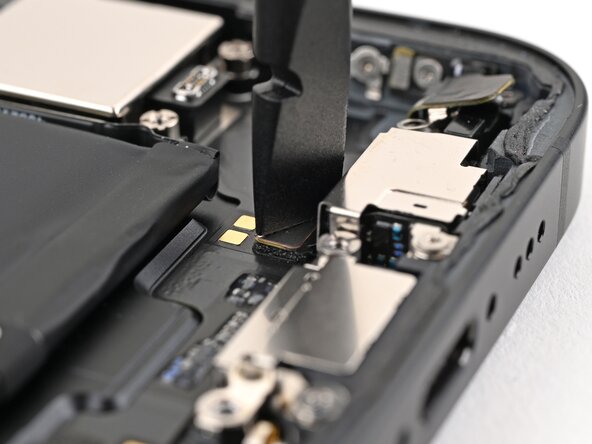
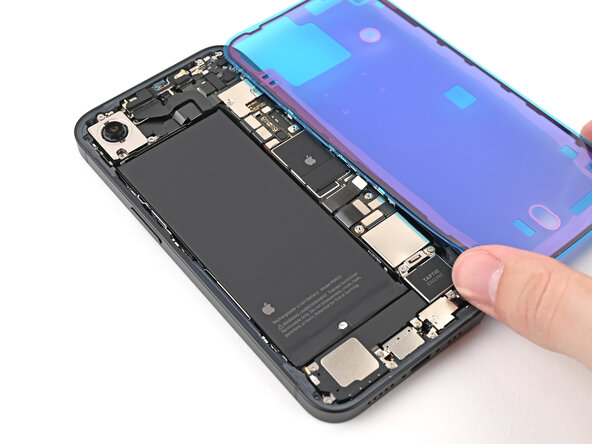
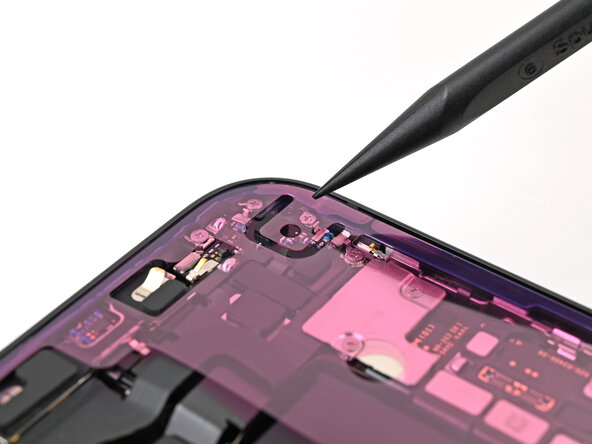
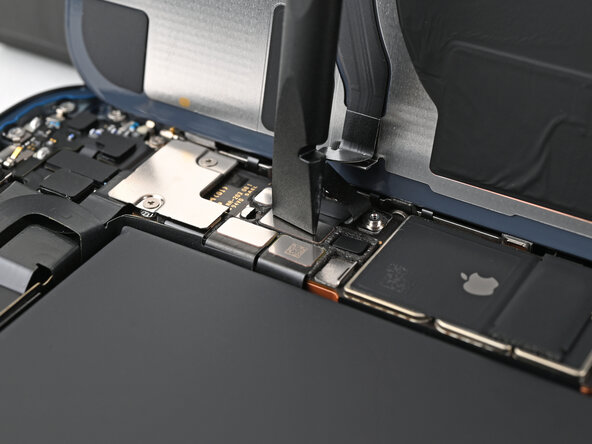
- Slide the flat end of your spudger right between the screw cover and the microphone like a pro.
- Give that spudger a little twist to break through the adhesive hiding underneath and pop free the metal clip.
- Carefully nudge the cover upward with your finger to expose the last standoff screw waiting underneath.
Tools Used
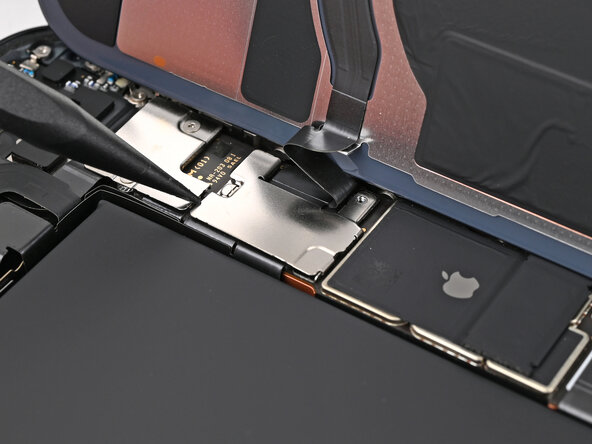
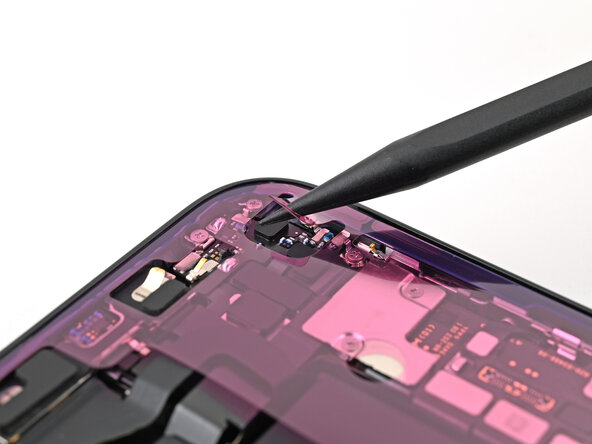
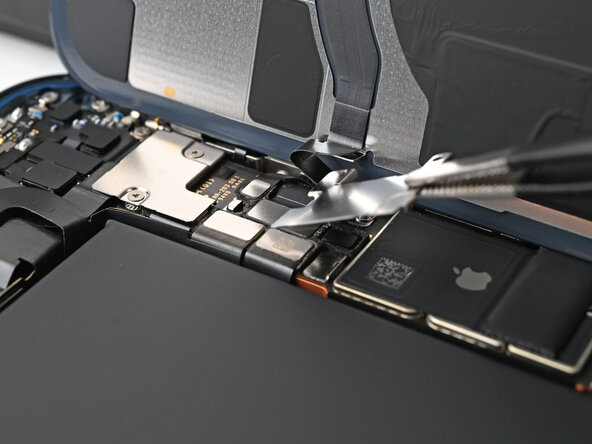
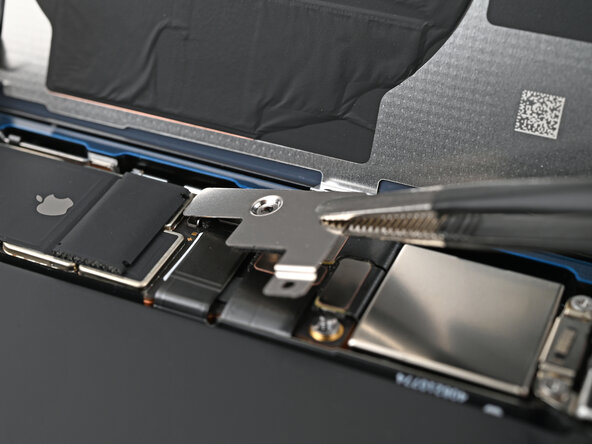
Step 32
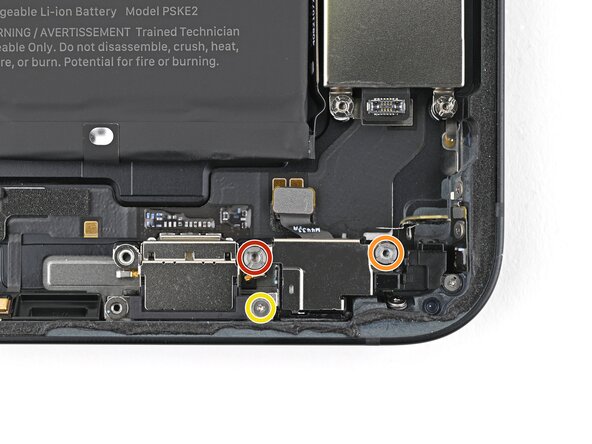
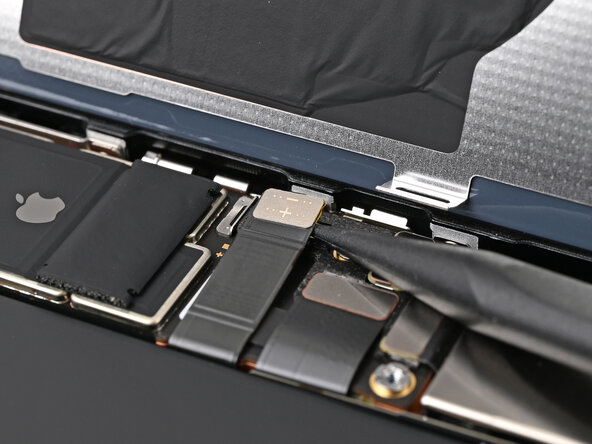
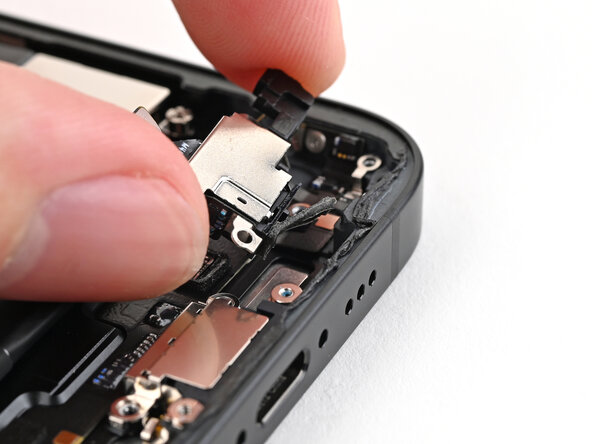
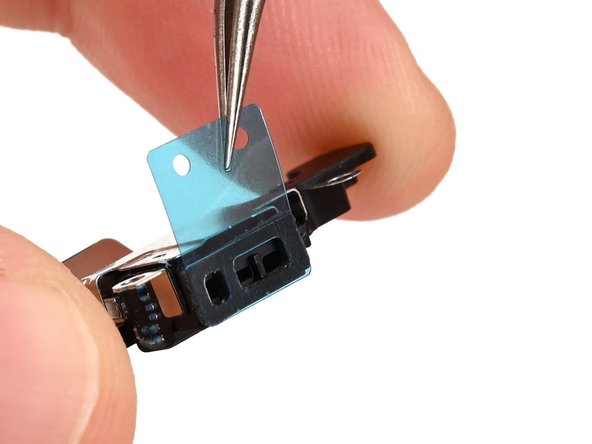
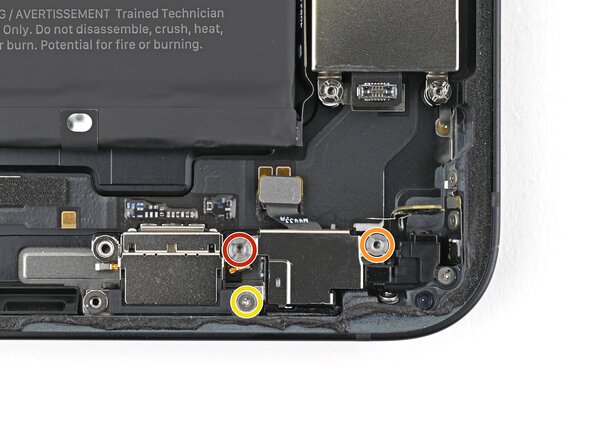
- Grab a standoff screwdriver and gently unscrew the pair of screws holding down the microphone, like you're opening a tiny treasure chest.
- Switch to a tri-point Y000 screwdriver to loosen the 1.3 mm-long screw securing the microphone — think of it as unscrewing a secret handshake.
- Find the 3.0 mm-long screw and remove it with your screwdriver — it's the extra-long guest at the screw party.
- Finally, locate the 2.8 mm-long screw and take it out; you're almost there, just a little more unscrewing fun ahead.
Tools Used
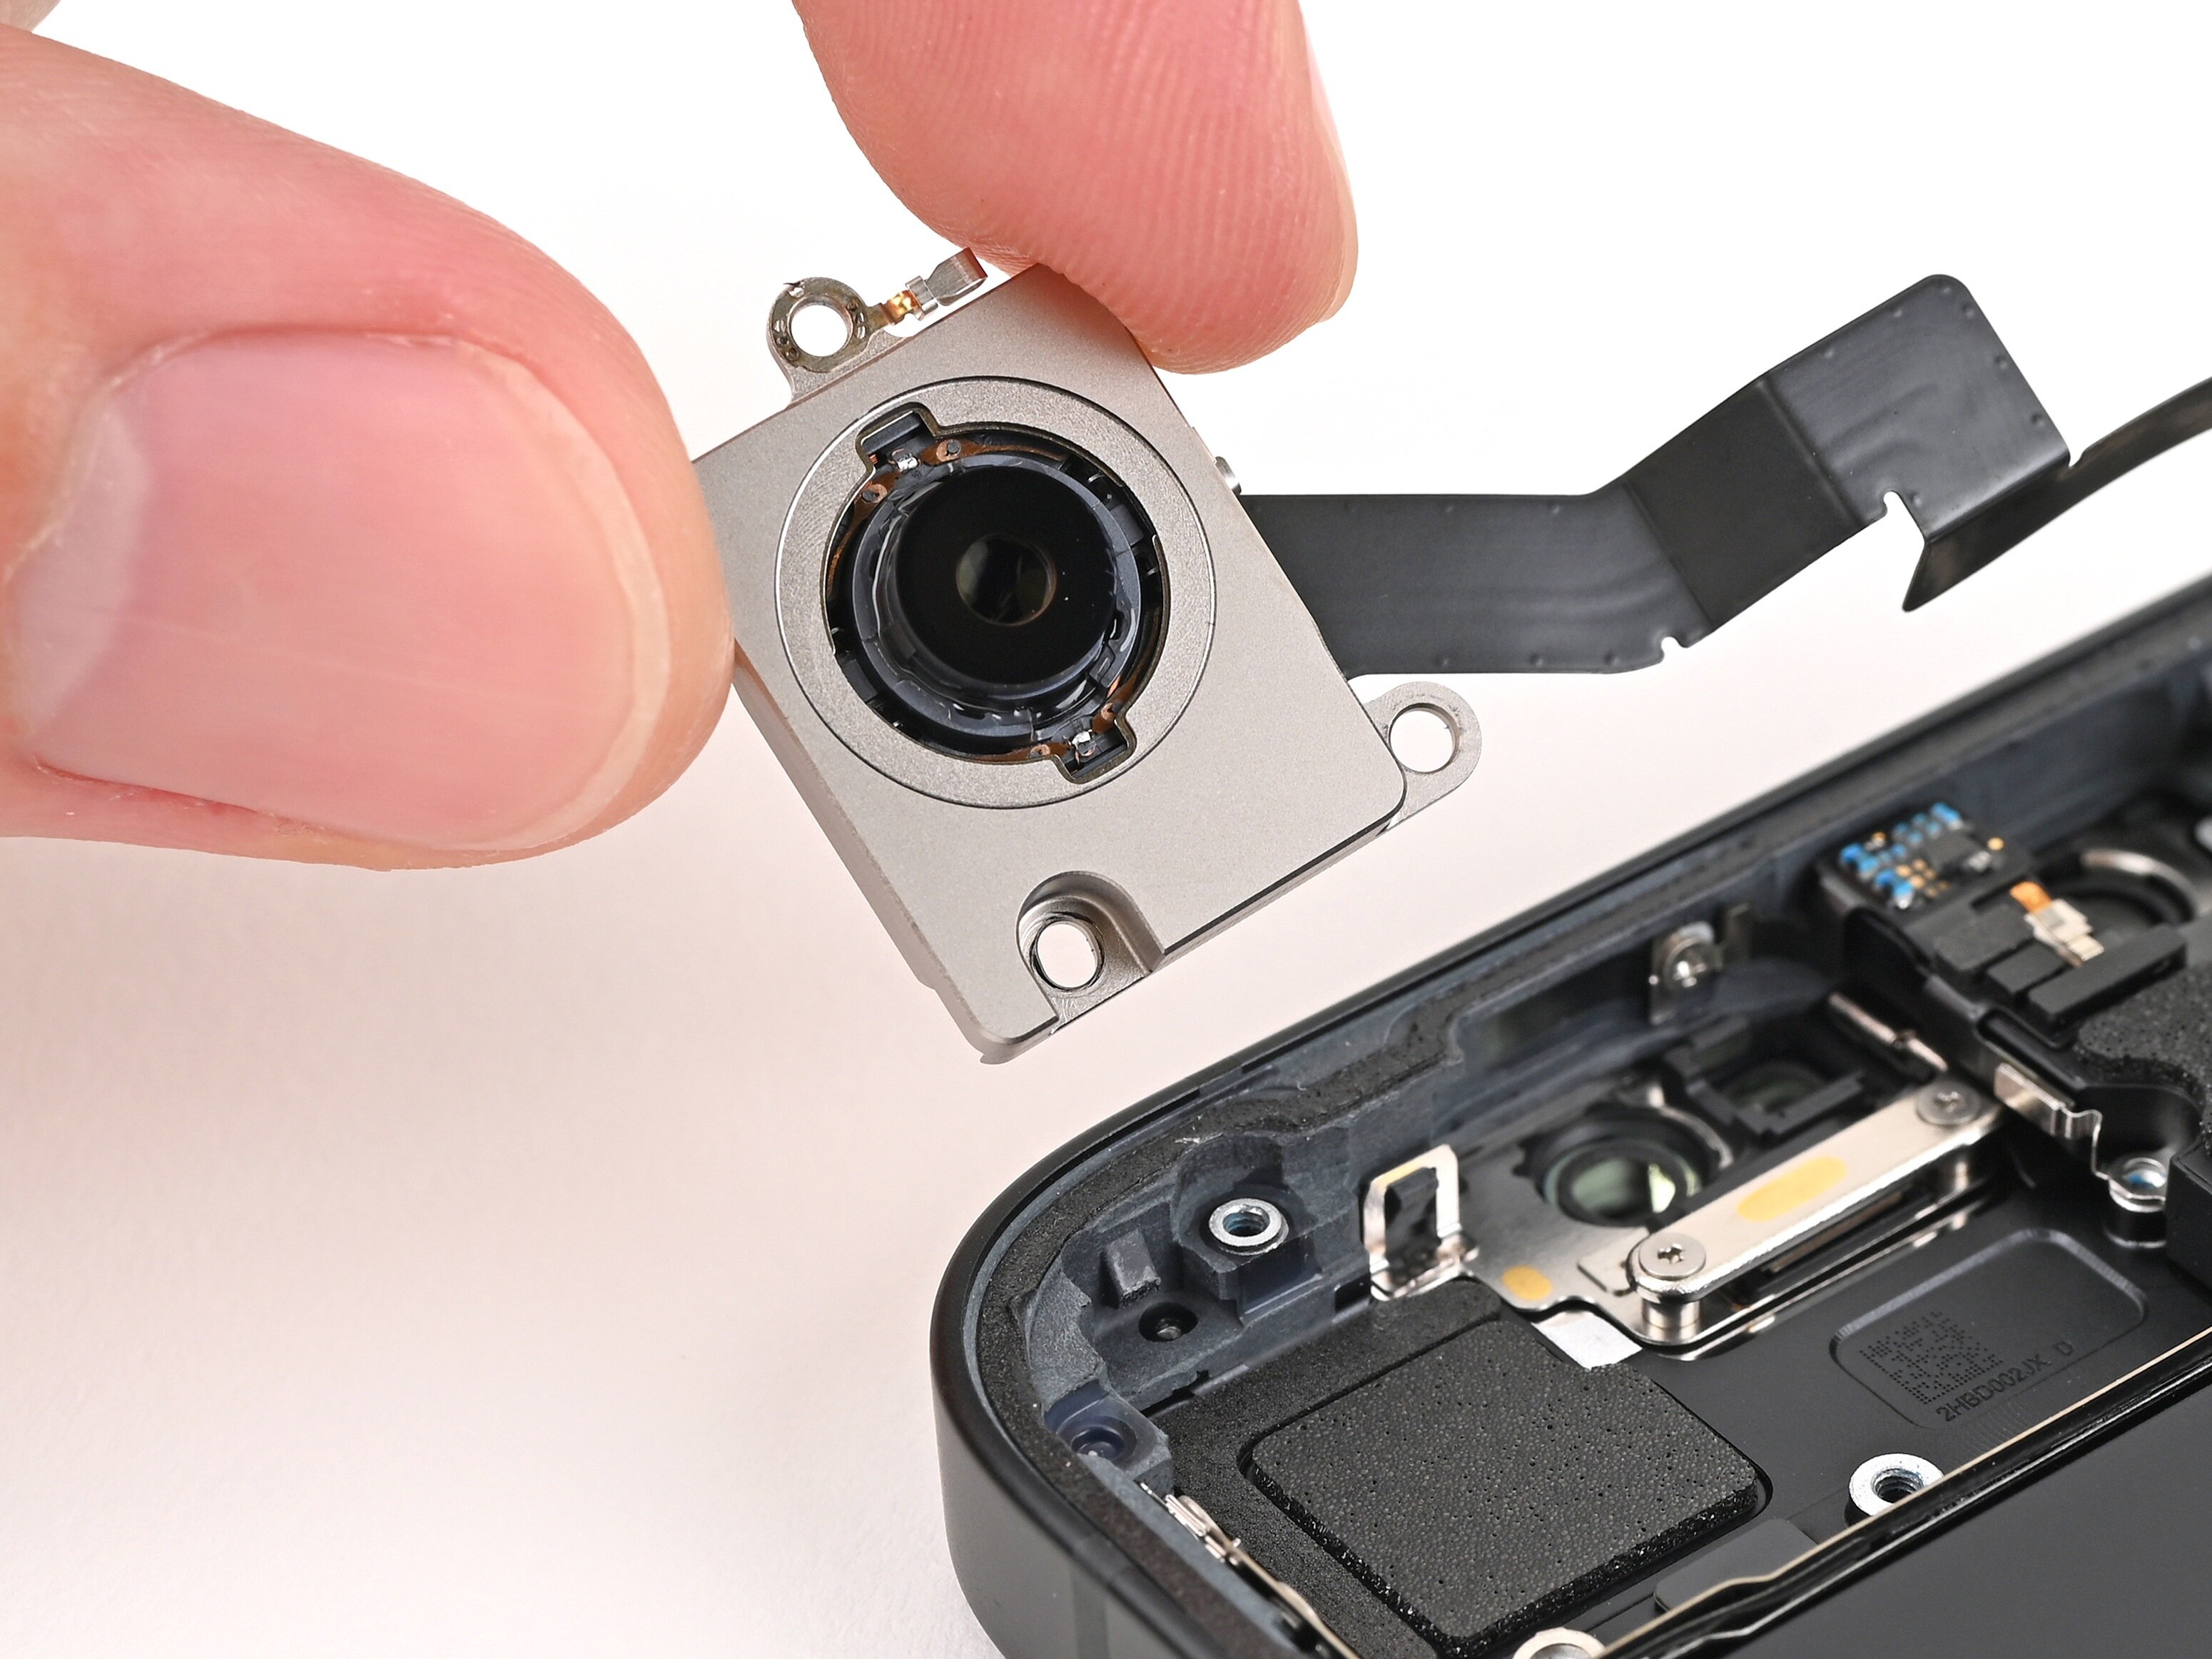
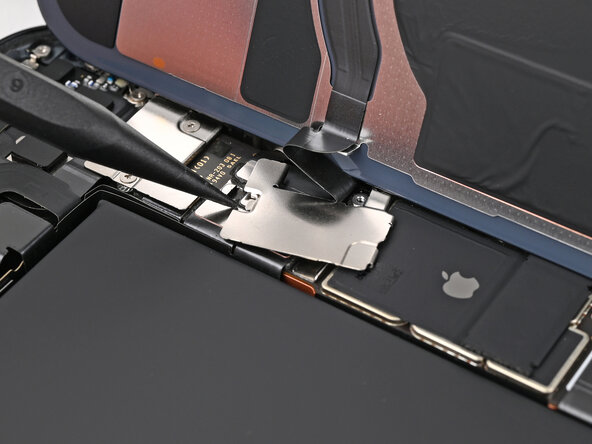
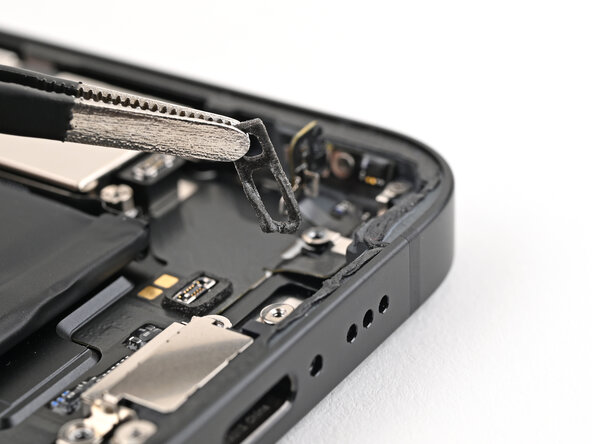
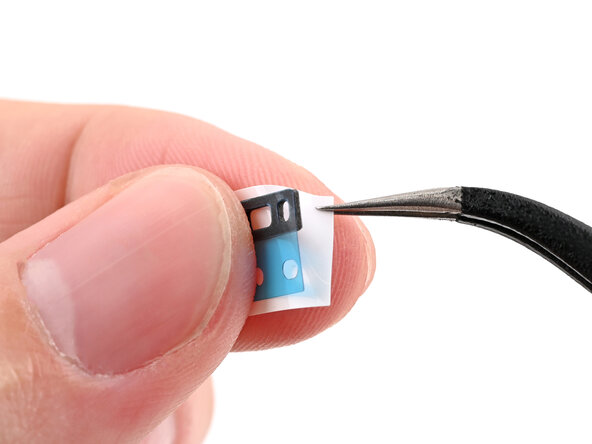
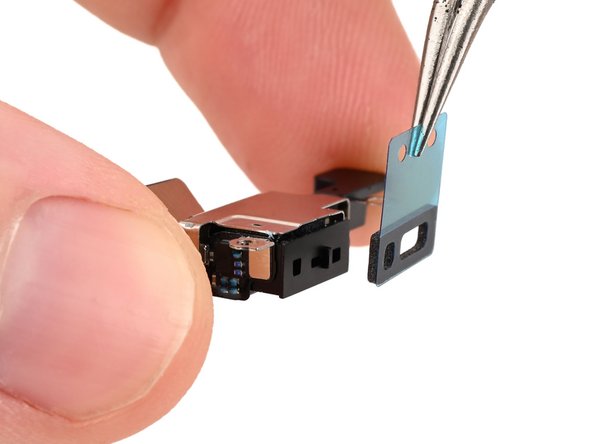
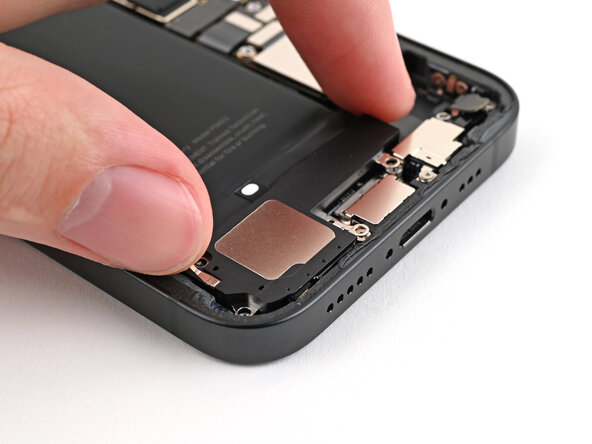
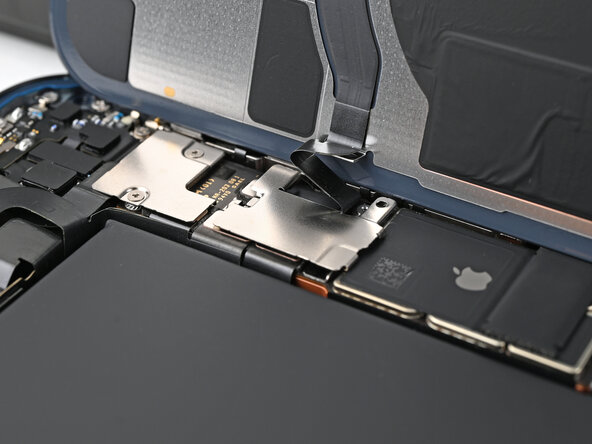
Step 33
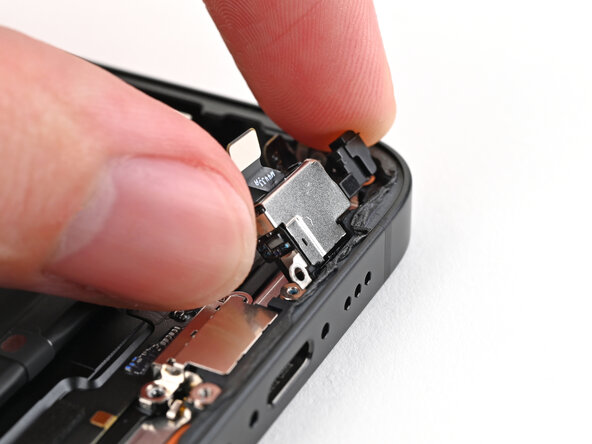
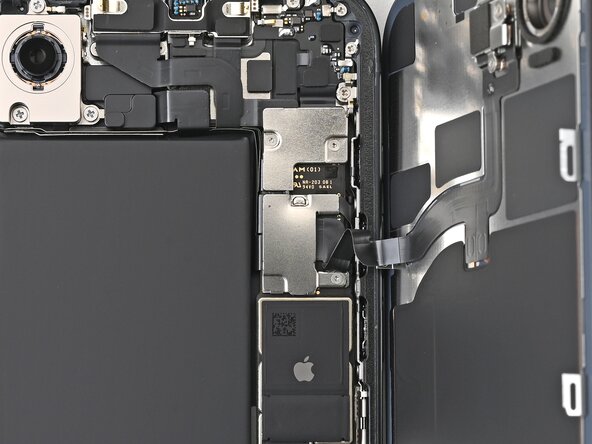
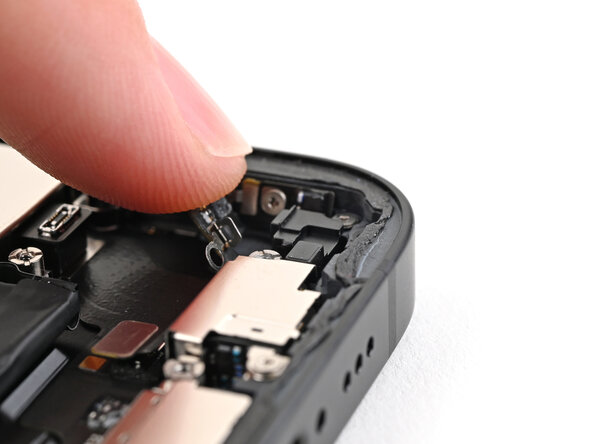
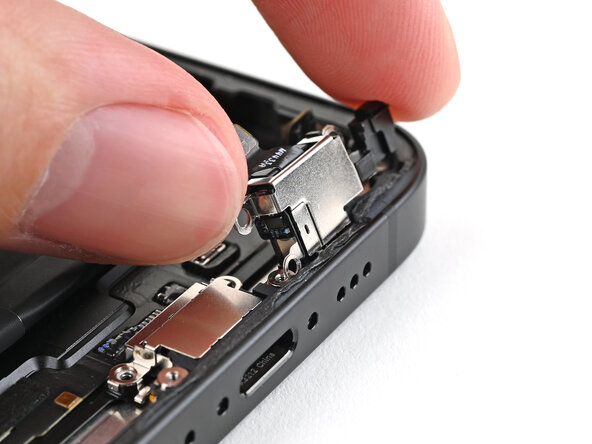
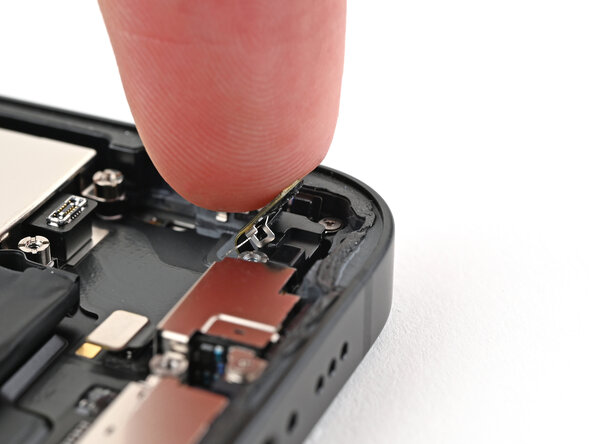
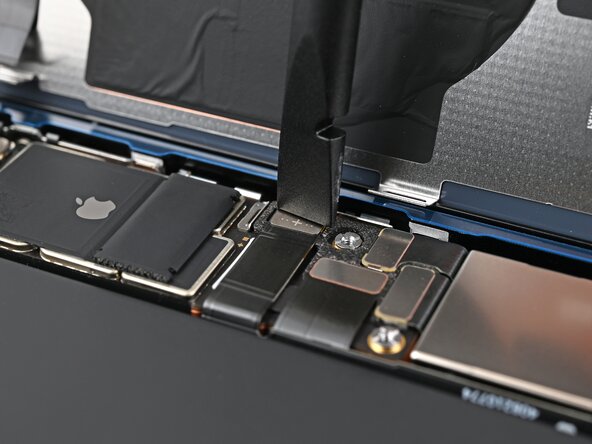
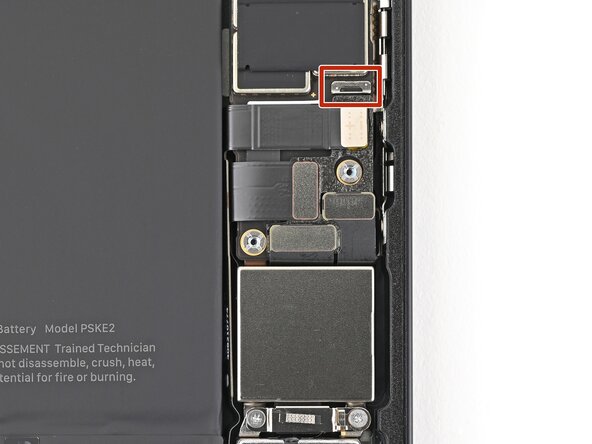
- Gently pry up the microphone with the flat end of a spudger just enough so you can grab it with your fingers.
Tools Used
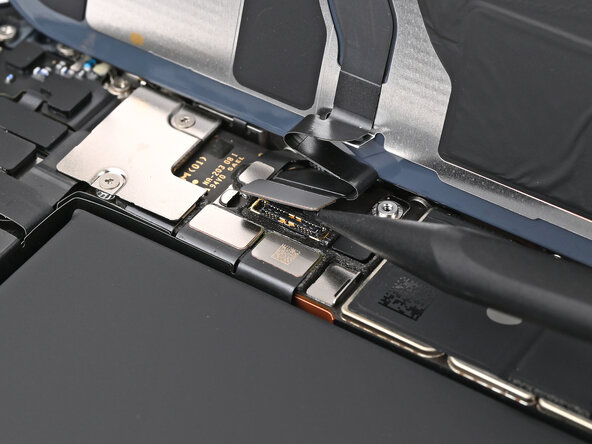
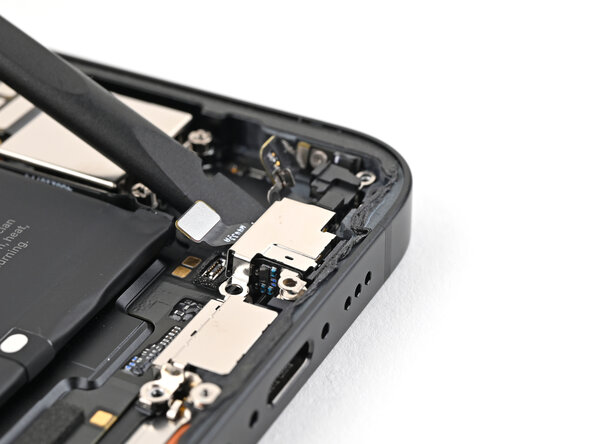
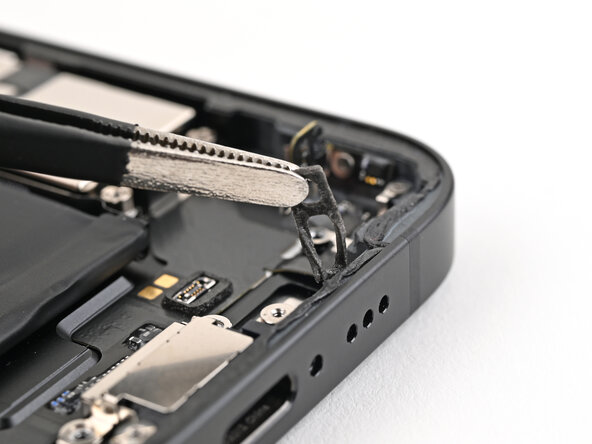
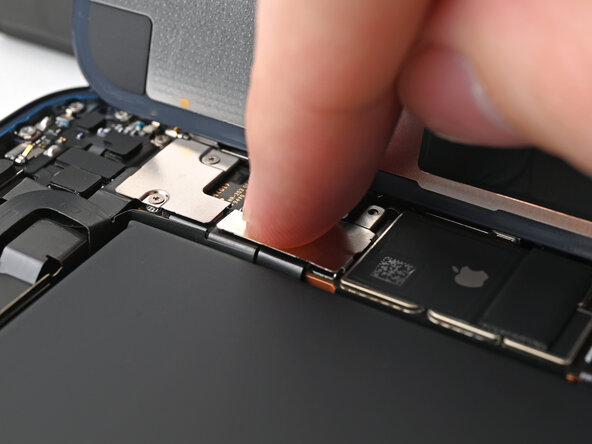
Step 34
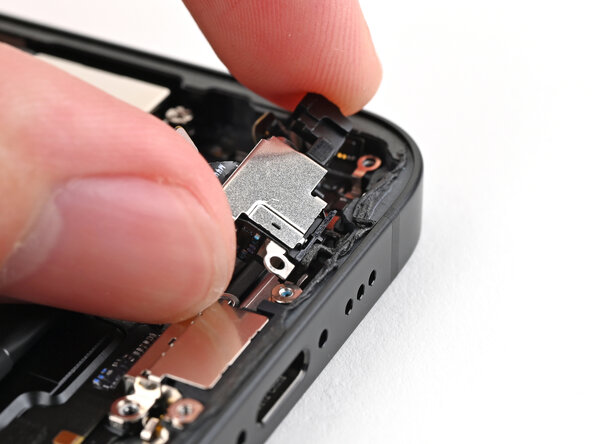
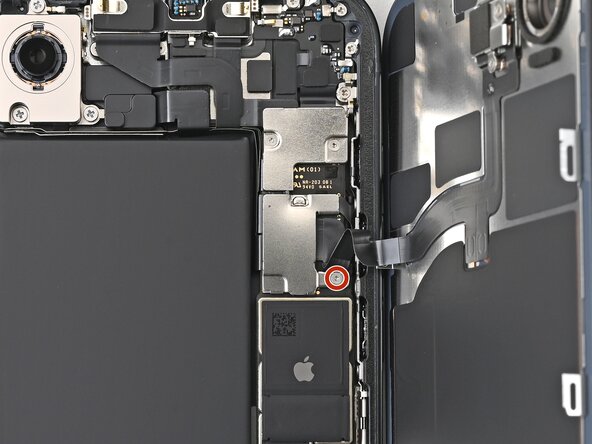
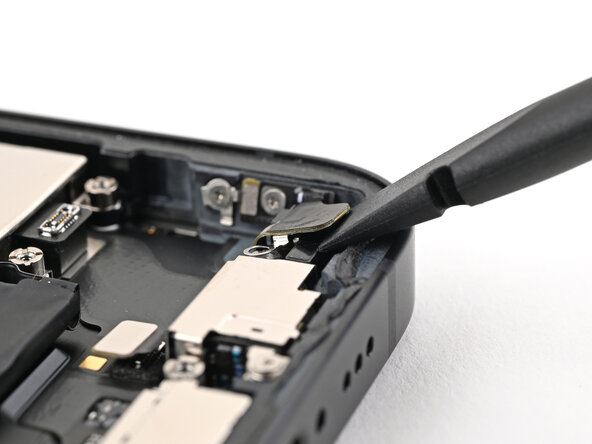
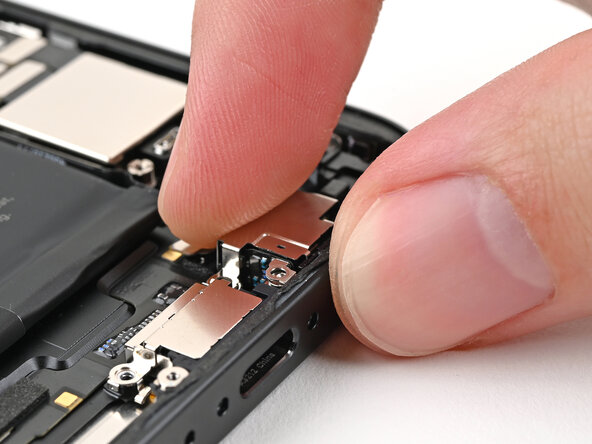
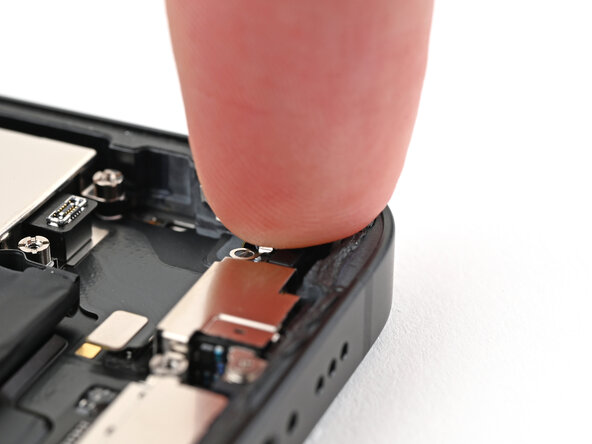
- Gently pull the microphone away from the frame to peel away the adhesive holding it in place.
- Carefully remove the microphone from its spot.
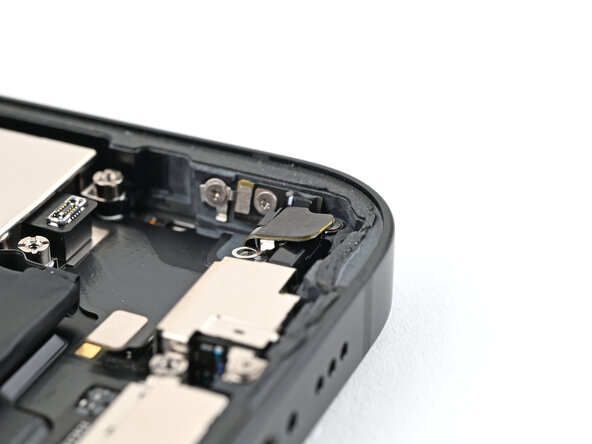
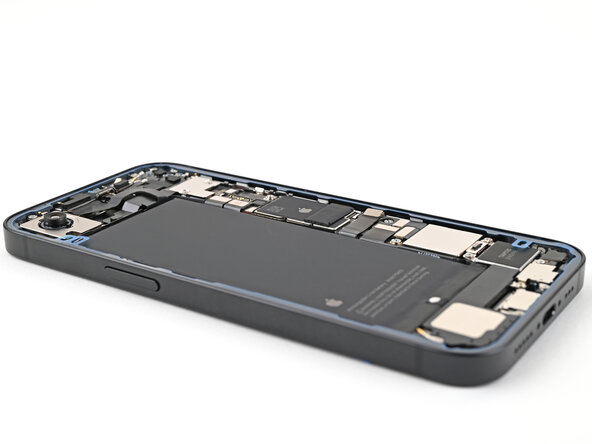
Step 35
- Great job on getting through the disassembly! Now, let’s walk through the reassembly steps to bring your device back to life. Keep a steady hand and follow along — before you know it, your device will be good as new. If you run into any snags, remember, you can always schedule a repair with Salvation Repair for extra help.
Step 36
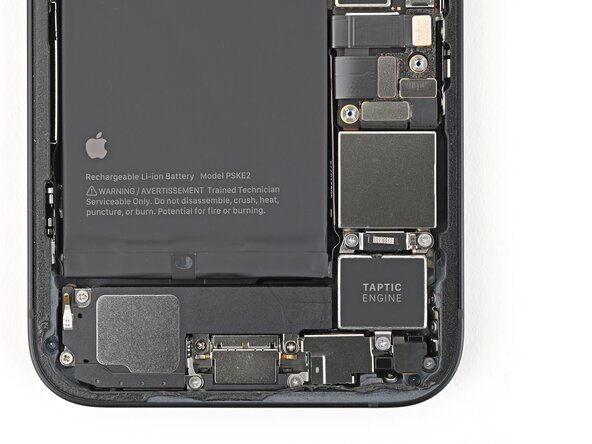
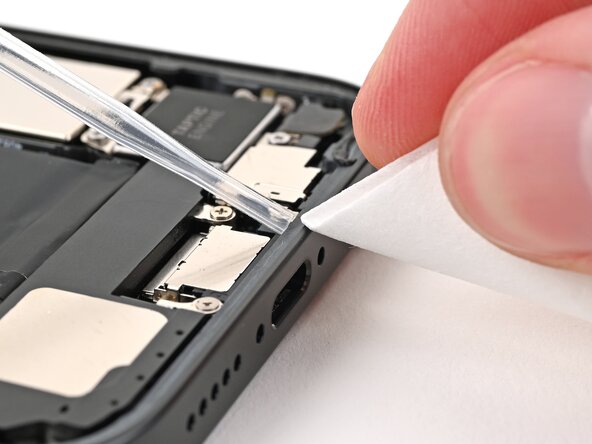
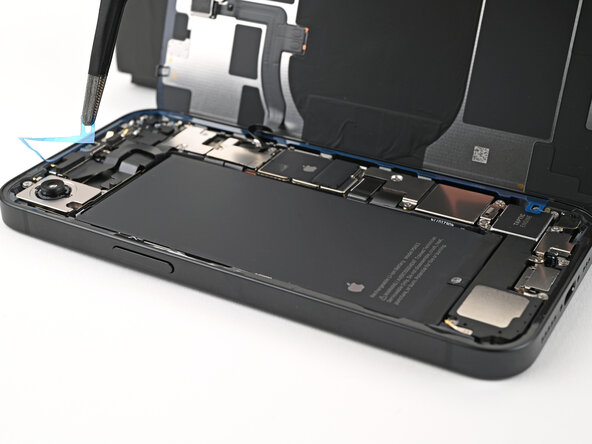
- Grab your trusty tweezers or just your fingers to gently peel away the old adhesive lurking at the bottom of the frame. It's like a little treasure hunt!
- If you spot any sticky residue sticking around, whip out some high concentration isopropyl alcohol (over 90% is the magic number) and a coffee filter or a lint-free cloth to give that frame a nice, clean shine.
Tools Used
Step 37
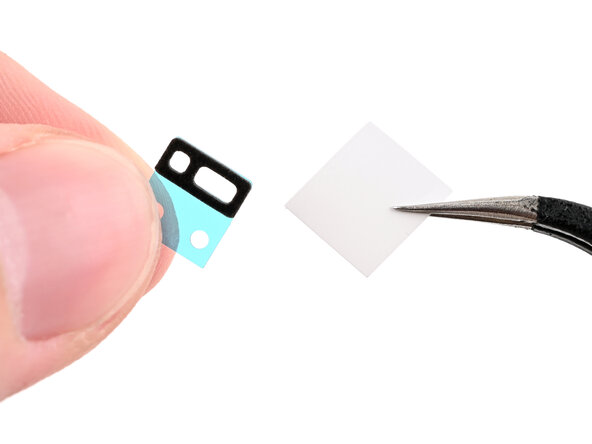
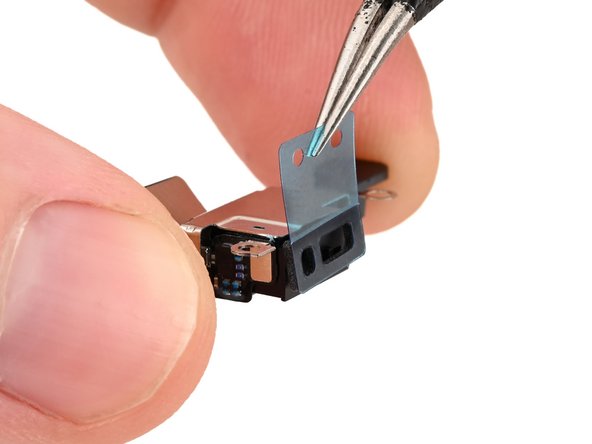
If your microphone already has adhesive, you can skip ahead—no need to mess with the next couple steps.
- Hold that microphone adhesive steady with one hand, and with the other, carefully peel off the white liner using your fingers or tweezers. Take it slow and steady, you got this!
Tools Used
Step 38
- Grab the microphone and make sure the metal side is facing up – like it’s ready to sing its best performance.
- Now, apply the adhesive to the microphone, keeping the pull tab pointing up. This helps it stick just right.
Step 39
- Peel off the blue backing from the microphone adhesive and get ready for the next step.
Step 40
- Angle that microphone downward and let the sticky stuff grab onto the frame around the sound channel.
- Give it a good press to make sure it's locked in and not going anywhere.
Step 41
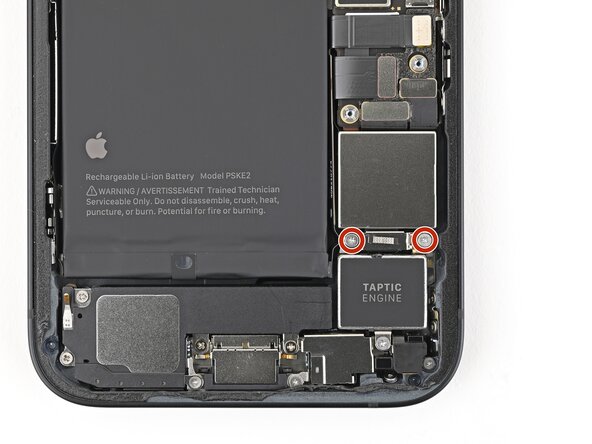
- While keeping the microphone pressed against the frame for stability, grab a standoff screwdriver to secure it with two screws. Use a tri-point Y000 screwdriver to tighten the single 1.0 mm screw that holds the microphone in place. Then, insert the 3.0 mm and 2.8 mm screws into their respective spots. Need a hand? You can always schedule a repair if things get tricky.
Tools Used
Step 42
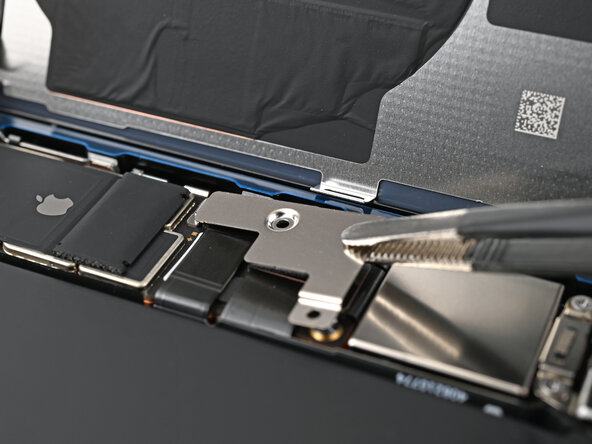
- Gently use the flat end of a spudger to press the microphone connector into place. Take your time, and make sure it's snug—like tucking in a little microphone!
Tools Used
Step 43
When you snap that clip into place, you should definitely hear and feel a satisfying 'click' – it's like a little victory dance for your device!
If the adhesive on the screw cover is feeling a bit lazy, don't fret! Just swap it out with a tiny piece of double-sided tape, like Tesa Tape, and you're good to go!
- Press the screw cover back into place with your finger, giving it a little nudge to make sure it's snug. You've got this!
Step 44
- Gently slot the loudspeaker into its designated cutout in the frame, making sure it seats snugly. If you need a hand or run into trouble, you can always schedule a repair to get professional help.
Step 45
- Grab a Phillips screwdriver and loosen five screws holding the loudspeaker in place—easy does it. Then, switch to a tri-point Y000 screwdriver to tighten one tiny 1.3 mm screw. Next, find the two 1.4 mm screws and secure them, followed by the two 1.7 mm screws. Keep track of each screw size so you don’t mix things up. If you need a hand, you can always schedule a repair.
Tools Used
Step 46
- Gently slide the Taptic Engine into its cozy little home in the frame.
Step 47


- Grab a Phillips screwdriver and carefully secure the Taptic Engine with the 2.1 mm-long screw. Just a little twist, and you’re good to go!
Step 48
- Gently use the flat end of your spudger to reconnect the Taptic Engine press connector—easy does it!
Tools Used
Step 49
- Gently slide the cover over the Taptic Engine connector, making sure it sits snugly. Keep it friendly and straightforward—you're on your way! If you need a hand, you can always schedule a repair.
Step 50


- Grab your Phillips screwdriver and tighten down the pair of 2.2 mm screws that hold in the Taptic Engine connector cover. Easy does it—just enough to secure it in place.
Step 51
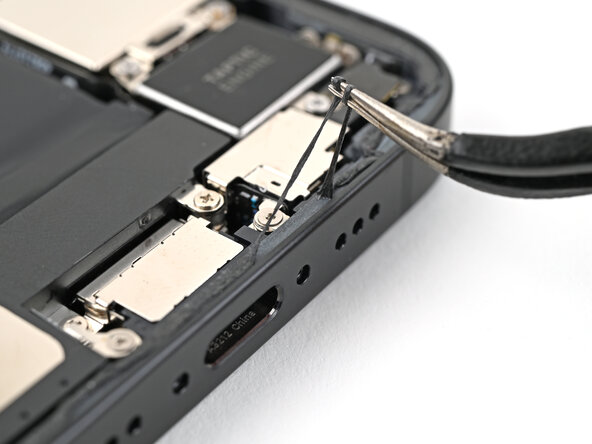
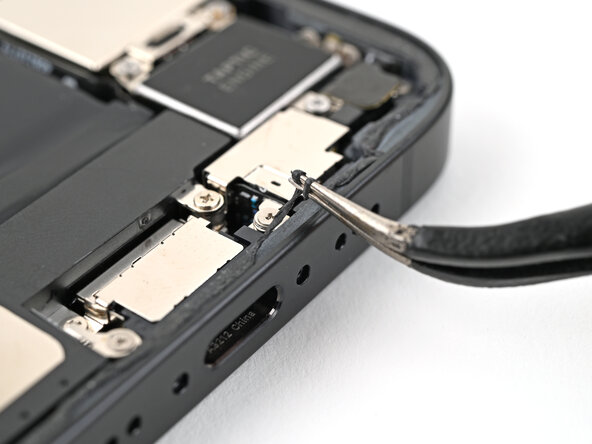
Sometimes the adhesive likes to play hide-and-seek—give it a little poke with your spudger to gather it up before grabbing it with your tweezers.
Step 52
Your liner's color and the pull tab spots might look different on your adhesive than what's shown here. No worries—just a friendly heads-up for a smooth repair process.
- Place your replacement adhesive onto the frame, making sure the bigger blue liner is underneath and the pull tab is positioned at the bottom-right corner.
- Use the camera hole and edge notches as your guides to line up the adhesive perfectly within the frame.
Step 53
Once you press the adhesive down, it’s stuck for good—no sliding it around. If it’s not quite right, you’ll need to peel it off and start fresh with new adhesive.
- Grab that pull tab and start peeling the back liner off the adhesive from the bottom—just don’t go all the way yet, keep it classy.
- Swing the blue liner outta the way and line up the adhesive with the bottom edge of your iPhone.
- Set the bottom edge of the adhesive into its spot in the frame, making sure those spring contacts on your iPhone are chillin’ right in their cutouts in the liner.
Step 54
Getting that lower edge of the adhesive lined up just right? Awesome! When it's in place, the side and top edges will fit like a glove. If things don’t line up perfectly, no worries—just peel it off and try again with some fresh adhesive.
If your adhesive isn't playing nice and you’re out of backups, it’s totally fine to reassemble your iPhone for a bit and use it without adhesive. Just keep in mind that water resistance is taking a little vacation until you get some new adhesive installed. Stay cool!
- Keep peeling off that back liner and gently press the adhesive down along the edges of the iPhone’s frame. Nice and steady, you’ve got this!
Step 55
- Take the flat end of your spudger and gently press the adhesive all around the edge of the frame—think of it as tucking in a cozy blanket so everything stays snug.
Tools Used
Step 56
- Gently use the spudger's tip to raise the pull tab located at the top right corner of that lovely pink adhesive liner until you can snag it with your fingers.
Tools Used
Step 57
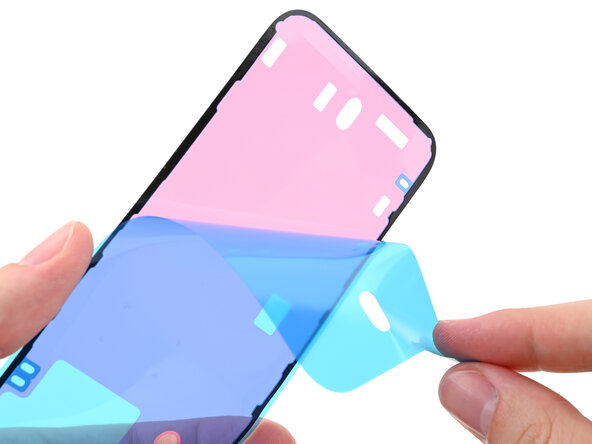
- Grab that pull tab and peel off the pink liner from the frame to reveal the glorious blue liners underneath.
Step 58
- Carefully prop up the back glass along the right side of your iPhone, using a box or any sturdy object to keep it steady.
- Gently press the charging coil connector into place using the flat end of a spudger or your finger, then do the same for the battery connector.
Tools Used
Step 59
- Set the middle connector cover on top of the wireless charging coil press connector, letting it hang just a bit over the slot on the logic board for the bottom clip. It’s like a cozy little hat—make sure it sits right!
Step 60

- Give that cover a gentle press with your finger so it sits snugly on the logic board.
- Keep holding it down and slide the cover up until the metal clips snap perfectly into place.
Step 61
- Grab those tweezers and gently position the top of the lower connector cover right above its cozy spot on the logic board.
- Now, delicately lay the lower connector cover over the press connector like it's settling in for a nice nap.
Tools Used
Step 62
- Grab your trusty tri-point Y000 screwdriver and get to work installing the 1.0mm-long screw that holds the middle connector cover in place. It's a small but mighty screw!
- Now, take the same tri-point Y000 screwdriver and secure the two 1.3mm-long screws that keep the lower connector cover snug and secure. You’ve got this!
Tools Used
Step 63
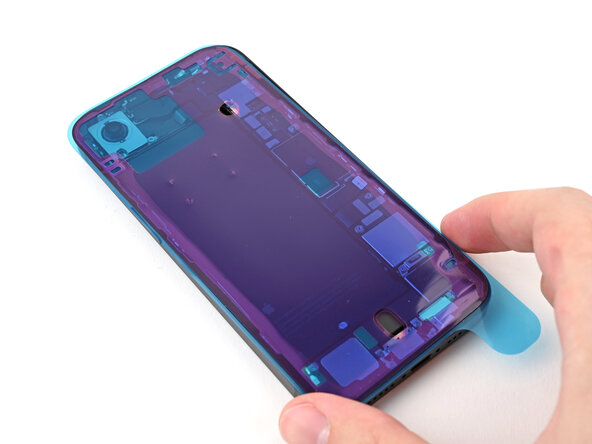
Hold the back glass just above the frame, keeping it away from the adhesive, and gently peel off the liner along the right edge. Take it slow and steady!
- Grab your trusty tweezers and gently tug on the three blue liners. Peel them off to reveal the sticky goodness underneath, and you're all set!
Tools Used
Step 64
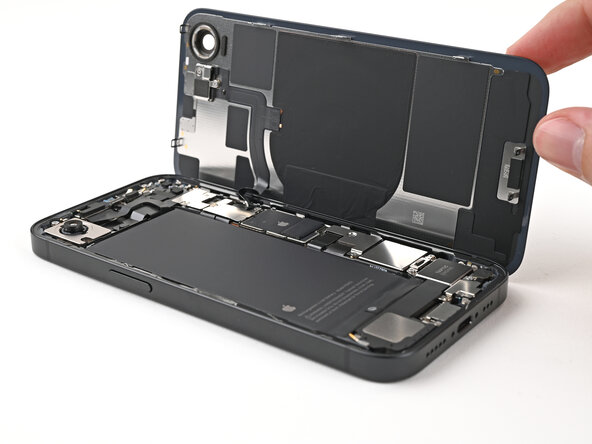
- Carefully position the back glass just above the phone and line it up with the frame. Take a deep breath, it’s almost time for the finishing touch!
Step 65
- Gently place the back glass down onto the frame and give it a little press until the clips snap into place.
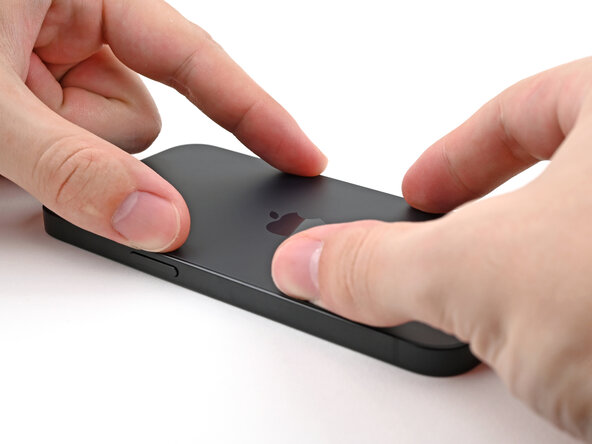
- Give a light press around the edges of the back glass to make sure all the clips are happily engaged.
Step 66

- Warm up the edges of the back glass using an iOpener, hair dryer, or heat gun until it feels nice and toasty to the touch—this helps the adhesive stick like a charm.
- Give the perimeter of the back glass a good, firm press. If you have screen vise clamps, pop them on to hold everything tight while the adhesive sets. No clamps? No worries, keep going for other ways to get that back glass secure.
Tools Used
Step 67
To get an even squeeze on your iPhone and help that back glass stick to the frame, don’t forget about the camera bump—it’s a little diva.
If you don’t have your original box, no worries! Just skip ahead for a different way to do it.
- If your iPhone came in a box, grab the lid and set it on a flat surface. Place your iPhone screen-side-up inside the lid, making sure the camera bump fits into its recess. Find an object roughly the same size as your iPhone but taller than the sides of the box, then stack it on top, followed by a few heavy items. Keep everything stacked for at least thirty minutes—lighter objects mean you should leave it longer. For best results, leave it overnight. If you need help, you can always schedule a repair.
Step 68
If you've misplaced your iPhone's original box, no worries! Follow the next three steps to find a cool alternative way to evenly compress that back glass like a pro.
- Flip the iPhone screen-side down and gently place it on a soft, flat surface. Make sure it's comfy!
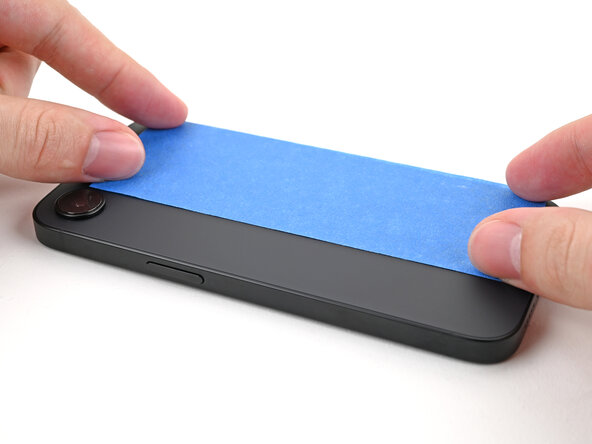
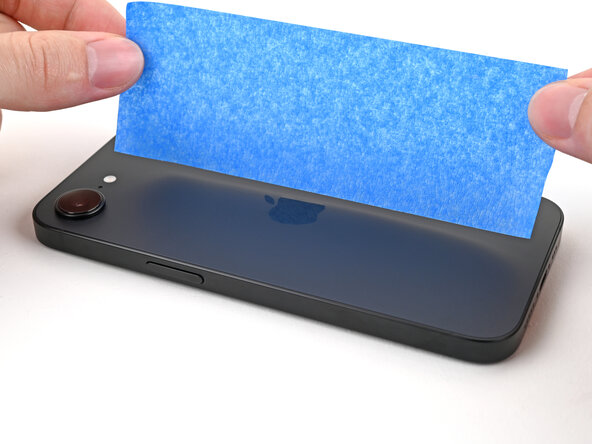
- Stick some tape to the back glass to keep it looking pristine while you work. No scratches on our watch!
Step 69
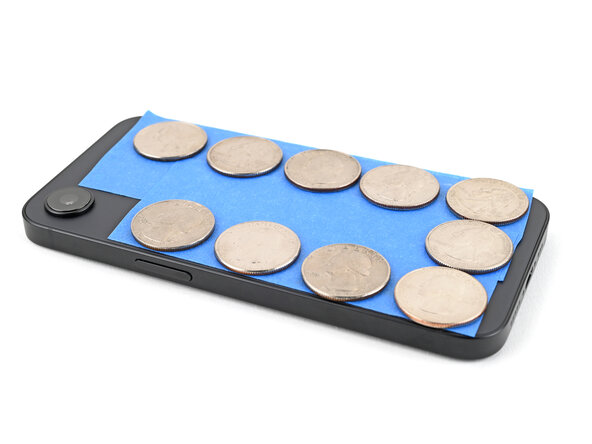
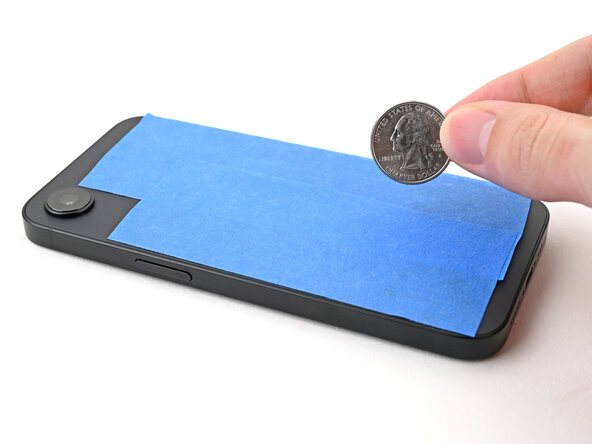
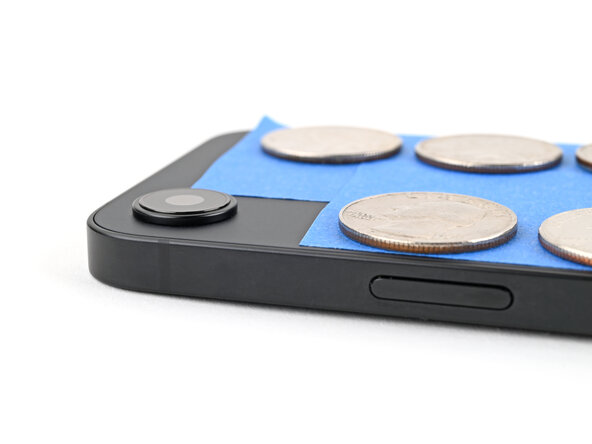
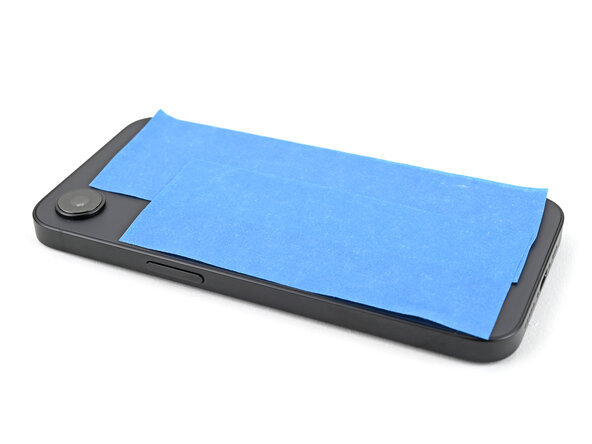
Since coins come in different thicknesses, you might want to stack a few to get the perfect fit.
- Lay down a layer of coins or other objects with similar thickness on the tape around the edges of the back glass.
- Space out the coins evenly and make sure they’re at least as thick as the camera bump.
Step 70

Heads up! Coins might leave a mark on the item below, so best to avoid using anything precious.
- Gather some hefty books or anything with a bit of weight and pile them on top of your iPhone.
- Let gravity do its thing for at least half an hour. If your stack is on the lighter side, give it more time—overnight works best if you’re feeling patient.
Step 71


- Grab your trusty P2 pentalobe screwdriver and let's get those two 7.8 mm-long screws snugly in place on either side of the charging port. You're doing great!