iPhone 5c Battery Replacement Guide: Step-by-Step DIY Tutorial
Duration: 30 min.
Steps: 11 Steps
Ready to breathe new life into your iPhone 5c? This guide walks you through the process of swapping out that pesky battery that’s causing all sorts of headaches. If your phone has been crashing during those intense gaming sessions, refusing to charge, or just has a battery life that’s shorter than your patience, you’re in the right place! Follow along as we help you tackle this repair on your own and get your device back to its prime. Let’s get started!
Step 1

– Grab your trusty pentalobe screwdriver because we’re about to crack open that iPhone 5c!
– Carefully remove the two pentalobe screws at the bottom of the enclosure. You’ll find them snugly positioned to the right and left of the Lightning connector. Don’t forget to stash those screws in the same compartment of your organizer tray. We’re talking about 2 x 3.8 mm pentalobe screws here!
Step 2


– Place your iPhone 5c on a soft, clean surface to keep that back looking sharp!
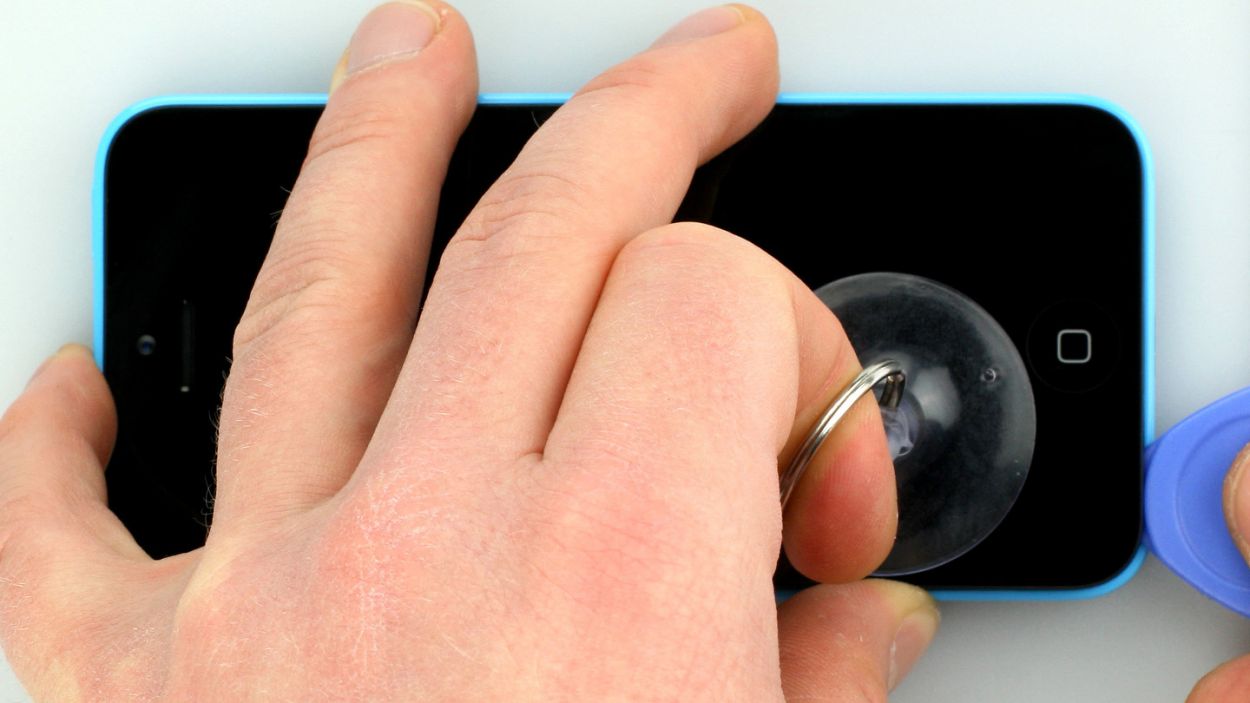
– To lift the front panel, grab a suction cup and a hard plastic pick. If your screen is cracked like a puzzle, don’t fret! Just cover it with packing tape to keep things tidy.
– Position the suction cup over the Home button (if you can) or right next to it (check out figure 1). As you lift the screen with the suction cup, slide that hard plastic pick between the plastic frame and the display frame, and gently press down on the plastic frame. Use the pick to help lift the screen too (see figure 2). It might take a few tries, but you got this!
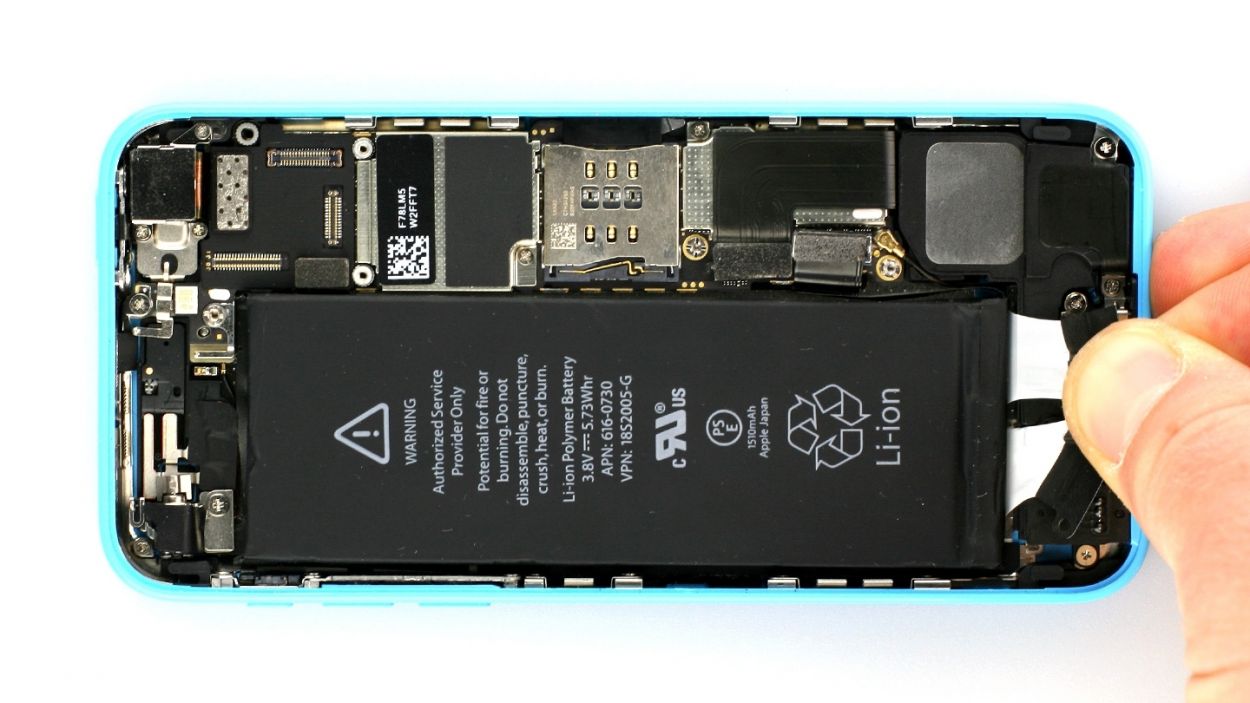
– Once you can lift the screen a couple of millimeters (see figure 3), carefully work your way around the edges until it’s loose on both sides (see figure 4).
Step 3
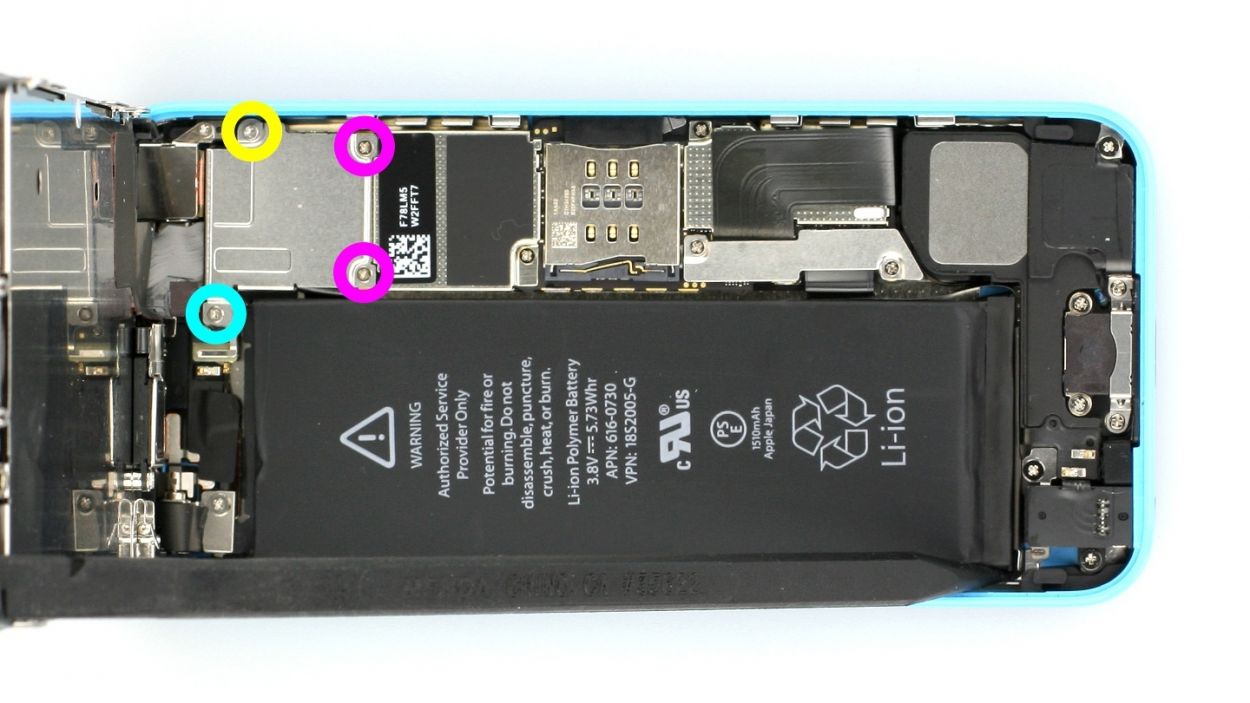
– First, let’s tackle those four Phillips screws on the shiny cover (check out figure 1 for a visual guide). Be sure to toss those screws into the same compartment of your organizer tray – organization is key! Now, gently lift the cover off to reveal the magic inside. You’ll be dealing with 1 x 3.2 mm Phillips screw (not magnetic), 2 x 1.2 mm Phillips screws, and 1 x 1.7 mm Phillips screw.
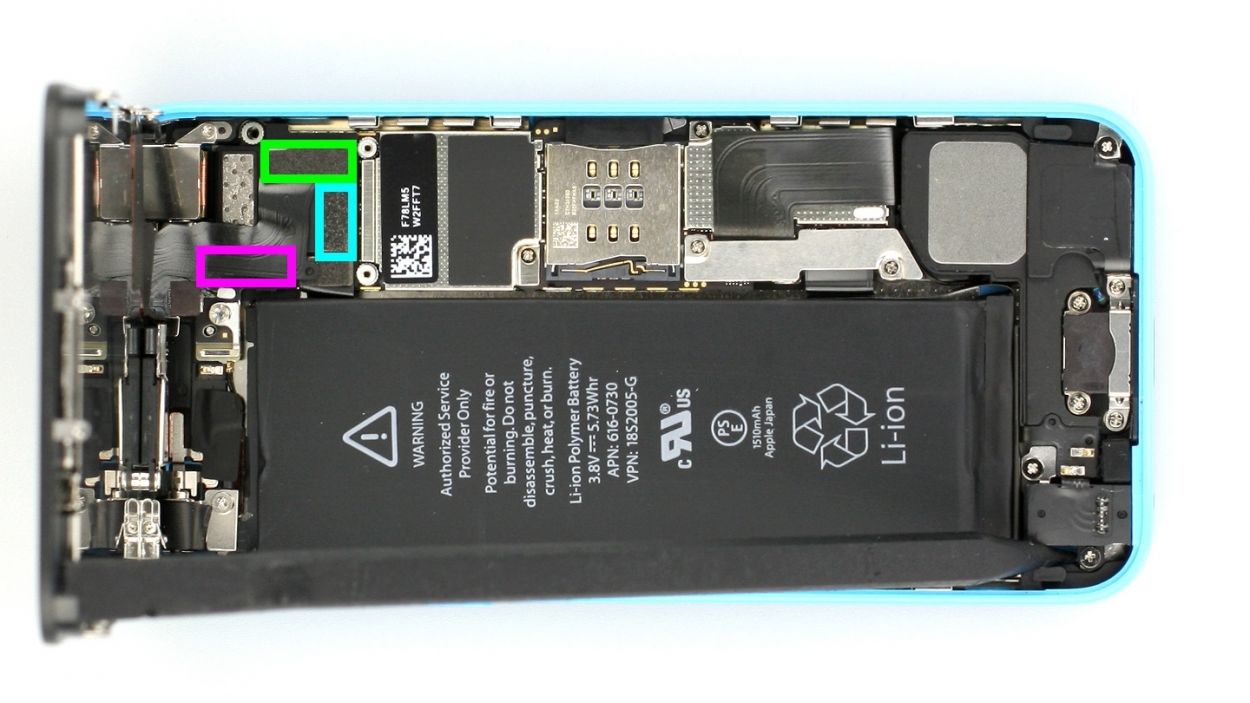
– Next up, it’s time to disconnect three connectors (see figure 2). Take it easy and be gentle! Use the pointed tip of your spudger and carefully slide it just under the contact to lift it up. You’ll be disconnecting the touchscreen, LCD, and the front camera/sensor/earpiece/ambient microphone.
– Now, let’s give that new display a test run! Temporarily connect the new display assembly and fire up your iPhone. Check if the LCD and touchscreen are working like champs. Make sure those connectors are snugly plugged in; otherwise, you might see a black screen or some funky stripes. If the display has a bit of a yellow tint, don’t worry, just refer to the last step in this guide.
– Time to reconnect that display assembly temporarily.
– Go ahead and start your iPhone again to see if everything is working smoothly with the LCD and touchscreen. Remember, those connectors need to be securely attached; otherwise, you might end up with a black display or stripes.
– And if you notice any yellowish hues on the display, just check out the last step in this guide for assistance.
Step 4
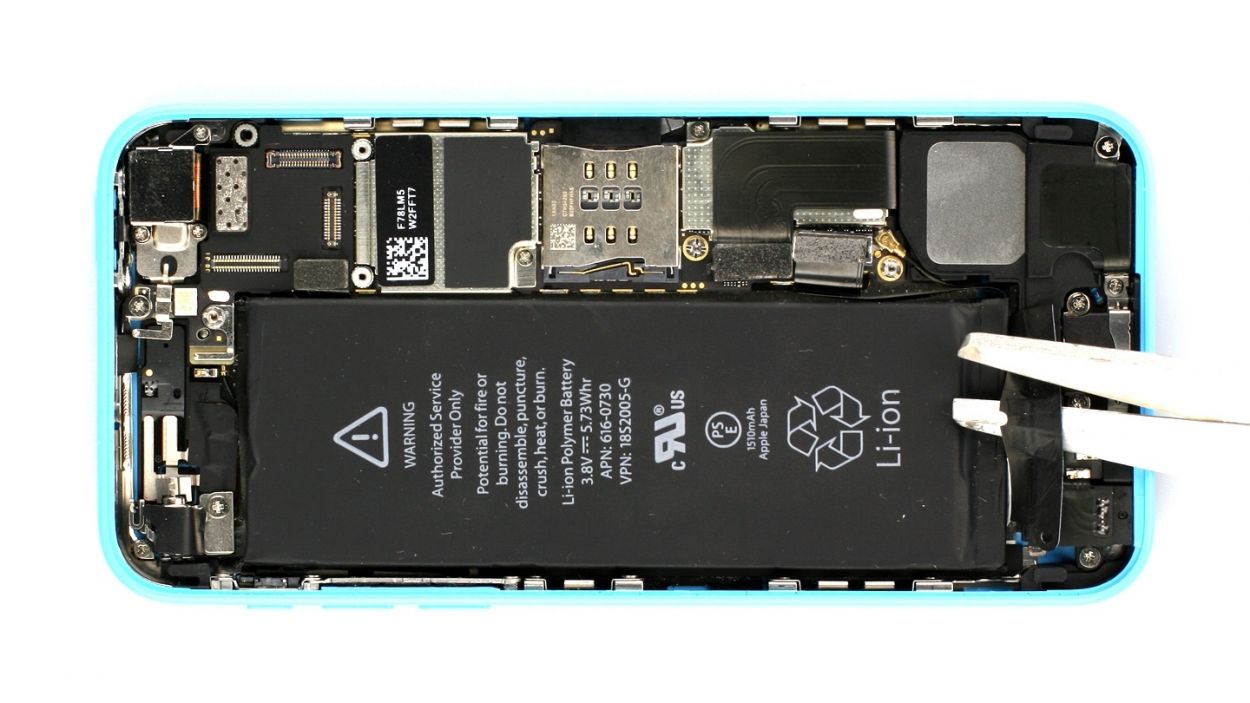
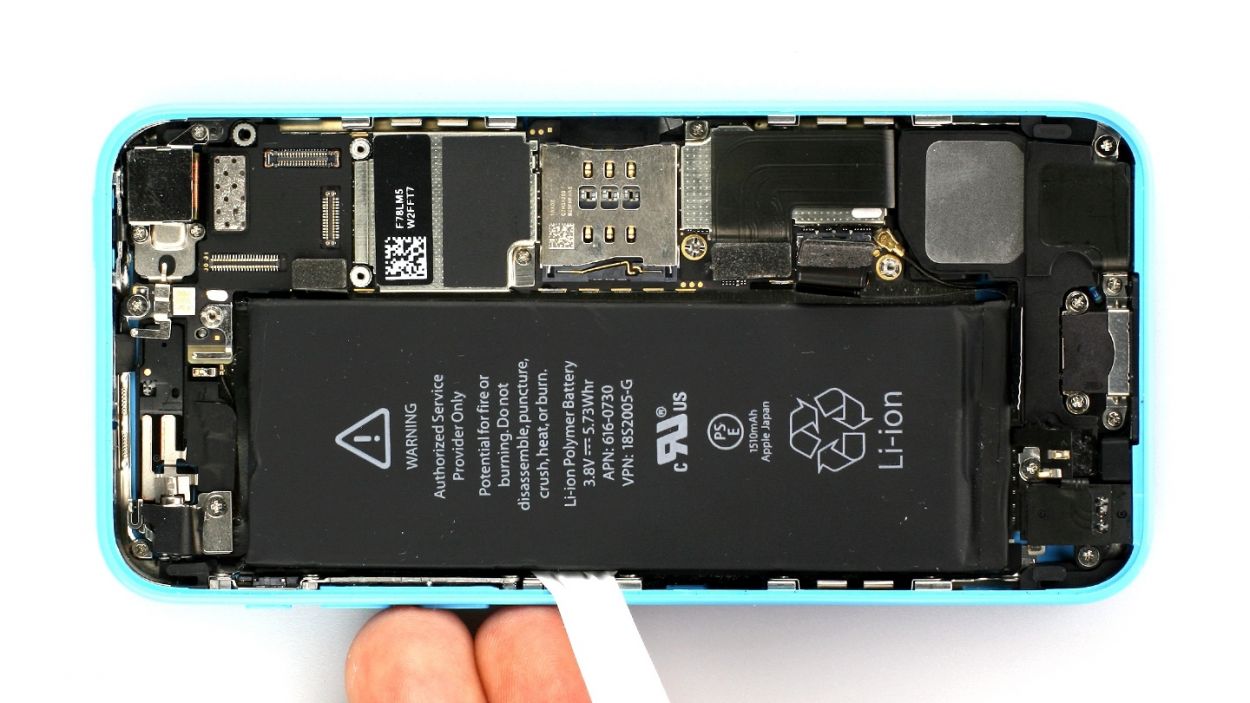
– Gently tug on the black end of the sticker to stretch it out (check out figure 1), then grab some scissors and snip it right down the middle (see figure 2).
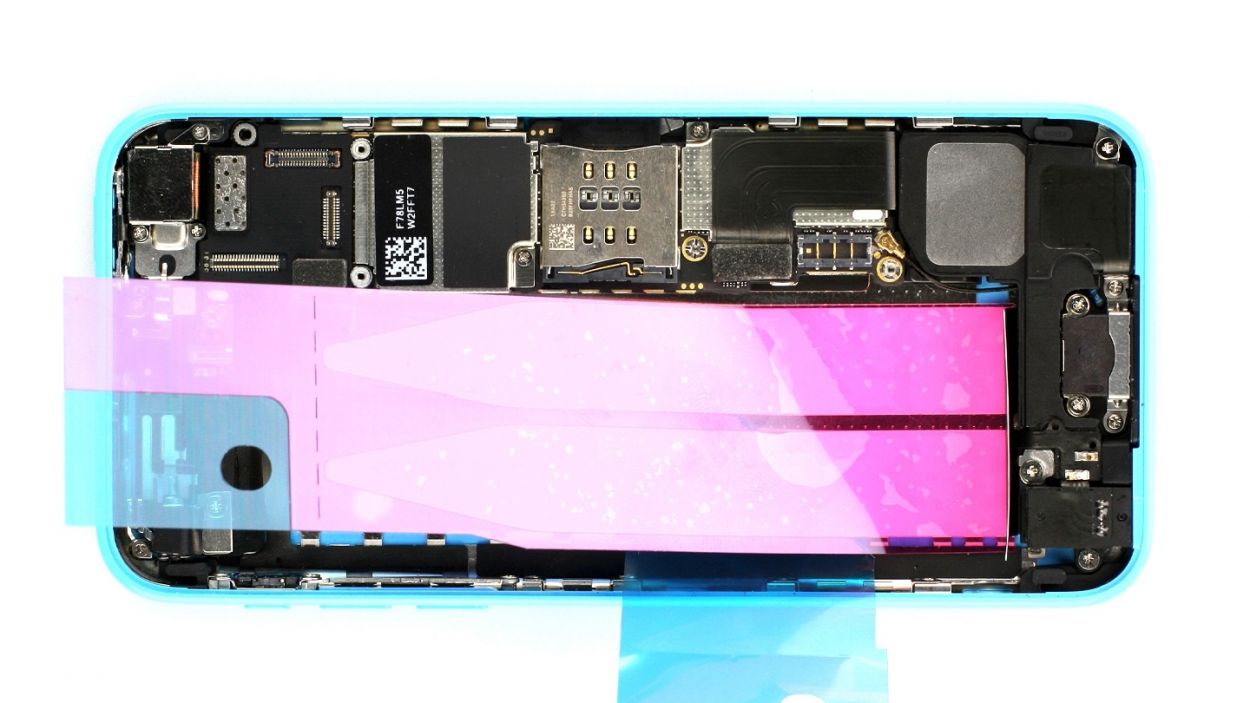
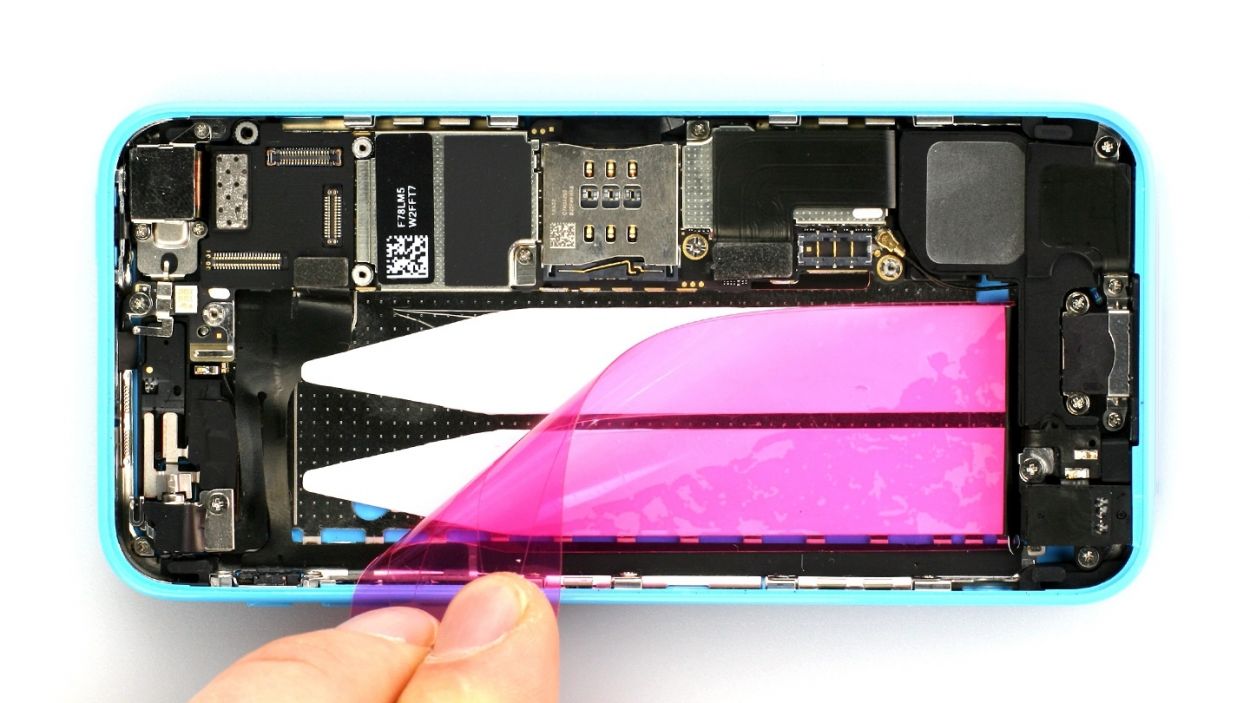
– Now, take your time and slowly peel back half of that adhesive strip to the side to free it up (see figure 3). Do the same for the other half and then say goodbye to the battery! It might seem trickier than it appears, so don’t rush it. If the strip decides to tear, just switch over to option 2.