iPhone 6s – Replacing the iSight camera
Duration: 30 min.
Steps: 10 Steps
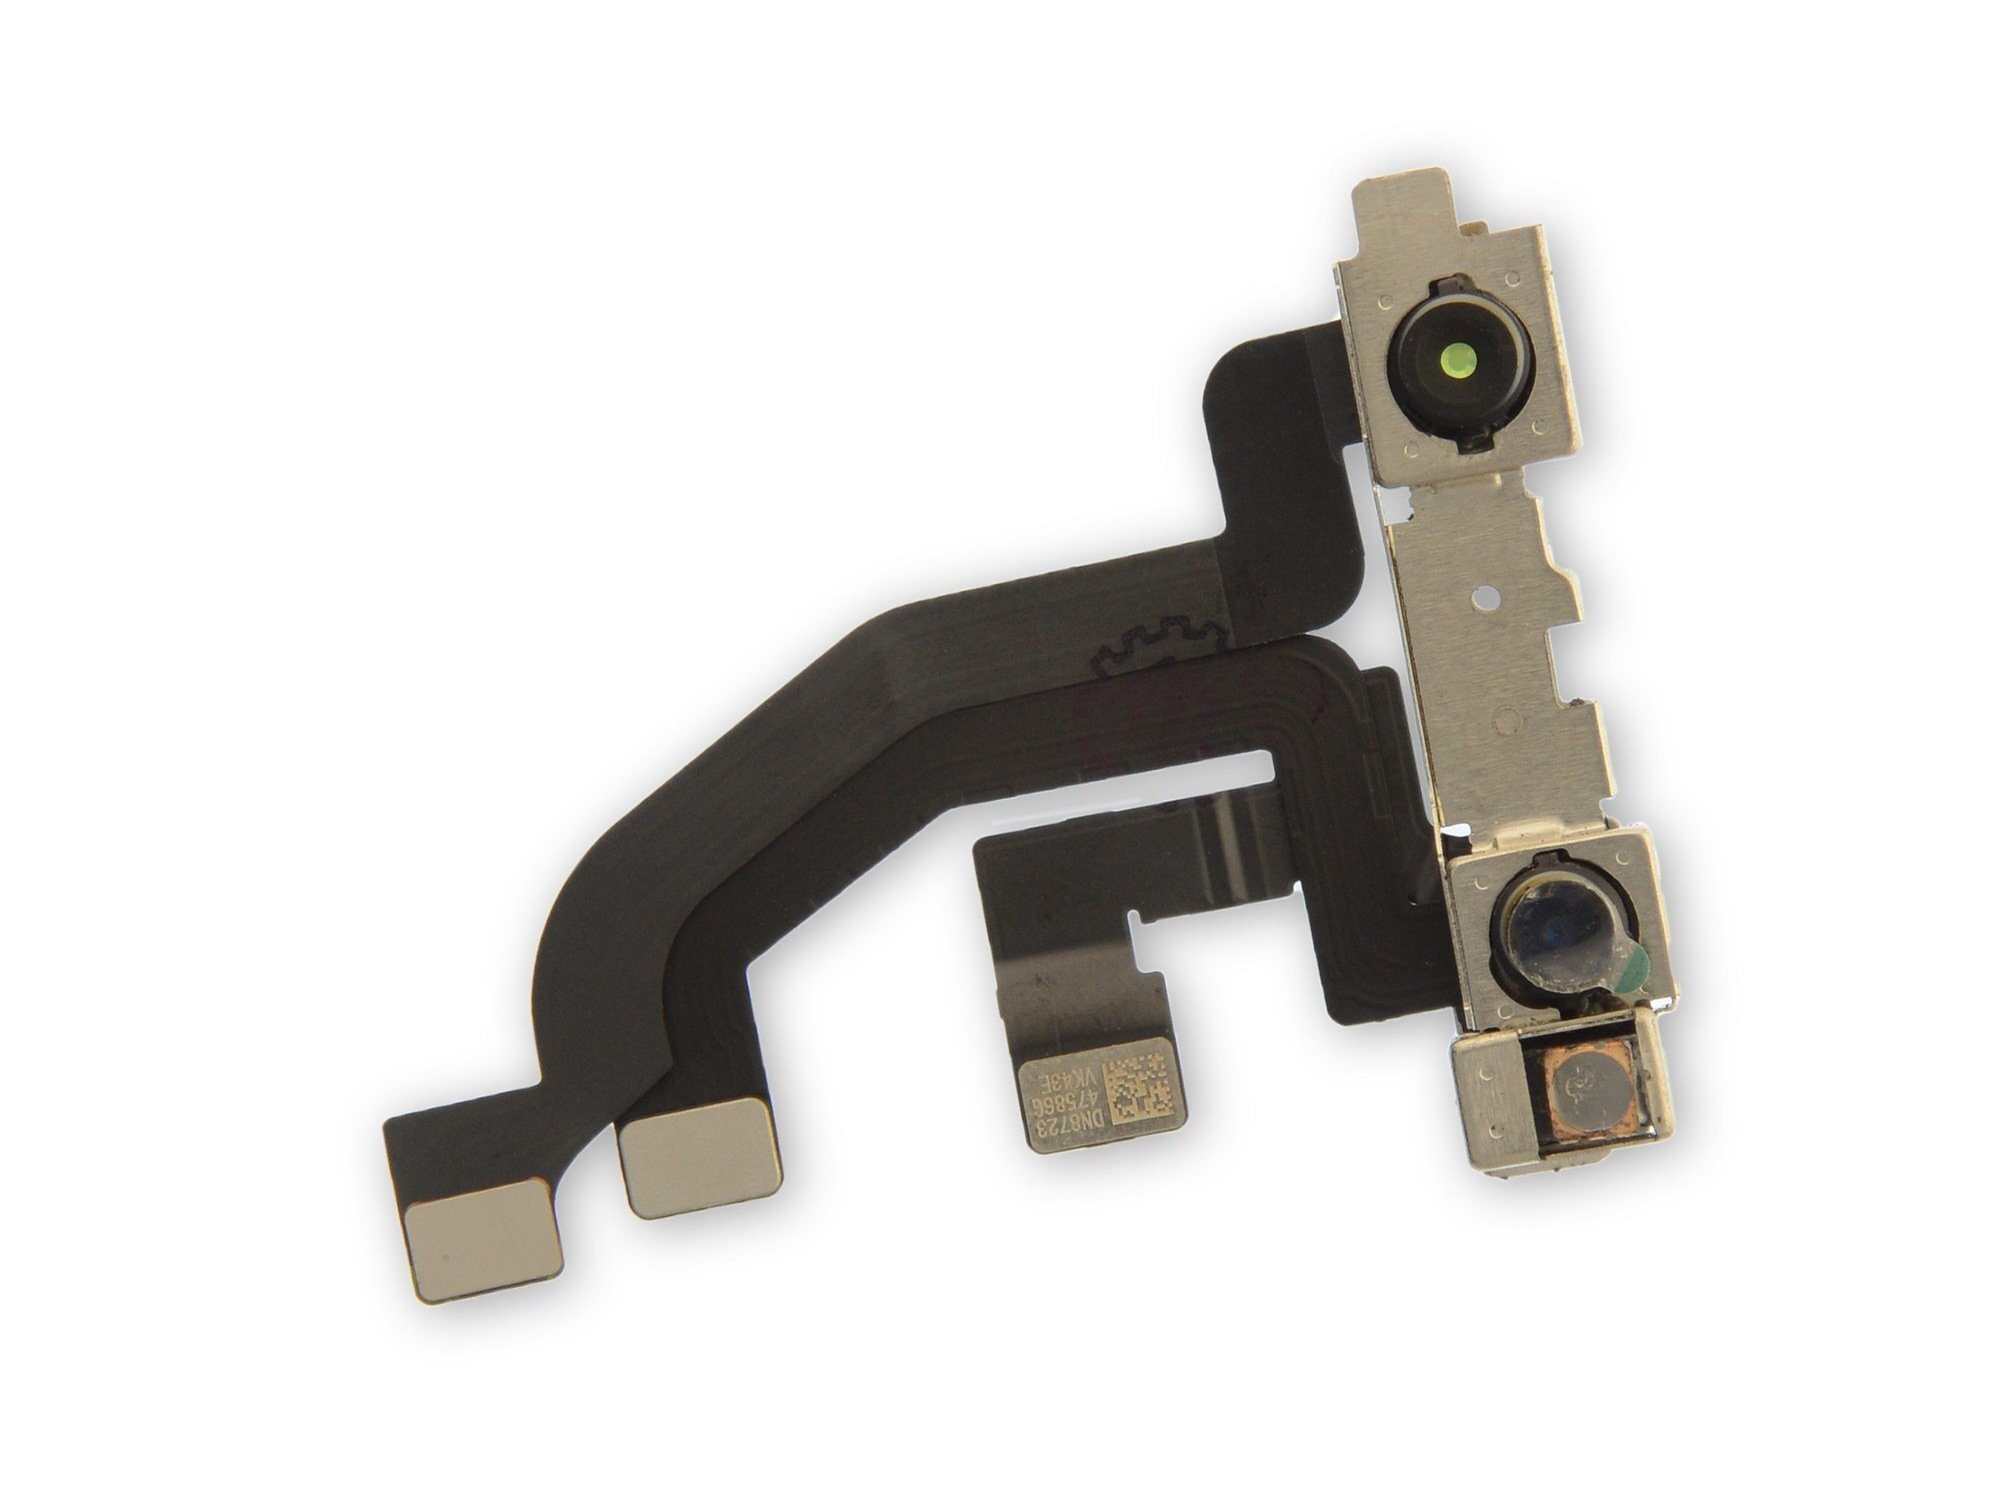
In this guide, we’ll walk you through replacing your iPhone 6s’ faulty rear camera all by yourself! If your rear camera is playing hide and seek, your photos look like they’re from a blurry dream, or it just won’t focus, then you’re in the right place. Let’s get that camera back in action!
Step 1


– First things first, power down your iPhone before diving into the repair zone! Press and hold the standby button for about three seconds until the slider pops up on your screen.
– Now, give that slider a gentle swipe from left to right, and voilà! Your iPhone will gracefully shut down in about 10 seconds.
Step 2

– To get into your iPhone 6s, grab a pentalobe screwdriver – it’s your trusty sidekick for this adventure!
– Next up, let’s remove the two pentalobe screws located on either side of the lightning connector. We suggest placing those little guys on a magnetic pad to keep them safe and sound, just as they were nestled in your phone before. You’re looking for .2 x 3.8 mm pentalobe screws!
Step 3

If you find yourself in a bit of a sticky situation, don’t fret! Just give those outer edges of the display a gentle warming up a few times.
– Place your iPhone 6s on a soft, clean surface—let’s keep that back scratch-free!
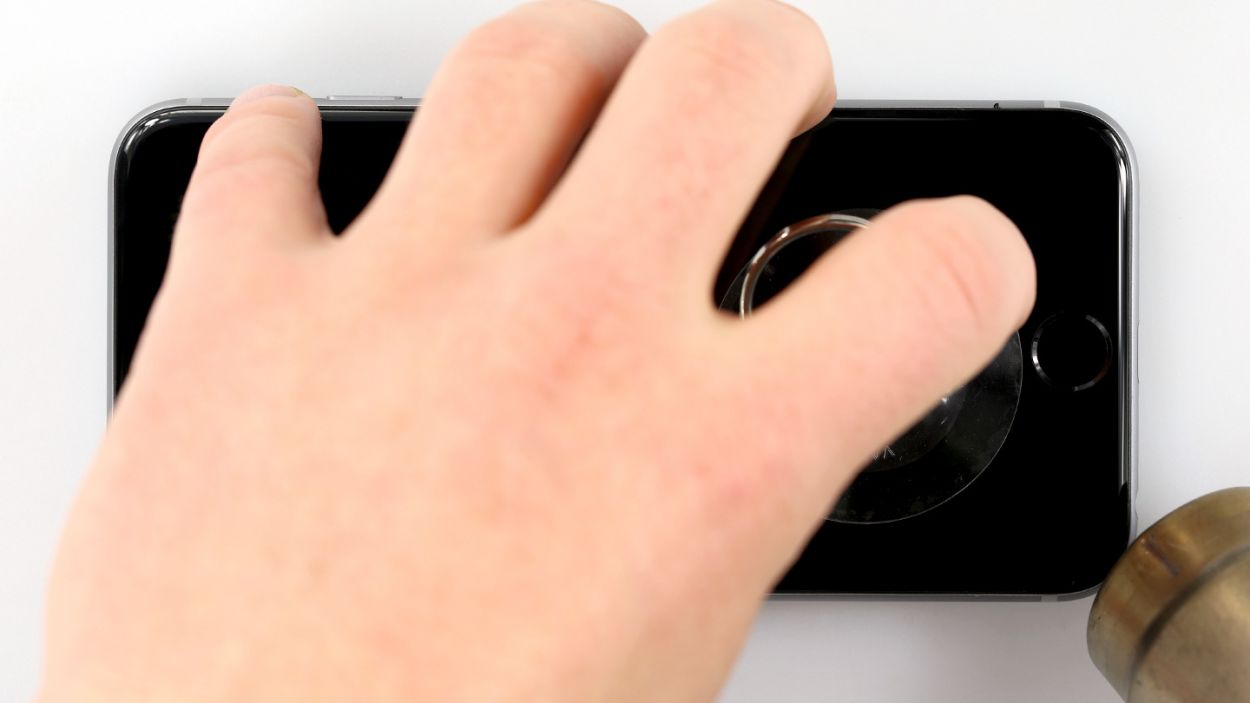
– Grab a suction cup to gently lift the front panel. You’ll also need a hard plastic plectrum and a hot-air gun. If your screen is looking a bit worse for wear, consider covering it with adhesive tape to keep things tidy before moving on.
– The screen is a little stuck to the frame. Use the hot-air gun to warm up the outer edges of the display to around 60°C (140°F).
– Position the suction cup over the home button or right next to it. While you lift the screen with the suction cup, slide the hard plastic plectrum between the aluminum frame and the display. Press down on the aluminum frame while lifting the display with the plectrum. It might take a few tries, but don’t worry!
– Once you can lift the screen a few millimeters, gently slide along the outer edges until both sides of the display are free. If needed, warm the edges of the display a few times to help out.
Tools Used
Step 4
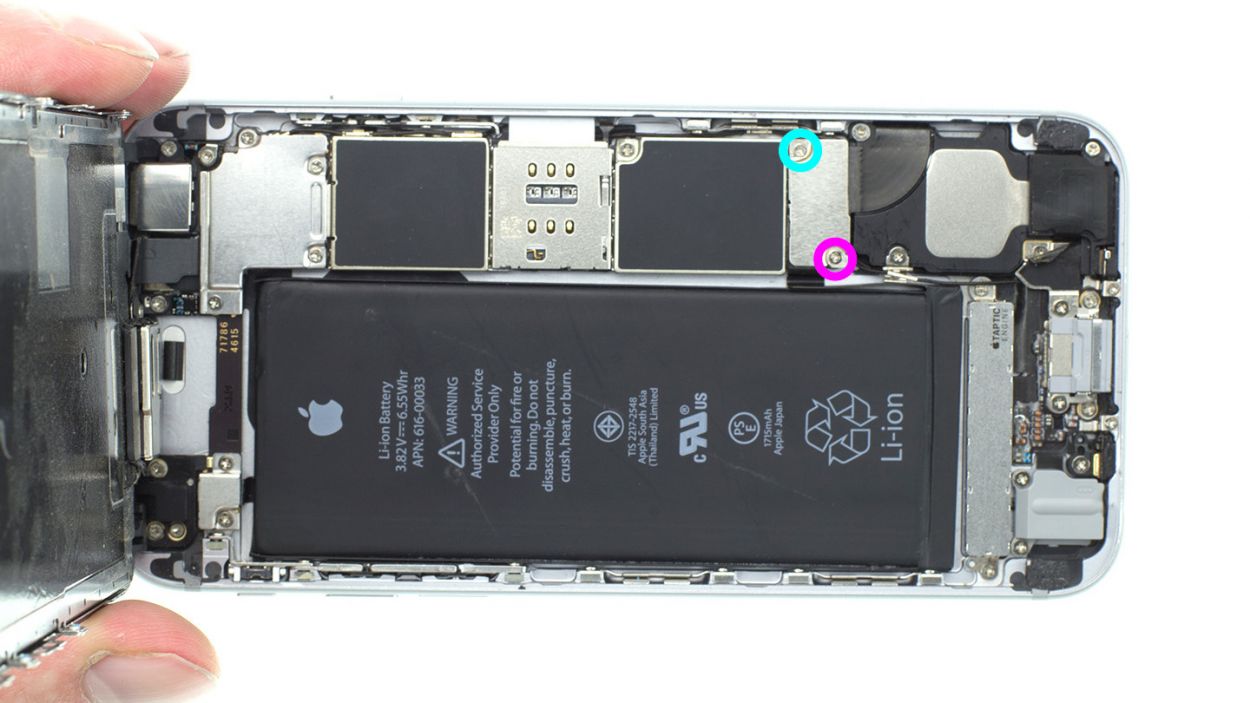
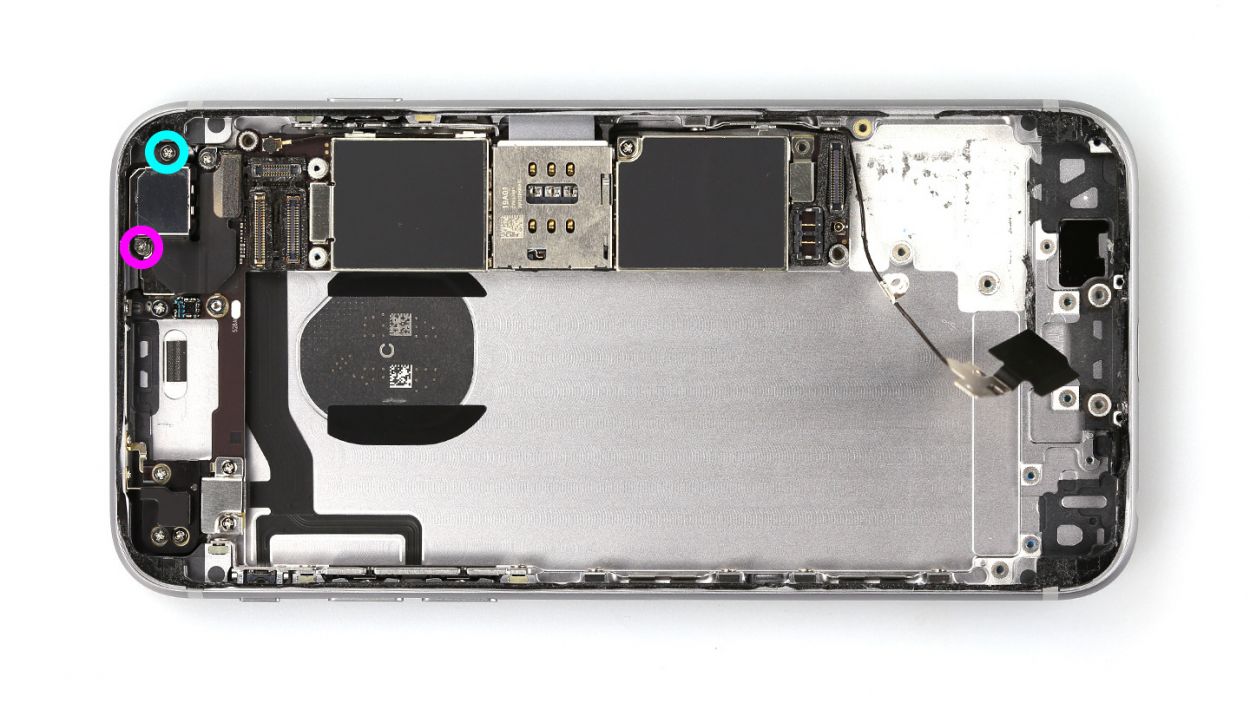
– Start by removing the Phillips screws and the plug cover that keep the battery plug in place. To keep everything organized, toss those loose parts onto a magnetic pad—it’s like a cozy little home for your screws! You’re looking at 1 x 2.2 mm Phillips screw and 1 x 2.9 mm Phillips screw.
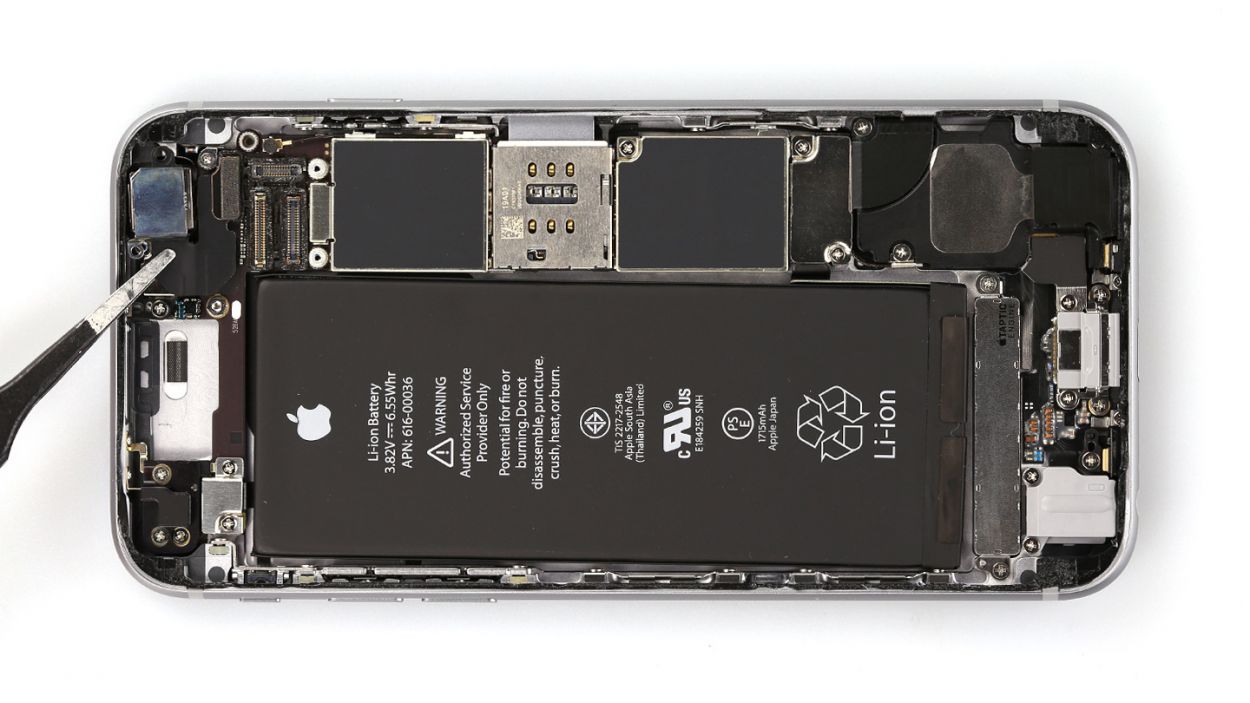
– Next, it’s time to gently detach the battery plug. Use an ESD spudger to slide under the plug. If you’re feeling adventurous and don’t have a spudger handy, your fingernail can do the trick too!
Step 5
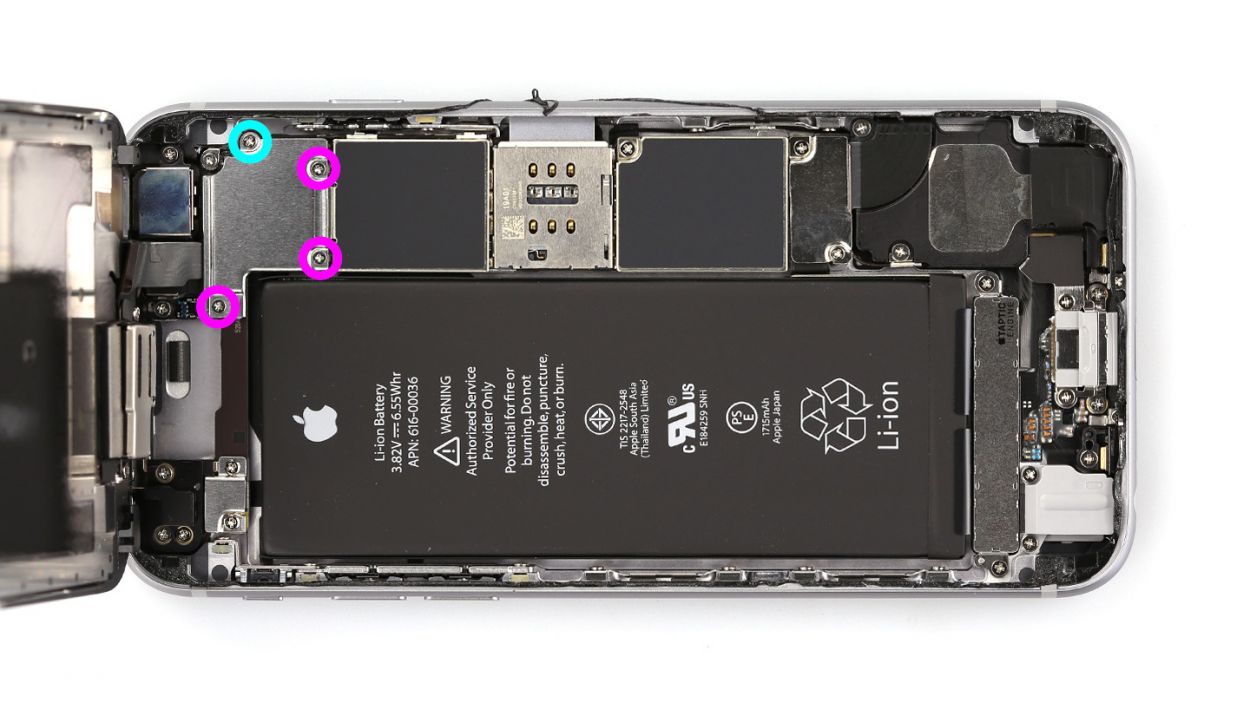

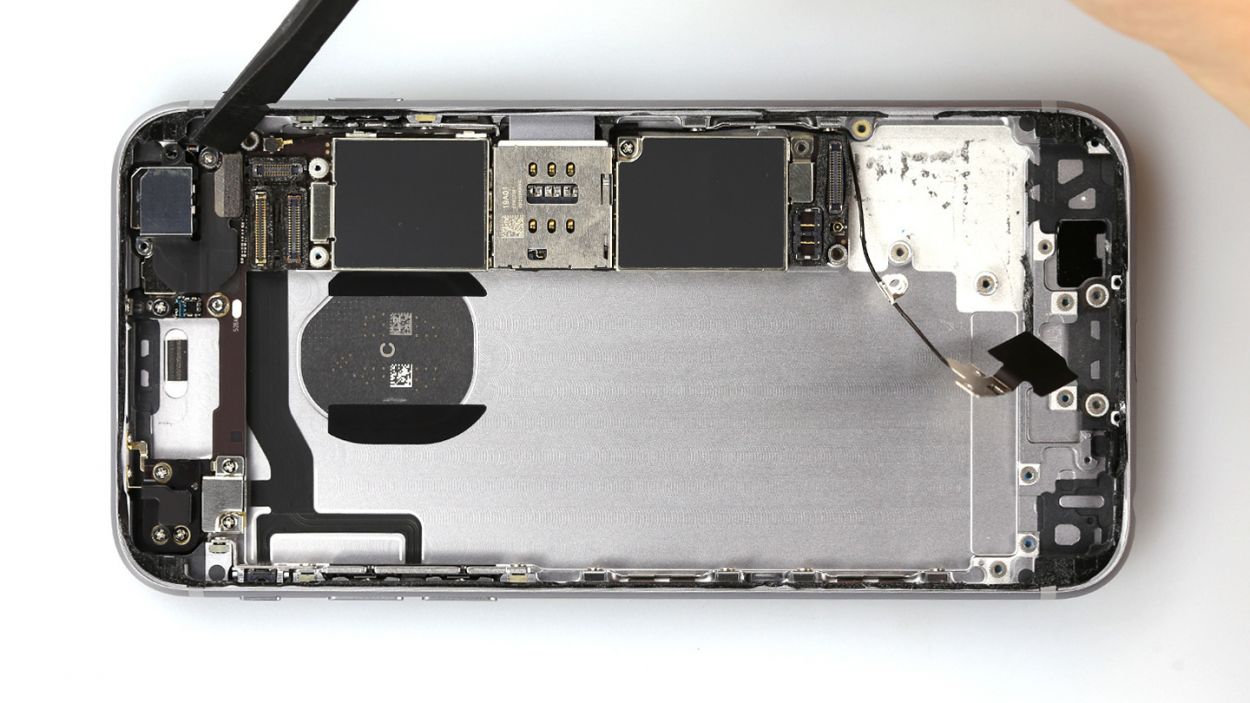
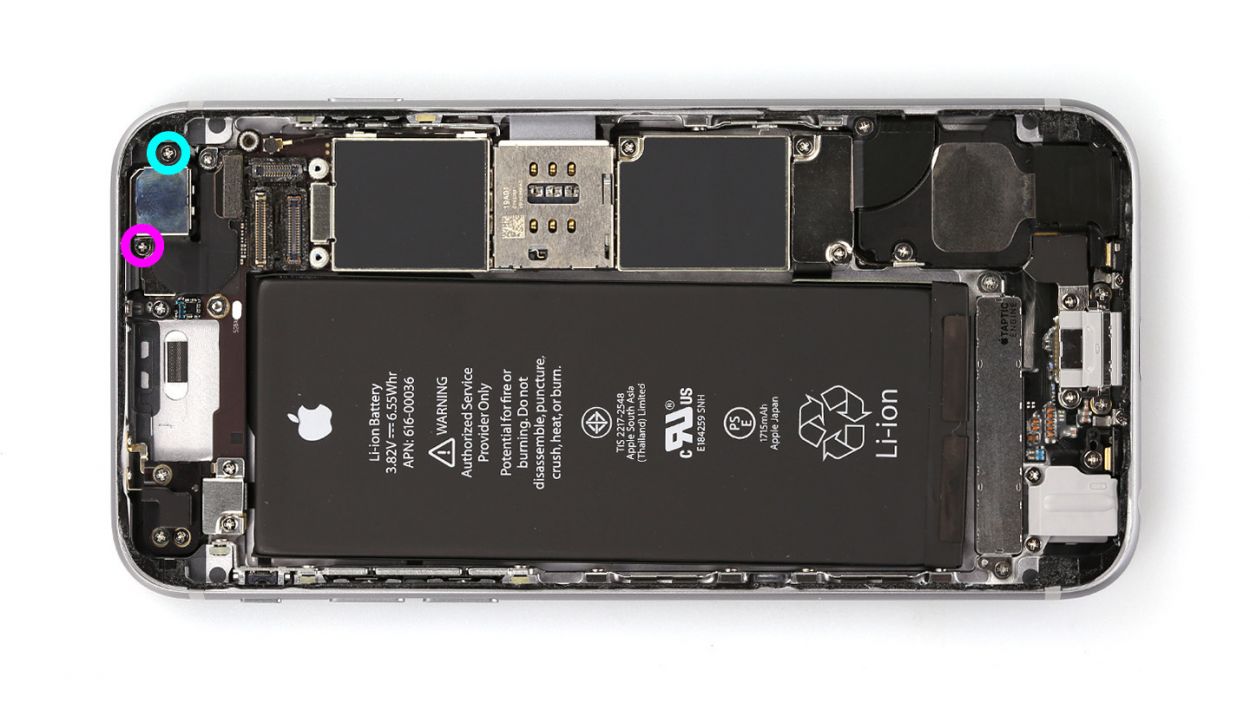
– First, loosen the four Phillips screws that hold down the shiny silver contact cover. Once you’ve got those screws free, gather them up with the cover and pop them onto your magnetic pad. This way, they’ll be easy to track down later—no more hunting around!
– Now, let’s tackle those three overlapping display connectors in the order shown below. Just slide your spudger under each connector and lift it up gently. You’ve got this! We’re talking about the Front camera/sensor/earpiece/ambient microphone, the Touch ID cable, and the display.
Step 6
Heads up! The silver cover is just a tad glued to the camera, so be gentle!
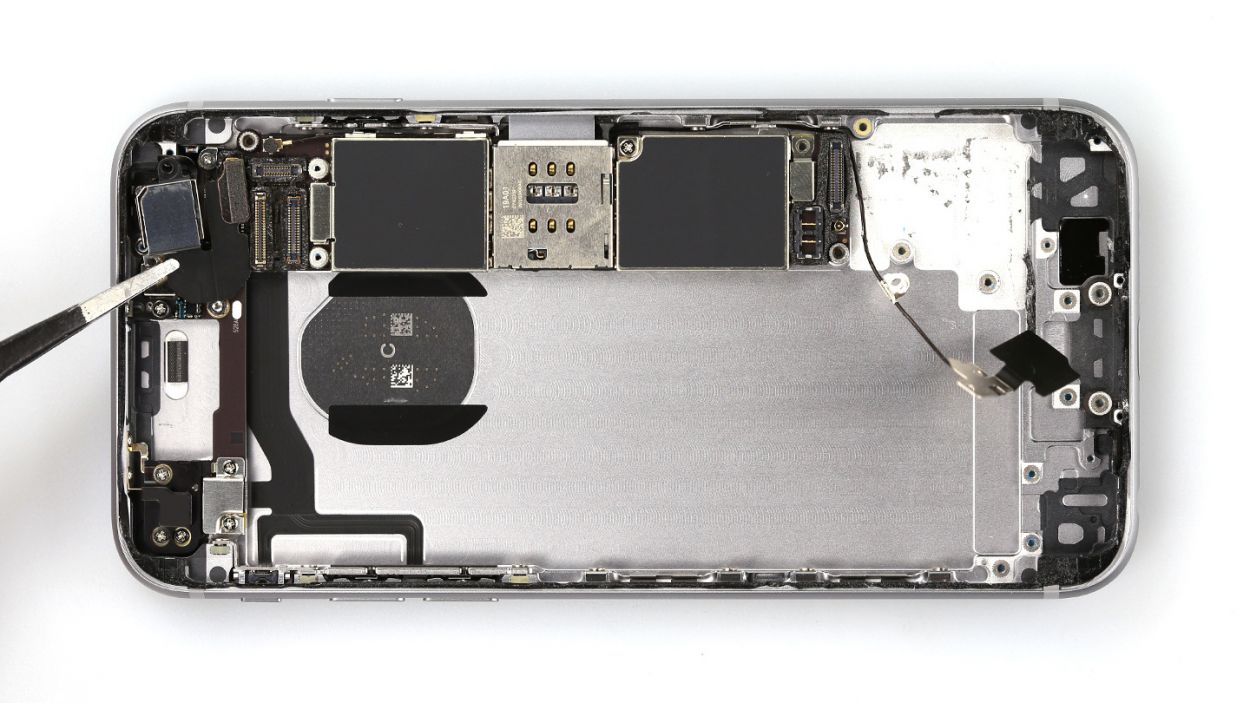
– Start by unscrewing the two Phillips screws from the camera cover. You’ll need one 2.0 mm Phillips screw and one 1.6 mm Phillips screw—easy peasy!
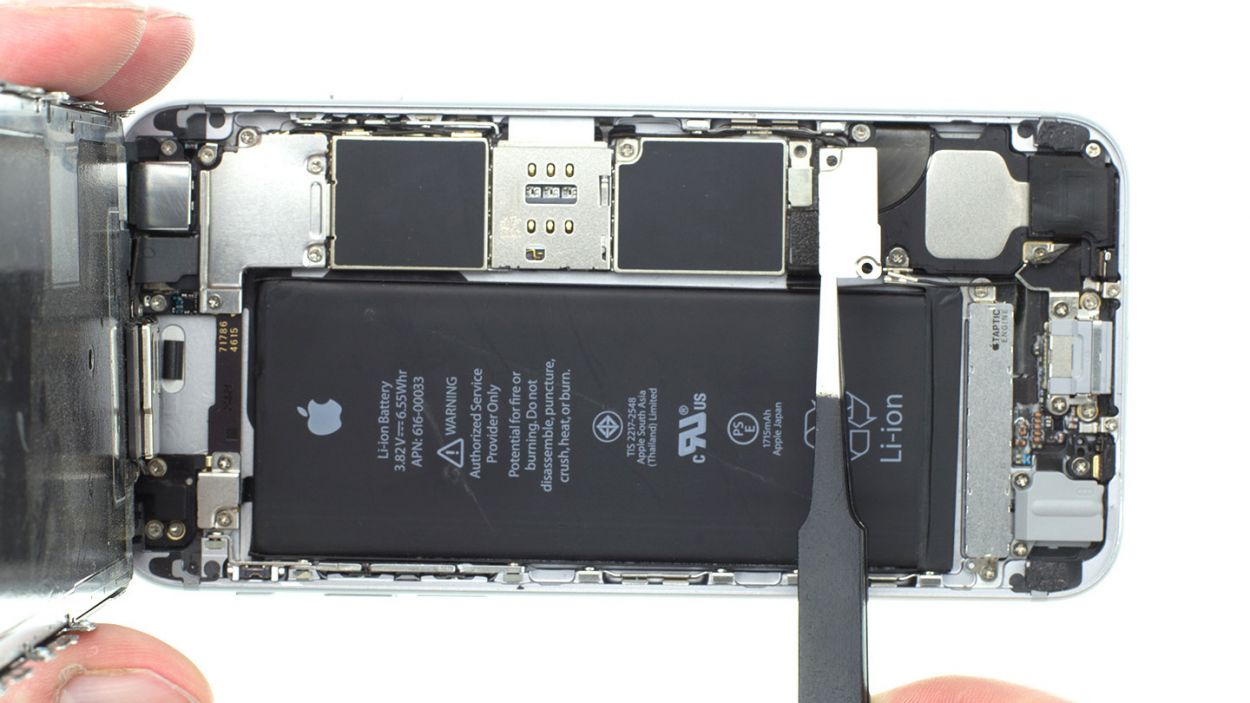
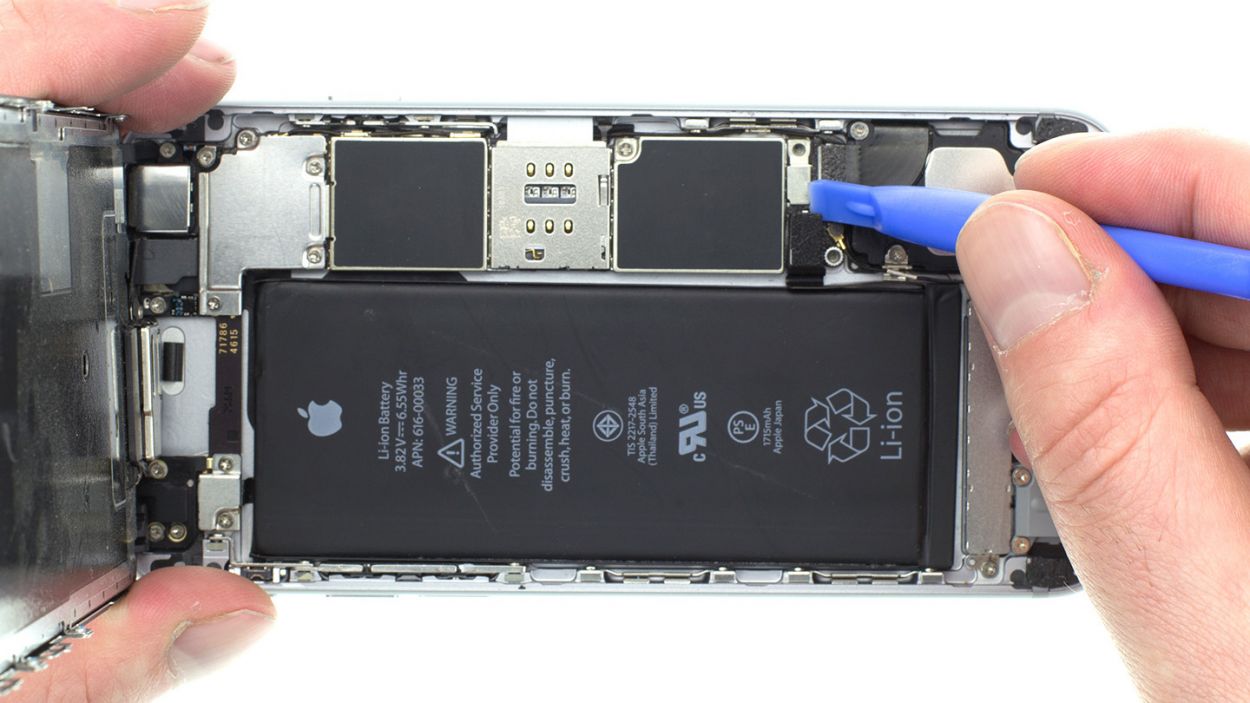
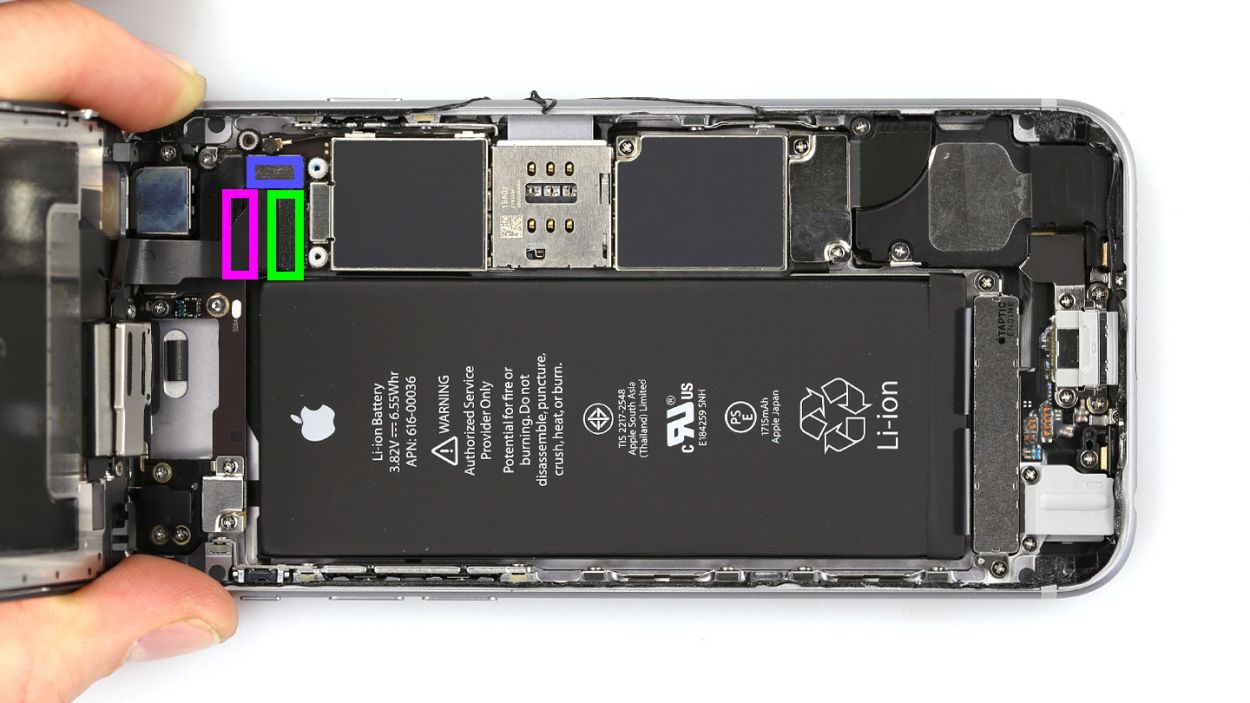
– Next, gently unplug the camera connector. Just slide your spudger under the connector and give it a little lift. No need to rush, take your time!
– Now, it’s time to carefully take the camera out of your iPhone. Just a quick heads up—the silver cover is a bit glued to the camera, so handle it with care!
Step 7

– Carefully place the camera back in its cozy spot and connect the camera’s cable—it’s like giving it a warm hug!
– Next, grab the camera cover and snugly screw it in place. If it’s still hanging out with the camera, no worries!
Step 8


Hey there! If those display connectors are feeling a bit shy and aren’t snugly connected, you might see some funky stripes or notice parts of the touchscreen are on a break! Let’s make sure everything is plugged in just right!
– First, let’s get those display connectors plugged in! It might take a few tries, so don’t stress if it doesn’t click right away. Just be gentle, and avoid bending those connectors. We’re talking about the Front camera/sensor/earpiece/ambient microphone, the Touch ID cable, and the display.
– Once you’ve got those connectors snugly in place, power up your iPhone! Make sure to check that the LCD, touchscreen, proximity sensor, front camera, and earpiece are all working like champs. If something looks off, like funky stripes or parts of the touchscreen being a little lazy, it’s probably a sign those connectors need a little more love!
– Finally, it’s time to put that connector cover back on and screw it in tight! You’ll need 3 x 1.3 mm Phillips screws and 1 x 2.9 mm Phillips screw for this step.
Step 9
– Gently fold the display down, making sure that the upper edge, where the cables are connected, clicks in snugly. Now, with a little finesse, push the display down towards the home button along the edge until it fits perfectly into the frame.
Step 10
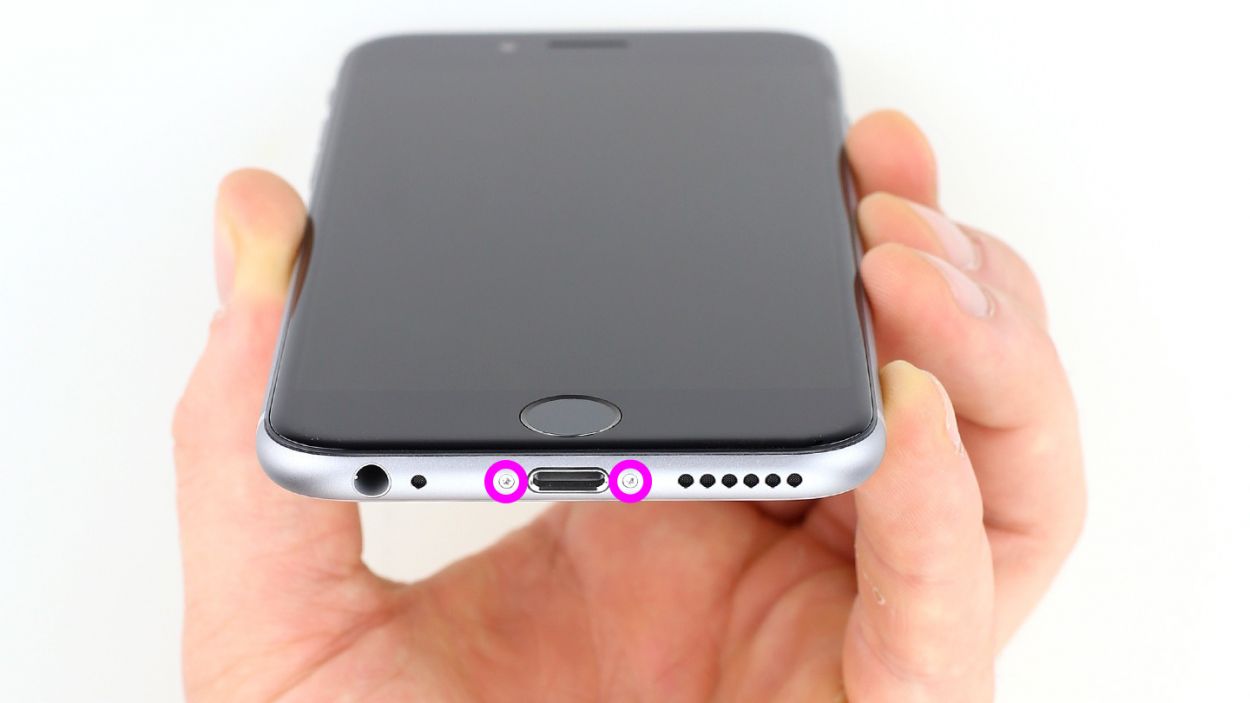
– Now, let’s give those two pentalobe screws at the bottom of the enclosure a good twist! Make sure they’re nice and snug—you’re looking for those 2 x 3.8 mm pentalobe screws to hold everything together perfectly.