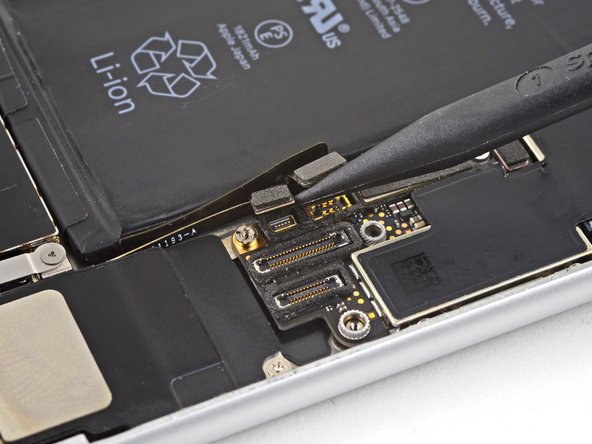
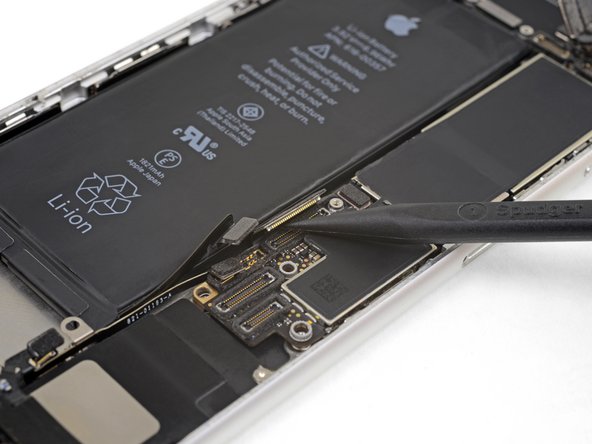
iPhone SE 2020 Logic Board Replacement
Duration: 45 minutes
Steps: 44 Steps
Ready to swap out the logic board on your iPhone SE 2020? Here’s what you need to know: the logic board and Touch ID fingerprint sensor are paired right from the factory. So, if you replace the logic board, Touch ID will be disabled unless you also swap in a new home button that’s been properly paired with your new logic board. Easy as that!
Step 1
Before you dive in, make sure your iPhone battery is below 25%. A fully charged lithium-ion battery can be a bit of a firecracker if it gets punctured, and we want to avoid that!
Be sure to power down your iPhone before starting the teardown. A powered-on device can lead to surprises that you don’t need right now.
Opening up your iPhone's display might just let the water in, spoiling the fun! Make sure you've got some replacement seals on hand before you dive into this step, or be extra careful to keep it away from any liquids if you're putting your iPhone back together without swapping out those seals.
- Take off those two 3.5 mm pentalobe screws hanging out on the bottom edge of your iPhone. You're almost there!
Step 2
Pushing the opening pick in too deep can cause damage—let's avoid that! Mark your pick to keep things safe and sound.
Feel free to mark other corners of your pick with different depths for extra control.
Or, stick a coin on your pick about 3 mm from the tip with some tape—it’s a handy little depth guide.
- Mark the opening pick 3 mm from the tip using a permanent marker to keep things precise and smooth.
Step 3
In the next few steps, we're introducing the Anti-Clamp, a nifty little tool we created to make opening your device a breeze. If you’re not rolling with the Anti-Clamp, no worries! Just skip ahead three steps for another way to get the job done.
Want to master the Anti-Clamp? Check out this handy guide for all the deets.
Is your iPhone feeling a bit too slick for the Anti-Clamp to grip? A little tape can create a super grippy surface to help you out!
- Pull back the blue handle to release the Anti-Clamp’s arms—easy peasy!
- Slide those arms over the edges of your iPhone, whether it's the left or right, you choose!
- Place the suction cups just above the home button on the bottom of your iPhone—one on the front, and the other on the back. They're like your iPhone’s new best friends.
- Squeeze the cups together to lock in some serious suction, and you're ready to go!
Step 4
- Give that blue handle a gentle pull forward to lock the arms in place.
- Spin the handle clockwise all the way around, or until you see the suction cups start to stretch.
- Keep an eye on those suction cups—make sure they’re playing nice and staying lined up. If they start to drift apart, loosen them a bit and get those arms back in formation.
Step 5
Go slow—just turn it a quarter each time and chill for a minute before the next twist. Let the Anti-Clamp and time team up to handle the hard part for you.
Feel free to use a hair dryer, heat gun, or hot plate to warm things up—but heads up, too much heat can mess with the screen or battery, so take it slow and steady.
If the Anti-Clamp isn’t opening enough of a gap, just add a bit more heat and give the handle a quarter turn to loosen things up.
- Warm up an iOpener and slide it through the arms of the Anti-Clamp.
- Bend the iOpener so it rests along the bottom edge of the iPhone.
- Hold tight for one minute to let the adhesive soften and create a gap.
- Gently insert an opening pick into that gap.
- Skip the next three steps.
Tools Used
Step 6
The next three steps are all about using a suction cup to separate the screen. Let's get that screen off with some style!
- Warming up the bottom edge of your iPhone helps loosen the sticky adhesive holding the screen in place, making it simpler to lift.
- Grab a hairdryer or an iOpener and gently heat the lower edge of the phone for around 90 seconds to soften that adhesive underneath.
Tools Used
Step 7
Keep the suction cup clear of the home button—otherwise, you’ll end up with a weak grip and zero glass-lifting power.
- Grab a suction cup and stick it to the bottom half of the front panel, just above the home button. Give it a gentle pull to make some space for the next step. Keep it steady, you're doing great!
Step 8
The waterproof adhesive keeping that screen snug and secure is no joke; getting that initial gap open requires some serious elbow grease! If you're struggling to create a little space, don't sweat it—just add a bit more heat and gently wiggle that screen up and down to weaken the adhesive until you can slip your tool in there. You've got this!
- Grab the suction cup and pull up with steady, confident pressure to gently nudge a small gap between the screen and frame.
- Slide an opening pick into the gap to start loosening things up.
Step 9
Don't go poking at the top edge of the display—those sneaky little plastic clips hold it tight and can snap if you try to force it. Handle with care!
- Grab your opening pick and start working your way up along the left edge of the phone, beginning from the bottom and gliding towards the volume controls and silent switch. This will help loosen up that stubborn adhesive holding the display in place.
- Once you’re near the top left corner of the display, stop and get ready for the next step.
Step 10
Heads up! There are some fragile cables running along the right edge of your iPhone. Keep your pick away from this area to avoid any accidental cable carnage.
Step 11
Keep your pick shallow—no deeper than 3 mm—to avoid messing up those delicate display cables.
- Pop your tool back in at the bottom right corner of the iPhone, then glide it up the right edge and around the corner to loosen up that stubborn adhesive.
Step 12
Keep the display lift under 15º—those ribbon cables are delicate and don't appreciate a stretch!
- With a gentle tug, lift the suction cup to raise the bottom edge of the display. You're doing great!
- Give a little pull on the small nub of the suction cup to detach it from the front panel. Easy peasy!
Step 13
- Gently slide an opening pick under the display near the top left corner and carefully work it along the top edge to free up the last bit of adhesive holding things together.
Step 14
- Gently slide the display assembly down a bit, just enough to loosen the clips that keep it attached to the rear case. You got this!
Step 15
Hold up! Don’t pull the display all the way off just yet—there are still some delicate ribbon cables hooking it up to the iPhone’s logic board.
- Open the iPhone by gently swinging the display up from the left side, just like flipping open the back cover of a book.
- Prop the display against something sturdy to keep it upright while you work on the phone.
Step 16
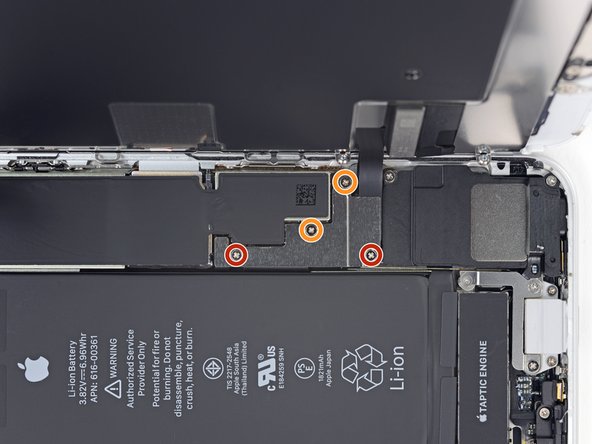
- Let's get started by unscrewing those four Phillips screws holding the lower display cable bracket snugly to the logic board. Here are the lengths you'll be dealing with:
- As you work through this guide, don't forget to keep an eye on your screws—each one deserves its own special spot during reassembly. Putting a screw in the wrong place could lead to some serious issues down the line.
- Time to say goodbye to that bracket!
- You've got two 1.3 mm screws to deal with.
- And don’t forget those two 2.8 mm screws!
Step 17
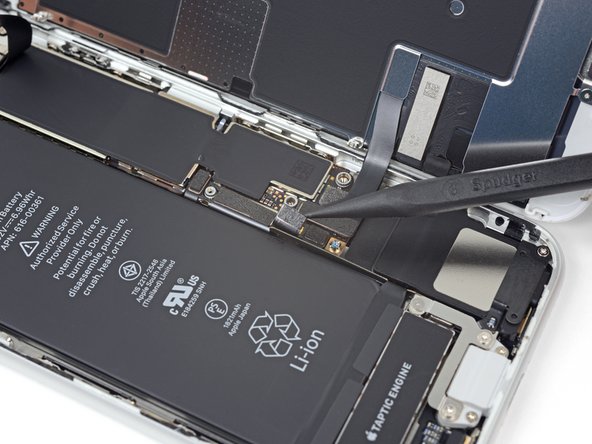
- Grab your trusty spudger and gently nudge that battery connector out of its cozy little socket on the logic board.
- Give the battery connector cable a gentle bend away from the logic board. This little move will keep it from accidentally reconnecting and powering up your phone while you work your magic.
Tools Used
Step 18
- Gently use the tip of a spudger to pop the lower display connector out of its socket.
- When reconnecting press-fit connectors like this one, press down on one side until you hear a click, then do the same on the other side. Avoid pressing in the middle to prevent bending the connector, which could cause permanent damage if misaligned.
Tools Used
Step 19
- Gently pry up with the pointy end of your spudger to unplug the second lower display cable.
Tools Used
Step 20
- Unscrew the three tiny 1.3 mm Phillips screws holding down the bracket over the front panel sensor assembly connector.
- Lift off that bracket and set it aside.
Step 21
- Gently pry the front panel sensor assembly connector loose using the tip of a spudger. You've got this!
Tools Used
Step 22
- Take off the display assembly carefully.
- When putting it back together, this is a great spot to stop if you want to swap out the adhesive around the display edges.
Step 23
Heads up: you might need to bring a bit of muscle for this one.
- Grab your trusty SIM card eject tool, a bit, or even a straightened paperclip. Find the little hole in the SIM card tray – it’s your golden ticket!
- Give it a gentle push to pop that tray out and let the magic happen!
Tools Used
Step 24
The SIM card slips right out of the tray—no wrestling required.
- Pop out the SIM card tray from your iPhone like a pro.
- When you put the SIM card back in, make sure it’s aligned just right with the tray. No one likes a misfit!
- Don’t forget that little rubber gasket around the SIM card tray! It’s there to keep water and dust at bay. If it’s looking worse for wear or MIA, swap it out or grab a new SIM card tray to keep your iPhone's insides safe and sound.
Step 25
- Grab the flat end of your trusty spudger and gently pop the camera cable connector straight up out of its socket. Easy does it!
Tools Used
Step 26
If you’re in a jam, a small flathead screwdriver can step in, just be extra careful to keep it from slipping and messing up the nearby parts.
The best way to get those standoff screws out is with a standoff screwdriver or bit—makes the job smooth and easy!
- Unscrew the two screws that are holding the rear camera bracket in place:
- One 3.0 mm standoff screw
- One 3.1 mm Phillips screw
Step 27
- Take off the rear camera bracket, it's time to let that little guy shine!
Step 28
- Grab your trusty spudger and gently pop the flash connector straight up out of its socket. No need for wrestling moves—just a little lift and you’re good!
Tools Used
Step 29
- Let's get started by taking off the two screws that are holding the upper cable bracket in place:
- First up, we have one 2.9 mm Phillips screw to tackle.
- And don't forget the little guy, a 1.3 mm Phillips screw waiting to be removed!
Step 30
- Carefully lift off the upper cable bracket to get it out of the way.
Step 31
- Grab your trusty spudger and use the flat end to gently pop the upper cable connector out of its socket. A little wiggle, and it’s free!
Tools Used
Step 32
- Unscrew the three Phillips 1.3 mm screws holding down the top left antenna component. Keep them safe!
Step 33
- Unscrew the 1.4 mm Phillips screw holding the antenna piece snugly at the top edge of the case. Keep it safe!
Step 34
- Detach the antenna component with care.
Step 35
- Unscrew the two Phillips screws that are holding down the grounding clip at the top left edge of the logic board. It's time to break free!
- One 1.5 mm Phillips screw
- One 2.6 mm Phillips screw
Step 36
- Take off the grounding clip and set it aside. You're one step closer to a successful repair!
Step 37
- Let's get those screws out of the way so we can free the motherboard! Here's what you'll need to do:
- First up, we'll tackle one 1.8 mm Phillips screw. That's right, grab your trusty screwdriver!
- Next, say hello to the 2.5 mm standoff screw. Give it a gentle twist to release it.
- Finally, don't forget about the 2.2 mm standoff screw. It’s the last piece of the puzzle!
Step 38
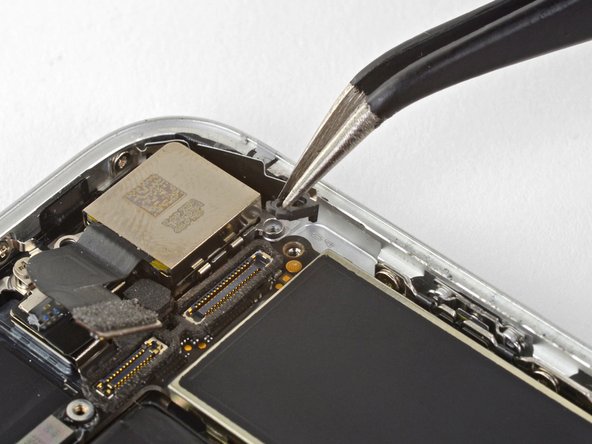
- Carefully use tweezers to nudge the logic board grounding bracket out of the way. A gentle touch goes a long way here!
Tools Used
Step 39
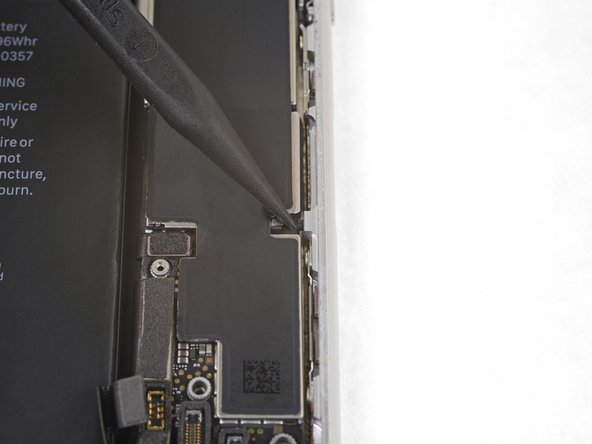
- Gently nudge the SIM card eject plunger away from the logic board using the pointy end of your trusty spudger.
Tools Used
Step 40
- Gently use the tip of a spudger to lift and disconnect the Wi-Fi antenna cable. You've got this!
Tools Used
Step 41
- Gently use the pointed end of a spudger to lift and unplug the Lightning cable connector.
Tools Used
Step 42
- Use the spudger tip to gently lift and disconnect the wireless charging coil connector. Take your time—no rush here, just a steady hand.
Tools Used
Step 43
Take it easy and don't yank on any cables! If you feel any resistance, pause and double-check that everything—cables, connectors, and components—are all clear and good to go. No need to rush, just make sure everything's in the right place before you move on.
- Gently use the flat end of a spudger to lift the battery connector end of the logic board. Take your time and be careful—it’ll pop up with a little love and patience!
Tools Used
Step 44
Watch out—make sure the logic board doesn’t catch on any cables while you’re working!
- Ready to wrap things up? Just reverse the above steps to put your device back together.
- When it’s time to say goodbye to old parts, drop them off at an R2 or e-Stewards certified recycler.
- Ran into a snag? Pop over to our Answers community for troubleshooting tips, or schedule a repair if you’d rather let the pros handle it.


