
iPhone X SIM Card Reader Replacement
Duration: 45 minutes
Steps: 5 Steps
Step 1


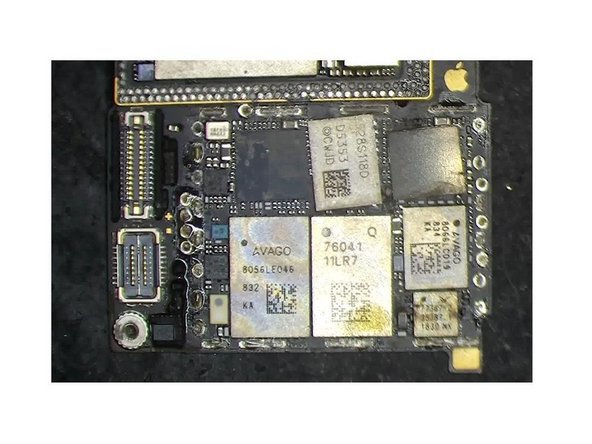
- Heads up! The SIM card reader on the iPhone X is attached with medium-temp solder, but the motherboard’s middle layer uses low-temp stuff. To keep things smooth, go ahead and split the motherboard first before tackling the SIM card reader.
- Watch out for a few ICs hanging out on the SIM card reader—they're not just there for decoration.
- Plus, there’s a sneaky plastic piece wedged right in the middle of the SIM card reader. Don’t let it catch you off guard!
Step 2


- Alright, it's time to get hands-on! As you’re carefully disassembling and doing some soldering, make sure to use rotational air and keep an eye on the temperature. Pop the motherboard onto the PCB Holder. Fire up that Hot Air Gun, set it to 240℃ with airflow level 7, and get to work. Don’t forget to peel off that sticker from the back of the motherboard – it’s gotta go!
- Next up, place the motherboard on the Heating Platform. We’re just focusing on heating the SIM card reader area. Secure the motherboard in place with some high-temp adhesive. Set your Heating Platform to 200℃ and let it do its thing. Now, grab that Hot Air Gun, bump it up to 280℃, airflow 7, and heat the edge of the SIM card reader. You're almost there!
Step 3

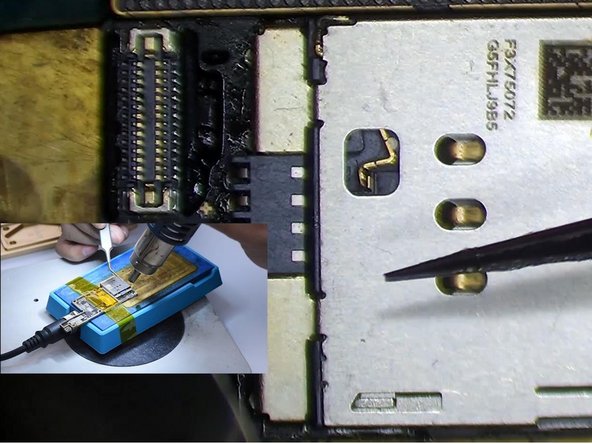
Heads up! To keep the SIM card reader and its tiny parts safe, steer clear of prying with tweezers—let’s keep everything in its cozy spot!
- Give the SIM card reader a gentle wiggle with your tweezers while applying heat. Once it loosens up, lift it straight up—no tilting or twisting.
Tools Used

Step 4

- Time to swap out the old SIM card reader! Dab a bit of Paste Flux onto the bonding pad—think of it as a little spa moment for your PCB.
- Place the new SIM card reader exactly where it belongs. Let it chill on the 200℃ Heating Platform, then hit those edges evenly with a Hot Air Gun at 280℃ and airflow set to 7. Gently press the SIM card reader while heating, making sure it's flush with the PCB. Nice and snug!
Step 5


- To put your device back together, just follow these steps in reverse — easy peasy!
- If you hit a snag or want a pro to handle it, you can always schedule a repair with us.


