
iPhone XS -12 Pro Max Important Battery Message Pop-ups Removing – 100% Fixed
Duration: 45 minutes
Steps: 9 Steps
Step 1

- Apple really went all out encrypting the battery on iPhone XS and newer models. Swap in a fresh battery, and your phone will greet you with the 'Important Battery Message' and a mysterious 'Service' warning. Plus, your shiny new battery will still show the old cycle count—like it’s holding onto the past.
- For iPhone 11 and 12 series, battery data is locked up tighter than your grandma’s secret cookie recipe. Techs have confirmed: pop in any battery that isn’t installed at an Apple Store or by their official crew, and you’ll see that warning light up.
- If you want to dodge these messages, Apple Stores or Apple Authorized Service Providers are your only way in. Otherwise, your phone’s going to keep reminding you about that battery swap!
Step 2

- To tackle the issue at hand, we've confirmed the latest solution. Today, we’re diving into fixes for the iPhone XS series, iPhone 11 series, and iPhone 12 series. Let's get into it!
- First up, let’s break down the battery structure. Think of it as a duo – the BMS board and the battery cell. The battery management system board acts like a trusty guardian, protecting your battery and keeping track of its data. Meanwhile, the battery cell is the powerhouse where all that energy is stored. Let’s keep this energy flowing!
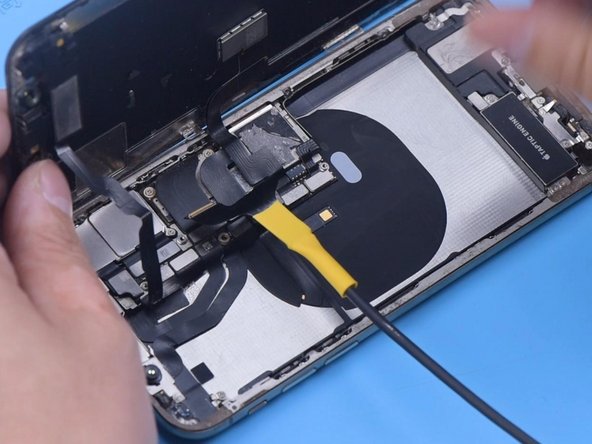
Step 3

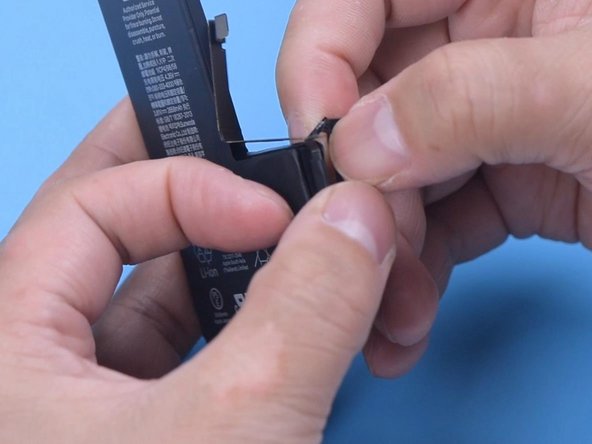

- Using the iPhone XS as our example, gather a battery data corrector and a new battery cell — it can be either an original or a quality aftermarket one. Start by taking the phone apart and carefully removing the battery.
- Next, spot weld the BMS board from the original battery onto the new battery cell. Be sure to peel off the protective tape on the BMS board first, and handle the flex cable gently to avoid any damage.
- Finally, use a pair of scissors to disconnect the battery’s cathode and anode connections.
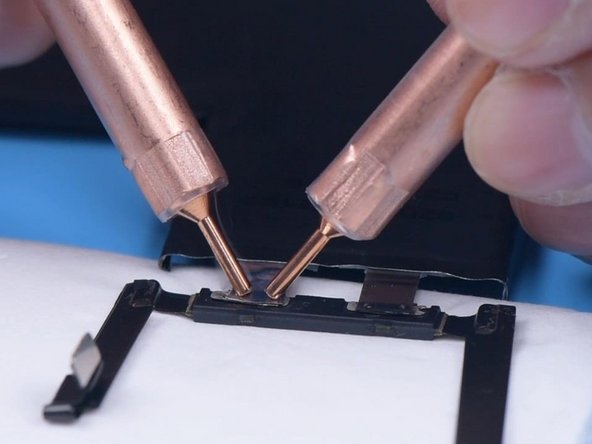
Step 4

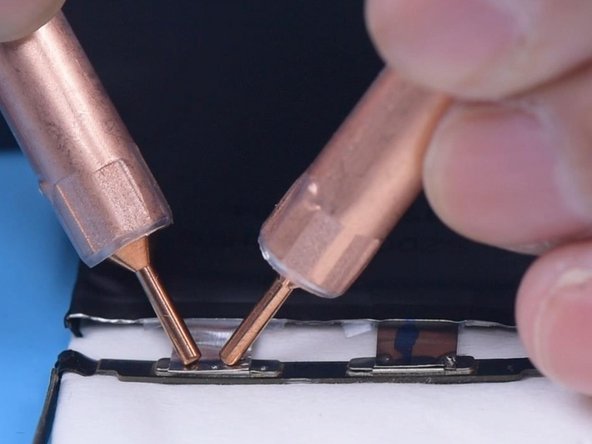

- First, carefully take out the original battery BMS board. Just make sure you line up the anode and cathode properly.
- Now, grab the Spot Welder and get to soldering!
- Once you're done soldering, it's time to install the BMS board back in. Don't forget to apply the protection tape to keep everything safe and sound.
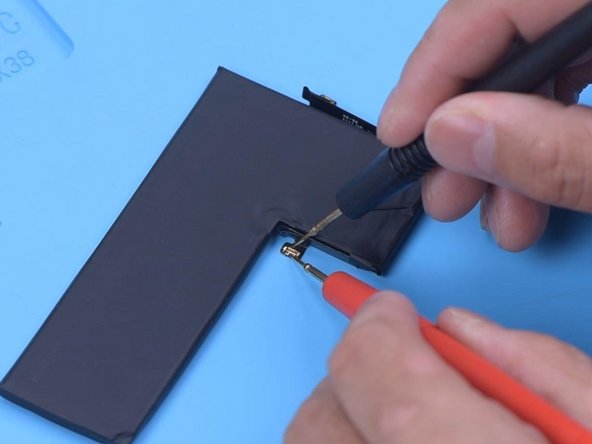
Step 5
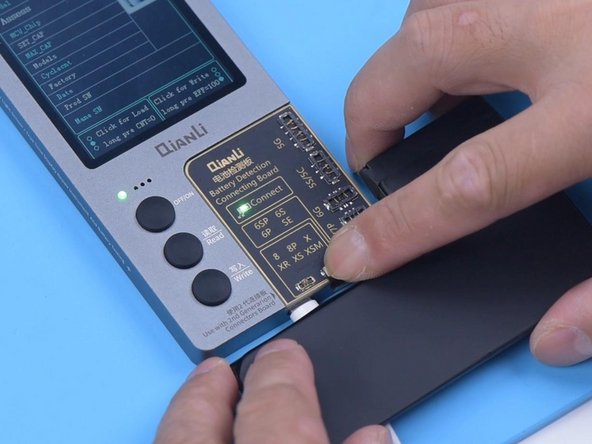
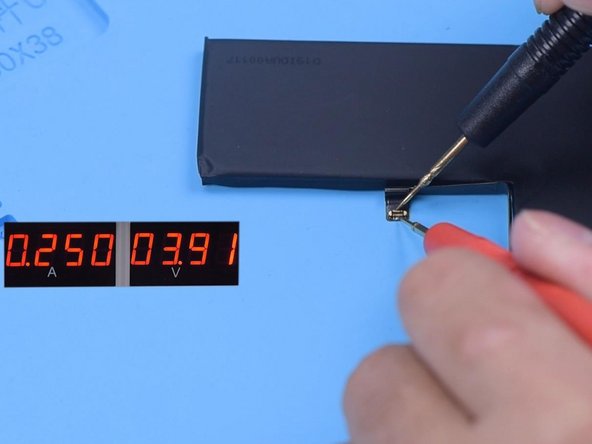
- Since we've swapped out the BMS board and your battery is now safe and sound, we can't measure the voltage just yet. Time to give it some love with a Direct Current Supply!
- Next up, hook up the battery to the programmer and hit that reading button. You'll be able to see all the juicy battery data on the BMS board. You're doing great!
Step 6


- Give the battery a fresh start: tweak those cycle times and get efficiency back in the game.
- Now, plug the display into the motherboard like the ultimate puzzle piece. Hook up the power cable and fire up the phone—look out for the 'Important Battery Message' popping up on the screen.
Step 7

- First off, you'll need to power up the phone using a power cable. The next step takes advantage of a little iOS quirk, so it's pretty important. After that, we’ll install the new battery. Head over to 'Settings' to check out the battery health info. You'll see the maximum capacity is at 100% and no pesky 'Important Battery Message'.
- Unlike the iPhone XS series, the battery data on the iPhone 11 and 12 series is encrypted. This means even if you swap in an original battery, the data is still locked. Even worse, you can’t fix the battery health or cycle count.
- Good news though—we’ve got the latest battery data fixer on the market. It’s been tested and works wonders for clearing that 'Important Battery Message' on iPhone 11 and 12 series. Let’s dive into the steps using an iPhone 11 Pro.
- Now, it’s time to remove the BMS board from the original battery and solder it onto the new one. Sounds tricky? Don’t worry, it’s totally doable!
Step 8


- First things first, let's get that BMS board installed! Once that's done, energize the battery with a Direct Current Supply. It's like giving your device a little jolt of excitement!
- Now, for our iPhone 11 friends, we can't just peek at their data directly. We need a special PCB board to unlock the secrets. So go ahead and attach that PCB board to the battery, and let’s get reading!
Step 9


- Now, just retrace your steps and put everything back together like a pro! If you find yourself in a pickle, don’t hesitate to schedule a repair for some expert help.


