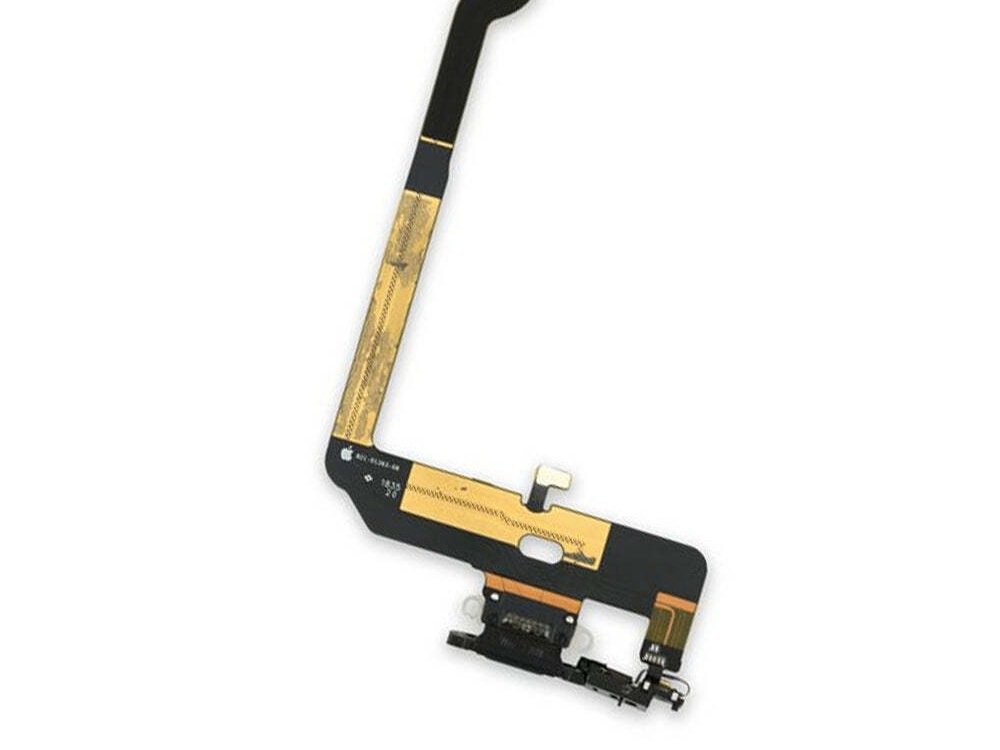
iPhone XS Lightning Connector Assembly Replacement
Duration: 45 minutes
Steps: 35 Steps
Got charging or connectivity issues on your iPhone XS? This guide shows you how to replace the Lightning connector assembly. If cleaning the port hasn’t worked, swapping out the Lightning connector should do the trick. Plus, this cable also handles the internal speaker, so if you're having sound problems, you’ll want to replace that too. After following the steps to remove the Taptic Engine, make sure to check out the video for the rest of the disassembly process. It’s always a good idea to get two perspectives before diving in! And remember, if you're feeling stuck, you can always schedule a repair for a helping hand.
Step 1

Before diving in, make sure your iPhone battery is under 25%. A fully charged lithium-ion battery could be a little too excited and go off like a firecracker if it gets poked the wrong way.
Cracking open your iPhone’s display will break its waterproof seals, so if you want to keep those splash defenses strong, have replacement seals on standby. If you skip the new seals, just keep your phone away from liquids when you put it back together.
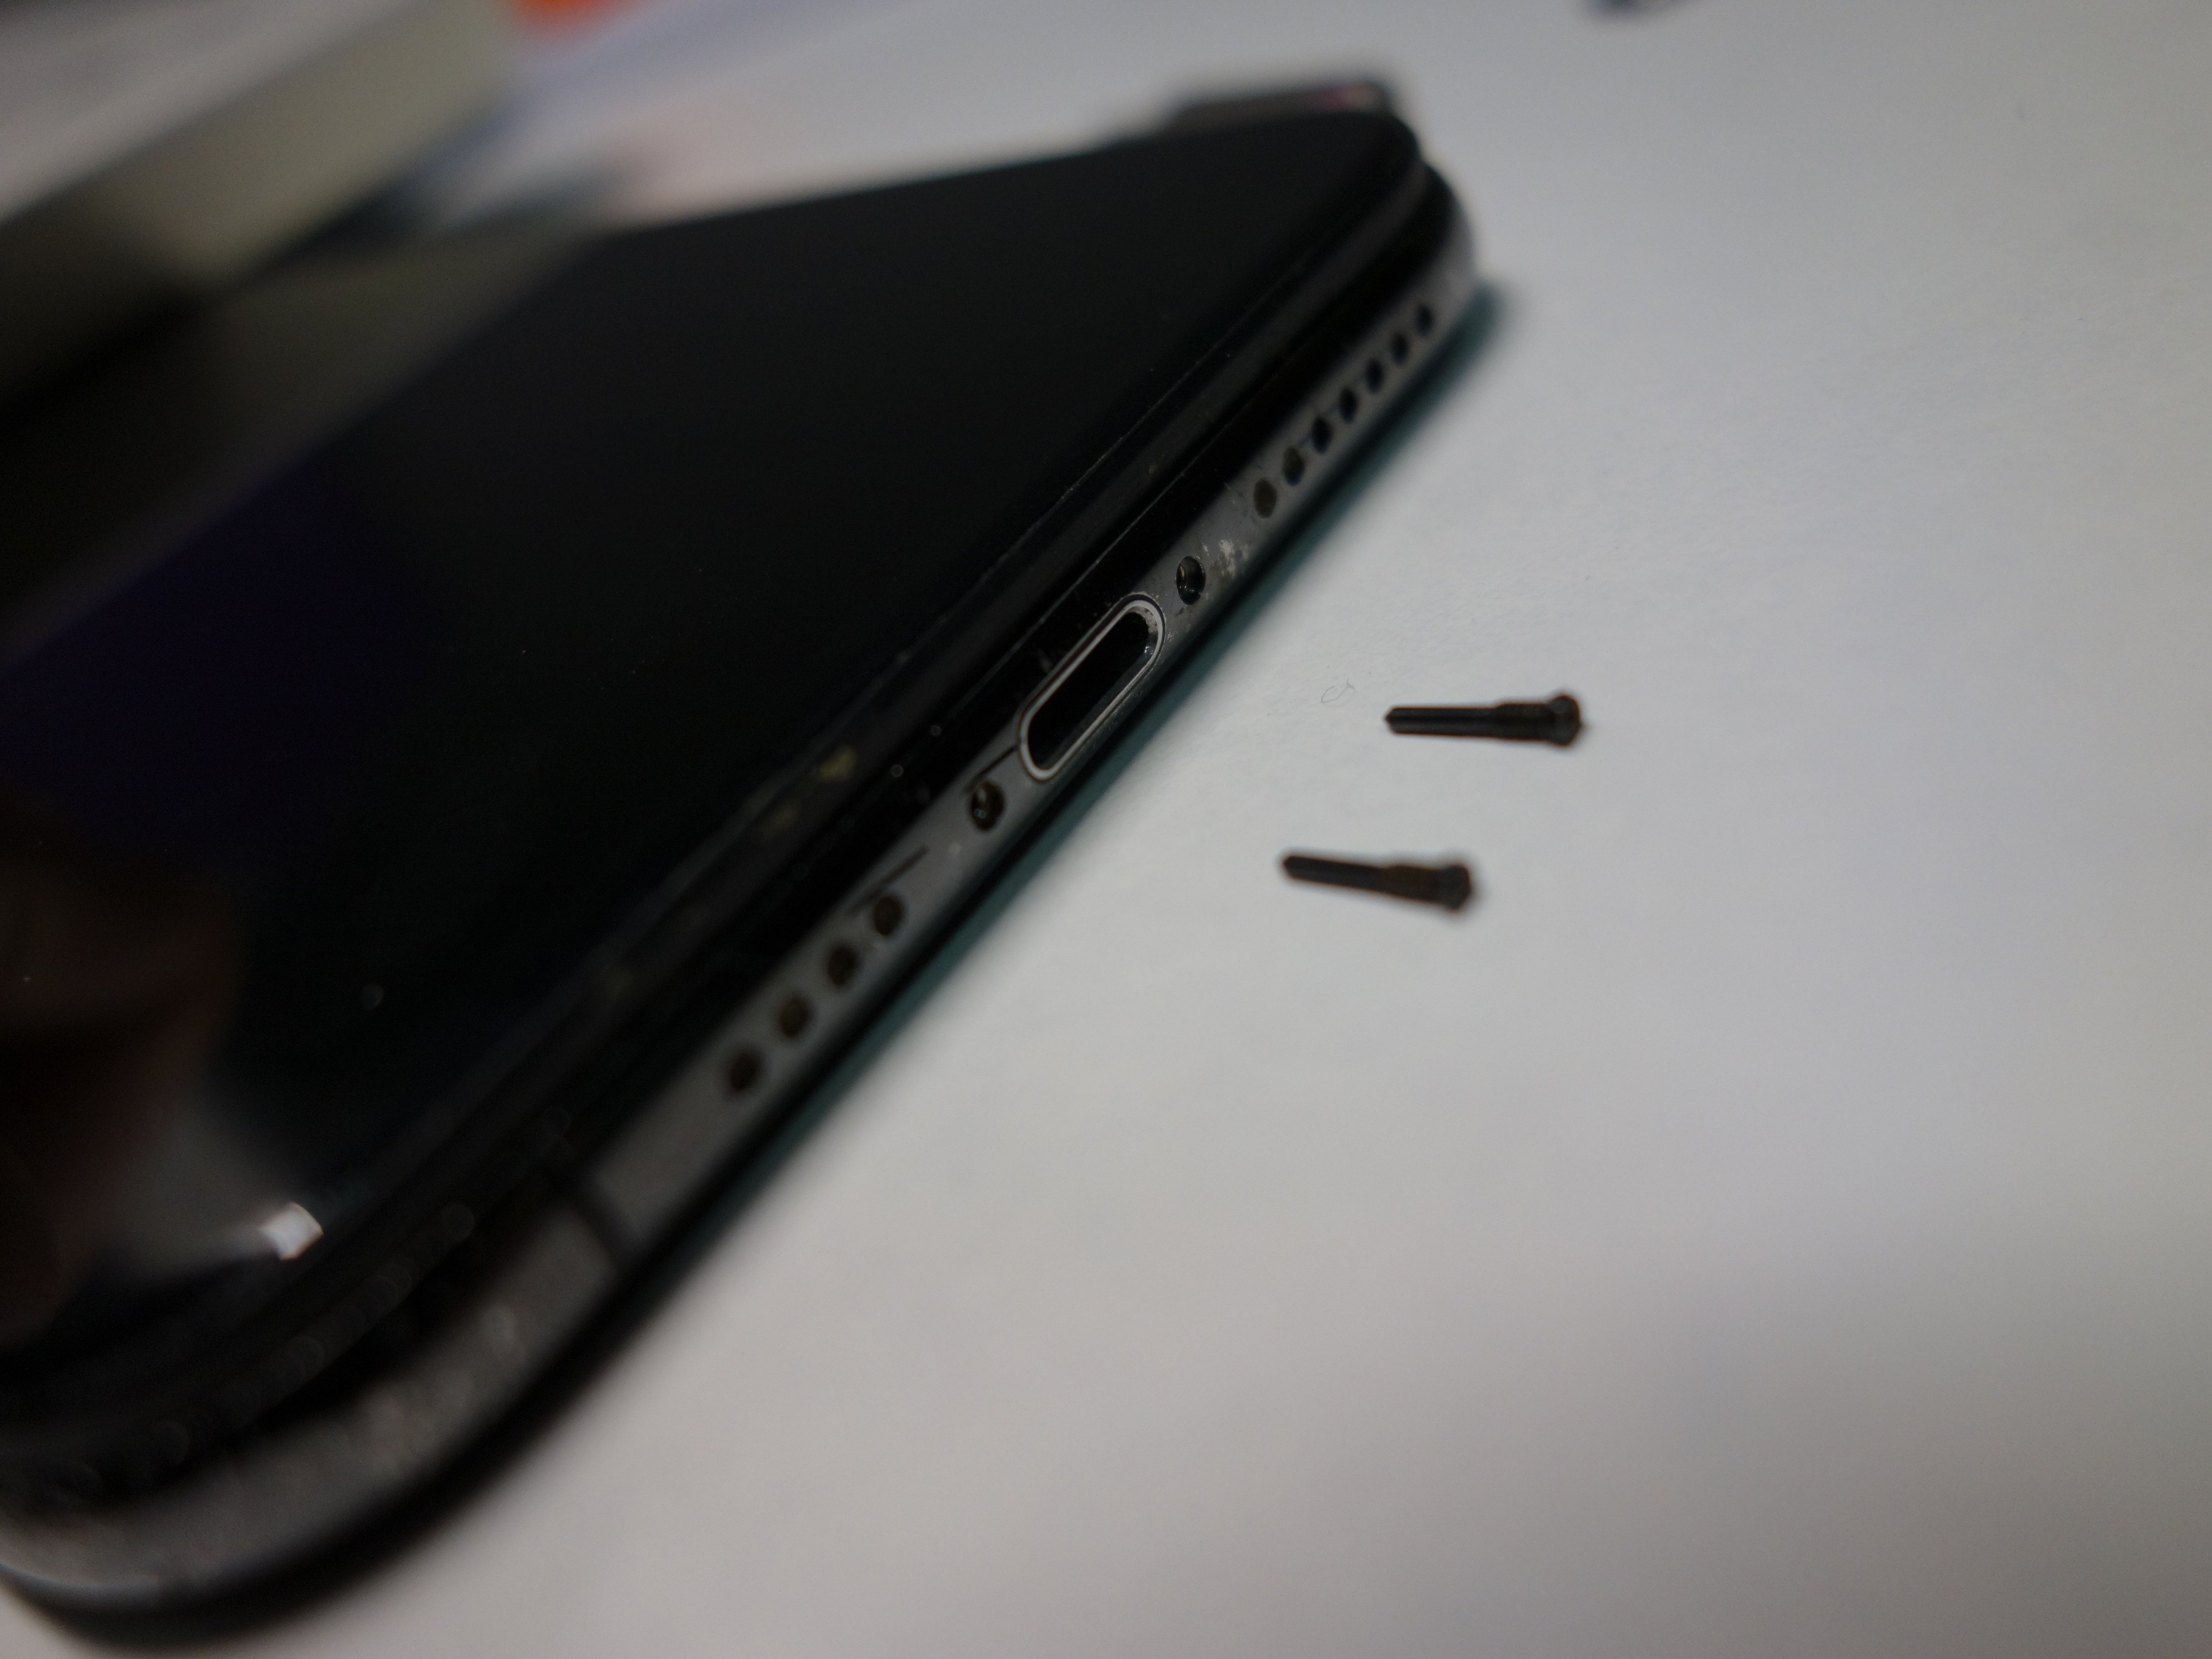
- Before diving into the exciting world of disassembly, let's make sure your iPhone is powered off. Safety first, right?
- Next up, grab your trusty pentalobe screwdriver and gently remove the two 6.9 mm-long screws located at the bottom edge of your iPhone. You've got this!
Step 2


Put on those safety glasses to keep your peepers safe from any sneaky glass bits that might pop out during the repair adventure.
Got a cracked screen on your iPhone? No worries! Just slap some tape over that glass to keep everything in check and avoid any accidental cuts while you work your magic.
If you’re really in a pinch, a little superglue on the suction cup can do the trick to keep it stuck to the screen. Just a quick fix to help you along!
- Place overlapping strips of clear packing tape on the iPhone's screen, covering the entire face. This will help make sure everything stays secure while you work.
- If the suction cup isn't sticking, no worries! Just fold a sturdy piece of tape (duct tape works great) into a handle, and use it to lift the screen instead. You've got this!
Step 3


The next three steps show you how to use the Anti-Clamp, a nifty tool we designed to make opening up your device a breeze. If you're not using the Anti-Clamp, just skip ahead three steps for another method.
Need the full scoop on how to work the Anti-Clamp? Check out this handy guide.
If your iPhone's surface is too smooth for the Anti-Clamp to grip, grab some tape to add a little texture and help the tool stay in place.
- Give that blue handle a gentle tug backwards to free the Anti-Clamp's arms.
- Slide those arms right over the left or right edge of your iPhone like a pro.
- Place the suction cups snugly near the bottom edge of your iPhone—one on the front and one on the back.
- Squeeze the cups together to create a solid grip on that spot you’re after.
Step 4


- Slide the blue handle forward to secure the arms in place.
- Twist the handle clockwise 360 degrees, or keep going until the suction cups start to stretch.
- Check that the suction cups are still lined up. If they slip out of place, just loosen them a bit and realign the arms for a perfect fit.
Step 5


Take it slow – no need to rush! Turn just a quarter turn at a time, and then give it a minute to breathe. Let the Anti-Clamp and some patience do their magic for you.
If you're feeling a little daring, you can also try using a hair dryer, heat gun, or hot plate. Just be careful—too much heat can mess with the display or internal battery, so keep it cool!
If the Anti-Clamp isn't giving you enough space, apply a bit more heat to the area and give the handle a gentle quarter turn.
- Warm up that iOpener and slide it carefully through the arms of the Anti-Clamp.
- Next, fold the iOpener so it rests snugly on the bottom edge of the iPhone.
- Take a breather and wait for a minute to let the adhesive loosen up and create a little gap for you.
- Now, gently slide an opening pick into the gap between the screen and the plastic bezel (avoid the screen itself).
- You can skip the next three steps — you're on a roll!
Tools Used

Step 6

Warming up the bottom edge of your iPhone loosens up the sticky glue holding the display in place, making it a breeze to pry open.
- Grab a hairdryer, heat gun, or iOpener and apply it to the bottom edge of your iPhone for about a minute. This will help soften up the adhesive, making it easier to get things moving. A little heat goes a long way!
Tools Used
Step 7


- Grab your suction handle and stick it to the bottom edge of your phone, but steer clear of the curved glass area.
Tools Used

Step 8


The adhesive keeping your display snug is pretty tough, so creating that first little gap can take some muscle! If you're struggling to pry it open, no worries—just add a little more heat and gently wiggle the screen up and down. This will help loosen the adhesive until you've got enough space to slide in your tool. You've got this!
- Give that suction cup a confident, steady pull to open up a small gap between the front panel and the rear case.
- Slide an opening pick into the gap you just created—aim for the space between the screen and the plastic bezel, not the screen itself.
Step 9


Keep your pick shallow—no deeper than 3 mm—to avoid any surprise pokes to the delicate bits inside.
- Gently glide the opening pick around the lower left corner and up the left edge of your iPhone, effortlessly cutting through the adhesive that's keeping the display snug in place.
Step 10

Careful now! There are some fragile cables hanging out along the right edge of your iPhone. Avoid inserting your pick here, as it could lead to some unwanted cable drama.
Step 11


Be careful not to push your pick more than 3 mm in—too much pressure could hurt those delicate display cables. Stay gentle and steady!
- Place your pick at the bottom edge of your iPhone and gently slide it up the right side to keep peeling away the adhesive. Keep it steady, you’re on the right track!
Step 12


Remember, those clips are delicate little things! Use a gentle touch and give yourself some time to get it right.
Keep your pick under 3 mm while you're working to avoid any mishaps with the front panel sensor array!
The top edge of the display is held in place with a mix of glue and clips, so give it a gentle nudge and be ready to work with both!
- Gently slide the opening pick around the top corner of the display while pulling or wiggling it downward toward the Lightning port. Take it easy—this is the trickiest part!
- Now, slide the pick to the opposite corner and cut through any remaining adhesive that’s still holding the display in place. You’re almost there!
Step 13

- Give the little tab on the suction cup a gentle tug to pop it off the front panel. Easy does it!
Step 14


Hold up! Don't yank the display off just yet — there are still some delicate ribbon cables playing connect-the-dots with the iPhone's logic board.
- Start by opening the iPhone like you’re flipping open a book—swing the display up from the left side.
- Prop the display up by leaning it against something sturdy so it stays out of your way while you work your magic.
- When putting it back together, place the display in position, line up the clips along the top edge, and gently press the top edge down first. Then snap the rest of the display into place. If it’s being stubborn and won’t click, double-check the clips around the edges to make sure they’re not bent or out of shape.
Step 15


- Unscrew the five little guardians holding down the logic board connector bracket. Their lengths are:
- Keep each screw in its original spot—mixing them up is a one-way ticket to iPhone chaos.
- Three Y000 screws, each at 1.0 mm
- One Y000 screw at 1.3 mm
- One Phillips screw, coming in at 3.7 mm
Step 16

The bracket might be a bit sticky. Give it a gentle but confident lift to pop it free.
- First, go ahead and take off the bracket. Easy, right?
- Now, before you seal up that display, take a moment to power up your iPhone and make sure everything's working as it should. It’s a good idea to test all the functions while you can. Once you're confident everything’s working, power down your iPhone completely before moving on. Trust us, you don't want any surprises later!
Step 17


Be careful not to mess up the black silicone seal around this and other board connections. These little guys are like the bouncers keeping water and dust out, so treat them with some respect!
- Grab a spudger or your trusty clean fingernail to gently lift the battery connector out of its cozy spot on the logic board.
- Give the connector a little bend away from the logic board to keep it from accidentally reconnecting and powering up your phone while you work your magic.
Tools Used

Step 18


- Carefully use a spudger or your fingernail to gently lift and unplug the front panel sensor assembly connector.
Tools Used
Step 19


- Gently use a spudger or your fingernail to unplug the OLED panel cable connector with care.
- When reconnecting, line up one side of the connector and press down until you hear a satisfying click, then do the same on the other side. Avoid pressing in the middle to keep those pins happy and avoid any permanent damage from bent connectors.
Tools Used
Step 20


- Gently lift the digitizer cable connector out of its socket using a spudger or your fingernail. No need to muscle it—slow and steady wins the race.
- Getting this connector back in is a bit like fitting a puzzle piece. Line it up carefully, then press down with your fingertip—one edge, then the other—until you feel that satisfying click.
- If your screen decides to play hard to get and ignores your touch after the swap, unplug the battery and give this connector another go. Make sure it’s clicked in all the way and there’s nothing hanging out in the socket.
Tools Used
Step 21


The front panel sensor assembly flex cable is gently stuck down—think of it as the phone’s attempt at a light hug.
- Gently lift the cable just enough to break the adhesive free without any sudden moves.
Step 22

- Take off the display assembly carefully.
- When putting everything back together, feel free to pause here if you want to swap out the waterproof adhesive around the display edges.
Step 23


- Let's get these five screws out to free up the two brackets chilling below the Taptic Engine and main speaker:
- One 1.0 mm tri-point Y000 screw
- Two 1.3 mm Phillips screws
- One 1.7 mm Phillips screw
- One 1.8 mm Phillips screw
Step 24


The brackets are gently stuck in place.
- Carefully lift each bracket to free it up, making sure not to bend anything out of shape.
- If the adhesive is stubborn, a touch of heat from a hair dryer or heat gun will loosen things up nicely. (Skip the iOpener—those spring contacts along the top don’t appreciate the extra pressure.)
Tools Used
Step 25


- Loosen and remove the 1.9 mm Phillips screw holding down the speaker connector cover. Keep it safe—you’ll need it later!
Step 26

- Gently pop off the speaker connector cover.
Step 27


- Gently use the tip of a spudger to lift and unplug the speaker connector.
Tools Used
Step 28


Carefully pry up the speaker without messing up the flex cable you just unplugged. If it’s tight, gently bend the cable toward the battery to give the speaker some wiggle room to come out.
- Slide your spudger under the top edge of the speaker, close to where the iPhone's case ends.
- Carefully nudge and lift that top edge of the speaker just a bit—easy does it!
- When putting the speaker back, double-check that the flex cable is sitting pretty and not caught underneath.
Tools Used
Step 29


If the adhesive is being stubborn, gently warm it up to loosen things and make peeling off the bumper strip a breeze.
- As you gently pry up the speaker, grab your tweezers and carefully peel off the plastic bumper strip from the top edge of the speaker. You've got this!
Tools Used

Step 30


- Give that speaker a gentle grip on its side edges and wiggle it back and forth like you're dancing, breaking free from the sticky stuff holding it to the bottom of the iPhone.
- Now, carefully pull the speaker away from the iPhone's bottom edge until that adhesive gasket decides to let go.
Step 31


- Take out the speaker—easy does it!
- That sticky gasket is a one-way ticket; once it’s off, it’s done. Use tweezers to clear off any leftover adhesive.
- For top-notch water and dust protection, slap on a fresh adhesive gasket when reassembling. Clean up the area with a dab of isopropyl alcohol and a lint-free cloth or coffee filter so the new gasket sticks like a champ. Pop the new gasket onto the speaker, and then drop the speaker back in place.
Tools Used
Step 32


- Grab a spudger and gently pry the Taptic Engine flex cable straight up to unplug it from its socket.
Tools Used
Step 33


- Loosen and take out the two 1.9 mm Phillips screws holding down the Taptic Engine—time to set it free!
Step 34


- Grab that plastic bumper strip and gently pop it over the speaker connector—like giving your device a little high five.
Step 35

- Now it's time to put everything back together! Just reverse the steps you took earlier, and you'll have your device ready to roll again. If you run into any tricky spots, don't hesitate to reach out and schedule a repair for a helping hand!