iPod Touch 4th Generation Teardown
Duration: 45 minutes
Steps: 24 Steps
We’re excited to finally get our hands on an iPod Touch with a camera! No more empty camera slots here. This is the first of three iPod tear-downs we’re doing this week – stay tuned for more! We’ve also taken apart the new iPod Nano and Shuffle. Keep up with our latest teardown adventures on Twitter! In case you missed it, last week was a big milestone for us. Not only are we diving into Apple repairs, but we also have parts and manuals for most game consoles now. We celebrated by tearing down five retro consoles – a real trip down memory lane. Just a heads-up: we support these teardowns by offering iPod Touch parts. Plus, we provide free open-source repair manuals for every iPod Touch, including this one!
Step 1

– Check out the shiny new iPod Touch we’re about to dive into!
– This model’s specs are basically on par with the iPhone 4, and here’s what it’s packing:
– A crisp 640 x 960 retina display
– Rear camera that shoots 720p video
– Front camera for classic VGA video
– Wi-Fi support for 802.11b/g/n
– FaceTime for easy video calls
– Smooth moves with a three-axis gyro
Step 2


– In this guide, we’ll explore some cool updates to the latest Touch model, like the new visible speaker grill on the bottom, which replaces the old method of audio output through the dock connector. The design has slimmed down again, with a flat back reminiscent of the iPhone 4, but still keeps that signature shiny stainless steel look. We’ll also look at the value you get for different storage options, noting that while the 8 GB version is affordable, the cost per gigabyte varies quite a bit with larger capacities. Plus, we’ll touch on some of the math and logic behind pricing; for instance, the 8 GB Touch packs a lot of features for a certain price, but the cost per gigabyte drops significantly with higher capacities. If you’re curious about how these details fit together or need help, you can always schedule a repair.
Step 3

– The new Touch (right) with its retina display might not scream ‘wow’ in this shot, but don’t let that fool you. The retina display packs a resolution of 640×960—double the pixels in each direction compared to the old Touch (which was 320×480)—meaning four times the pixel punch. When turned off, the retina display is nearly pitch black, a sleek look that sets it apart from the earlier iPod Touch, which appears as a dark gray when powered down. If you need a hand with your device, you can always schedule a repair.
Step 4


– Let’s talk cameras! The iPod Touch finally steps into the camera game with two lenses. The front-facing camera is just like the one on the iPhone 4, capturing VGA-quality photos and videos—perfect for quick snaps and FaceTime chats. The rear camera, however, is a bit more modest, sporting a 960×720 resolution—that’s roughly 0.7 megapixels—compared to the 5 megapixels on the iPhone 4. Apple probably had to trim down the still photo resolution to keep the Touch sleek and slim. Plus, there’s a tiny microphone hole next to the rear camera, boosting the audio capabilities so your FaceTime calls sound just right. If you need help, you can always schedule a repair.
Step 5


– Alright, enough about the outside, let’s dive into the good stuff inside…
– There are no visible screws here, so it’s time to get creative and figure out what clever combo of glue, tabs, and Apple wizardry is holding the Touch together.
– We started by using a heat gun to gently soften the adhesive, making it easier to separate.
– Next, we carefully ran an iPod Touch opening tool around the edges to break the adhesive seal and release the display.
Tools Used

Step 6


Heads up from your pals at Salvation Repair: getting inside this device is pretty tricky, and it’s definitely not designed with repair in mind.
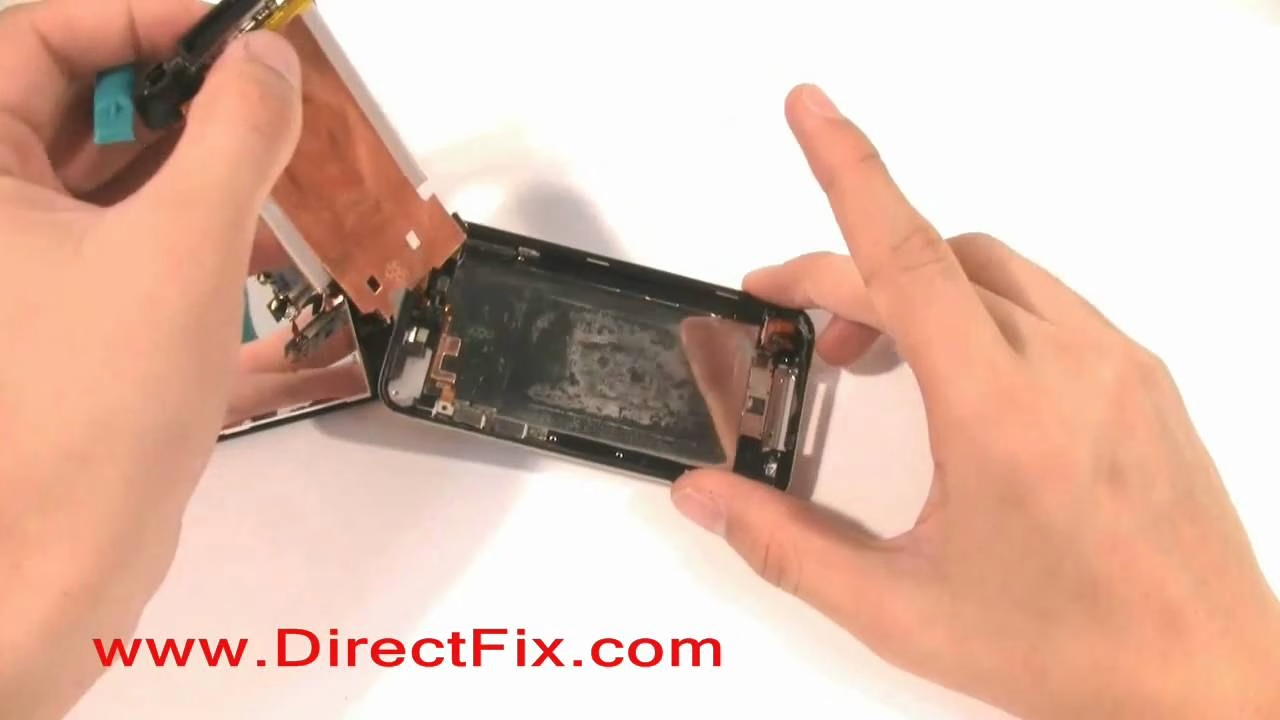
– That was one of the smoothest iPod Touch openings we’ve done—hopefully, the internals will stay nice and repair-friendly. Now, let’s get that display assembly free; it’s still attached, and honestly, disconnecting it might take a bit of patience, but don’t worry, we’re in this together.
Step 7

You’ll need to disconnect a couple of cables that are keeping your display assembly stuck to the logic board. One of these cables is pretty straightforward to disconnect, but the other one is a bit more finicky. The thin black cable is hiding underneath the logic board, which makes things a tad more complicated. Don’t worry, with a little patience, you’ll be able to tackle this step in no time. If you get stuck, don’t stress – just take a deep breath and remember you are one step closer to getting your device up and running again.
– Just like with the iPhone 4, the front glass and LCD on this device are a package deal—they’re fused together for that dust-free, seamless look. The upside: no annoying dust sneaking under your screen. The downside: repairs will cost a bit more, since you can’t swap just the glass.
– If you’re rocking a 1st, 2nd, or 3rd generation Touch, you’re in luck! You can swap out just the front glass without having to replace the LCD.
Step 8


– Next up is the mighty EMI shield, standing between you and the iPod’s inner workings. Good news—just a few Phillips #00 screws are keeping it in place.
– Fun fact: this EMI shield is a bit of a heavyweight at 11 grams. Considering the whole iPod Touch weighs 101 grams, that’s over 10% dedicated to this one metal part.
Step 9

Be gentle when handling the EMI shield to avoid catching the ribbon cable on the adhesive strip near the top of the device, which can cause damage.
– Once you’ve taken off the EMI shield, the battery becomes the star of the show. Next, Apple promises you can enjoy up to 40 hours of listening—perfect for long days and even longer playlists. When it comes to the logic board, you’ll notice this side looks pretty sparse, as Apple kept many chips hidden away. Lastly, contrary to their initial marketing claims on the FaceTime page, the iPod Touch actually doesn’t feature a vibrator motor. If you need extra help along the way, you can always schedule a repair.
Step 10

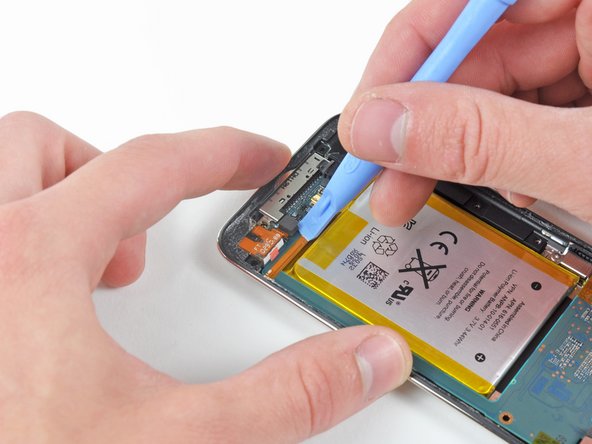
– The battery has a capacity of 3.44 Watt-hours. Not too shabby for keeping your device running!
– As with other iPod Touch models, the battery is soldered directly to the logic board. It’s understandable given the sleek design, but we definitely wish Apple had made it easier to swap out the battery.
– The good news? Apple made some improvements. Unlike the 3rd Generation Touch, there’s now more space between the three solder points (on the orange ribbon next to the battery). This little change should make replacing the battery a bit smoother, with less chance of accidentally causing any mishaps.
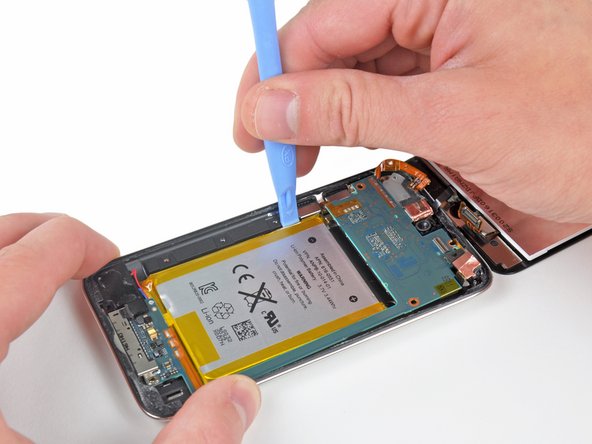
Step 11


– For the first time in the iPod Touch lineup, the headphone jack isn’t stuck to the logic board. Progress!
– Just pop out one screw, disconnect one connector, and the headphone jack comes right out.
– Having the headphone jack on its own board makes life a lot easier when it comes to repairs.
Step 12

– Here’s the headphone jack sitting solo. Check out the liquid damage indicator on the bottom of the part—it’ll tell you if water’s been involved.
– This headphone jack is stamped with Foxconn. Longtime contract manufacturer for Apple, Foxconn’s mark here hints that Apple might not have made this part themselves.
Step 13

– Gently pry the battery and logic board out of the casing—it’s a bit of a tight fit. Keep in mind, the headphone/sleep button control ribbon cable is both soldered onto the logic board and glued to the outer case, so you’ll need a bit of patience and finesse. If you find yourself stuck, you can always schedule a repair for expert help.
Step 14


The control ribbon cable sticks to the rear panel pretty firmly, especially around the volume buttons. Since the volume buttons don’t have a structural bracket (just a steel cover), the adhesive needs to be tough enough to handle even the most enthusiastic button presses.
– Once you’ve carefully removed the logic board, battery, and display assembly from the rear panel, you’ll have clear access to the screws securing the volume button cover and the sleep button. Keep at it—you’re getting closer!
– With a bit of gentle but firm scraping using a metal spudger, the ribbon cable will finally free itself from the rear panel. Take your time, and you’ll have it disconnected in no time.
Tools Used


Step 15


Since the back cover is likely thin, it probably has a copper shield underneath to help with heat dissipation or EMI shielding—maybe both. This layer is there to keep things running smoothly and prevent interference. If you need help, you can always schedule a repair.
– Once you’ve carefully peeled away that loop of copper tape from around the digitizer connector, you’re all set to gently separate the display assembly from the logic board.
– At this point, you can also remove the copper shield that’s secured to the back of the battery. Just be careful and take your time!
Step 16


Rumor has it, the 4th gen Touch’s retina display skips out on IPS, unlike the iPhone 4. Want to see the difference? Try looking at the same image on both devices from a sharp angle. As shown in the second pic, the Touch (at the bottom) really drops in contrast when viewed from below. Wild, right?
– The Touch’s display assembly is all about that slim life—just 2.93 mm thick. For comparison, that’s a bit thinner than the iPhone 4’s 3.05 mm display, but it’s packing 30% more thickness than the ultra-slim 2.27 mm screen on the newest iPod Nano.
Step 17


Wondering if the iPhone 4’s rear camera can be swapped into the Touch? Not quite—doing so would require some pretty serious hacking, and it’s not a straightforward swap. If you need help with any tricky repairs, you can always schedule a repair.
– Now’s the moment to unplug the rear camera from the logic board—easy does it.
– Fun fact: Unlike the iPhone 4, this iPod Touch’s rear camera skips autofocus and keeps things low-res. Less is more, right?
– The camera itself is a compact little square—just 6.5 mm on each side and 3.3 mm tall. That’s way tinier than what you’d find on the iPhone 4.
– Just above the camera, check out that shiny silver cylinder—that’s the microphone. It’s a fresh addition for the iPod Touch family.
Step 18


No shocker here—they both pack the same pixel power!
– Pop out the front-facing camera—it’s right there and easy to disconnect from the logic board.
– No surprises here: it’s a doppelganger of the iPhone 4’s front camera.
– This little lens measures 4.9 mm on each side and is just 2.5 mm thick, making it a slim upgrade—about 0.3 mm thinner than its iPhone 4 sibling.
Step 19


– Next up, we disconnected the Touch’s single external antenna.
– This antenna, most likely responsible for Wi-Fi reception, is tucked away near the front glass panel when the Touch is all put together. Now, with the antenna’s new position, there’s no need for the plastic ‘window’ that was part of the 3rd generation Touch. Nice and tidy!
Step 20


And just a heads-up, there’s no slot to upgrade the RAM here. Pretty much sealed tight—no extra memory slots to play with. If you need help with anything else, you can always schedule a repair.
– We’ve struck gold—well, chips, anyway!
– This iPod rocks the same A4 processor that powers the iPad and iPhone 4. The Toshiba chip here is a close match to the one found in the iPad during the FCC teardown, though the iPad’s chip got swapped with a Samsung chip later on.
– Check out the K4X2G643GE marking on the A4 processor package. That matches the iPad’s processor exactly, but it’s not the same as the iPhone 4’s. The iPad comes with 256 MB RAM, while the iPhone 4 gets 512 MB. So, just like the iPad, this iPod Touch is working with 256 MB of RAM.
– Here’s a switch-up: Toshiba now supplies the NAND flash memory, unlike the iPad which used Samsung.
– Spotted: a Murata KM0727121 Wi-Fi module hanging out inside.
Step 21

– At the other end of the logic board, you’ll spot a few more chips hanging out.
– Right below that chip row, you’ll see the dock connector with its 30 pins—clear as day.
– Over on the far left, there’s the 338S0859 chip. It’s kinda like the Cirrus Logic audio codec in the iPhone 4 (model 338S0589).
– Next up, we have the new AGD8 2032 gyroscope, which looks pretty much like the one in the iPhone 4.
– And just next to the gyroscope, you’ll find the 2032 33DH chip. It seems like this one came packaged with the gyroscope in the iPhone 4, serving as the accelerometer.
Step 22

– The iPod Touch now has a real speaker – and it’s actually pretty cool!
– It looks like Apple is sending audio out through both the new speaker grill and the dock connector. If things get tricky, don’t worry – you’re doing great and schedule a repair if you need a hand.
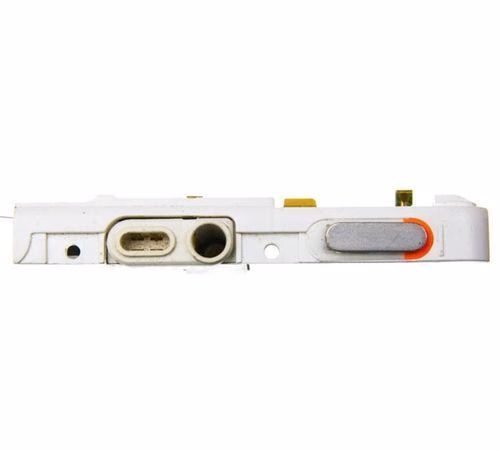
Step 23


This part keeps the Wi-Fi antenna above the lower metal housing, making sure your signal stays strong and steady. Science and a little bit of clever design, all working together to keep you online.
– What’s this? Just some empty space?
– We’re not entirely sure what this white plastic piece does other than taking up space. Maybe it’s there to save a little weight. Who knows? It’s probably harmless, but if it’s got you stumped, don’t hesitate to schedule a repair.
Step 24

– iPod Touch 4th Generation Repairability: 4 out of 10 (10 is easiest to repair)
– Opening up this device is pretty simple as long as you have a heat gun and some iPod Touch opening tools nearby.
– Good news! The headphone jack is not soldered to the logic board – a first for the iPod Touch series.
– The front glass and LCD are glued together, so if you’re fixing a cracked screen, be ready for a bit more work. But hey, you’ve got this!
– To remove the display, you’ll need to take out the logic board. It’s a step-by-step job, but totally doable.
– Apple decided to solder the volume and sleep button cables directly to the logic board. In the past, there was a ZIF connector here. This means removing the logic board can be a little tricky.
– Just like older models, the battery is soldered to the logic board, which means you’ll need to get in there with some precision.
Tools Used
Success!