Kindle 3 Teardown
Duration: 45 minutes
Steps: 6 Steps
The Kindle 3 is a fantastic e-reader brought to you by Amazon.com, perfect for diving into your favorite stories and discovering new adventures!
Step 1

– Gently pop off the back—there are about a dozen clips holding it in place all around the edges.
– Use an X-ACTO blade or a spludger to carefully work your way around and lift it out.
– Honestly, I just used my fingernails since one corner was already open (thanks to a previous accidental crunch).
Step 2


– There are 24 screws holding it in place. Remove them using a PH00 and PH000 screwdriver – the same trusty drivers you’d use for a MacBook. Easy peasy!
– The battery is a 1750 mAh, 6.47Wh lithium polymer, which gives you about 10% more power than the Kindle 2.
– Note that this image is upside down, so keep that in mind as you work through this step.
Step 3

– Time to tackle those two cables on the left side! They’re snugly held by a little piece of plastic. Just use your fingernail to gently flip it out—no sweat, it’s super easy!
– Check out the cable circled in red—this one connects to the side buttons.
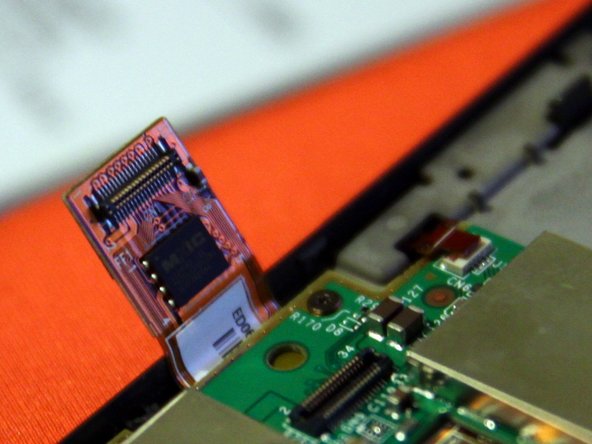
– And over here, circled in blue, is the cable for the e-ink display. This one’s a bit of a show-off with some fancy ICs tucked in there!
Step 4


– First up, disconnect the cable located in the bottom right corner—this little guy is the one for the keypad!
– Just above that, you’ll find a sleek black piece of plastic. It’s the connector between the circuit board and an external slot for the optional cover and light available on Amazon.
– And if you look a bit higher (though it’s not shown here), there’s another small cable that links to the other side buttons.
Step 5
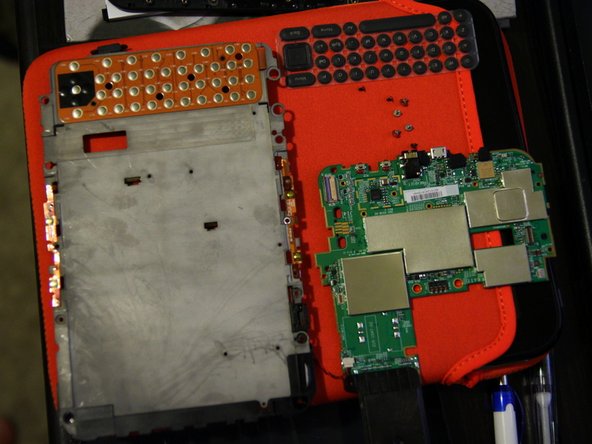

– Now that you’ve removed all the screws shown in step one, the PCB can be easily removed, along with the back plate.
Step 6

– And there you have it. Very easy to disassemble but most of the parts are not replaceable, except for the screen and battery.
Success!