Kindle Fire HD 6 Teardown
Duration: 45 minutes
Steps: 8 Steps
Heads up! We’ve also taken apart the new Amazon Kindle 7th Generation!
Billed as the “Most Powerful Tablet Under $100,” the Kindle Fire HD 6 is hard to ignore. Let’s see if this budget-friendly device is a steal, a headache, or a hidden gem. We’re opening it up and showing you what’s inside. Bonus: we’ve also cracked open Amazon’s Kindle 7th Generation. Want more behind-the-scenes moments? Check out our Twitter, Facebook, and Instagram!
Step 1

– One hundred bucks. A Benjamin. A single C-note. That’s what it costs to grab yourself Amazon’s shiny new Kindle Fire HD 6. So, what does that hard-earned cash get you? Let’s take a look:
– A 6-inch high-def touchscreen, with a resolution of 1280 x 800 and a pixel density of 252 ppi—perfect for those crisp, vibrant visuals.
– A quad-core processor, with two cores cruising at 1.5 GHz and the other two at a cool 1.2 GHz, keeping everything running smooth.
– 1 GB of RAM, just enough to get things done without too much lag.
– You can pick between 8 GB of internal storage (with 4.5 GB available for you to use) or 16 GB (with 11.6 GB available) for all your apps, games, and media.
– Wi-Fi support that covers 802.11b, 802.11g, or 802.11n, plus an accelerometer, gyroscope, and Bluetooth for all your motion-sensing and device connection needs.
– A VGA front-facing camera, and a 2.0 MP rear-facing HD camera, so you’re ready to snap and chat in style.
Step 2


– Great news! You won’t need anything fancy—just an opening pick to get this case apart. The panel is held in place by plastic clips and no glue, making your job a breeze. Looks familiar—this Fire HD 6 is basically a tiny Kindle Fire. It’s a straightforward device, and internally, it’s been simplified quite a bit (not to mention its smaller size). From what we can see, the motherboard, rear camera, battery, and speaker are all readily accessible and easy to remove. If you need a hand along the way, you can always schedule a repair.
Step 3


Hey Amazon, any chance you could ease up on the Kindle battery glue? It’s a bit much. Thanks a bunch!
– Well, that was unexpected. The battery, while snug and ready to go, seems to have a bit of separation anxiety.
– The Kindle Fire HD 6 packs a hefty 3.7 V, 3400 mAh (12.6 Wh) Lithium-ion Polymer battery that weighs in at 60 grams—about one-fifth of the tablet’s total weight.
– Even with our trusty plastic card, we had to put some muscle into prying the battery free.
– Amazon promises around 8 hours of use, but hey, keep in mind that “results may vary.”
– For comparison, the HDX 7″ boasts a 17.29 Wh battery, and the original 7″ Fire tablet had a 16.28 Wh capacity.
Step 4


According to Amazon, the rear-facing camera is pretty impressive, capable of snapping high-res photos—including panoramas and HDR shots—and recording smooth 1080p HD videos. It’s ready to capture all your moments in sharp detail.
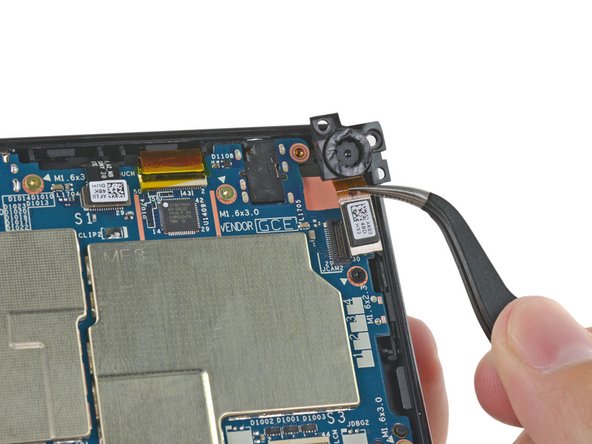
– Next up on the modular components tour: out come the speaker, the rear camera, and—finally—the motherboard makes its grand exit.
– The 2.0 MP rear camera is here for all your photography needs, especially if you’re nostalgic for that classic early 2000s look.
– So, if you’ve ever wanted to snap pictures that have a certain vintage flip-phone energy, this is your moment.
Step 5

– Meet the ICs that fire up the Kindle Fire HD 6! Here’s the lineup: First, we’ve got the SK Hynix H5TC4G63AFR 4 Gb (that’s 512 MB) DDR3L SDRAM — think of it as the brainpower for your device. Next up is the Toshiba THGBMBG6D1KBAIL 8 GB e-MMC NAND Flash, your storage superstar. The MediaTek MT8135V Applications Processor is the engine driving your tablet’s performance. The MediaTek MT6397A 1425-ANAH EC4 AW80H handles power management like a champ. For wireless connectivity, the MediaTek MT6628TP Wi-Fi/Bluetooth Controller has got you covered. The SlimPort ANX3618 takes care of video output connections, making sure your content gets where it needs to go. And last but not least, the Cypress Semiconductor CY8CTMA4 63-56LQI 1419 F 04 CYP620476 is in charge of the device’s interface and control signals. If you’re diving into this repair adventure and need a hand, you can always schedule a repair with Salvation Repair.
Step 6

– Take a peek at the backside of the motherboard—there are a few ICs hanging out here:
– Maxim Integrated MAX97236 Audio Amplifier, complete with Jack Detection flair
– M651 X171C1 L146 is chilling here too
– Don’t miss the Novatek NT50357 1422-AD D7MN91, also in the mix
Step 7

Looks like this design is a carryover from the original Fire. It’s like they took the best parts and kept ’em for this version!
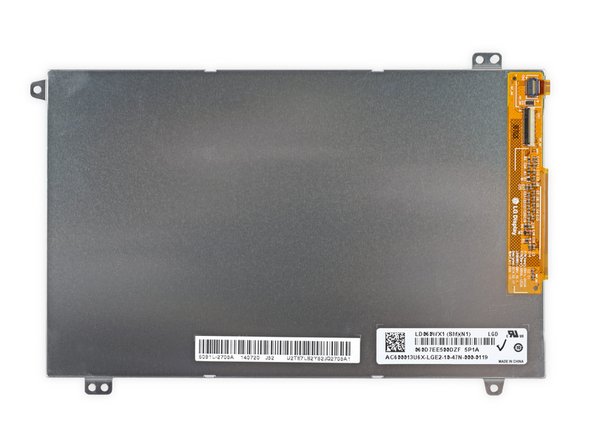
– No optical adhesive here! It’s been a while since we’ve seen a tablet display split into separate glass and display components.
– The 6-inch display, with a resolution of 1280 x 800 pixels (252 ppi), comes courtesy of LG Display.
– The display glass assembly includes both the digitizer and the VGA front-facing camera.
Step 8


Limited availability of replacement parts has kept repair options in other Kindle models pretty slim. Fingers crossed, this model doesn’t run into the same issues. If you need help, you can always schedule a repair.
– The Fire HD 6 is a breeze to repair with a score of 8 out of 10—meaning it’s pretty user-friendly. The back cover pops off easily, giving you straightforward access to the internals. Inside, you’ll find only T5 Torx screws—so a single Torx screwdriver is all you need. Thanks to its simple design and limited parts, disassembly is smooth sailing and less frustrating. Be aware that the battery adhesive is quite strong, which can make removing the battery a bit tricky and requires some patience. Also, the glass is fused to the front plastic frame, so you’ll need a heat gun to carefully loosen it if you want to replace a cracked screen—alternatively, you’ll have to replace both components together. If you need help, you can always schedule a repair.
Success!