Lenovo IdeaCentre K410 Motherboard Replacement
Duration: 45 minutes
Steps: 12 Steps
Step 1

– Flip the computer onto its side, like the cool pro you are.
– Twist out those two 14mm screws—don’t worry, they’re so chill you can unscrew them with just your fingers!
Step 2

– Slide that side panel straight back with confidence, and pop it off the computer like a pro!
Step 3

– Time to get your hands busy! Start by unscrewing that 14mm screw that’s keeping the back panel cover in place. You got this!
– Now, gently slide that flap back to reveal the expansion card retaining screw. You’re doing great!
Step 4

– Let’s get started! Use a trusty Phillips #2 screwdriver to carefully remove the 8mm screw that’s holding the USB 3.0 Expansion Card in place. You got this!
Step 5

– Use a bit of steady oomph and pull straight up on the expansion card to pop it out of the computer.
Step 6

– To free up the memory module, press downward on those two white clips on either side—you’ve got this!
– Now, give the memory module a gentle pull upward to remove it from the unit. Easy peasy!
Step 7

Handle those screws with care—let’s keep them intact and not stripped!
– Get your Phillips #00 Precision screwdriver ready and remove the four 12mm screws that hold the fan in place. If theyre stubborn, dont worry, just keep going until theyre all out.
Step 8

– Alright, here’s the move: carefully unplug the fan’s single connector from the motherboard—don’t yank it, just a gentle tug will do. Then, lift that fan up and away like a pro, and boom, it’s out of the computer. Easy breezy!
Step 9

The screws will stay snugly in the heat sink, so no need to worry about them popping out completely!
– Grab a Phillips #2 screwdriver and loosen up those four screws anchoring the heat sink. You got this!
– Lift the heat sink straight up—no tilting, just a clean pull to pop it off.
Step 10

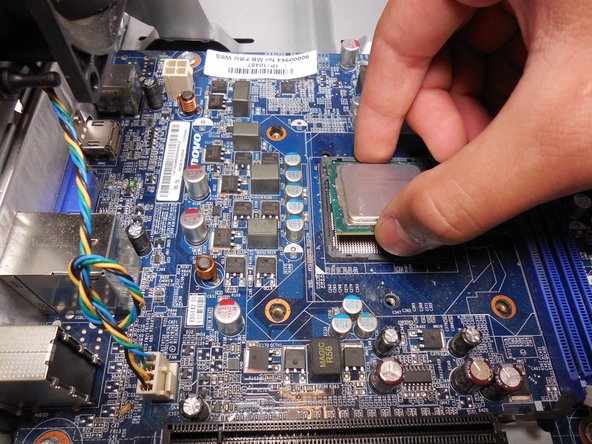
– Grab your trusty Torx #20 screwdriver and take out the two 8mm screws holding the CPU cover in place.
– Next, use your Torx #20 screwdriver to remove the 11mm screw. Almost there!
– Now, carefully lift off the cover and gently pull the CPU out, making sure not to force anything. You’re doing great!
Step 11


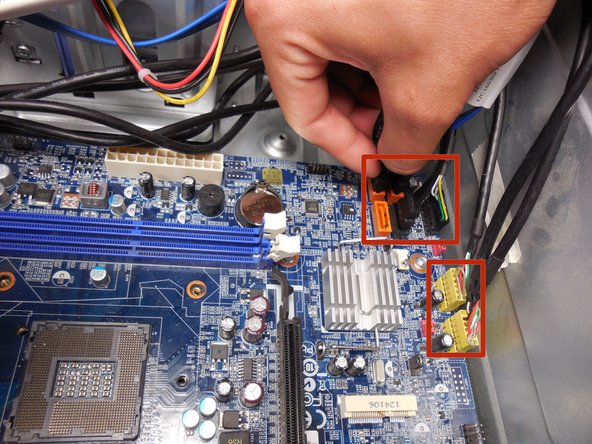
The biggest connection might make you feel like you’re arm wrestling a robot—it needs a good bit of oomph to come off!
– Disconnect all cables connected to the motherboard.
Step 12
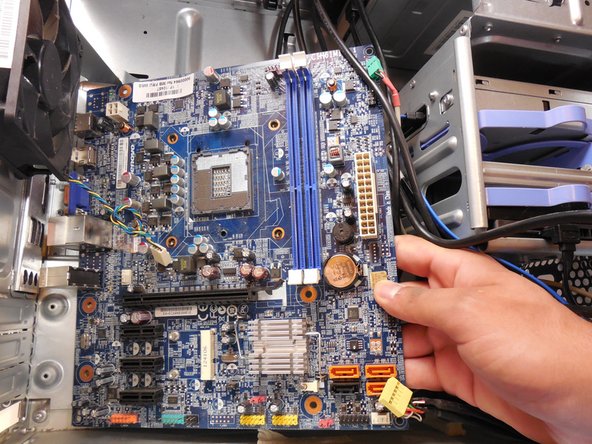

– Unscrew all 6 snazzy 8mm screws holding the motherboard to the base of the tower—grab your trusty Phillips #2 screwdriver and get to it!
– Carefully ease the motherboard out of the unit—no need to muscle it, just a gentle pull will do the trick.
Success!