Lenovo Ideatab A1000 Teardown / Take apart / Disassembling
Duration: 45 minutes
Steps: 6 Steps
Ready to dive into your tablet’s inner workings? Let’s take it apart step by step!
Step 1


– Grab your trusty Phillips screwdriver and remove the two screws hanging out beneath the memory card and SIM card covers. They’re just waiting for you!
– Now, take a plastic tool and gently pry off the back cover. You’re doing great—keep it up!
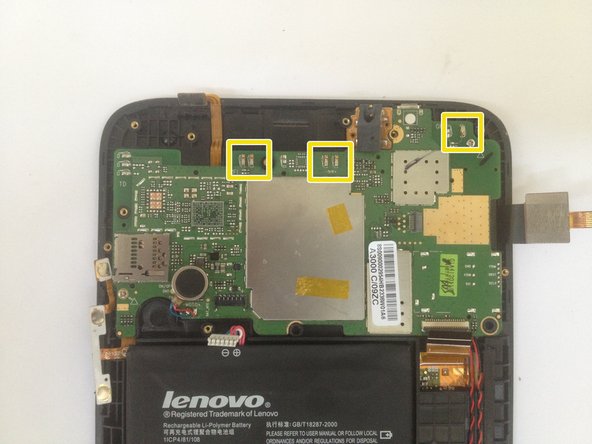
Step 2


– Time to get your screwdriver out! Unscrew those 8 little screws and lift off the motherboard cover with care.
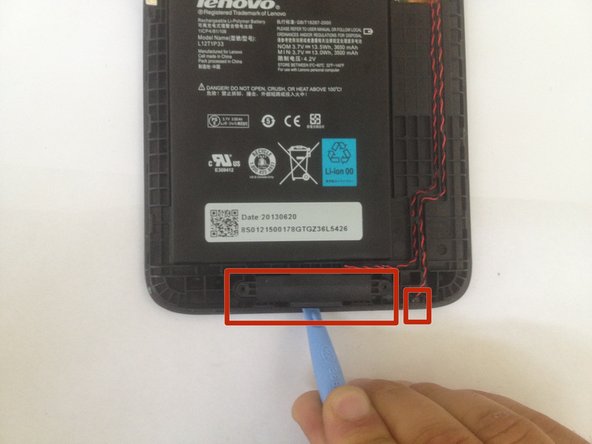
– Now, let’s disconnect the battery connector—just a gentle tug will do!
Step 3


– Get ready to rock this repair by starting with the Volume Buttons, Power Button, and Vibration motor – the trifecta of phone functionality!
– Next up, let’s tackle the Audio Jack Connector, Touch Screen Flex Cable connector, and LCD Display Flex Cable Connector. These tiny connectors are the secret to getting your device’s audio and visuals back in action.
– Now it’s time to dive into the Wi-Fi Antenna Connector, Speaker Connector, and GPS Antenna Connector. These little guys are the key to keeping you connected and on the right track.
Step 4


– Time to say goodbye to that lower speaker and microphone—gently remove them.
– Next, let’s free up the power button, volume buttons, and vibration motor from the middle frame. They’ve been stuck long enough!
– Carefully unhook the LCD Display and Touch screen flex cables. We’re getting closer!
– Unscrew those 2 Phillips screws holding the main board in place. It’s all coming together now!
Step 5

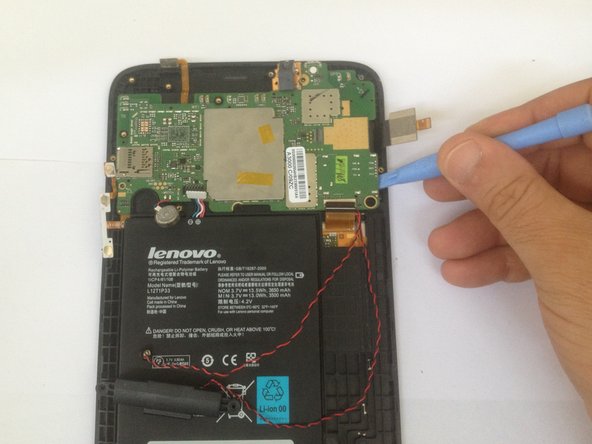

– Time to get that logic board out! Remove it carefully.
– Be gentle, the motherboard is stuck to the front outer case, so take your time.
Step 6


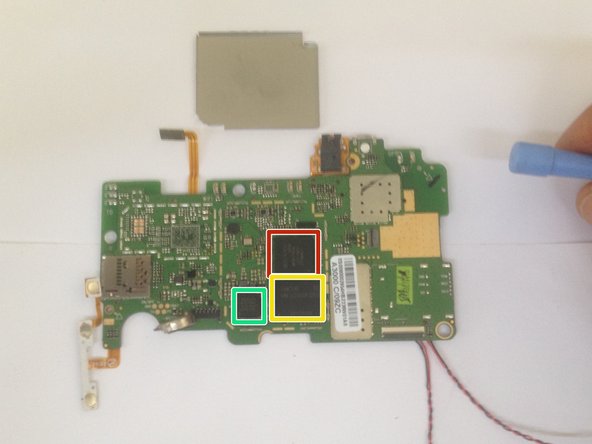
– CPU – Mediatek, MT8317ATA
– Memory chip – eMMC(16GB)+LPDDR2(1GB) – KMK3U000VM-B410
– Power management chip – Mediatek MT6329BA
– .
– .
– And there you have it! You’re all set to tackle your tech troubles. If you need help, you can always schedule a repair.