Lenovo IdeaTab A1000L Front Facing Camera Replacement
Duration: 45 minutes
Steps: 16 Steps
Get ready to swap out your camera and snap away once more! Follow these simple steps for a smooth replacement.
Step 1

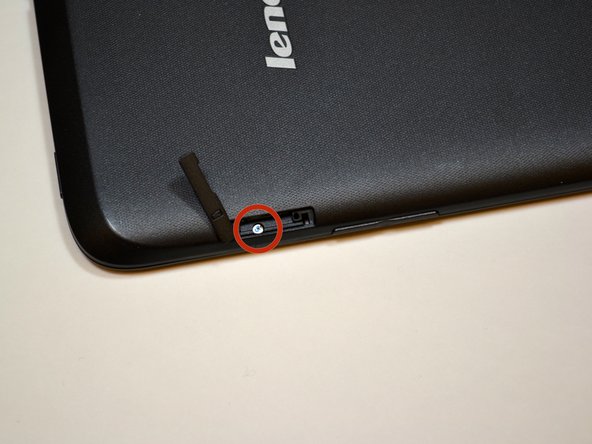
You might spot a sneaky sticker hiding the screw head. If you do, just grab some tweezers, peel it off, and then go ahead and remove that screw like a pro!
– First things first, let’s give your device a little downtime—power it off before we dive in!
– Now, find that tiny tab on the upper right side of your IdeaTab, just above the volume buttons. It’s got a lock symbol on it. Gently pry it open using your fingernail—it’s like unlocking a treasure chest!
– Grab your trusty Phillips #000 screwdriver and unscrew the 3.5mm screw. Once you’ve done that, set it aside where it won’t roll away!
Tools Used


Step 2

Take it easy when prying the plastic back cover—go slow and steady to avoid any cracks or snaps. It’s a delicate dance, but you’ve got this!
– Grab your trusty blue plastic opening tool and start prying the back panel away from the front panel, beginning at the charging port. Gently work your way along the right edge of the back cover – it’s like opening a stubborn jar, but easier, we promise!
– Now, take that plastic opening tool and work your magic around the entire device. You’re freeing those pesky plastic clips, one by one, and before you know it, the back cover will be off in no time. Easy peasy!
Step 3

– Find the volume key on the right side of your tablet – it’s time to set it free!
– Slide that volume key upwards and out of its home – easy does it!
Step 4

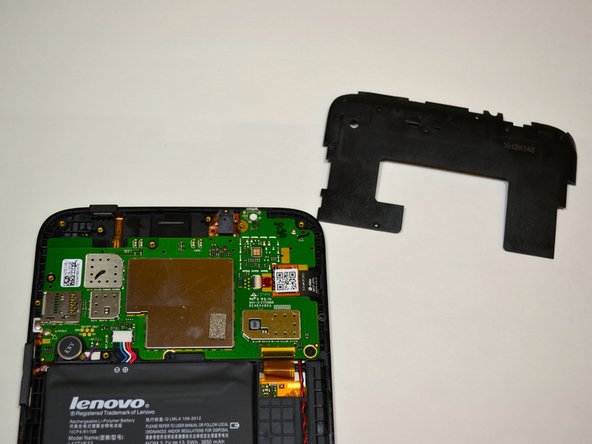
– Grab your trusty Phillips #000 screwdriver and take out the seven shiny silver M1.4 3.5mm screws holding down the back plate.
– Stick with the same screwdriver and remove the single black M1.4 4.1mm screw—don’t let it blend in!
– Carefully lift off the back plate, giving your device a much-needed breather.
Tools Used
Step 5

– Find the power button chilling on the top right corner of your tablet.
– Give that button a gentle nudge upwards to pop it off.
Step 6

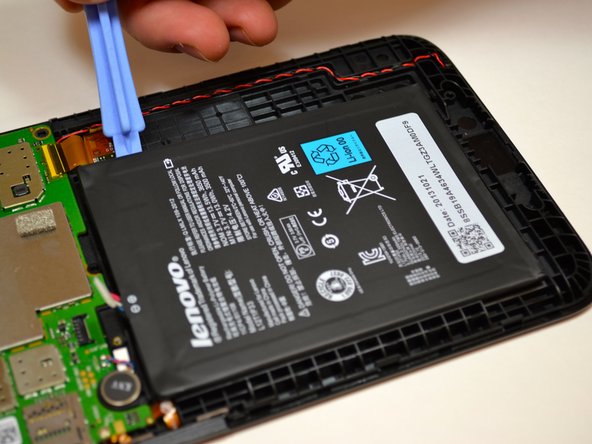
– Let’s get started by disconnecting the battery wires from the system board. Take your trusty plastic opening tool and slide it under the white plastic piece, then gently pull up to release the wires.
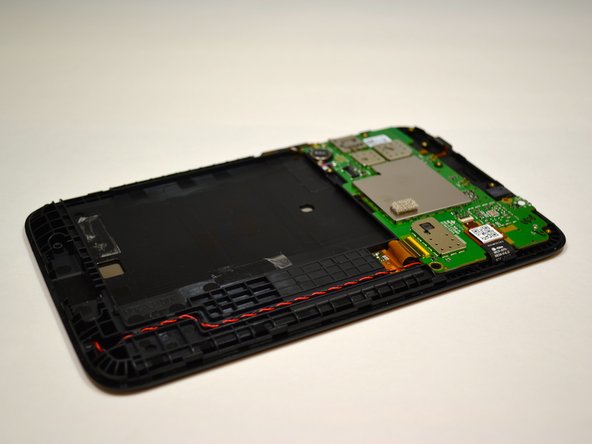
– Next, use that same plastic opening tool to loosen the battery from the device. Simply lift up on the battery on all sides to detach it from the adhesive – easy peasy!
Step 7

– Start by finding the volume button mechanism – it’s a little FPC stuck to the device frame. Don’t stress, it’s pretty easy to spot.
– Now, gently pry off the FPC using your trusty tweezers or a plastic opening tool. A little patience here goes a long way.
– Repeat the same steps to remove the FPC located just to the left of the volume button mechanism. You’re almost there!
Step 8

– First, track down the power button mechanism – it’s time to set it free!
– Gently pry the power button mechanism off using a trusty tweezer or plastic opening tool. Take your time, and it’ll be removed in no time.
Step 9

– Lift the circular motor unit straight up with your trusty tweezers—it’ll come right out, easy as pie!
Step 10

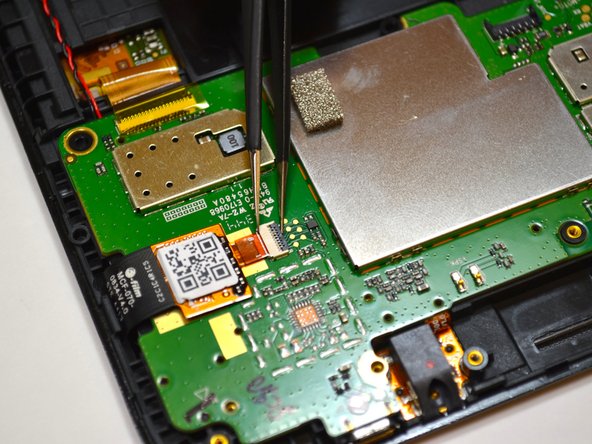
The white connector might have a quirky little yellow mylar sticker on it. Go ahead and peel that off like it’s a fun surprise, then keep moving forward!
– Find the component that has a QR code on it—it’s your treasure map!
– Before you can unplug this little guy, you’ll need to free it from the white connector first.
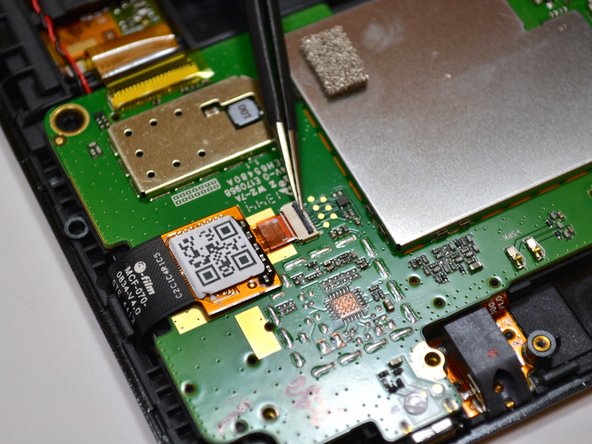
– To do that, grab some tweezers and give the black piece a gentle twist, rotating it 90 degrees so it’s standing tall.
– With the black piece now pointing up, you’re ready to release the orange wires. Using your tweezers, carefully pull those orange wires straight out from the white connector like you’re plucking a perfect peach!
Step 11

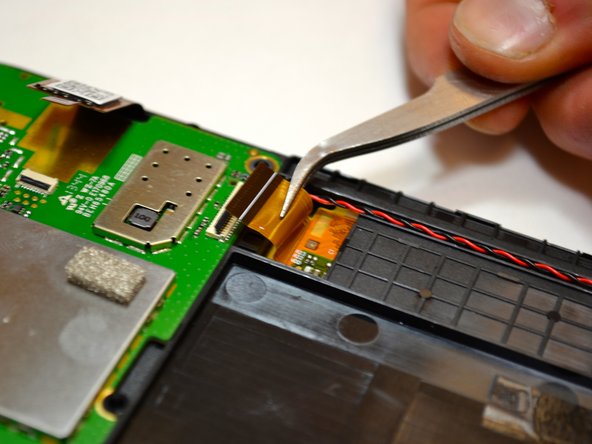
Look for a yellow mylar sticker on top of the white connector. Gently peel it off and keep moving forward with the repair.
– First things first, find that orange cable chilling to the right of the battery tray.
– To say goodbye to this component, you’ll need to unhook it from the white connector. Grab your tweezers and gently nudge the black piece upwards, twisting it 90 degrees so it’s waving goodbye up top.
– With the black piece standing tall, you can now slide those orange wires out of the connectors. Use your tweezers to pull the orange wire straight out from the white connector like you’re giving it a little tug to come along!
Step 12

– Grab your trusty #000 Phillips screwdriver and carefully unscrew those two M1.4 3.5mm screws from the system board. Set them aside like a pro, and let’s keep this repair adventure rolling!
Step 13

– Find the audio assembly hanging out near the top-right corner of your device.
– To get that audio assembly out of there, grab your trusty tweezers, pop them into the circular hole in the black plastic box, and give it a gentle upward tug.
Tools Used
Step 14
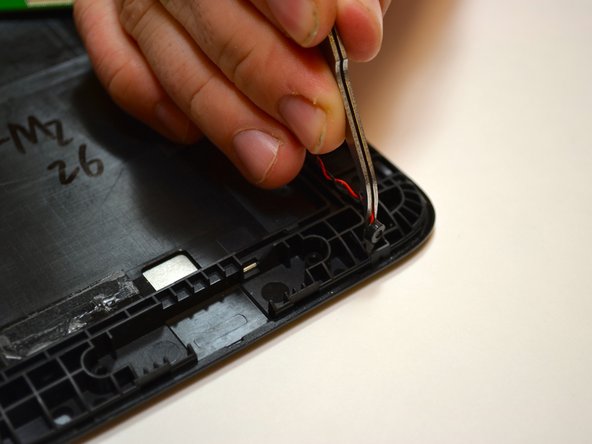

– Find the microphone nestled at the bottom of your device.
– Use your tweezers to carefully lift out the microphone along with its black and red cords. Gently pull them up together – it’ll pop right out.
Tools Used
Step 15

– You’ve successfully freed the system board from its cozy home in the device! Now, gently lift it up and place it on a soft, padded surface to keep it safe and sound.
– Great news! The screen display unit is all set for a new adventure. Time to swap it out!
Step 16

– The camera hangs out on the backside of the system board. Go ahead and locate it!
Success!