Lenovo IdeaTab S2109A-F Camera Replacement
Duration: 45 minutes
Steps: 8 Steps
Ready to tackle a little tech magic? This guide is your go-to for swapping out the camera on your Lenovo IdeaTab S2109A-F. If your camera’s image is looking a bit wonky or cracked, you’ve hit the right spot! Before diving in, make sure to power down the tablet and check out the battery replacement guide. You’ll encounter a fair number of screws along the way, so keep an eye on them and stay organized as you work through these steps. Remember, a gentle touch goes a long way in making this replacement smooth and damage-free for your tablet. If you need help, you can always schedule a repair.
Step 1


Before you dive into this guide, make sure to power down your tablet. It’s not a good idea to poke around inside while it’s still running!
– Flip your tablet so the screen faces down, and grab your trusty opening tool to start popping off that back cover.
– Gently wedge the tool along the edge and apply a little pressure to work the back panel loose—take it slow, and you’ll have it off in no time.
Step 2


– Take hold of the battery and lift it up gently—no need for superhero strength here. As you do, you’ll reveal a red and black coiled wire lurking underneath.
– Keep pulling the battery, but easy does it! Make sure to tug just enough until the cord is fully extended with no slack.
Step 3

– Grip the battery gently with one hand, and with the other hand, pinch the two wires closest to the connection point using your thumb and index finger.
– Give the black and red wires a confident pull using your fingers, but keep it steady—no need to tug so hard that you risk breaking anything.
– Slide the battery out of the device carefully.
Step 4


– Grab your Phillips #00 screwdriver and unscrew the two 4 mm screws hanging out on the right side of the housing—you’re totally nailing this!
Tools Used

Step 5


Most of this stretch is covered by copper, so keep an eye out for that shiny stuff as you go.
– Find the long, L-shaped system board and get ready to work your magic.
– Use your trusty Phillips #00 screwdriver to unscrew the ten 2 mm screws holding the system board in place. A little twist here and there, and you’re good to go!
Tools Used
Step 6

– Flip that center latch open with your big trusty tool—look for the shiny gold connector underneath.
– Give the gold connector a gentle tug using the latch. Smooth moves only!
Step 7


– Lift up the L-shaped board carefully and pop those two connectors free—top and bottom. Easy does it!
Step 8
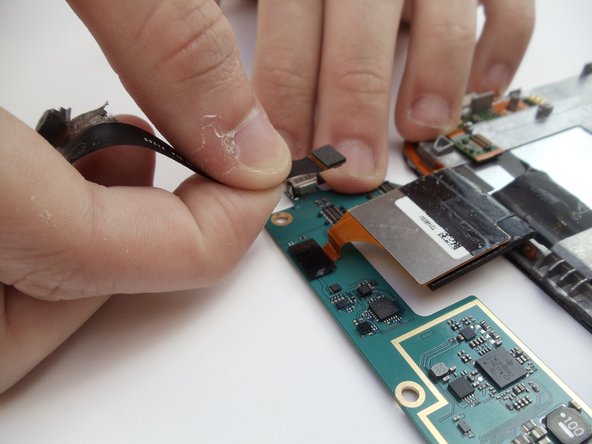

– Pinch the camera connector between your thumb and index finger.
– Gently wiggle and pull the wire to disconnect the camera—nice and easy does it!
Success!