Lenovo Ideatab S6000 Rear Camera Replacement
Duration: 45 minutes
Steps: 8 Steps
Step 1

These screens are stuck on with some seriously stubborn glue! So, take a deep breath and give yourself some time to tackle this step like a pro.
– Gently pry off the speaker screens using a plastic opening tool. If they’re feeling a bit stubborn, you might want to give them a little nudge with tweezers or a craft knife first. Happy repairing!
Step 2

– Take out the screws from the two spots you just uncovered. Easy does it!
Step 3

Skip the metal tools for this one, they’re just not the right fit! Grab something non-metallic instead for a smooth repair process.
Take it nice and easy as you work your way around the device to carefully pop off the backing.
– Work your way around the casing with the spudger, gently prying the screen away from the backing – you’ll hear a slight popping sound as each lock tab disengages, which is completely normal.
– Keep going until all the tabs are released, and the screen comes off easily.
Tools Used

Step 4

– Carefully peel away the plastic covering the battery cable. Let’s get that battery ready to rock and roll!
Step 5


– Grab your trusty plastic opening tool or just use your fingers. Give a gentle tug on both sides of the plug to set it free. You’ve got this!
Step 6

– To remove the battery, grab the handy tab and pull upward.
– The battery’s a little clingy thanks to some adhesive, so give it a firm but steady pull—don’t be shy, it’ll come loose after a little effort.
Step 7

– Carefully lift the metal connector plate as if you’re revealing a hidden treasure.
Step 8
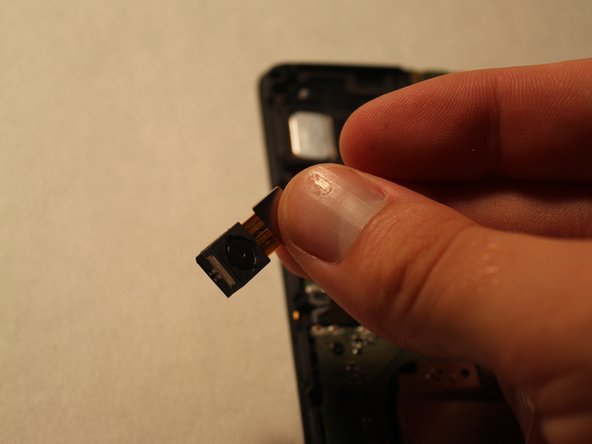

The camera is held in place by some glue, so don’t rush it! Take your time and gently work it loose. It’ll come off with a little patience.
– Gently nudge the camera from all angles to free it from its spot.
– Swapping in a new camera? Just plug it in and retrace these steps in reverse. Easy!
Success!