Lenovo Ideatab S6000 Speakers Replacement
Duration: 45 minutes
Steps: 8 Steps
Step 1

These screens are stuck down with some stubborn glue, so take it slow and steady to get it off cleanly.
– Let’s get started by carefully prying the speaker screens loose with a plastic opening tool. If they’re being stubborn, don’t worry – a little help from some tweezers or a craft knife should do the trick.
Step 2

– Now it’s time to get rid of those screws that were hiding under the covers. Remove them from both spots to move forward with your repair.
Step 3

Steer clear of using metal tools for this one!
Work your way around the device nice and easy as you pry off the back—no rush, just keep it steady and smooth.
– Work your way around the casing with the spudger, gently prying the screen away from the backing. You’ll know you’re making progress when you hear the satisfying pop of each lock tab disengaging.
– Keep going until all the tabs are free, and the screen is separated from the backing. If you need a little extra help, don’t worry – it’s all part of the process.
Tools Used

Step 4

– Gently peel away the plastic that’s snugly hugging the battery cable. You’ve got this!
Step 5


– Grab your plastic opening tool or just use your fingers—whatever suits your style. Now, with a steady hand, gently pull on both sides of the plug until it pops free. No need to wrestle with it; a little finesse goes a long way!
Step 6

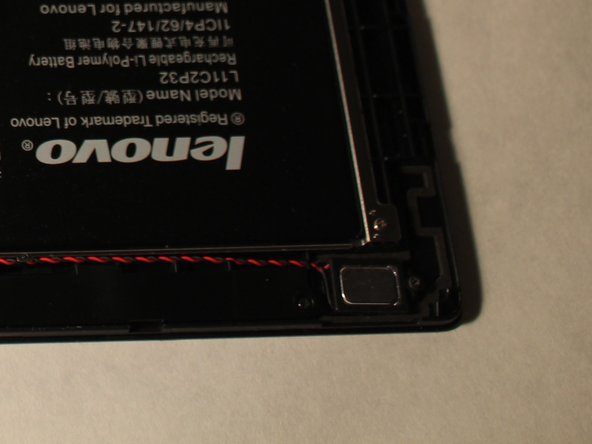
– Let’s get started by removing the battery. Grab the tab and gently pull it up – it’s held in place by some sticky adhesive, so be prepared for a bit of resistance.
– Keep pulling upwards from the tab, and with a little effort, the battery should lift right out. Don’t worry if it takes a sec, it’s supposed to be a bit stubborn.
Step 7

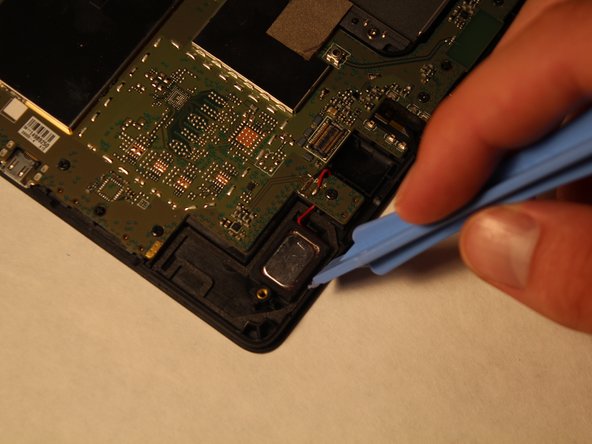
– Time to get a little aggressive with those speakers – they’re stuck to the tablet with glue, so be prepared for some serious prying action to get them out.
– When you’re prying, make sure to get your tool all the way under the speakers to avoid any damage or extra hassle.
Step 8

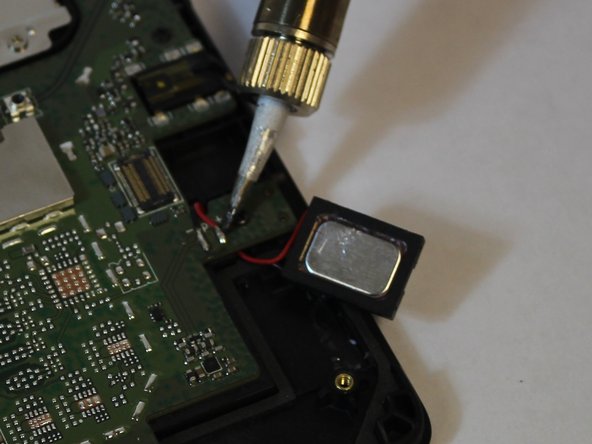
You can skip this step unless you’re swapping out the speakers.
Take note of where those red and black wires are hanging out.
– Now that you’ve got everything put back together, simply reverse the steps and you’ll be good to go!
– If this task feels a bit tricky or you just need an extra pair of hands, don’t hesitate to schedule a repair. We’ve got you covered!
Success!