Lenovo Tab 2 A10-70 Front Glass and Digitizer Replacement
Duration: 45 minutes
Steps: 7 Steps
Removing the screen from the Lenovo Tab 2 A10-70 can be quite the challenge, but once you tackle that adhesive, it gets a whole lot easier! Keep your chin up! (And hey, sorry about the pics in this guide; let’s just say the baby bump has its own spotlight!)
Step 1


– Removing the plastic casing is a breeze! Just grab your spudger—or, if you’re feeling confident, your trusty fingernail—and glide it along the edge to pop it off.
Tools Used

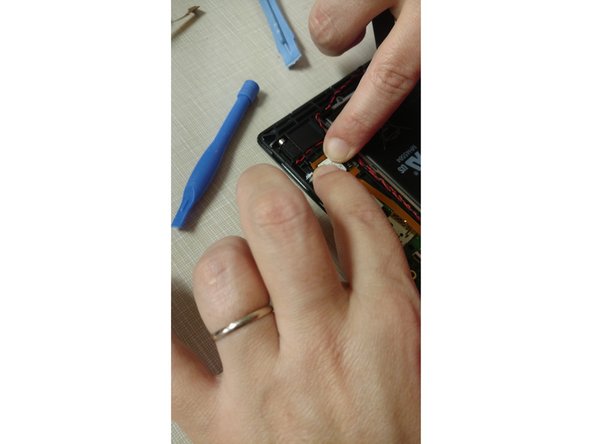
Step 2

– With a gentle touch, use your fingernail or tweezers to lift the holding flap and carefully disconnect the digitizer cable from the old screen.
Tools Used

Step 3


– Handle with care! This glass can shatter easily and send tiny shards everywhere if you get too aggressive.
– The glass is seriously glued to the frame and LCD—expect a solid workout getting the old screen off (it might take a while).
– Use a heat gun or a high-powered blow dryer to gently warm up the edges of the glass. Start in one corner and carefully work your spudger in.
– Keep your spudger level as you slide it in to avoid damaging the LCD. There’s a gap to work with, but the adhesive is extra stubborn!

Step 4
– Tidy up the edges
– Grab your spudger or razor knife and gently scrape away any leftover adhesive that’s hanging around. You’ll want those edges nice and clean for the next step!
Tools Used
Step 5

– Gently guide the digitizer cable through the slot in the case – no rush, just a smooth move!
– Flip the case over and securely reconnect the new digitizer cable – it’ll click right in!
– Before you get all excited about sticking things down, test the screen and digitizer to make sure everything’s working perfectly.
Step 6


– Your new screen is here! If it didn’t come with adhesive, go ahead and add some 3M tape for extra security – the screen you got might already have it, but a little extra never hurts
– Now it’s time to put the screen in place, press down firmly to make sure it’s snug and even
– Almost done! Put the back cover back on and you’re good to go! If you need help, you can always schedule a repair
Step 7

– To put your device back together, just retrace your steps in reverse. You’ve got this!
– If you need help, you can always schedule a repair
Success!
