Lenovo Tab 2 A8 Audio/Video Port Replacement
Duration: 45 minutes
Steps: 6 Steps
Ready to tackle your device? This guide walks you through popping off the back cover and carefully removing the motherboard to get direct access to the A/V port. Step-by-step, you’ll master the art of replacing that tricky little port like a pro!
Step 1


If you’ve already peeled back the seal on that little screw, you’re ready to move on to the next step!
Since this screw is on the smaller side, grabbing it with a pair of tweezers might make things a bit easier.
– Get your tablet ready for surgery by placing it face down on a soft, stable surface – think of it like a comfy pillow for your device.
– Time to get up close and personal with that screw in the back. Use a Metal Spudger to carefully scrape off the seal, and don’t worry if it takes a little elbow grease.
– Grab your trusty Phillips #000 Screwdriver and remove the M1.4 × 2.5 screw. You’re one step closer to fixing your tablet!
Tools Used


Step 2


You might need to give it a little nudge to pop the back cover off at first.
Just a heads-up: the button tabs inside this device are a bit free-spirited and may decide to jump out when you open it.
– Start at one side and gently work your way around the tablet to pop off the back cover. Grab a metal spudger for this step—it’ll make the job a breeze!
Tools Used
Step 3


When handling tiny screws, it’s a good idea to grab a pair of tweezers to make the job easier.
– Grab your trusty Phillips #000 screwdriver and carefully take out those four M1.4 × 2.5 screws that are keeping the motherboard snug and secure.
Tools Used
Step 4


The cable linking your screen to the motherboard is snugly in place, so you might need to channel your inner strength to gently disconnect it.
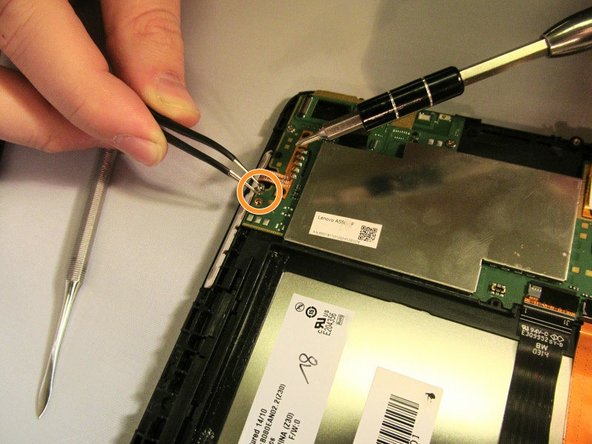
– Time to unscrew the M1.4 × 2.5 screw that’s keeping the battery lead cozy with the battery. Grab your trusty Phillips #000 screwdriver and make it happen!
– Now, with your tweezers in hand, gently nudge that battery lead aside so it doesn’t get in the way of the motherboard’s grand performance.
– Using your tweezers again, carefully disconnect the strip that’s linking the screen to the motherboard. Let’s keep things flowing smoothly!
Tools Used
Step 5

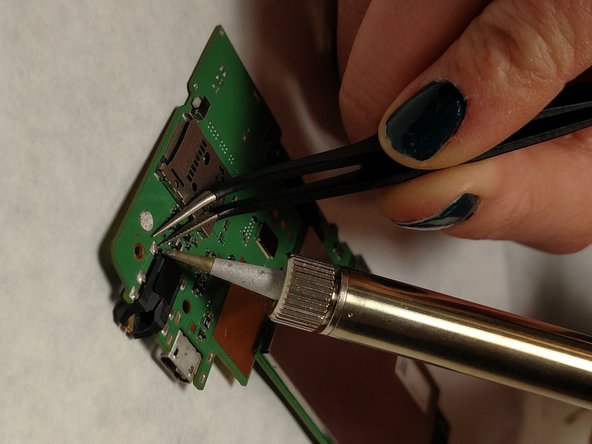
Hey there! Watch out for those tiny tabs—they can get a bit cranky if you pry the motherboard up too hard.
Those button tabs are glued to the motherboard with a sneaky little adhesive strip. Be gentle when you remove the motherboard to keep those wires safe and sound.
– Let’s get that motherboard out! Carefully lift the top edge and gently pull it outward to release it from the small tabs that are holding it in place.
Step 6

– Now, just retrace your steps and put everything back together, it’s basically the reverse of the teardown!
– If you hit any snags along the way, don’t worry – you can always schedule a repair for expert help.
Tools Used
Success!