Lenovo Tab 2 A8 Speaker Replacement
Duration: 45 minutes
Steps: 5 Steps
Ready to hear your tunes and alerts loud and clear again? This guide walks you through getting to the buzzer ringer part of your speaker so you can swap it out for a fresh one.
Step 1


If the screw’s seal is already gone, you’re one step ahead – move on to the next part of the process!
This screw is tiny, so you might want to grab some tweezers to make it easier to handle.
– Lay the tablet down on its back on a cushy, stable surface to keep that screen safe and sound.
– Next up, grab your Metal Spudger and gently scrape away the seal that’s covering the screw on the back of the tablet.
– Now, take your trusty Phillips #000 Screwdriver and remove that M1.4 × 2.5 screw with ease.
Tools Used


Step 2


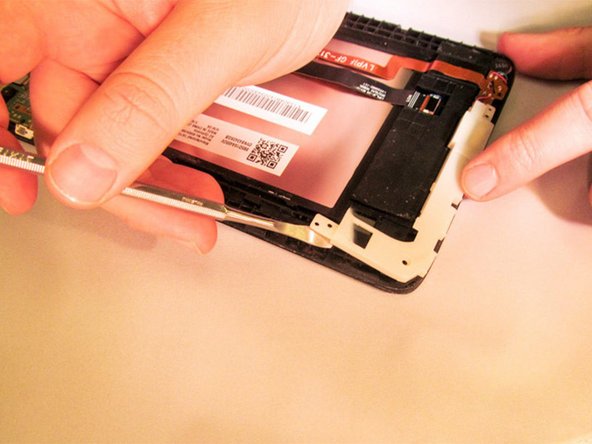
You might need to give the back cover a little extra oomph to pop it off at first.
Heads up—the button tabs on this device are just hanging out inside the case, so expect them to drop out when you open it.
– Let’s get started by removing the back cover. Begin on one side of the tablet and work your way around, using a metal Spudger to gently pry it off. This might take a bit of effort, but don’t worry, you’ve got this!
Tools Used
Step 3

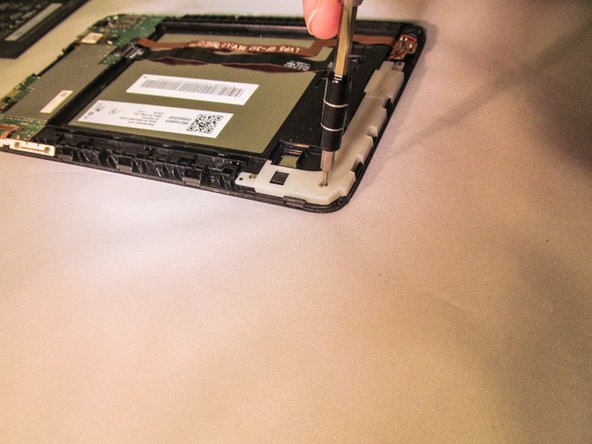
– First, let’s get that speaker housing out of the way. Use a Phillips #000 screwdriver and turn those three M1.4 × 2.5 screws counterclockwise until they’re loose. Easy peasy!
– Next, it’s time to carefully pry off the speaker housing. Grab your trusty metal spudger and gently work it around the edges until it comes loose. Don’t worry if it takes a little bit of effort – you got this!
Tools Used
Step 4

Handle those speaker wires with care – they’re not fans of roughhousing! Gently wiggle the speaker out of its cozy socket, and remember, it’s got a magnetic personality, so keep metal tools at bay!
– Grab a plastic probe and slide it through the tab. Gently pry it to lift the speaker out of its socket. Easy does it!
Tools Used
Step 5

– Grab your soldering iron and carefully melt the solder connecting the speaker wires to the speaker chip. Take your time—no need to rush this part!
Tools Used

Success!