Lenovo Tab 4 TB-8504F Rear Camera Replacement
Duration: 45 minutes
Steps: 5 Steps
Is your rear camera misbehaving and turning your photos into a blurry mess? It might be time for a swap! This guide will help you replace the rear camera on your Lenovo Tab 4 TB8504F, so you can get back to snapping those stunning pics and videos. A faulty camera can leave you with fuzzy, low-quality, or even totally blank shots. Before diving in, check that your camera lens is clean and snap a test picture. If it’s still not looking right, you may need a new camera. With just a few straightforward steps, you can replace the rear camera and enjoy crystal-clear images again! Make sure you have the tools listed in this guide, follow the steps carefully, and take your time. Remember, power off your device and unplug it from any cords (like chargers and headphones) before you start. Be extra gentle with the battery in Step 4—if it gets damaged, your tablet won’t turn on. Once you’ve completed Step 5, it’s time to pop in the new rear camera and follow the steps backward from Step 5 to put your device back together. If you need help, you can always schedule a repair.
Step 1


– Begin with the microSD slot – it’s the perfect spot to kick things off.
– Grab your trusty opening pick and gently slide it under the back cover of your tablet. Take it slow, you’re doing great.
– Now, work your way around the tablet with the pick until the back cover pops off. You’re almost there!
Step 2


– Grab your Phillips #000 screwdriver and remove the 8 screws holding this thing together—like a pro!
– Peel off that tape securing the plate—it’s time for it to go!
– Gently lift the plate using precision tweezers or your fingers—handle with care, but don’t be shy.
– Heads up! There’s a sneaky screw hiding under the blue ‘S’ sticker—don’t let it fool you!
Tools Used


Step 3


– Peel off that yellow tape with care – it’s got to go!
– Grab a spudger or a plastic opening tool, and gently disconnect the battery’s ribbon cable from the motherboard. Take your time with it!
Tools Used

Step 4


Handle the battery with care – no bending or puncturing, okay?
– Gently tug on those two stretch release adhesive strips. Remember, it’s all about pulling away from the battery, not up!
– After you’ve peeled off the tabs, carefully lift that battery right out of the frame.
Step 5

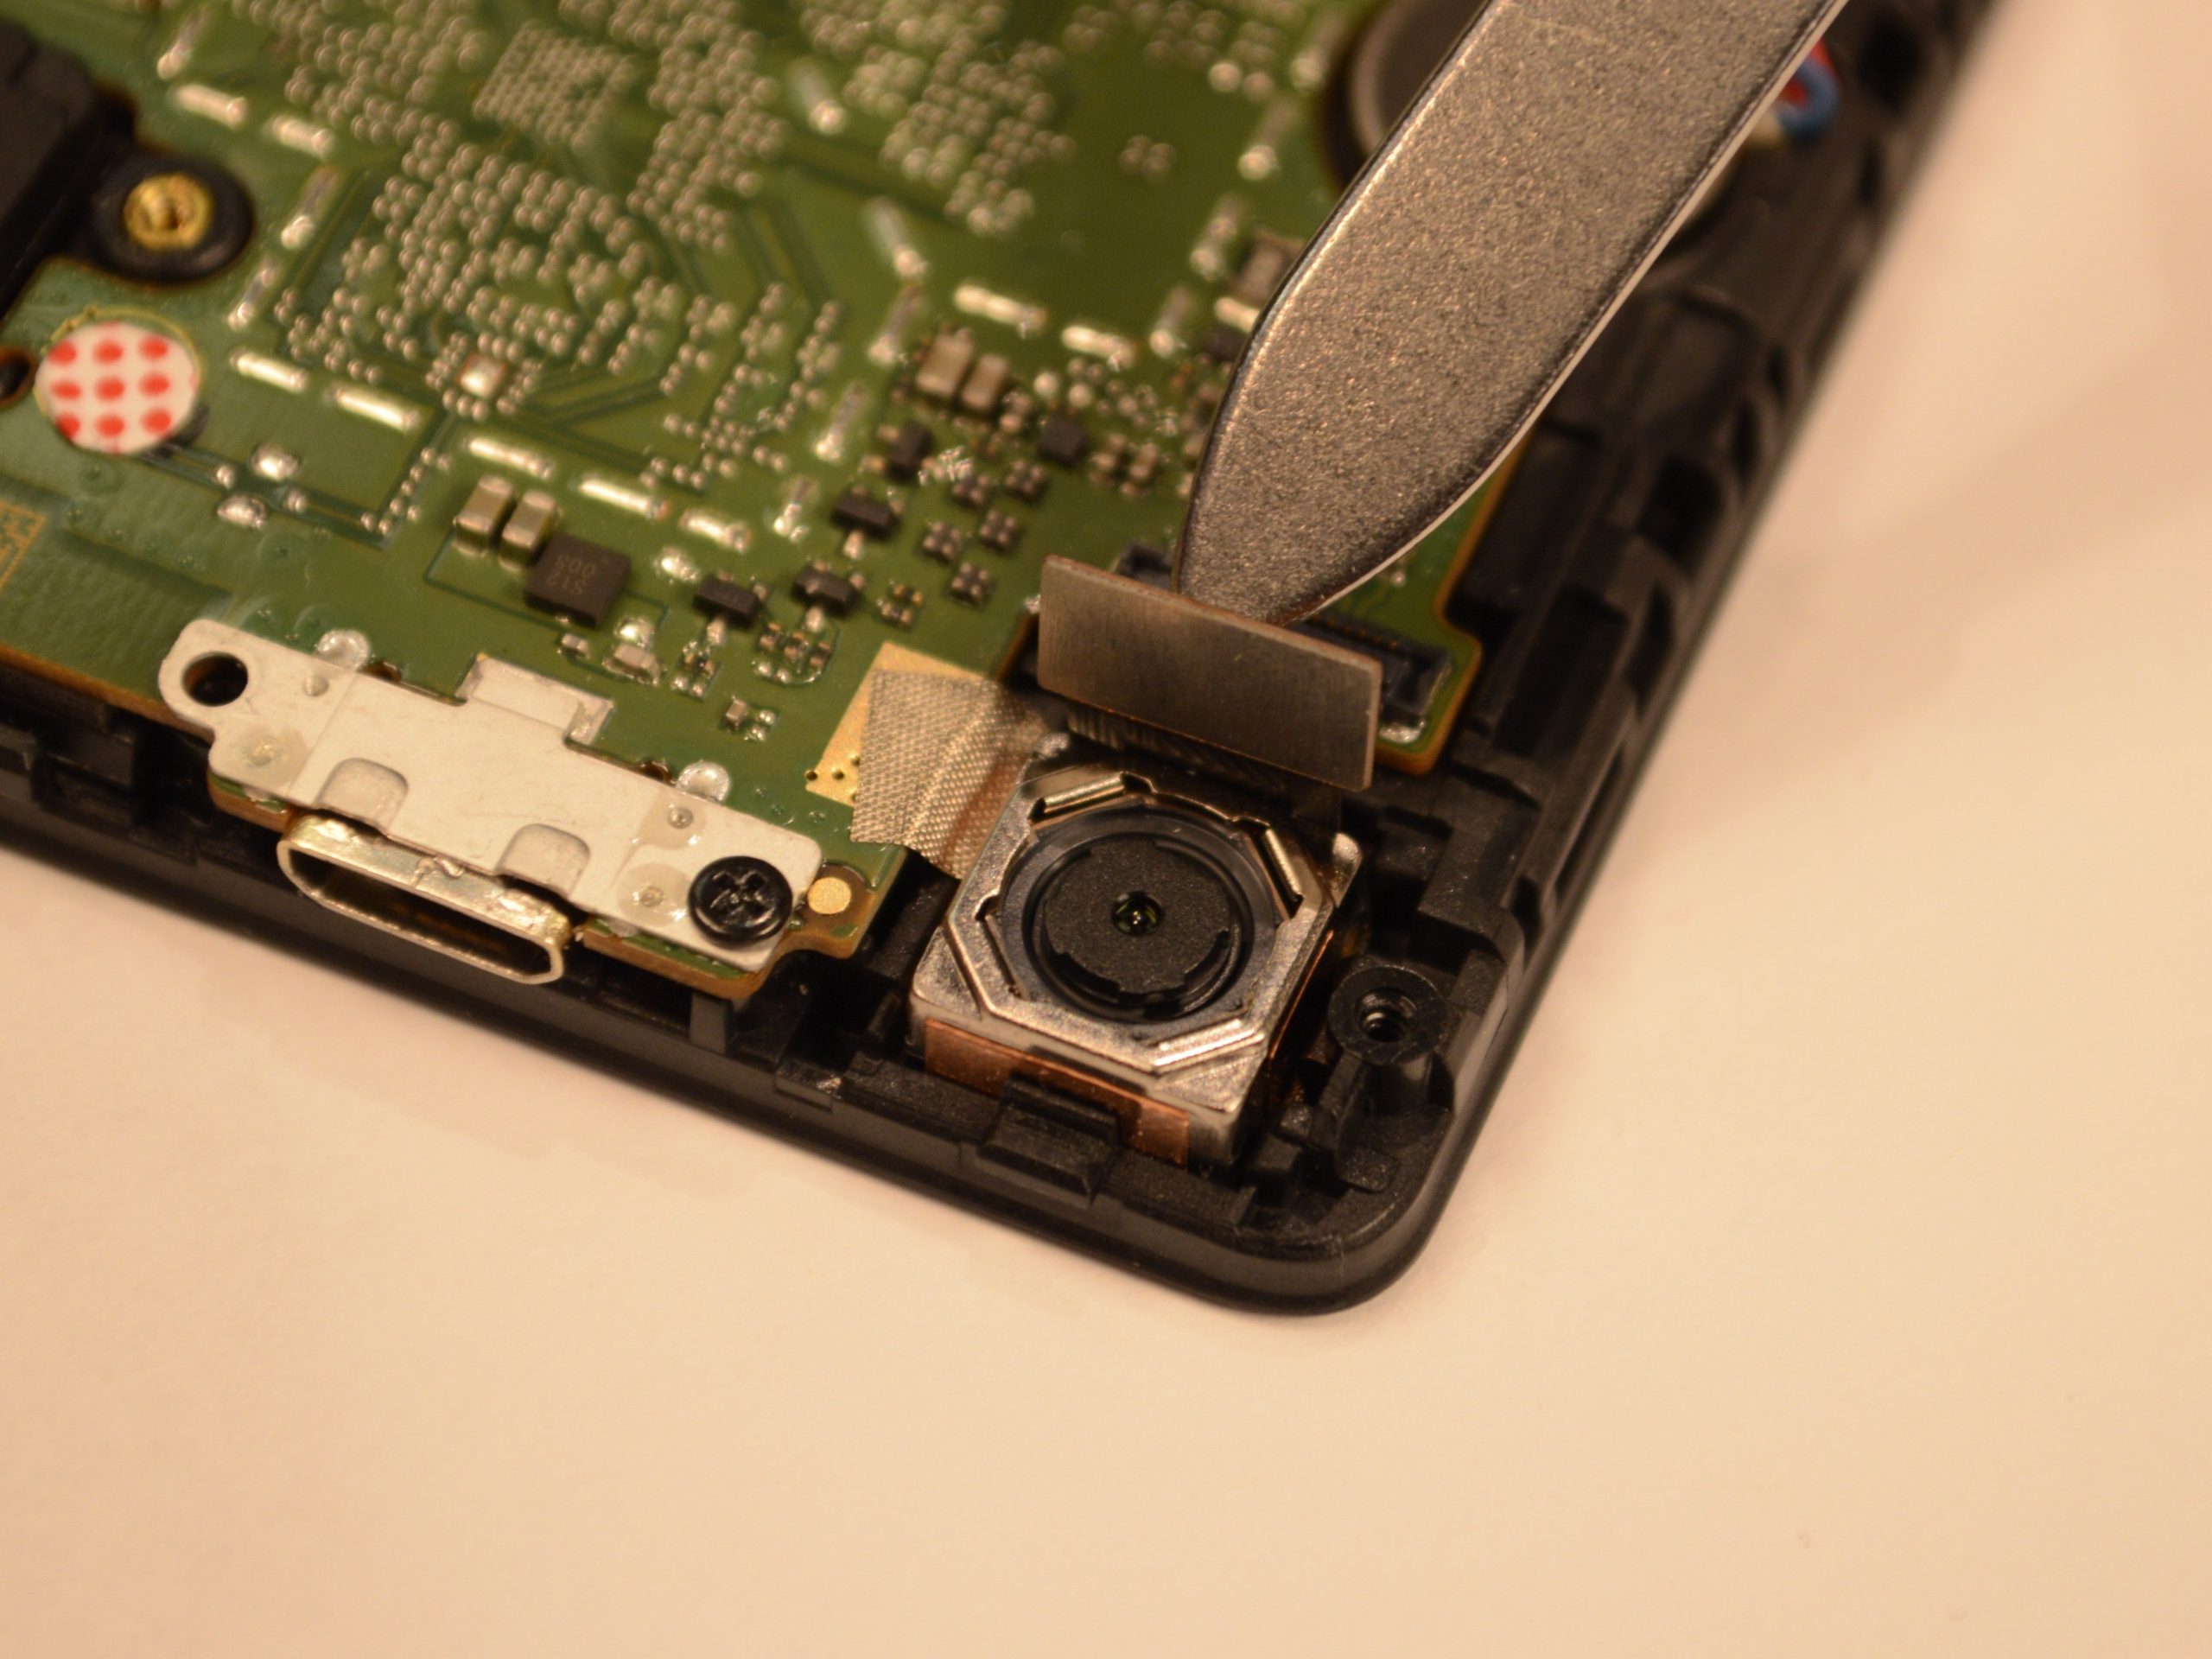
– Grab a spudger and gently lift the rear camera’s press-fit connector up and away. A little nudge, and it should come free.
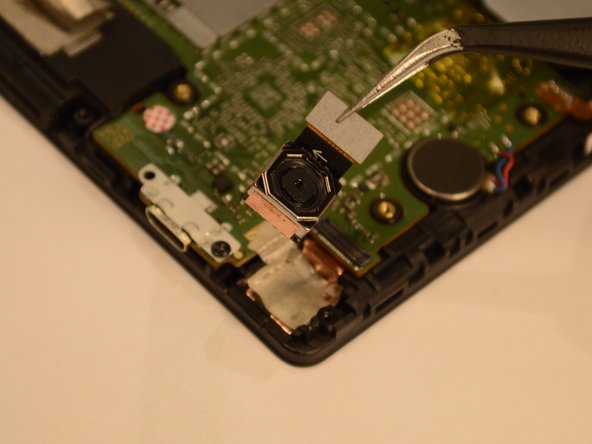
– Now, take your tweezers and carefully lift the rear camera out of the frame. Just be gentle, it’s a tight squeeze, but it’ll come right out.
Success!