Lenovo Thinkpad Tablet 1838 Touch Screen Replacement
Duration: 45 minutes
Steps: 7 Steps
Get ready to give your Lenovo ThinkPad Tablet 1838 a brand new touch screen. If your screen is cracked or not displaying properly, this step-by-step guide will walk you through replacing it. First, make sure your device is powered off and unplugged – safety first. If your screen is cracked, be careful of those tiny glass shards, and consider taping it up to keep everything secure. Now you’re all set to start the replacement process. If you need help along the way, don’t worry, we’ve got you covered. Let’s get started.
Step 1

Gently slide the spudger under the button and give it a little lift. You’ve got this!
– Pop off that left-pointing arrow button—give it a gentle lift, and it should come right out.
Tools Used

Step 2

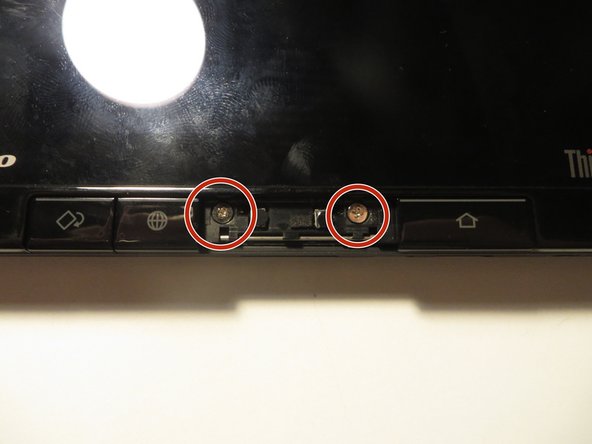
– Let’s get started by removing the two 10mm Phillips #00 screws. Grab your trusty screwdriver and get to work!
Step 3

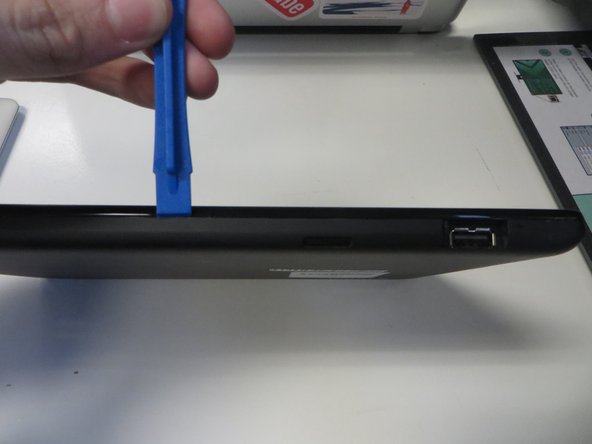
Take it slow—start at the bottom of your tablet and work your way around counterclockwise. Patience wins the day!
– Time to get this tablet opened up! Use an opening tool to carefully pry the screen away from the rest of the device. Don’t worry, it’s easier than it sounds!
Step 4

– Gently swing the tablet screen open to the left—just keep an eye on those connecting wires so nothing gets yanked loose.
Step 5


– Flip up the little white latch to free the ribbon connector.
– Slide the wire gently to the left to pop it out.
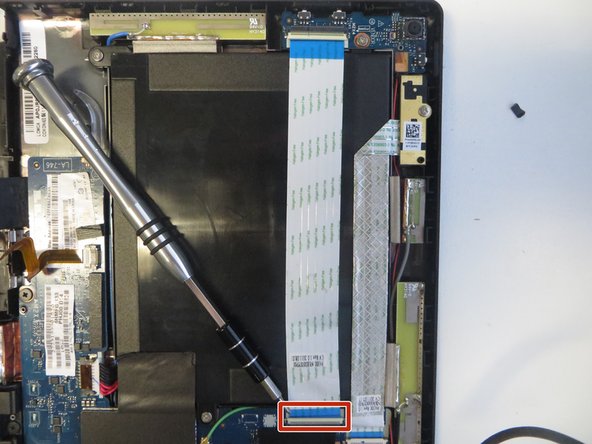
Step 6


You’ll likely find some tape covering the connector, so take a moment to carefully remove it.
– Time to disconnect that last ribbon connector! Use your trusty fingernails to grip the ends and gently pull it to the left. Easy does it!
Step 7

– You’ve made it past the first hurdle – the old screen is history!
Success!