Lenovo ThinkPad X1 Extreme Charging Port Replacement
Duration: 45 minutes
Steps: 7 Steps
Ready to tackle the challenge of replacing the charging port on your Lenovo ThinkPad X1 Extreme Generation 1? Awesome! The charging port is your gateway to keeping your device powered up, and a damaged port can leave you in the dark. Before diving in, give that port a good look for any pesky dust or debris, and try out a couple of different chargers to make sure the issue lies with the port itself. When you’re set to go, remember to power down your device first! Start by removing the battery, then gently strip away the plastic covering from the wires. And if things get tricky, don’t hesitate to schedule a repair for expert help. Let’s get your device back in action!
Step 1


First things first—cut the power and unplug your device to keep things safe and smooth before diving in!
Loosen these screws, but don’t worry about removing them completely – they’ll stay attached to the cover, nice and secure!
– Flip the laptop upside down so you’re looking at its underside, with the trackpad closest to you.
– Take a Phillips #00 screwdriver and loosen up those seven captive screws like a pro.
– Grab your trusty blue opening pick and slide it into the gap between the bottom panel and the chassis—pop off the single clip on each side. Easy peasy!
– Gently lift off the back cover and voilà, you’re inside the device.
Tools Used

Step 2


– Loosen up that 3mm screw securing the wireless adapter with a nimble Phillips #00 screwdriver — it’s about to set off on an adventure.
– Gently slide that adapter right out of its connector like it’s escaping for freedom. Easy does it!
– Now, unplug the black and gray cables by giving them a delicate tug upwards, separating them from the fan frame. Take your time; they’re not in a rush!
Tools Used
Step 3


– Flip that little black tab up and gently unhook the cable from the fan’s frame. You’re doing great!
– Now, carefully pull the cable away from the fan frame. Keep it steady!
Step 4


These screws are going nowhere—they’re designed to stay snugly attached to the fan.
– Alright, grab your trusty Philips #00 screwdriver and loosen up those five screws holding the fan to the motherboard. Nice and easy, no rush—you’re doing great!
Step 5


To track down these fans, just look for the labels ‘FANR1’ and ‘FANL2’ on the motherboard – easy peasy!
– Carefully unplug the two cables on either side of the fan. You’ve got this!
– Gently lift the fan out and bid it farewell as you remove it from the device.
Step 6

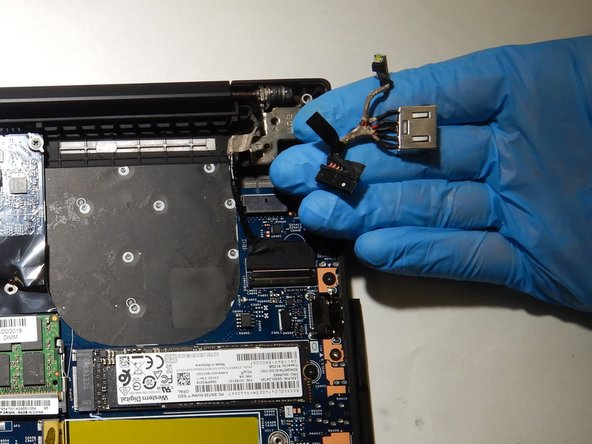
– Let’s get started by removing the two screws on the cover of the charging port using a Phillips #00 screwdriver. This is the first step in fixing your device, and it’s easier than you think!
Tools Used
Step 7

– To put everything back together, just reverse the steps and you’ll be good as new!
– If you need help or have any questions, you can always schedule a repair with Salvation Repair.
Success!