Lenovo ThinkPad X1 Extreme Hinges Replacement
Duration: 45 minutes
Steps: 7 Steps
If your laptop’s seen better days and struggles to open smoothly, don’t sweat it—it happens over time. To get to the hinges, you’ll need to remove the motherboard and battery. Don’t worry, we’ve got other guides to walk you through those steps and the warnings you should know. Let’s fix this and bring your laptop back to life!
Step 1


Pause for a moment and disconnect your device from power to kick things off safely.
These screws will loosen up but won’t jump ship—they’re clutching the cover tight. No need to yank them out, just let them do their thing.
– Flip the laptop over so it’s chillin’ bottom-up, with the trackpad closest to you for easy access.
– Grab your Phillips #00 screwdriver and unscrew those seven captive screws—time to set them free!
– Take a trusty blue opening pick, slide it into the gap between the bottom panel and the chassis, and gently pop off one clip from each side—easy does it!
– Lift off that back cover and let your device breathe!
Tools Used

Step 2

– Grab your trusty Phillips #00 screwdriver and carefully unscrew the four 4 mm screws located just above the battery. You got this!
Step 3

– Gently lift the speaker modules on either side of the battery off their pegs and carefully unwind the cable from the front of the battery. Take your time—you’re doing great!
– Move the speaker modules out of the way for now. Nice and easy!
Step 4


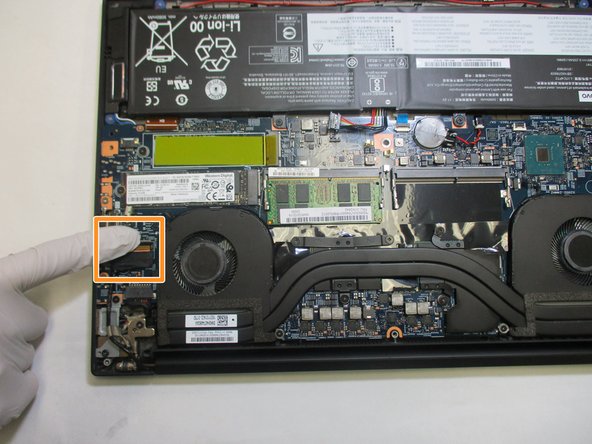
– Grab those tweezers and carefully lift off the plastic cover from the connector—steady hands win the race!
– Use a spudger or your fingernail to pop the battery straight up from the motherboard like you’re winning a mini treasure hunt.
Tools Used

Step 5

– Gently pop that battery out of its cozy frame and lift it away from the device.
Step 6


– Let’s get started! Remove the back panel and track down those connecting wires – they can be tricky to find, but you got this!
– Time to disconnect the display connections on the motherboard. Take your time, and make sure they’re completely disconnected before moving on.
– Now, grab your trusty Phillips #00 screwdriver and remove the six screws (three on each hinge) that are holding the hinges in place on the main chassis. You’re making great progress!
Tools Used
Step 7


– Start by flipping the display face up, and grab a Jimmy tool. Slide it between the display and the bezel, giving it a little wiggle and pry around the edges until the bezel pops off like a champ!
– Next up, grab your trusty Phillips #1 screwdriver and unscrew the first two visible 1.2 mm screws. Once those are out, gently peel back the adhesive to uncover the sneaky third screw hiding underneath.
– Now, it’s time to lift the hinges up and off the display. You’ve got this!
Tools Used

Success!