Lenovo Y410P LCD Replacement
Duration: 45 minutes
Steps: 12 Steps
Got a cracked or busted LCD? Don’t stress, we’ve got you covered. Follow this guide to swap out your damaged screen and get your device looking as good as new. If you run into trouble, don’t hesitate to schedule a repair.
Step 1


– Unscrew those eight M2.5 x 8mm Phillips head screws with your trusty Phillips #0 screwdriver, right in the spots we’ve highlighted for you.
– Carefully lift off the bottom cover and set it aside like a pro.
Tools Used

Step 2


Handle that hard drive with care, my friend! A little bump and it could send your precious data packing. Keep it safe and sound!
– Grab your trusty Phillips #0 screwdriver and unscrew those two M2.5x4mm screws with ease.
– Once those screws are out of the way, gently slide the hard drive out of the casing. You’re making progress!
Tools Used
Step 3


– Turn the laptop over so the bottom is facing up. Give that optical drive release lever a gentle tug back and slide the optical drive right out. Easy peasy!
– Now, let’s get those screws out! Unscrew the three M2x3mm Phillips head screws that we’ve highlighted for you.
– At the front edge of your laptop, let’s free up the SD card holder by pressing on the card. This little step will pave the way for more disassembly in the upcoming antics!
Step 4


– Grab your Phillips #00 screwdriver and confidently take out those two M2.5 x 6mm screws—easy peasy!
– Gently unhook the two WiFi antenna cables—like unplugging a cool pair of headphones.
– Detach the sound connector with a smooth move—you’re practically a repair ninja!
Step 5

Take it easy with that ribbon cable when popping off the keyboard—it’s still hanging on for dear life!
– Alright, let’s get this party started! Open up that laptop hinge and give it a little tip-tap onto its side. Now, grab your trusty screwdriver and use the back end to gently nudge the keyboard out from the optical drive area. Easy peasy!
– Now, flip that laptop back to its rightful position and start prying the keyboard up slowly. Take your time until it’s completely free from the case – you got this!
– Time to detach those pesky ribbon cables! Just open the indicated latches with care and they’ll come right off. Smooth sailing ahead!
Step 6


Carefully lift the palm rest, but don’t go all the way! There’s a sneaky ribbon cable still hanging out underneath, so keep it attached while you work your magic.
– Gently release the ribbon cables by lifting the designated latches.
– Flip your laptop upside down and use a Phillips #0 screwdriver to take out the M2.5x8mm screw.
– Lay the laptop on its side and carefully separate the bottom from the top.
– Detach the ribbon cable by lifting its corresponding latch.
Tools Used
Step 7


– Gently disconnect the specified cable perched on top of the motherboard.
– Time to flip your laptop over and carefully unhook the specified cables.
– Using a Phillips #0 screwdriver, unscrew those two M2.5x4mm screws with a steady hand.
– Now, with a bit of finesse, lift out the motherboard using your hands.
Tools Used
Step 8

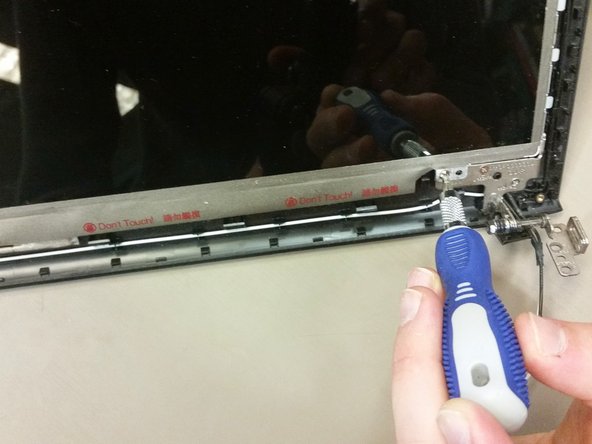
– Pop off the LCD assembly by unscrewing four M2.5x4mm Phillips screws—two on each side. It’s just a little twist and shout!
– Gently pull the LCD assembly away from the main frame like you’re peeling a sticker—slow and steady does it!
Step 9

– Grab a flat head screwdriver and gently wedge out the two sneaky plastic tabs to expose the screws hiding beneath.
– Switch to a #0 Phillips screwdriver and carefully unscrew the two silver M2.5x4mm screws—just like opening a tiny treasure chest.
– One tab is hanging out in the bottom left corner, and its twin is chilling in the bottom right. Perfect symmetry, like a well-rehearsed dance routine.
– Those screws? They’re right under the plastic tabs you just liberated. No surprises here!
Step 10


– Pop off the latches at each bottom corner—they’re hiding right beneath the screws you just removed. Sneaky little things!
– Slide your fingers into the edge of the bezel and gently pull it away from the back cover. Keep pulling until one side pops loose. Feels kinda satisfying, right?
– Now, use the same pulling method to release all the remaining sides of the bezel. You’ve got this!
– Start at one corner and work your way around—be thorough and make sure the bezel is completely separated from the back cover.
– When it’s fully loosened, take the bezel off entirely from both the LCD screen and back cover. High-five—you’re crushing this repair!
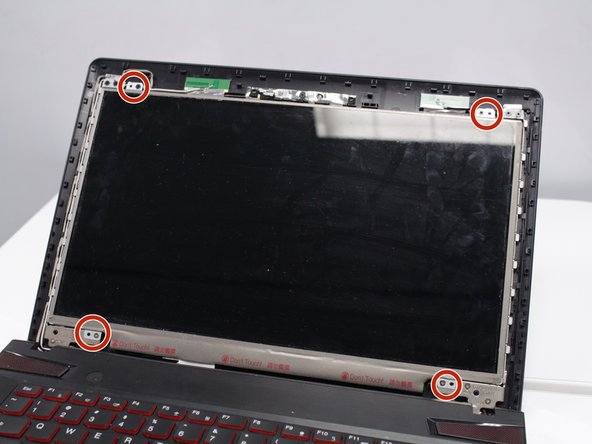
Step 11

– Let’s get started by removing the four M2.5x4mm Phillips screws, one at each corner. Grab your screwdriver and get ready to kick off this repair!
Step 12

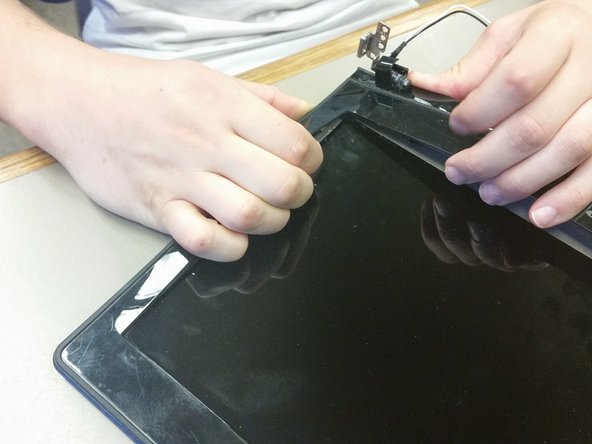
– Carefully lift up the LCD screen and flip it over like you’re turning a page in your favorite book.
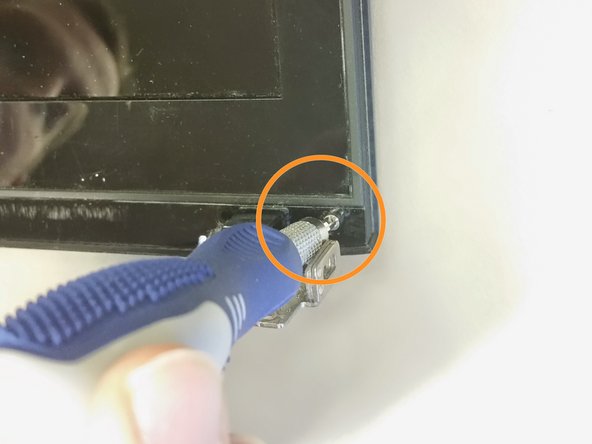
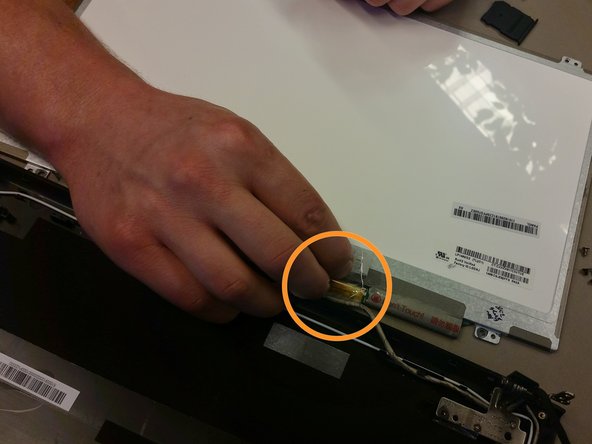
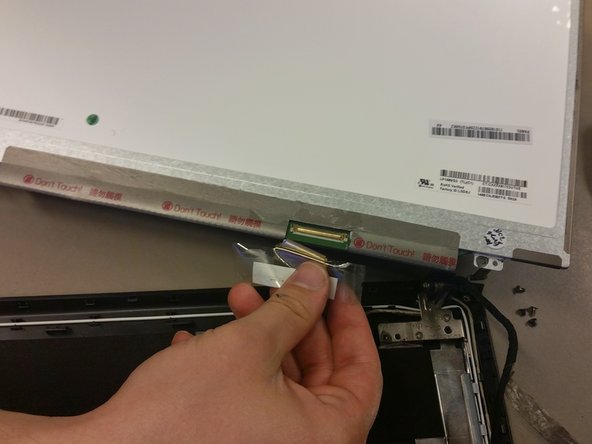
– Check out the back of the LCD screen and find the protective tape chilling in the bottom right corner. Peel that tape off to reveal a cool little latch with a connector cable.
– Flip that latch open so you can free the connector cable. Gently slide the cable out by pulling it downward—nice and easy!
– Congrats! The old LCD is officially unplugged. You’re now ready to get that shiny new screen installed. Let’s make it happen!
Success!