Lenovo YOGA 730-15IKB Fingerprint Reader Replacement
Duration: 45 minutes
Steps: 25 Steps
Get ready to swap out the fingerprint reader in your Lenovo YOGA 730-15IKB! This nifty little gadget is what recognizes your unique fingerprint, making it super easy for you to unlock your laptop. But before diving in, why not check out the troubleshooting page to rule out any pesky software hiccups? If your fingerprint reader is looking a bit scratched or isn’t recognizing your fingers like it used to, it might just be time for a fresh, new replacement. Let’s get started!
Step 1


Power down your computer and yank that charger plug before diving in. Safety first, repair hero!
– Flip the laptop belly-up and check out the underside—it’s go-time!
– Unscrew the ten 7mm T5 Torx screws and set ’em aside where they won’t play hide-and-seek.
Step 2


– Gently lift the bottom cover using your trusty opening tool.
– Begin at the front edge and smoothly work your way along the sides.
Step 3

– Lift the bottom cover up and gently pop it away from the back hinges. Keep it smooth and steady—you’ve got this!
Step 4

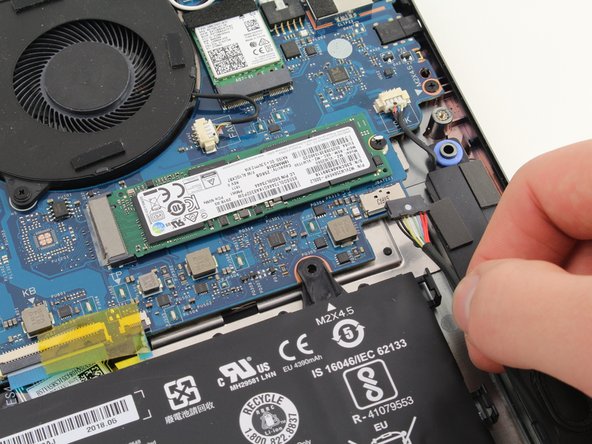
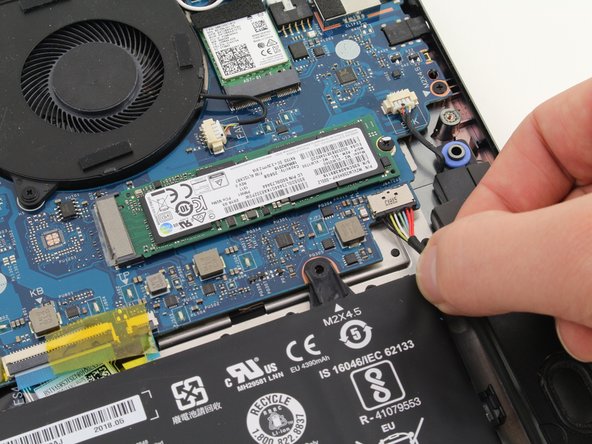
Keep it cool—pull alongside the battery, not straight up!
Carefully wiggle out the cable—those tiny, delicate wires on the connector have no chill and deserve all your patience!
– Gently detach the battery from the motherboard by carefully pulling on the battery cable with your fingers or a trusty pair of tweezers. You’ve got this!
Step 5


– Let’s get those four 4mm Phillips #1 screws out of there and free the battery!
Step 6

Handle the battery with care! Touching the terminal could give you an unexpected jolt, and puncturing it might lead to a fiery situation. Stay cool and stay safe!
– Gently lift the battery up and pop it out of the chassis like a pro.
Step 7

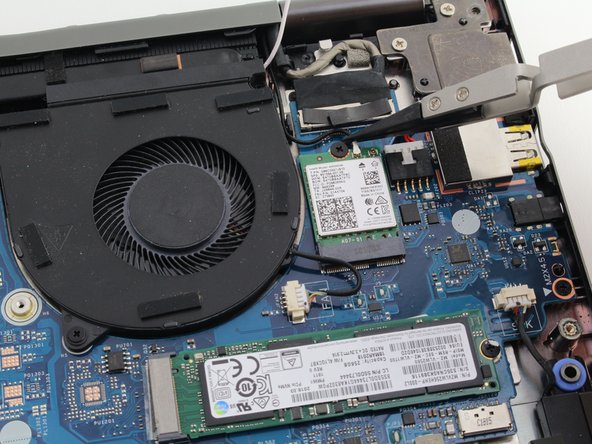
When your laptop is flipped over, you’ll find the left fan cozying up on the right side, right next to the wireless card and the SSD.
– Lift the black and white antenna wires gently out of the groove on the right side of the fan, like you’re freeing some tiny adventurers from a snug hideout.
Step 8


– Time to free the fan cable! Gently pull the wire toward the right side of the laptop, giving it a little wiggle to loosen it up.
– If it’s being stubborn, use the white tabs on the connector to give the cable a nudge and release it.
Step 9


– Unscrew those two 4mm Phillips #1 screws and let’s get this party started!
Step 10

– Lift the fan gently upward and guide it toward the front of the laptop with a smooth motion.
Step 11

Flip that laptop upside down, and you’ll find the right fan hanging out on the left side, chilling near the big metal RAM cover. Easy peasy.
– Unplug the fan cable by gently pulling it toward the back of the laptop. A little wiggle action helps break it free.
– Need a hand? Use the white tabs on the connector to nudge the cable loose—it’s like giving it a friendly push!
Step 12


– Take out the two 4mm Phillips #1 screws like a pro. You got this!
Step 13

– Lift the fan gently and slide it towards the front of the laptop. You’ve got this!
Step 14

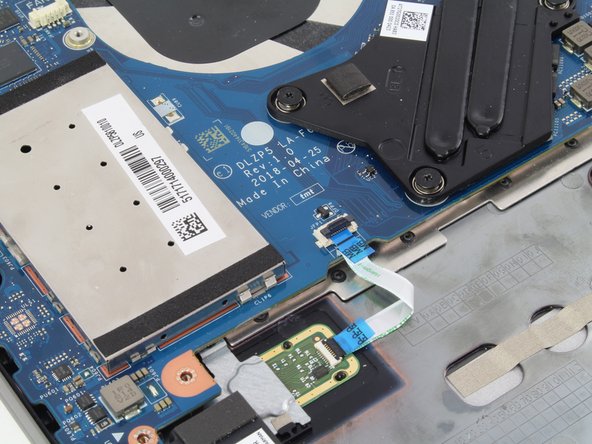

– Let’s get started! First, locate the fingerprint reader ribbon cable at the bottom left of the motherboard and gently remove it.
– Next, find the black tab on the connector and give it a little pull upwards – it’s like a secret handshake!
– The ribbon cable should now come out of the connector with ease, and you’ll be one step closer to fixing your device. Nice work!
Step 15
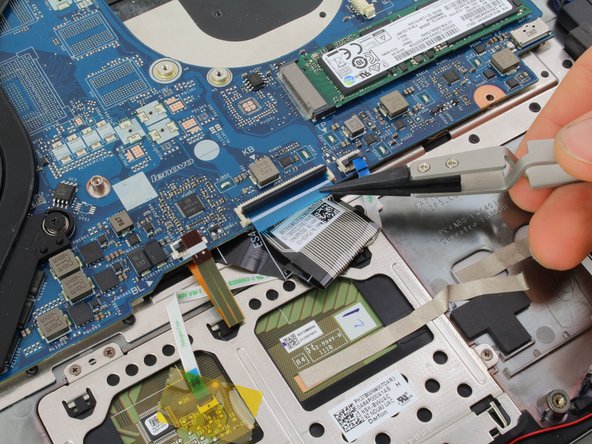

– Let’s get those ribbon cables off the motherboard! Start by gently removing the three ribbon cables located at the lower edge.
– For each cable, just lift the black tab on the connector—it’s as easy as pie!
– Now, the ribbon cables should slide right out of the connectors without any fuss.
Step 16

Give those white tabs on the connector a little nudge to pop the cable out with ease.
– Gently pull the speaker cable towards the front of the laptop to disconnect it. You’ve got this!
Step 17

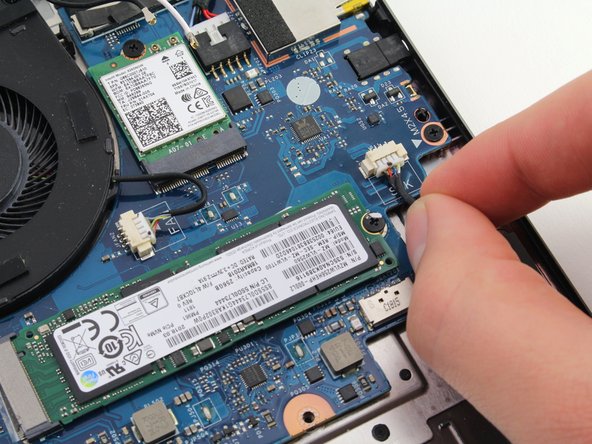
– Peel off that sticky tape from the top of the wireless card—like you’re unwrapping a gift!
Step 18

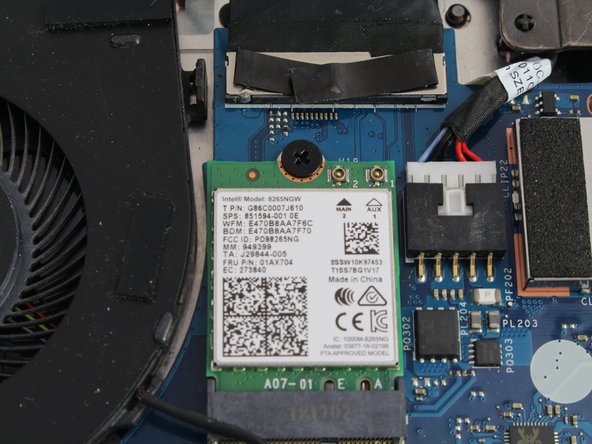
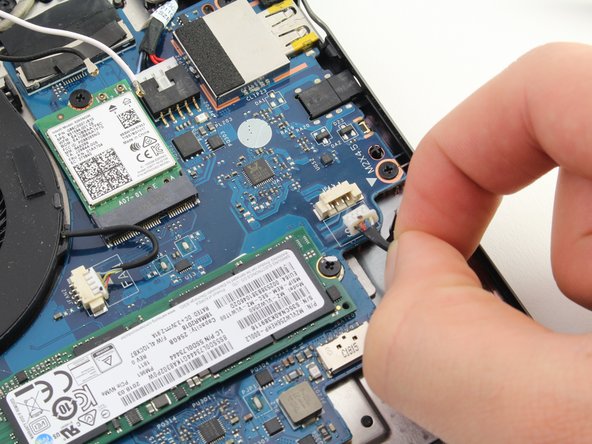
– Carefully pop the black and white antenna wires off the wireless card—don’t be shy, they’ll come off.
– When putting it back together, the white wire hooks up to the right terminal marked ‘1,’ and the black wire clicks into the left terminal marked ‘2.’ Simple as that!
Step 19
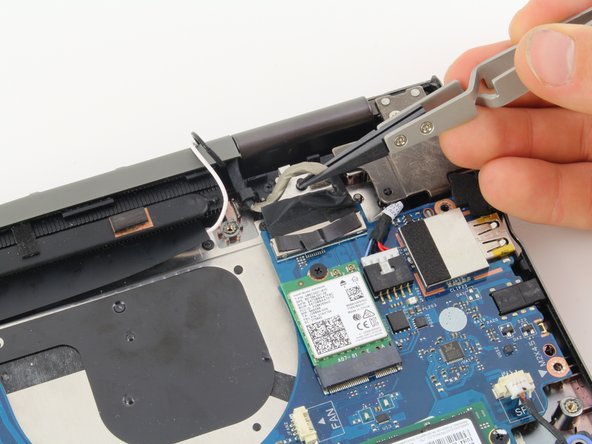

– Gently lift the thick gray display cable near the back of the laptop—it’s like giving it a little encouragement to let go—and disconnect the display.
Step 20


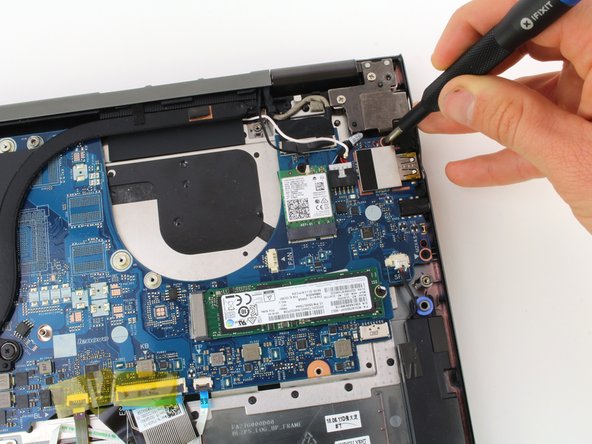
Removing the cable might need a little oomph—just be careful not to mess up the connector or the cable itself. You’ve got this!
The charging port hooks up to the computer via a cable that’s chillin’ at the top-left corner of the motherboard.
– Gently tug on that bundle of wires and guide it toward the back of the laptop like you’re giving it a little nudge to move along.
Step 21

– Take out those four 4mm Phillips #1 screws—easy peasy, just a quick unscrew, and you’re good to go!
Step 22

When you’re swapping out the motherboard, don’t forget to carefully remove the SSD, wireless card, heat sink, and any extra RAM. These trusty components need to hitch a ride to their new home on the replacement motherboard.
– Carefully lift the motherboard out of the laptop chassis—like you’re gently picking up a sleeping baby bird.
Step 23
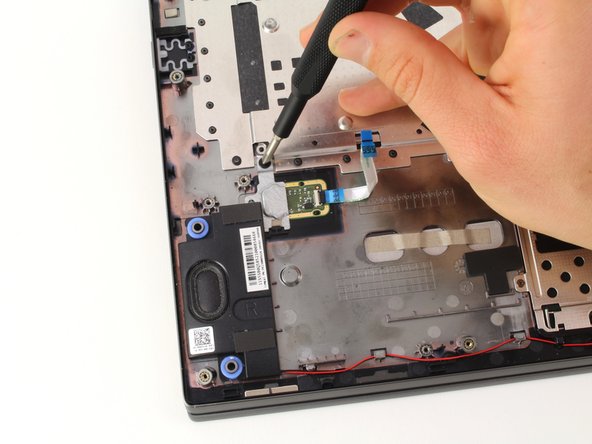

– Unscrew the single 2mm Phillips #1 screw—yeah, the tiny one that’s giving you the side-eye.
Step 24

Hang onto the ribbon—just in case the new fingerprint reader doesn’t come with one to connect to the motherboard. Better safe than sorry!
– Gently lift off the tiny metal plate sitting above the reader. You’ve got this!
Step 25

– Gently lift the fingerprint reader out of the chassis, as if you’re giving it a little lift-off. It should come free without too much effort!
Success!