Lenovo Yoga 920-13IKB Motherboard Replacement
Duration: 45 minutes
Steps: 12 Steps
Ready to swap out that motherboard in your Lenovo Yoga 920-13IKB? This guide will walk you through the process step by step, making it as smooth as possible. Grab your tools, stay focused, and let’s make this repair happen!
Step 1


Flip your device over and scope out the screws holding down the back cover. Time to get unscrewed!
– Let’s get started! Remove the ten 5mm Torx T5 screws from the back cover to loosen it up. This is the first step in getting inside and fixing your device.
Step 2


– Sneak the opening tool under the back cover—it’s your best bud for lifting stubborn covers. Just wiggle it gently, and let it do the heavy lifting!
– Grab the cover and give it a little upward tug to unhook that pesky tab in the center. It’s like releasing a tiny latch—easy peasy!
Tools Used

Step 3


– Unscrew those twelve 5mm Phillips #00 screws holding the motherboard down—think of it as setting your motherboard free!
Step 4


– Gently lift up the ten flat connectors that are keeping the motherboard in place using the iFixit Opening Tool to set the motherboard free. You’ve got this!
Tools Used
Step 5


– Gently pull out the ribbon cables from the opened connectors using tweezers to give that motherboard some breathing room.
Tools Used

Step 6
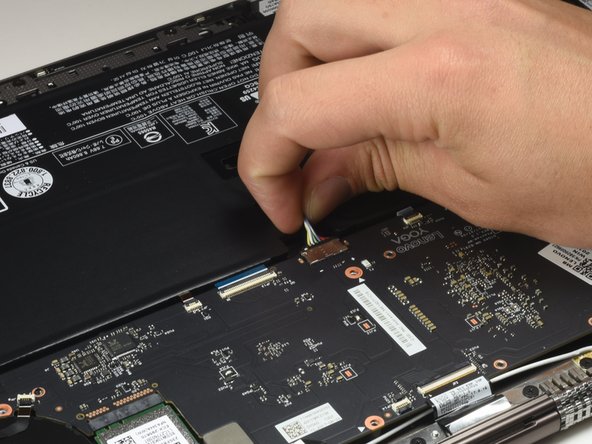

– Gently unplug the battery by sliding the ribbon cable bundle out of the top of the motherboard. You’ve got this—be careful and take your time!
Step 7


– Use your trusty tweezers to carefully detach the red and black wires from the motherboard. Take it slow, and remember – a steady hand makes for a smoother fix!
Tools Used
Step 8


Don’t yank the motherboard all the way out just yet! Make sure to disconnect the green AC card first. We want to avoid any accidental damage!
– Lift that motherboard nice and parallel to the hinge—take it slow and steady!
– Ease it out from the USB-C and audio jack port cutouts—gentle is the name of the game—freeing the motherboard from the device casing.
Step 9

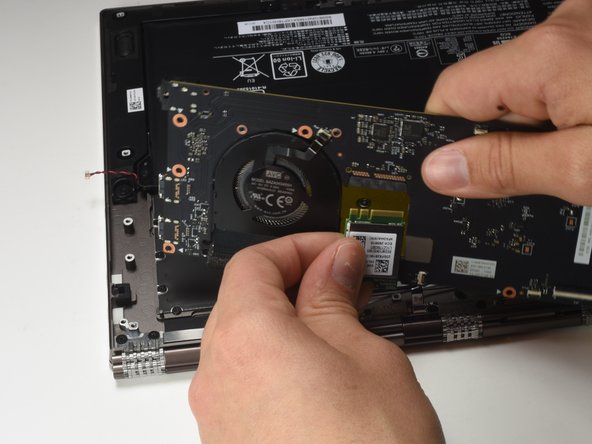

– Carefully unplug the green AC card from the motherboard by gripping it firmly and giving it a steady pull. No tools needed—just your trusty hands!
Step 10

– Flip the motherboard over so you can get to the backside. Trust us, the adventure gets even cooler from here.
Step 11


The screws stay with the speaker when you pop it off the motherboard—no escape attempts here!
– Grab your screwdriver and take out the four 3mm JIS #00 screws. Easy does it!
– Now, remove the single 3mm Phillips #00 screw with your trusty screwdriver. Almost there!
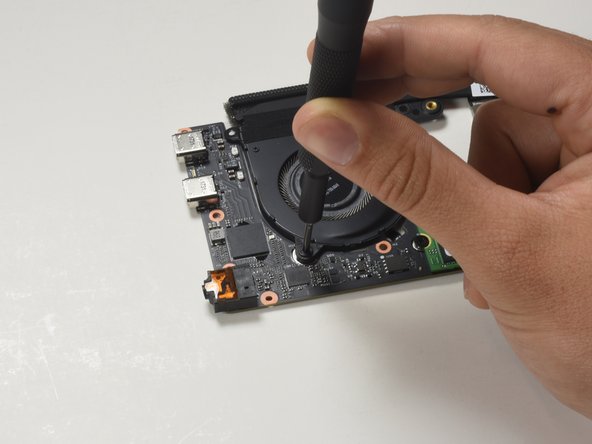
Step 12

– Disconnect the fans from the motherboard to prepare for their replacement. Let’s make this swap smooth and easy!
Success!