Lenovo Yoga Tab 3 10 LCD Replacement
Duration: 45 minutes
Steps: 8 Steps
Before diving in, make sure you have the right replacement screen. Pinpoint your tablet’s exact model name—head to “About the tablet” at the bottom of the Android settings app for the details. Hunt down the part online and stick to reputable sellers for your purchase.
Step 1

– Pop open that built-in kickstand like a pro—easy does it!
Step 2


– First, let’s get started by removing the sticker under the built-in kickstand – it’s hiding two tiny 0.75 mm screws!
– Next up, take off the microSD card slot cover and gently remove any microSD card that’s inserted.
– Now, grab your trusty Phillips head screwdriver and remove the three 0.75 mm screws. You’re making great progress!
Step 3


You’re gonna need a bit of muscle to pop off those small plastic braces holding the backplate onto the device. Hang in there—you’re crushing it!
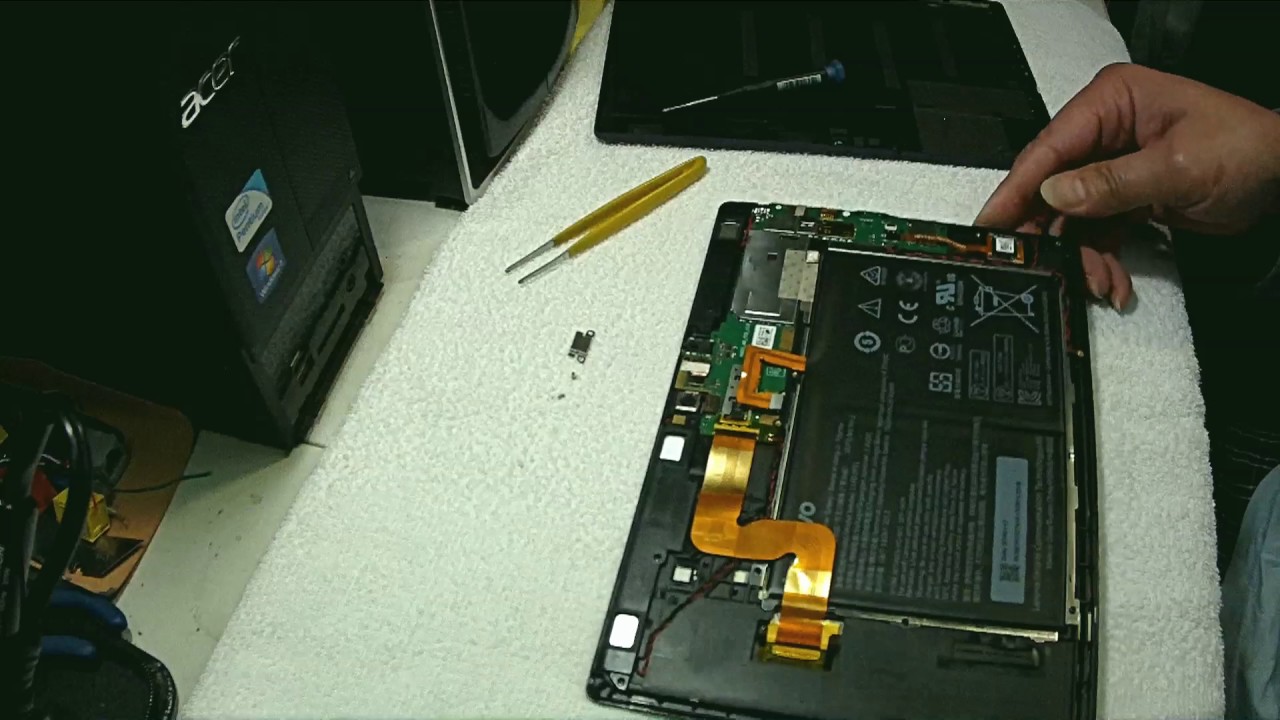
– Get started by turning your device around so the screen is facing you – let’s get this repair party started!
– Now, carefully slide the spudger into the gap between the screen and the back cover. Gently pry the back cover away from the device frame – it’s like opening a little door!
– Keep working your way around the edge of the device, using the spudger to release the backplate from the frame. You’re making great progress!
Step 4

– Before you start, take a sec to remove the two tiny screws at the top left (check the red bordered area in the photo). Next, carefully take off the metal shield and disconnect the battery wire. This will get you started on the right foot!
Step 5
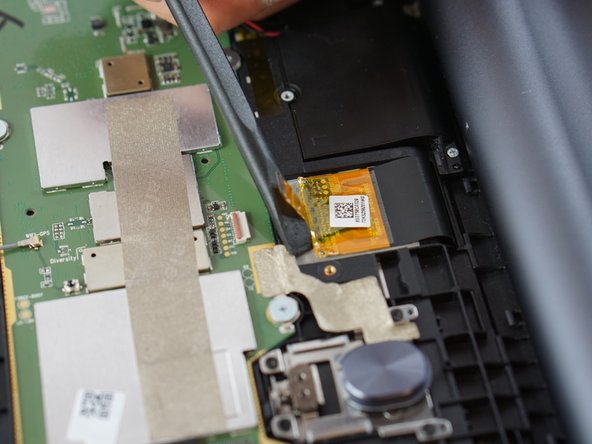

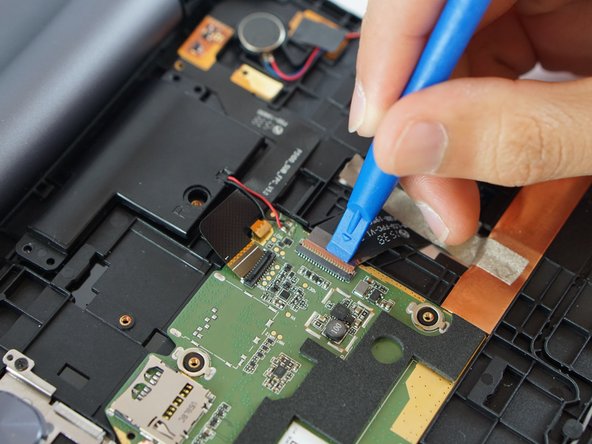
Get ready for a slightly tricky part! This ribbon connection can be a bit stubborn to remove from the casing, so take your time and be gentle during the process.
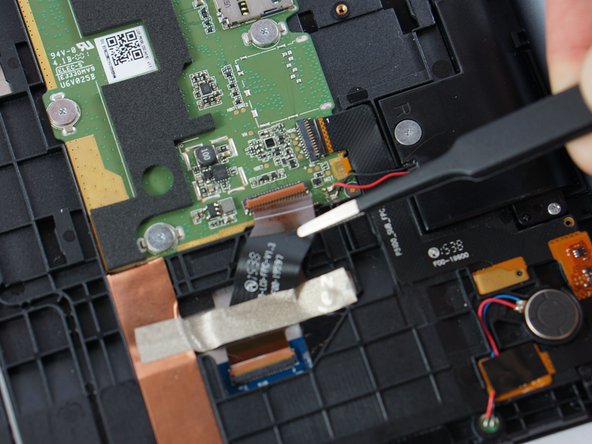
Take a peek at your new LCD to see if it comes with a fresh ribbon cable (that’s the black one in the second photo). If not, don’t worry! You’ll just need to carefully peel up the tape holding it in place and disconnect it from the LCD end instead of the motherboard end.
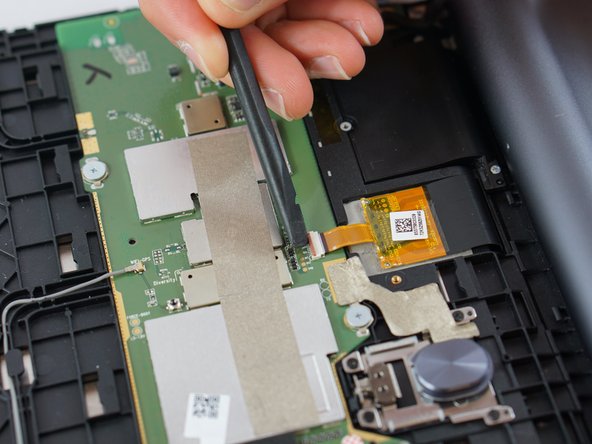
– Gently grab your tweezers and flip up the locking flaps to free those ribbon cables for the LCD and digitizer (you might remember them from the blue-bordered areas in the previous step’s pic). Easy peasy!
– Now, with your trusty spudger, carefully lift up the shiny, gold-toned base from the adhesive. Take your time and let it release like it’s meant to.
Tools Used

Step 6

Protect those peepers with some safety glasses and be gentle with that LCD screen – we want it to stay in one piece!
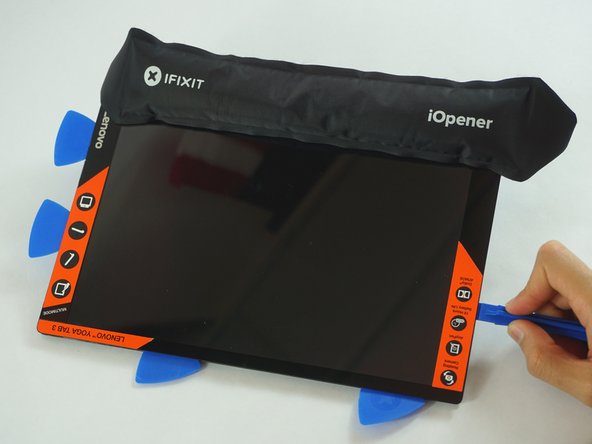
Heat things up just enough to loosen the sticky stuff around the edges—steer clear of the LCD, though!
– Grab the iOpener and cozy it up to the sides of your device to loosen up the sticky stuff holding it together.
Tools Used

Step 7
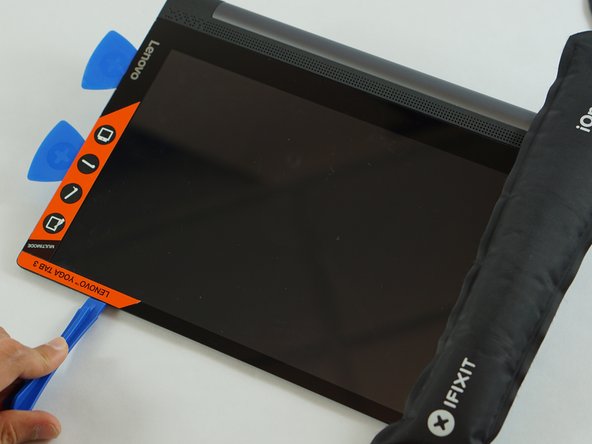

Take it easy and keep it gentle—too much force or pressure here could mess up the fragile glass panel or the LCD beneath. Slow and steady wins the repair race!
– Grab those plastic opening tools and gently work your way around the screen to separate it from the device. A little patience goes a long way here, so take your time and don’t rush it.
Step 8

Take your time when detaching the screen; it might still be clinging on with some adhesive, so patience is key!
– Gently lift the screen away from the device, like you’re opening a treasure chest, but with care.
– Be sure the cable ribbon makes it through safely—think of it like a secret mission, and the ribbon is your undercover agent.
Success!