Lexibook Junior Tablet Motherboard Replacement
Duration: 45 minutes
Steps: 9 Steps
Ready to give your Lexibook Junior tablet a fresh start? This guide walks you through replacing the motherboard, the heart of your device. Before diving in, remember: first things first – you’ll need to remove the battery. Let’s get this tablet back to its prime!
Step 1

Power down your device before diving in—let’s keep those sparks flying only in your personality, not your tech!
– Flip the device so the screen is chilling face-down. Grab that metal spudger and pop off the small rubber circles from all four corners. Voilà, screws unveiled!
– Now, use the same trusty spudger to pry up that slim, sneaky rubber rectangle on the back of the device. Surprise! More screws waiting to be freed.
Tools Used


Step 2

– Grab your trusty Phillips #00 screwdriver and unscrew those four 6.8mm screws sitting pretty at the corners of your device.
– Still rocking that same screwdriver? Great! Now, let’s tackle the three sneaky screws hiding behind the rubber rectangle. Remember, these little guys won’t be leaving the device, so don’t worry about them wandering off.
– Now, take a plastic opening tool and gently coax the back panel of the tablet open. Be gentle, and it will reward you with access!
Tools Used

Step 3

Take your time and be gentle with the battery and metal plate. A nylon spudger is your best friend here, so stick with that. Patience is key—slow and steady will get you the best results!
– Gently slide the nylon spudger under the battery and lift it out with a little finesse. It should come off without too much drama.
Tools Used
Step 4

Need some soldering savvy? Check out our Soldering Guide for some expert tips and tricks to get you started!
– Grab your soldering iron and carefully free the battery from the motherboard—take it slow and steady for a smooth removal.
Tools Used

Step 5


– Grab your trusty plastic opening tool and nudge those two little black-and-white switches outward toward the ribbon wires—don’t be shy, give them a gentle push!
– Take it slow and steady as you slide the ribbon wire out of the switch—it’s like setting it free from a tiny mechanical hug.
Step 6

– Using the plastic opening tool, nudge the larger black-and-white strip upward—it’s leading to a ribbon wire, so be gentle!
– Now, carefully slide that ribbon wire out of the switch. No yanking—smooth and steady wins the race.
Step 7
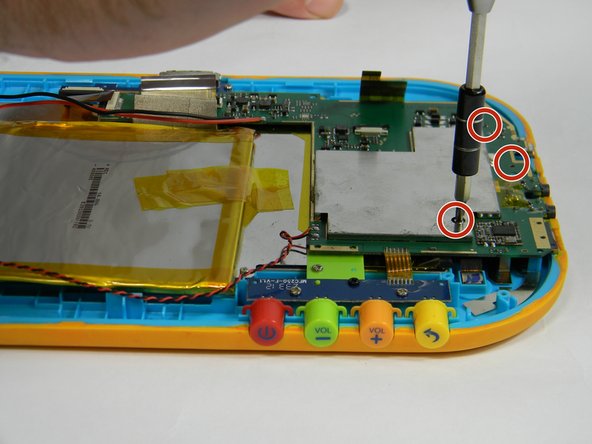

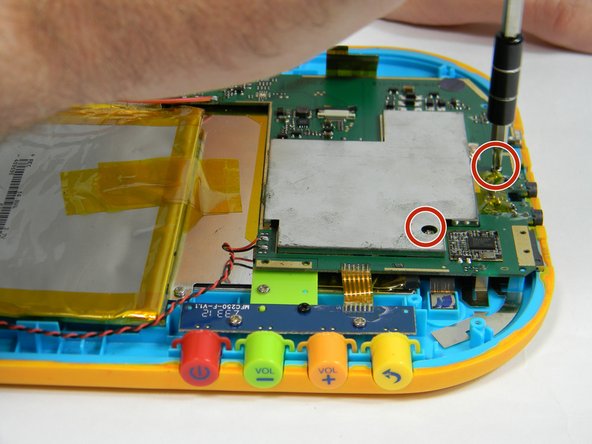
– Grab your trusty PH00 Phillips screwdriver and remove the five 4 mm screws hanging out around the edge of the motherboard.
Step 8
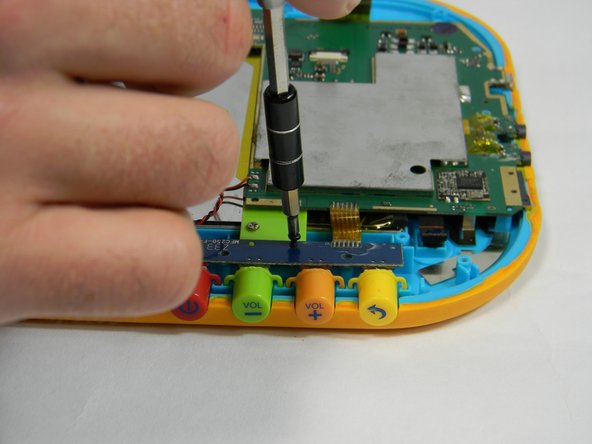

– Let’s get that button board out! Remove it by unscrewing two 4 mm screws and one 6.5 mm screw. Easy peasy!
Step 9

Need a crash course on soldering? Swing by the Soldering Guide for all the basics and a few pro tips.
– You made it! To get your device back in working order, just reverse the steps you followed to take it apart.
– If you need help or have any questions, you can always schedule a repair
Success!
