LexiBook Tablet One LCD / Digitizer Replacement
Duration: 45 minutes
Steps: 13 Steps
Getting that LCD and Digitizer back in place so everything works smoothly is totally doable! You’ll need a couple of prying tools and a screwdriver to make sure everything clicks into place. No sweat—just follow along, and if you hit a tough spot, you can always schedule a repair.
Step 1


Be careful when opening the device – you don’t want to damage the speaker or, worse, the motherboard. Let’s take it one step at a time and get this repair done smoothly!
The clips keeping the case snug are spaced about 1.5 inches apart—be gentle, but don’t be shy about popping them loose!
– Alright, let’s get this party started by opening up the case! Grab your trusty blue plastic opening tool and slide it into the gap where the two casings meet. Gently pry upwards until you hear that satisfying pop of a clip releasing. Now, carefully work your way around the device, repeating this motion until the front and back casings are fully apart. You’ve got this!
Step 2


Watch out for those speaker wires! They have a knack for getting a bit too cozy and may decide to part ways with both the speaker and the board. Keep an eye on them as you go!
– Gently work the spudger between the speaker and the case. Once it’s in there, give it a little pry upwards, and the speaker should pop right out. Set it aside, and you’re one step closer!
Tools Used

Step 3

It might feel like you’re really pushing hard here, but don’t worry, that’s just the strong adhesive doing its thing. As long as you’re careful and keep the tool steady—no tilting or poking the battery or LCD—you’ll be just fine!
– Time to get that battery out! Use your trusty spudger to carefully pry between the battery and the LCD screen. Work your way around the battery until it’s free from its sticky situation. Don’t worry if it takes a bit of wiggling – you got this!
Tools Used
Step 4


– Time to get that battery circuit board unleashed! You’ll notice two pieces of tape holding things in place – one folded over the side and another wrapped snugly around the circuit board. Gently peel both off, and you’re one step closer to getting your device up and running again.
Step 5

Soldering made simple! This guide will walk you through using a soldering gun to fix your tech, step by step. If you ever get stuck or need a hand, don’t hesitate to schedule a repair.
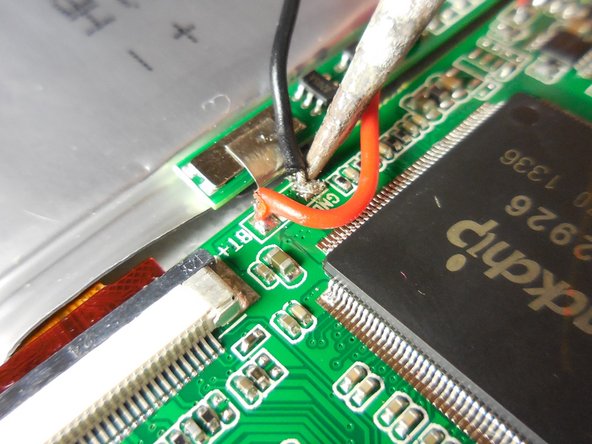
– Alright, the battery is free, and the tape is gone! Now, you should have some wiggle room for the wires. Take a deep breath and get comfortable—it’s time to carefully unsolder those connections from the motherboard.
Step 6

Watch out! The speaker wires might be having a little too much fun under the tape, so be gentle and make sure they stay connected to the motherboard.
– Peel off the tape from these ribbon cables and unclip them gently. You’re almost there, just a couple more steps to go!
Step 7

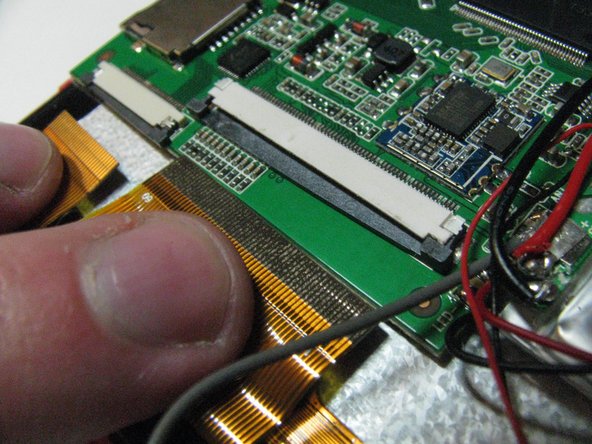
– Gently detach the LCD and Digitizer ribbon cables from the motherboard by keeping those clips open and carefully pulling the ribbons free.
Step 8

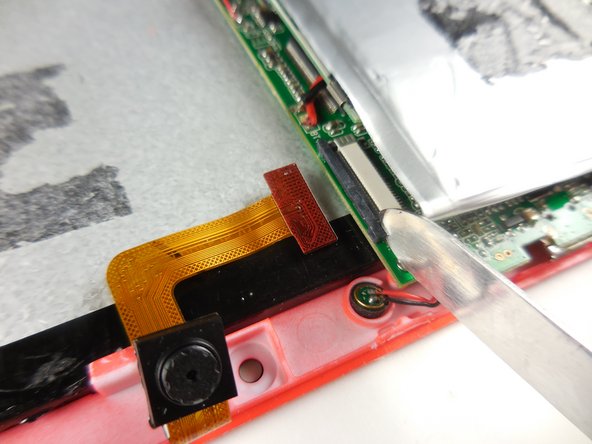
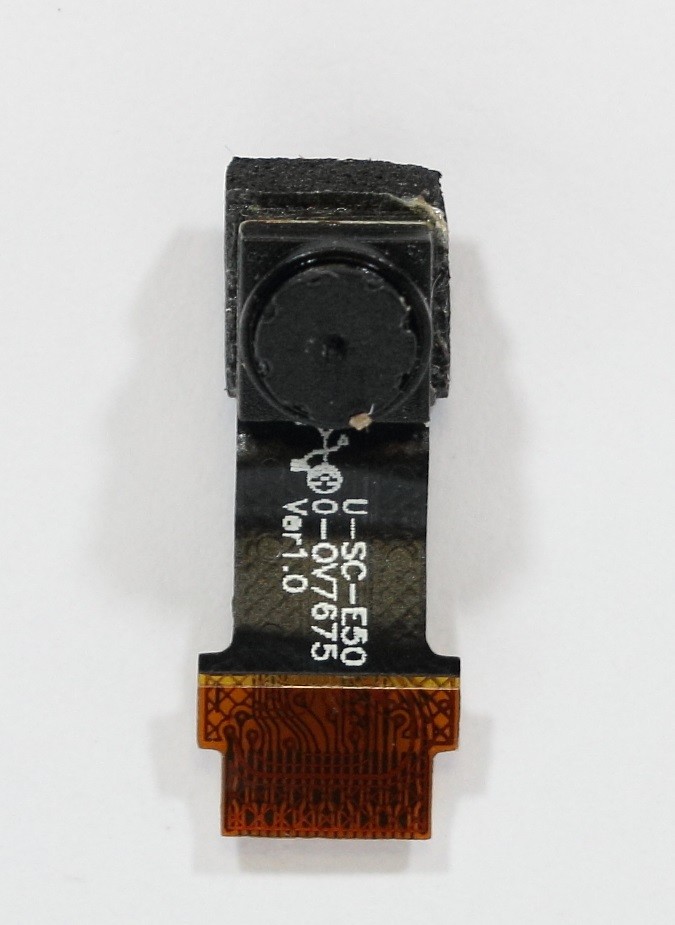
– Gently pop open the clip and slide the camera ribbon cable out. It’s like a smooth, easy break-up—just a little pull and you’re done!
Step 9

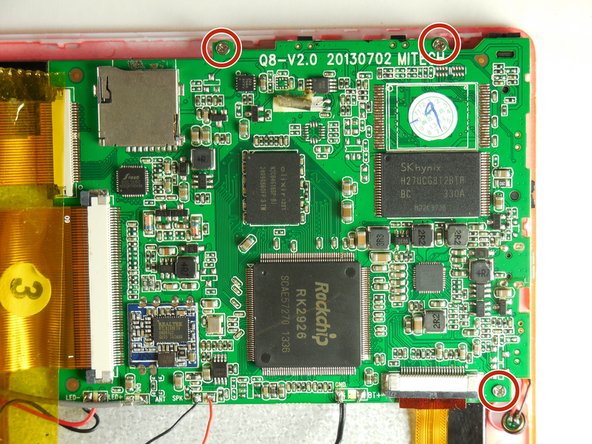
A 3/16 in. Phillips head screwdriver will slip right into those screw heads without a hitch.
These are the only three screws in the device, and they’re all the same size – no need to worry about mixing them up!
– Grab your trusty screwdriver and go ahead and unscrew those 3 little screws that are keeping the motherboard snug in its case. You’ve got this!
Step 10

How to Solder is your go-to guide for mastering the art of using a soldering gun. Let’s get those connections sizzling!
– Alright, grab your soldering kit and let’s carefully unhook those motherboard connections.
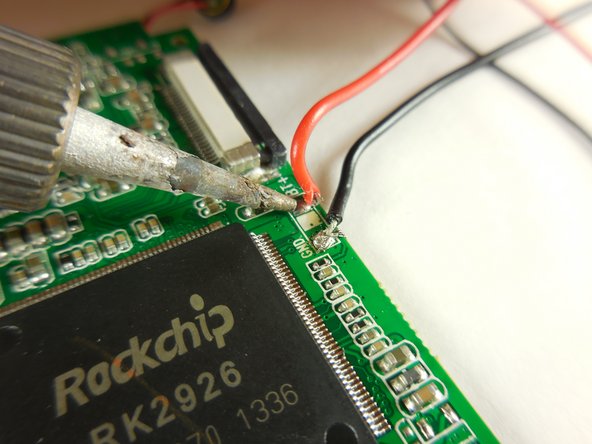
– Detach the battery wires. (If you didn’t already tackle this earlier, now’s your moment!)
– Unclip the speaker wires—it’s easier than it sounds!
– Disconnect the ground wire. Stay steady, you’ve got this!
– Remove the LCD wires. Take it slow and steady.
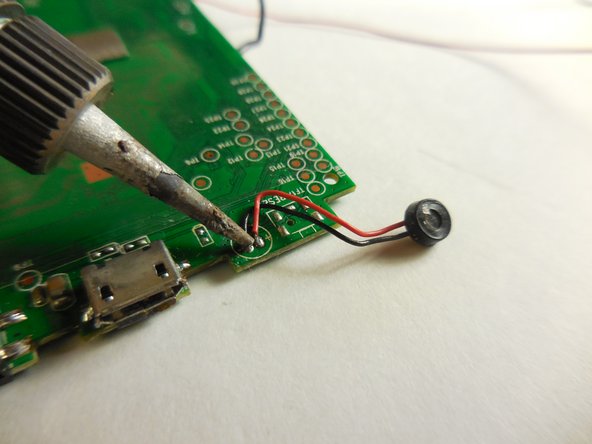
– Lastly, gently free up the microphone tucked under the board. You’re doing great!
Step 11

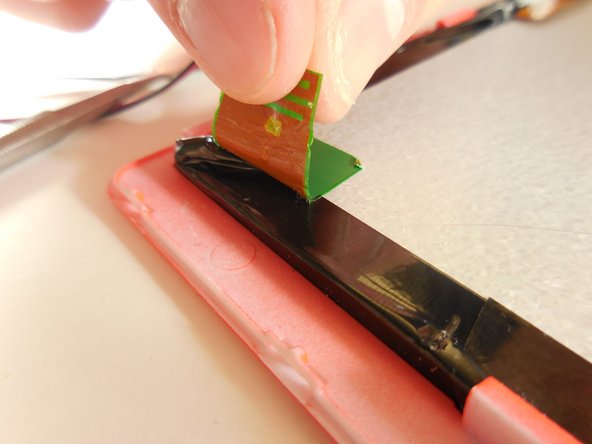
Be gentle with that tape – don’t yank it all the way off just yet!
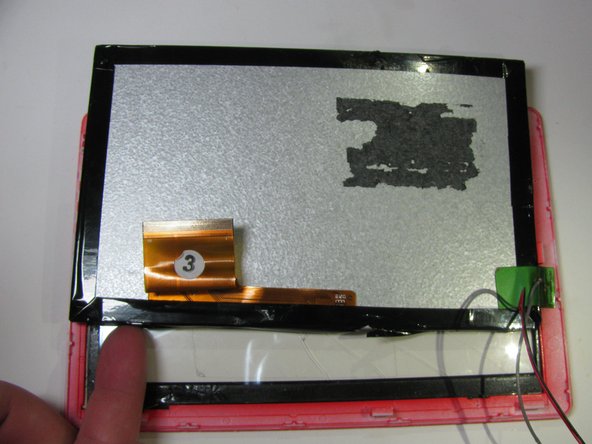
– Look for the green grounding tape in the bottom left corner of the LCD. Grab a spudger and gently slide it between the casing and the tape. Carefully lift it up, and then peel the tape away. Easy does it!
Tools Used
Step 12

– Carefully pop the LCD out of the clips on one side. Then, with a smooth sideways move, slide it free.
Step 13

– To put your device back together, just retrace these steps in reverse—easy as pie!
– If you need help, you can always schedule a repair.
Success!