LexiBook Tablet One MotherBoard Replacement
Duration: 45 minutes
Steps: 10 Steps
Let’s get that motherboard replaced! To do this, we’ll be building on the steps from other guides, so make sure you’re comfortable with the basics. If you’re feeling stuck, don’t worry – we’ve got you covered. Just follow along and we’ll have you back up and running in no time. If you need help, you can always schedule a repair.
Step 1


Take it easy while opening your device – we want to keep that speaker and motherboard safe and sound!
The clips that keep the case snug are spaced about 1.5 inches apart, so get ready to get up close and personal with your device!
– Alright, first up, let’s get this case open! Grab your trusty blue plastic opening tool and gently slide it between the two casings. Give it a little wiggle until you hear a satisfying ‘pop’ from the clip. Now, carefully work your way around the device, prying as you go. Keep it steady until the front and back casings are fully separated. You’re almost there!
Step 2


Handle the speaker wires with care! They have a knack for getting a little too cozy and might decide to part ways with both the speaker and the board.
– Gently coax the speaker out by sliding the spudger between the case and the speaker. Give it a little lift until the speaker pops out. Once it’s free, just set it aside for now.
Tools Used

Step 3

Pushing might feel like you’re wrestling with the world’s stickiest adhesive—that’s totally normal! The glue is strong, but stay steady and keep your tool flat to avoid any mishaps with the battery or LCD. Take your time, and you’re good to go!
– Grab your trusty spudger and get to work gently prying between the battery and LCD. Move methodically around the battery, applying steady pressure until it finally frees itself. Take your time—patience is your best tool here!
Tools Used
Step 4


– Time to unwrap the battery’s circuit board from its sticky situation! You’ll find not one, but two pieces of tape holding it in place – one folded over the side and another wrapped snugly around the board. Gently peel both off to set it free.
Step 5
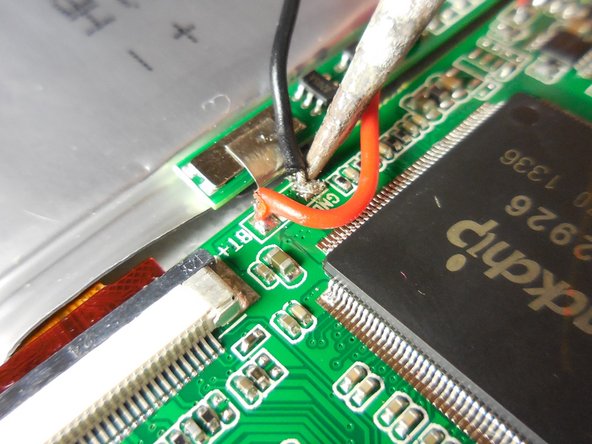

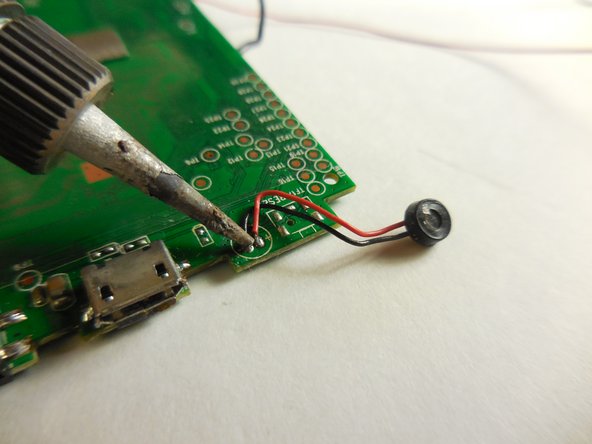
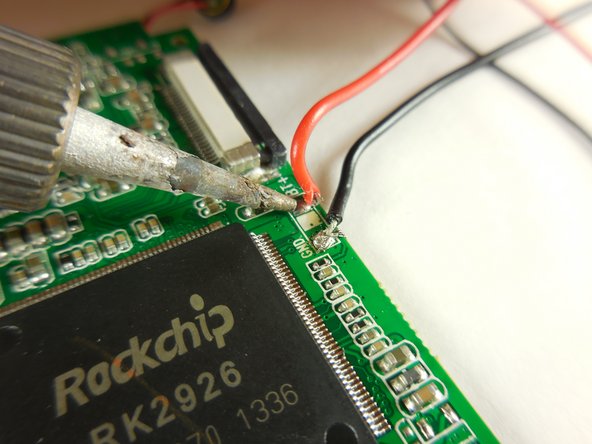
Ready to master soldering? This guide walks you through using a soldering gun step by step, making it easy and dare we say, a little fun.
– Now that you’ve managed to pry the battery free and remove the tape, it’s time to give those wires some breathing room. Take your time and make sure you’ve got enough space to work comfortably. Next, carefully solder off the connections on the motherboard. If you’re feeling stuck, just remember to take it one step at a time – and don’t hesitate to seek help if you need it.
Step 6

Heads up! The speaker wires might be hiding under the tape and could stay stuck to it—take it slow so you don’t accidentally pull them off the motherboard.
– Peel the tape off those ribbon cables and their clips with care.
Step 7

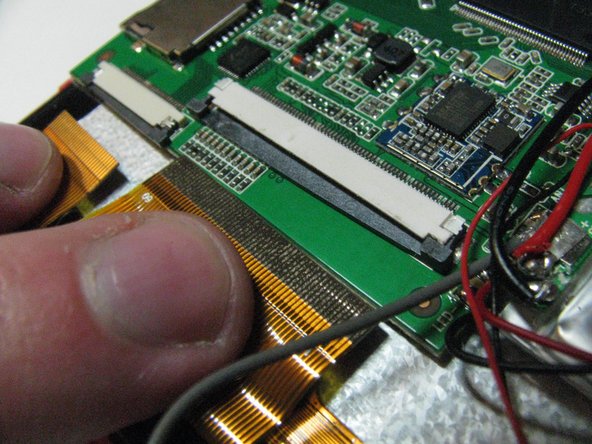
– Carefully pop open the clips and slide out those ribbon cables like a pro—just a smooth pull and you’re set!
Step 8

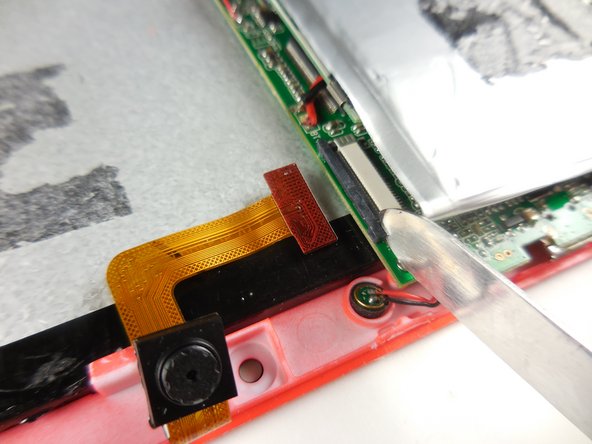
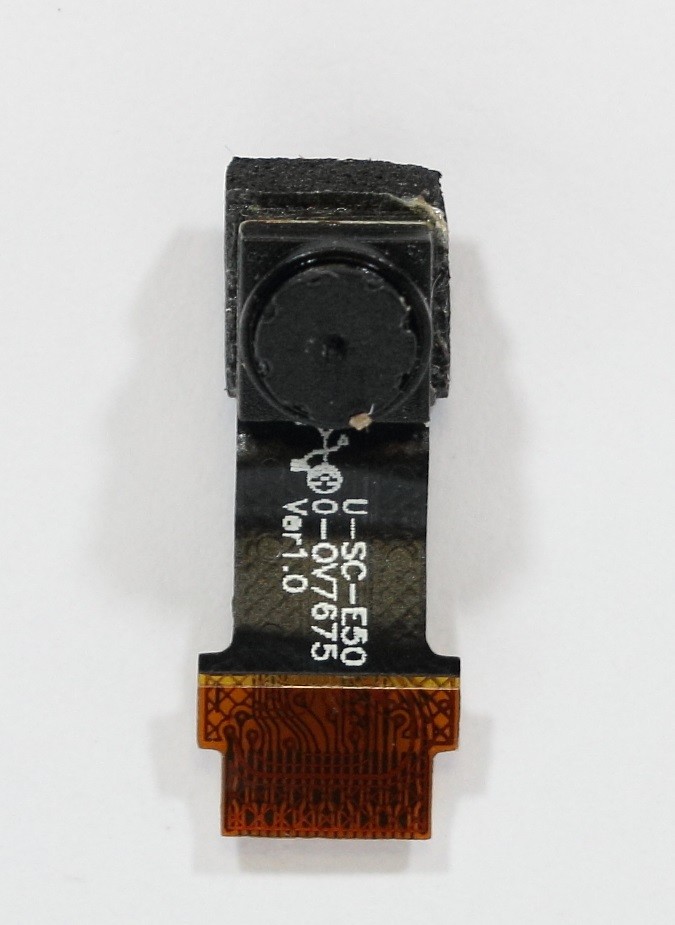
– Gently open the clip and pull the camera ribbon cable out. It’s a simple step, but make sure you go slow to avoid any unnecessary tension on the cable.
Step 9

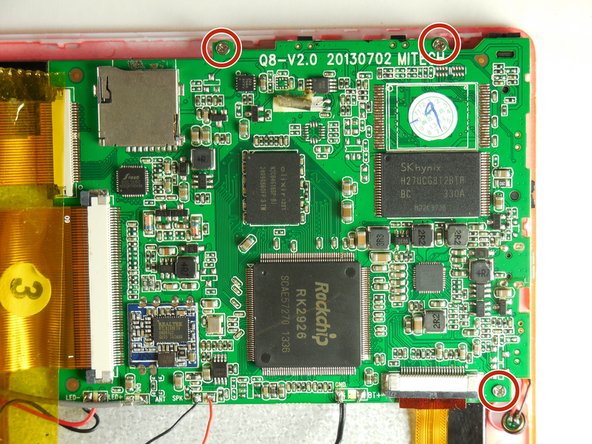
Grab yourself a 3/16 in. Phillips head screwdriver—it’s the perfect fit for these screw heads.
Good news: there are only three screws in this device, and they’re all the same size. No mix-ups, no mysteries—just a straightforward unscrew and go!
– Grab your trusty screwdriver and carefully remove the 3 screws that are keeping the motherboard snug in its case. You’ve got this!
Step 10

Soldering might sound like a tricky skill, but don’t worry, we’ve got you covered! This guide will walk you through using a soldering gun like a pro, step by step. It’s easier than it sounds, and with a little practice, you’ll be handling it with confidence. And hey, if you run into any roadblocks, remember, you can always schedule a repair to get expert help.
– You’re almost done! To get your device back in working order, just reverse the steps you followed to take it apart.
– If you need help or want to make sure everything is done correctly, you can always schedule a repair
Success!