LG UltraFine 5K Teardown
Duration: 45 minutes
Steps: 13 Steps
Step 1


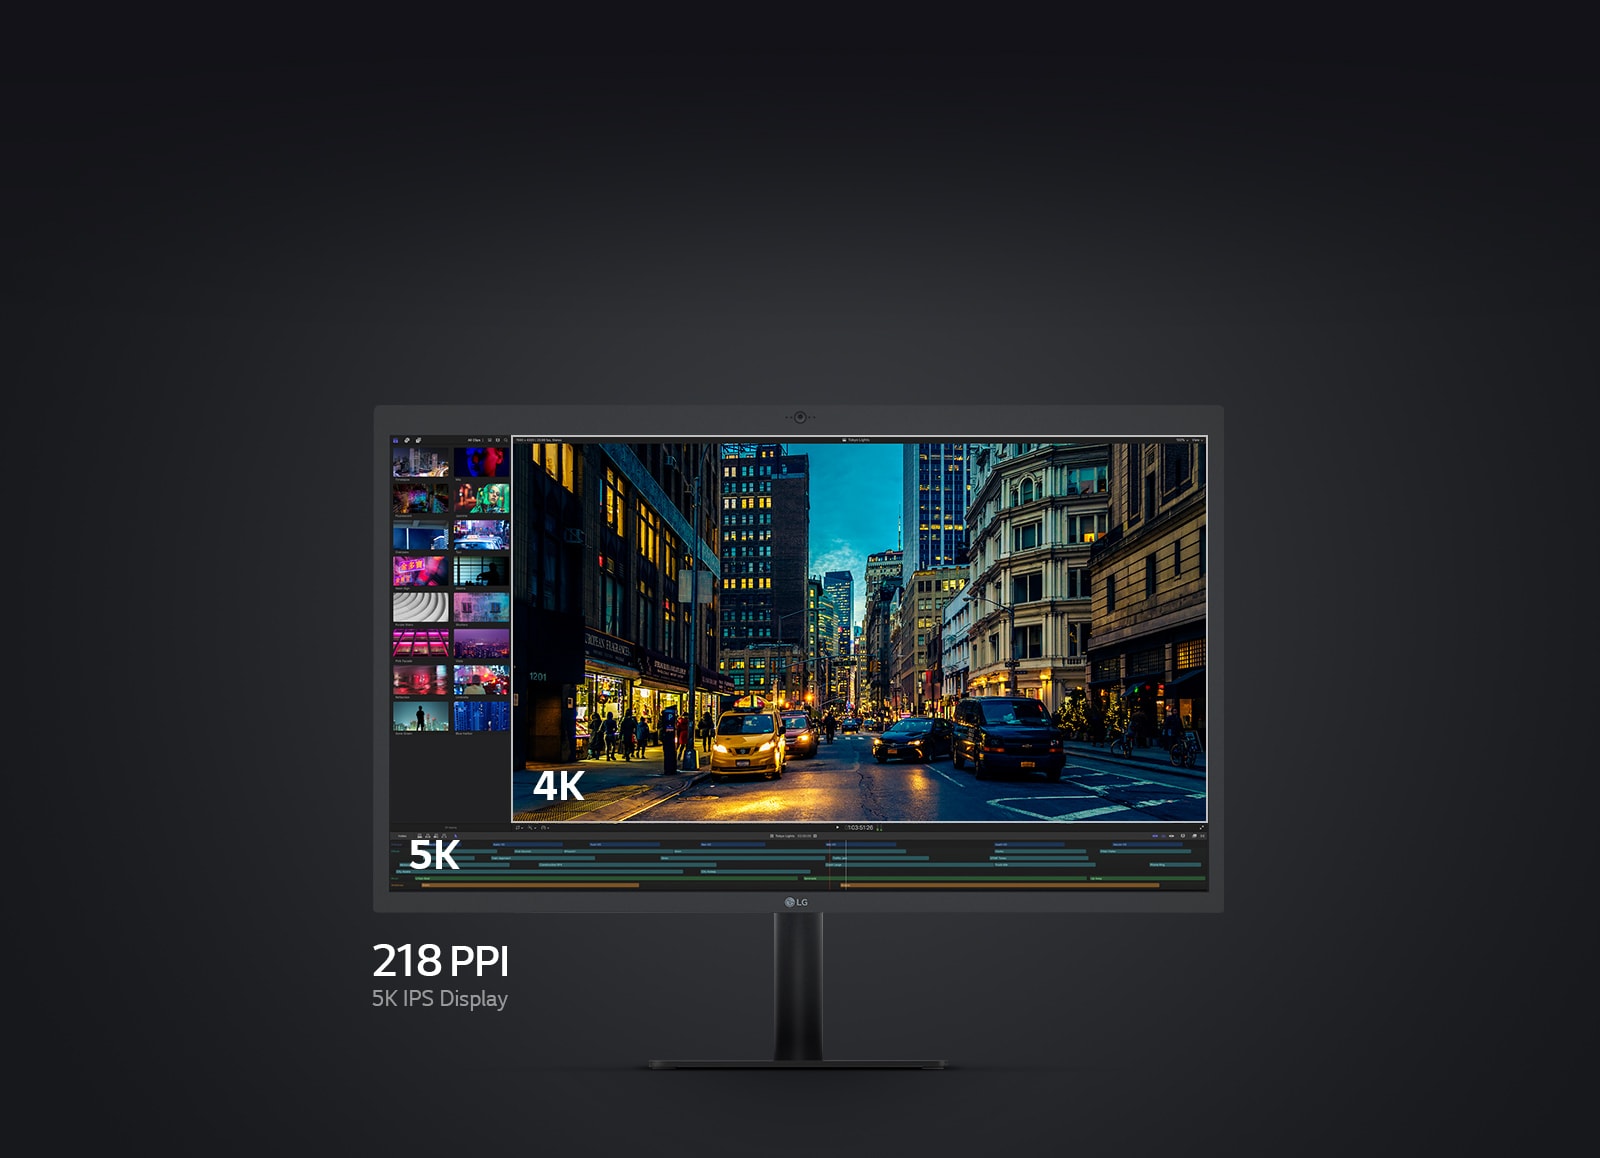
– LG 27MD5KL
Step 2


– Let’s start by unplugging those cables, shall we?
– Remove the webcam module cable with care.
– Now, gently disconnect the display panel cable.
– Next up, hit that service button for some factory testing action.
– Finally, say goodbye to the LG Display LM270QQ2 LCD Panel.
Step 3


– Unplug the speaker cable—it’s ready for a break. Next, lift out the speaker module and set it aside like the VIP it is.
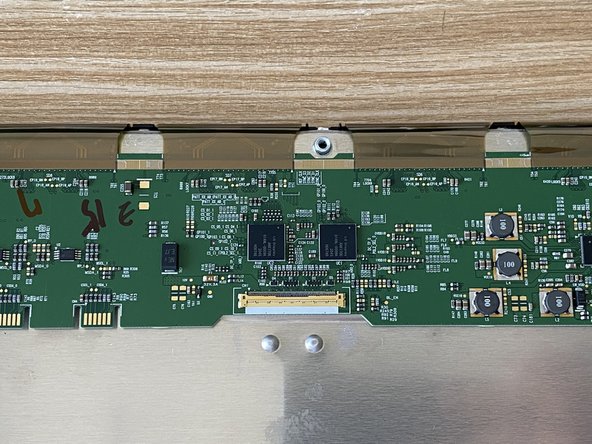
Step 4
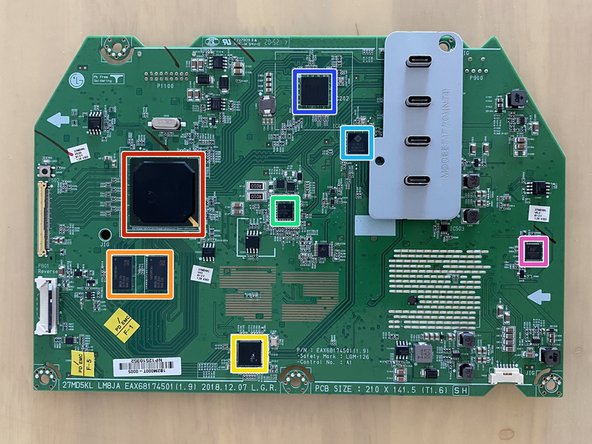


– Chip ID for the logic board
– Realtek RTD2799 Monitor Controller
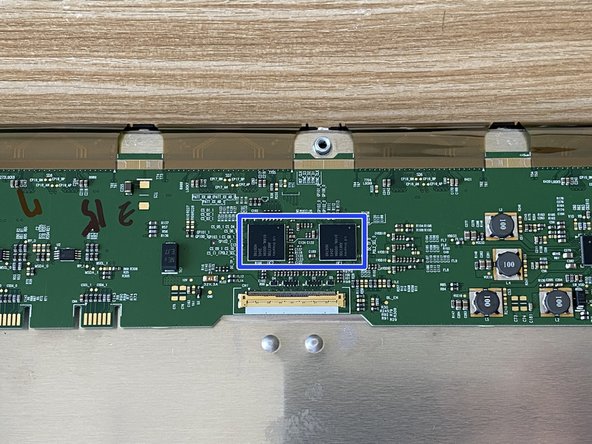
– Samsung DDR3 RAM
– Texas Instruments TUSB8041 Four-Port Super-Speed USB 3.0 Hubs
– Texas Instruments TPS65983B USB Type-C and Power Delivery (PD) 3.0 Controller
– Genesys Logic GL3523 USB 3.1 Gen 1 Hub Controller
– Intel JHL7440 Thunderbolt 3 Controller (Titan Ridge)
– NTP7515D Audio Amp
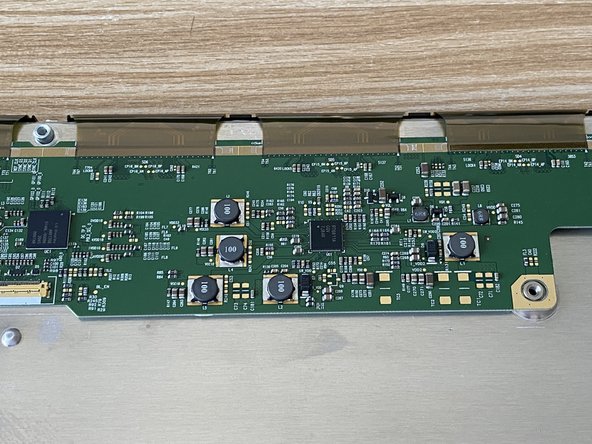
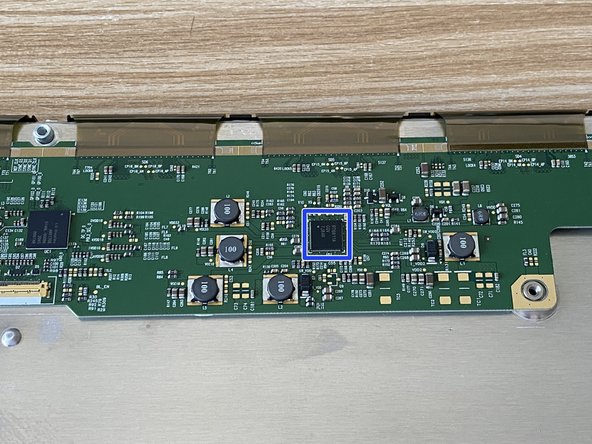
Step 5

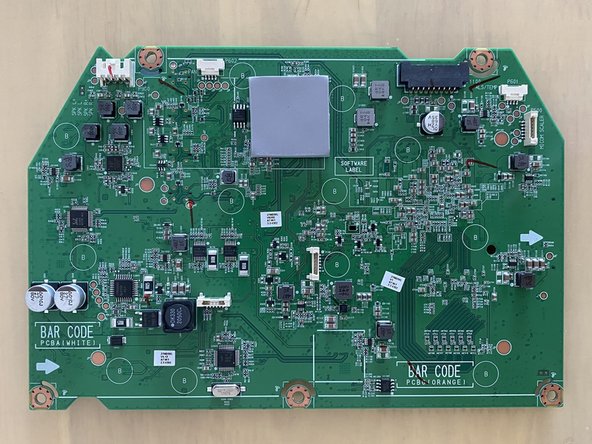
– Chip ID for the logic board – This little guy holds the secrets to your device’s brain. Make sure you have it ready to go!
– Realtek ALC4020 Audio IC – Your phone’s audio magic happens here. If you’re not hearing sound, this might need some attention.
– NTP7515D Audio Amp – Cranking up the volume? This component ensures your sound’s as loud and clear as you want it.
– Texas Instruments LP8860AQ1 LED Driver – Lighting up your screen is no small feat. This LED driver makes sure everything looks bright and sharp.
– NXP Semiconductors LPC11U68J 32-bit Microcontroller – The multitasker of your device. It runs the show and keeps everything in sync.
Step 6


– Webcam unit with built-in mic, ambient light sensor, and a handy camera activity light.
– Cypress CYUSB3064-BZXC USB SuperSpeed controller—handles the camera’s traffic.
– STMicroelectronics image processor for sharp, clear video.
– Camera activity light—shows when you’re live.
– Camera module.
– Ambient light sensor—adjusts brightness automatically.
– Microphone for crisp, clear audio.
Step 7
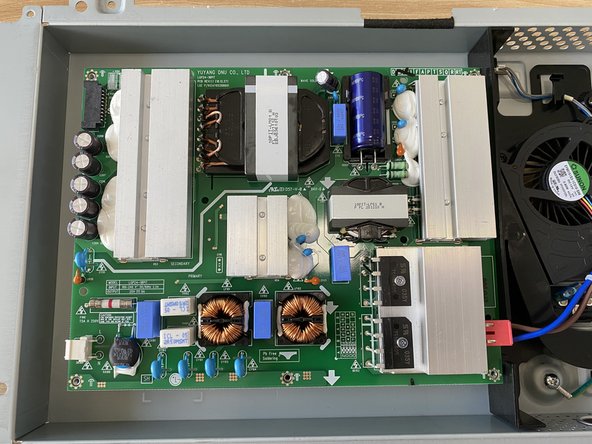

– AC-DC Adapter module—grab your adapter and get ready to give your device the power it craves!
Step 8

– First up, grab the Chip ID for your LCD control board – this is the secret code that makes everything tick. It’s like the VIP pass to your display’s world.
– Next, you’ll want to locate the Analogix/LG Display ANX1706 Display Controller. Think of this as the brain of the operation, controlling all the magic behind your screen. Once you’ve got it, it’s game on!
Step 9

– LCD control board chip identifier
– Richtek Technology RT6811A integrated circuit
Step 10

– Gently separate the LCD from the rest of the panel, like peeling apart a sandwich—slow and steady!
– Carefully disconnect the cable that links the control board to the panel. It’s like untangling a pair of headphones, but with more precision.
Step 11


– Gently lift the holder up and away, like you’re giving it a little high-five!
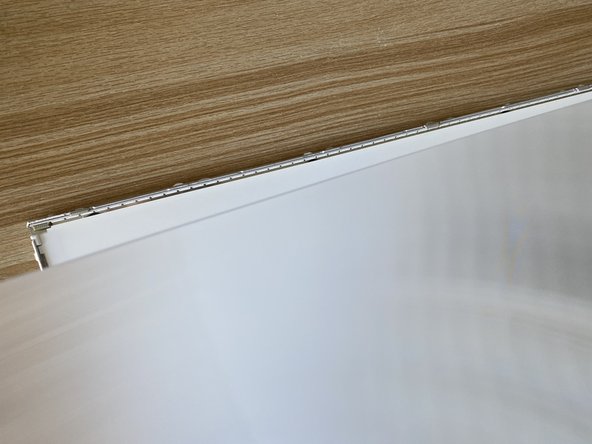
Step 12

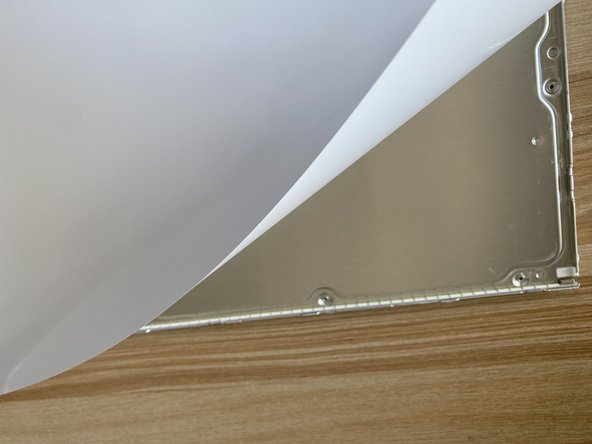
– Alright, it’s time to tackle that polarizing filter film. Grab your tools and let’s get to it! This step is crucial, so make sure you’re handling it gently. Peel off the old film slowly, making sure not to damage the screen beneath. If you’re feeling unsure or things aren’t going as planned, no worries! You can always schedule a repair to get it fixed up by the pros. Take your time—you’re doing great!
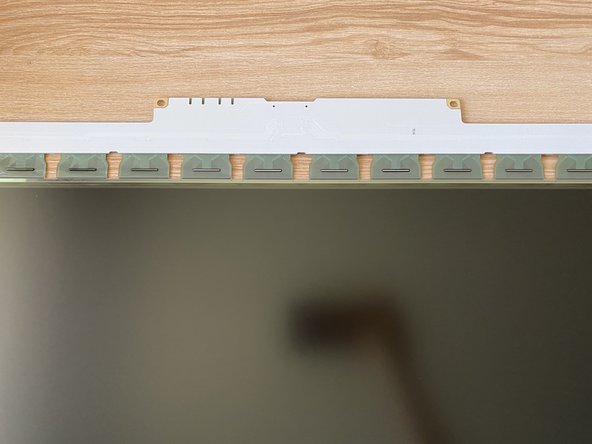
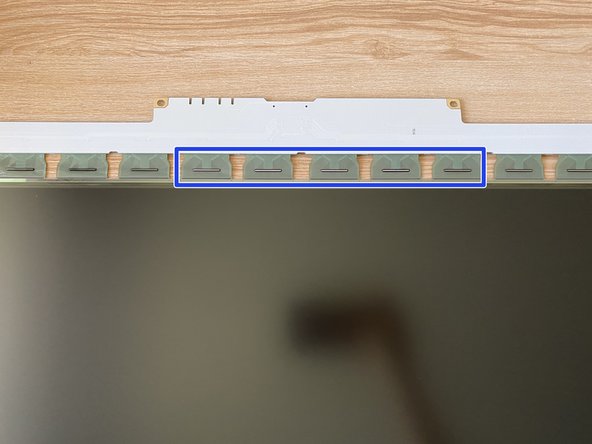
Step 13

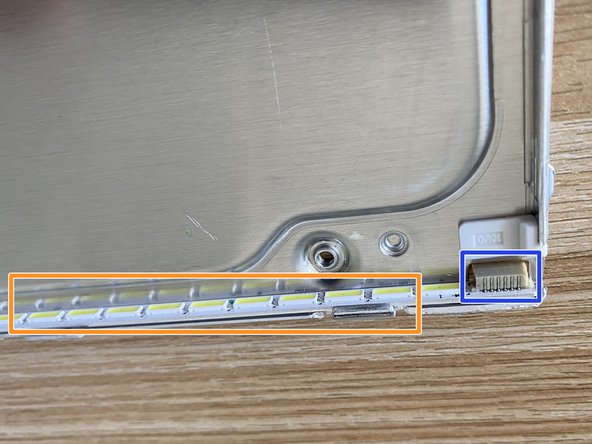
– First up, we’re going to tackle that LCD backlight module (LEDs). This little guy is what helps your screen shine bright and crisp, so let’s make sure it’s in top shape. Gently disconnect the backlight connector and handle with care—it’s more delicate than it looks!
– Now, let’s focus on the backlight connector. It might seem like a small piece of the puzzle, but don’t underestimate its importance! Carefully detach it, and remember to avoid pulling on the wires too hard. You wouldn’t want to create more work for yourself!
Success!