MacBook Pro 13″ Unibody Early 2011 Right Speaker/Subwoofer Replacement
Duration: 45 minutes
Steps: 18 Steps
Hey there! Just a friendly heads-up: be sure to handle your device with care while you’re working on it. If you hit a snag or feel unsure, don’t hesitate to reach out for help. You can always schedule a repair with us!
Follow this guide to swap out that pesky blown subwoofer or right speaker. Let’s get your sound back in action!
Step 1

– Unscrew and set free those ten screws waiting for you!
Step 2


– Gently use your fingers to lift the lower case away from the MacBook’s body, right by the vent. It’s like giving your laptop a little hug!
– Now, go ahead and take off the lower case.
Step 3


Gently nudge both short sides of the connector upward to help it ease out of its socket. Just a heads up—watch those corners! They can be a bit fragile and might break off if you’re not careful.
– Gently nudge the battery connector upwards from its cozy spot on the logic board using the edge of a spudger. You’ve got this!
Tools Used

Step 4

– Gently nudge the battery cable a bit away from its cozy spot on the logic board to prevent it from making any surprise connections while you’re busy working your magic.
Step 5

– Grab your trusty spudger and gently coax the AirPort/Bluetooth ribbon cable connector up from its cozy spot on the logic board. It’s like giving it a little nudge to say, ‘Hey, time to come out and play!’
Tools Used
Step 6

Gently pull the cable straight out, keeping it parallel to the logic board. Yanking it upwards could put a strain on either the logic board or the cable, and we definitely want to avoid that!
While our awesome iFixit team suggests sticking to the steps, some adventurous users choose to skip this one entirely. Curious about their experiences? Check out the comments for this step!
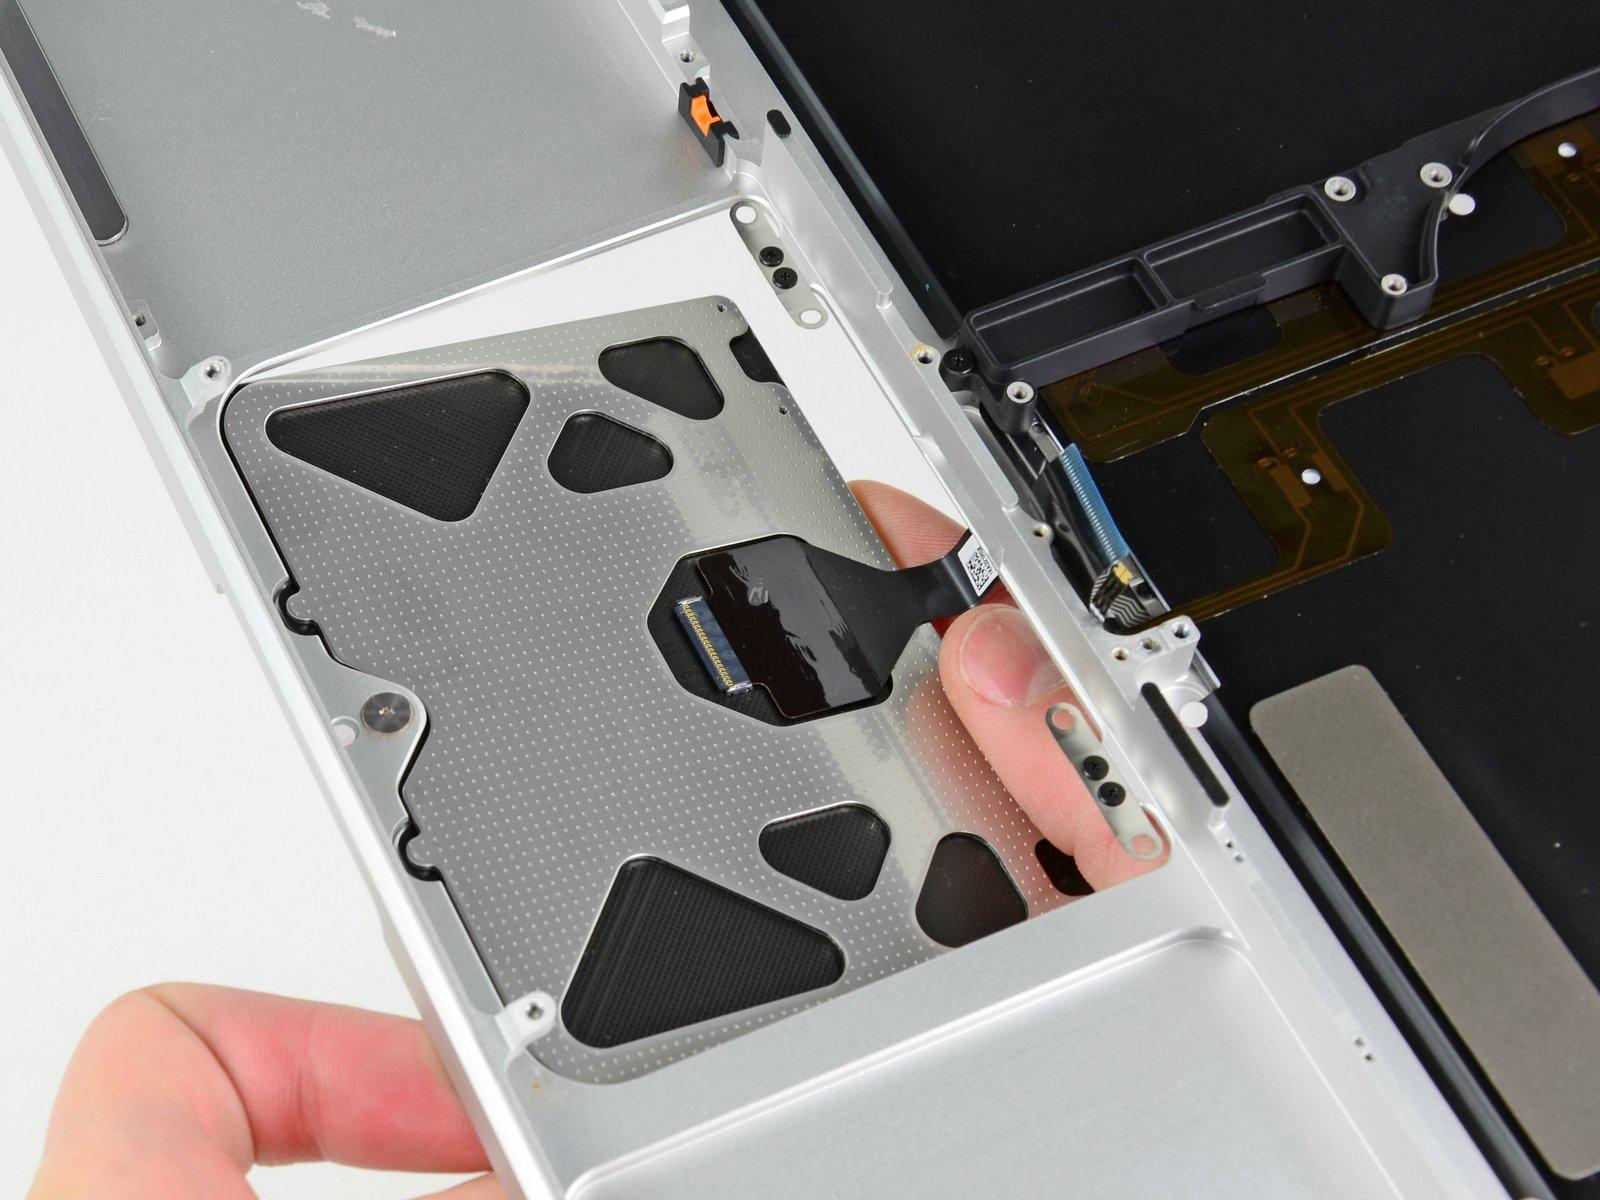
– Gently wiggle the camera cable free from its snug spot on the logic board.
Step 7


– Gently nudge the AirPort/Bluetooth ribbon cable aside as you peel off the camera cable from its sticky spot on the subwoofer and the AirPort/Bluetooth bracket. It’s like unwrapping a present, but way more technical!
– Carefully guide the camera cable out from under the little retaining finger that’s molded into the AirPort/Bluetooth bracket. Just think of it as helping your device stretch out a bit!
Step 8


– Grab your trusty spudger and gently nudge the antenna connector closest to the logic board upwards from its cozy spot on the AirPort/Bluetooth board.
– Next up, let’s guide that antenna cable out from beneath the finger molded into the AirPort/Bluetooth bracket. Nice and easy!
Tools Used
Step 9

– Grab your trusty Phillips #00 screwdriver and let’s get those five screws out of the way!
Tools Used

Step 10


– Gently lift the AirPort/Bluetooth assembly and the Subwoofer from the center of the optical drive’s side until they gracefully part ways.
– Carefully slide the AirPort/Bluetooth assembly and the subwoofer away from the top of the optical drive, giving them some personal space.
Step 11


– Gently wiggle the right speaker/subwoofer cable free from its cozy spot under the retaining finger by the optical drive.
– Now, give that right speaker/subwoofer cable a little lift to disconnect it from the logic board. You’ve got this!
Step 12

– Gently slide the flat end of your spudger under the hard drive cable connector and lift it up from its cozy spot on the logic board.
– Now, give that hard drive cable a little nudge and bend it away from the optical drive, creating some space for the next steps!
Tools Used
Step 13

– Gently use the flat end of a spudger to lift the optical drive connector out of its cozy spot on the logic board. You’re almost there!
Tools Used
Step 14

– Unscrew those three 2.7 mm Phillips screws holding the optical drive snugly to the upper case. You’ve got this!
Tools Used
Step 15

– Gently lift the optical drive from the edge nearest to the display and slide it out of the upper case. If you run into any trouble, remember, you can always schedule a repair.
Step 16


Begin by gently lifting from the edge of the right speaker closest to the display. Starting from the opposite side could risk damaging one of the antennas. Keep it cool and steady!
– Grab a plastic opening tool or any slim prying buddy you have lying around, and gently nudge the right speaker away from the sticky adhesive that’s holding it tight to the upper case.
– Keep prying along the edge of the right speaker until it pops free from the upper case. You’re doing great!
Tools Used

Step 17

– Gently detach the right speaker from the opening near the optical drive.
Tools Used
Step 18


– Gently lift the right speaker cable from the edge of the optical drive opening. We want it free, not stuck!
– Carefully guide the cable away from the clips that are hanging out near the logic board’s edge. It’s like giving it a little dance!
– Now, go ahead and take out the right speaker/subwoofer assembly from the upper case. You’re doing great!
Tools Used
