Mastercraft 17FY2-MC Cordless Drill Teardown
Duration: 45 minutes
Steps: 7 Steps
This teardown shows the disassembly of the Mastercraft 17FY2-MC Cordless Drill/Driver. The guide shows all components after disassembly and explains their functionality.
Step 1

– Grab your Phillips head screwdriver and take out the six screws holding the casing together.
Step 2


Disconnecting the negative side of the battery is a smart move! It keeps you safe from accidentally touching other parts of the drill while the battery is still connected. Safety first, right?
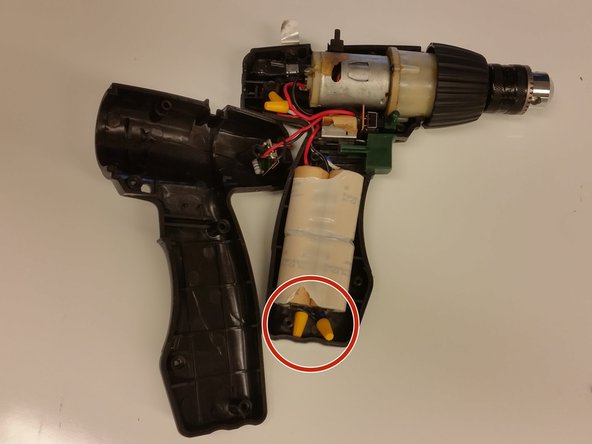
– Start by twisting off the two yellow connectors at the bottom of the handle. Give those wires a gentle bend away from each other so they don’t try to be friends again too soon.
– Next, unscrew the two yellow connectors up top on the drill, and lift out the whole battery pack like a pro.
Step 3

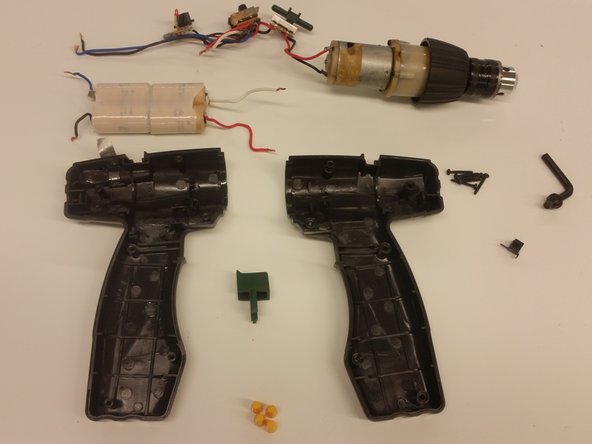
The drill is powered by a battery pack made up of four NiCd cells, each providing a nominal 1.2V. When connected in series, this gives the pack a total voltage of 4.8V. It’s like a little power team working together to get the job done!
Step 4

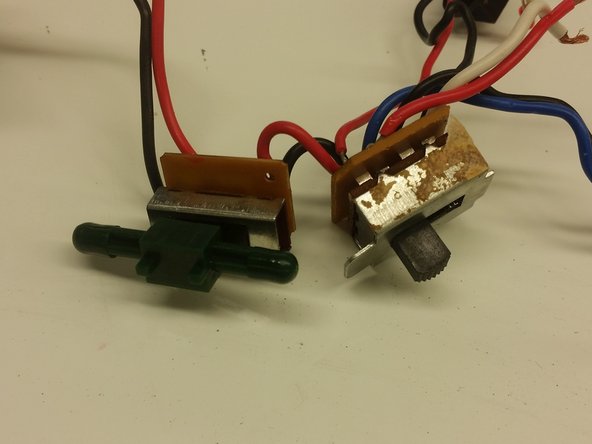
– Gently slide out the charging port, trigger switch, and direction switch from their spots in the casing. Now, lift the entire motor assembly out of the case like a pro.
Step 5

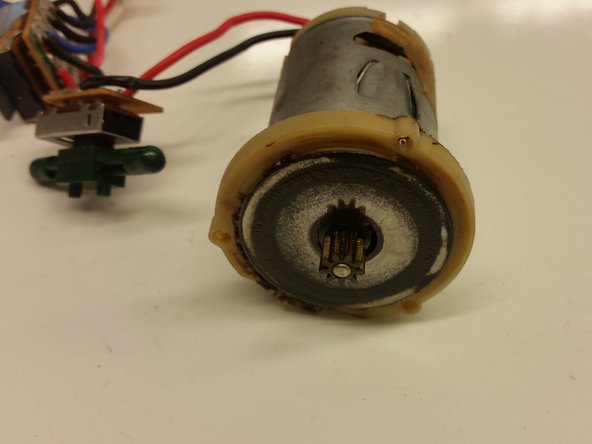
The DC motor (shown in the second image) gets the action going by spinning a shaft that’s connected to a small gear, making everything move.
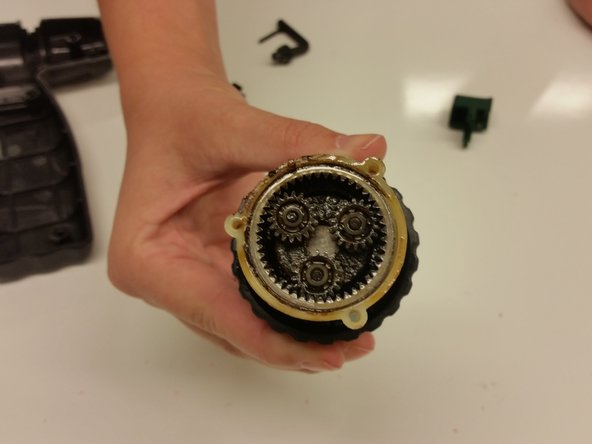
The drill mechanism (featured in the third image) works its magic by using a set of gears to give the drill head some extra power. Pretty nifty, right?
– Grab your Phillips head screwdriver and spin out the three screws holding the motor in place. This will free the drill mechanism from the motor—pretty satisfying, right?
Step 6

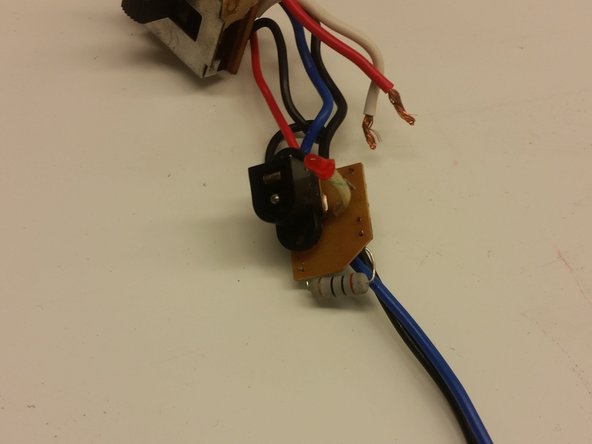
The charging port (second image) powers up your device when you plug in a DC power supply. It also shows off a red LED light to let you know it’s charging.
The trigger switch adjusts the motor speed by adding more battery power the further you press down. So, the harder you push, the faster it goes!
The direction switch flips the motor’s polarity, letting the motor spin either clockwise or counterclockwise. It’s your motor’s way of saying, ‘Let’s go this way!’
– Here’s a breakdown of the three main parts of the controlling electronics (from left to right in the first image): the charging port, the trigger mechanism, and the direction switch. Each one plays its part in getting everything running smoothly, so let’s take a closer look and make sure they’re all in top shape.
Step 7

– And there you have it! You’ve successfully wrapped up the teardown of the Mastercraft 17FY2-MC Cordless Drill.
Success!