Microsoft Surface Laptop 3 Screen Replacement Guide
Duration: 45 minutes
Steps: 24 Steps
Ready to swap out or fix up the screen on your Microsoft Surface Laptop 3 (13.5″)? This guide has you covered! We’re walking you through replacing the whole screen assembly, so make sure your replacement part includes the metal shell and screen hinges. If you’ve only got the panel itself, check out the linked guide for that process. Pro tip: Stay grounded and follow electrostatic discharge (ESD) safety tips while you work. A heads-up—some photos may show a slightly different model, but don’t worry, the steps remain the same!
Step 1


Fire up your laptop and let that battery dip below 25% before you dive into repairs! A charged lithium-ion battery can be a bit of a drama queen if it gets punctured, so let’s keep things safe and sound.
– First things first, let’s give your laptop a little break—power it down and unplug all those pesky cables.
– Now, gently close the laptop like you’re tucking it in for a cozy nap.
Step 2


– Turn your laptop upside down and set it on your work area with the feet facing up, ready for some troubleshooting magic!
Step 3


Use the pointed end of a spudger to carefully pop off the feet from the bottom of the laptop. It’s easy once you get the hang of it!
Keep in mind that the two feet near the back (screen side) are a bit different from the two at the front. Make sure to distinguish them!
– Each foot has a sneaky little indent that makes removal a breeze!
– To ensure your spudger finds that indent, slide it in at the nearest long edge, keeping it parallel to the short edges of the laptop, just like shown. You’ve got this!
Tools Used

Step 4


The two rear feet are held in place with a bit of light adhesive.
– Slide the pointed tip of your trusty spudger right under one of the two rear feet, aiming for that back edge.
– Gently nudge the spudger beneath the foot and lift it up to release it like a pro.
– Now, do it again to remove the second rear foot. You’re on a roll!
Tools Used
Step 5


The two front feet are held in place by some snazzy plastic clips and a touch of light adhesive.
– Let’s get started! Carefully insert the pointed end of a spudger under one of the front feet, right at its front edge.
– Gently push the spudger under the foot and pry it up to release – you got this!
– Repeat the same steps to remove the second front foot. You’re making great progress!
Tools Used
Step 6


– While putting things back together:
– Keep in mind that the front and back feet aren’t the same—they’ve got their own vibe.
– The front feet are like puzzle pieces; they only snap into place one way, so get them aligned just right.
Step 7


– Instead of sticking with those old, tired feet on your device, why not jazz things up with some 8 mm rubber furniture pads? They’re a fantastic alternative!
– Just peel a pad off its backing, line it up over the foot cavity, and give it a good press to make sure it sticks. Easy peasy!
Step 8

As you dive into this repair, make sure to keep track of every screw and put it back exactly where it came from. It’s a surefire way to prevent any accidental laptop damage!
– Grab your trusty T5 Torx driver and unscrew those four 3 mm screws hiding in the foot cavities—they’re keeping the upper case locked in place.
– When putting it all back together, go easy on those screws! They’ve got a tendency to strip if you go full Hulk on them.
Step 9


– Turn that device over, like flipping a pancake.
– Swing that display open as wide as it gets.
Step 10


Hold up! Don’t yank off the upper case just yet—it’s still tethered to the laptop like a loyal sidekick.
Double-check that the upper case hugs the perimeter snugly. Any gaps between the upper and lower case near the display could spell trouble when closing up shop.
The upper case stays put thanks to some magnetic magic.
– Grab the top edge of the upper case, right above the keyboard, and lift it straight up to pop it loose.
– Carefully tilt the front edge of the upper case away from the laptop—watch out for the keyboard and touchpad ribbon cables underneath. No need to play tug-of-war here!
– When putting it all back together, gently lower the upper case onto the lower case. Let the magnets snap it into place like magic, and make sure it sits flat and snug.
Step 11


The ribbon cable for the keyboard and touchpad is held in place by a magnet connector—pretty neat, right?
On some models, you’ll find this connector hidden under a layer of black tape.
– Gently slide the flat end of your trusty spudger under one side of the ribbon cable connector and give it a little nudge to pop it free.
– Carefully detach the ribbon cable from the motherboard and set it aside.
Tools Used
Step 12


Make sure that ribbon cable is lying nice and flat—no twists, no stress, and definitely no drama!
– Take off the upper case with care.
– Place the upper case on a clean surface, making sure the keyboard side is facing down.
Step 13

Popping out the SSD also doubles as a battery disconnect. Make sure to do this before diving into any major repairs!
– Grab a T5 Torx driver and take out the 2.7mm screw that’s holding the SSD in place.
Step 14


Once you take out the SSD screw, the SSD will pop up at a low angle.
– Grab the end of the SSD and give it a gentle pull to free it from the board connector.
– When putting it back together, slide the SSD into its board connector at a slight angle, and secure it back in place with the SSD screw.
Step 15
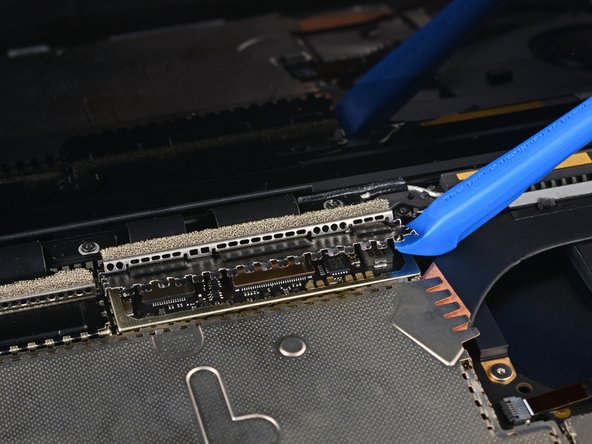


Try to keep the shield in good shape—it’s going to be back in action during reassembly, so handle it with care!
– Let’s get started! Use an opening tool to carefully pry up the black shield covering the right bank of display connectors – it’s time to set those connectors free!
– Work your way around the shield, repeating the process at different points until it becomes loose and easy to remove.
– Now it’s time to say goodbye to that shield – simply remove it and you’ll be one step closer to a fully functional device. If you need help, you can always schedule a repair
Step 16
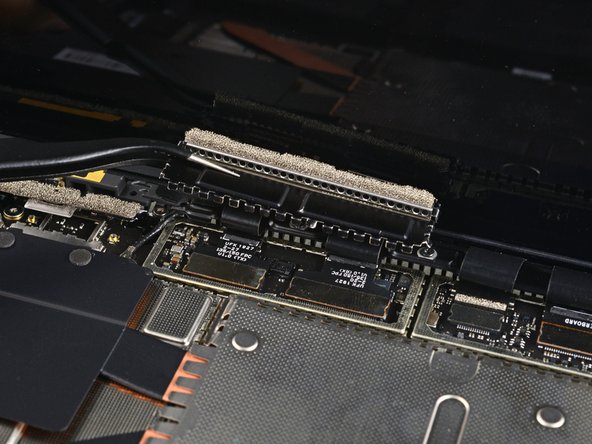

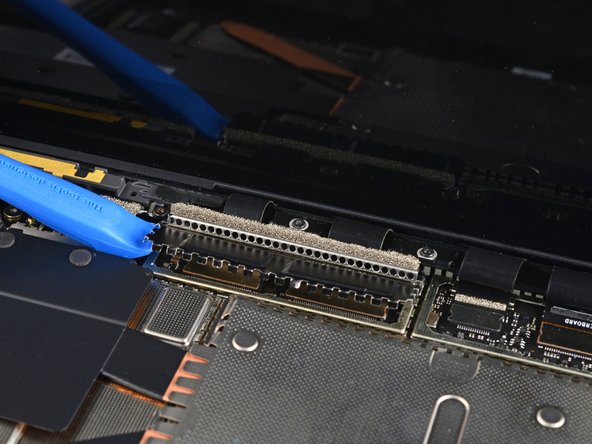
– Now, let’s get the rest of that shield out of the way! Repeat the previous step to remove the remaining shield from the left bank of display connectors. You’re doing great!
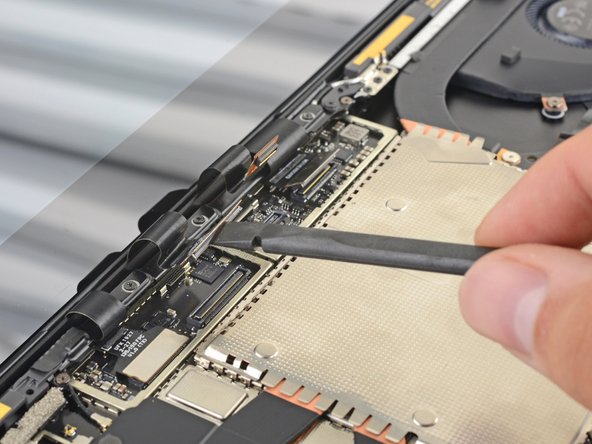
Step 17


– Grab the flat end of your trusty spudger and gently lift the first display cable out of its socket on the motherboard to disconnect it.
Tools Used
Step 18
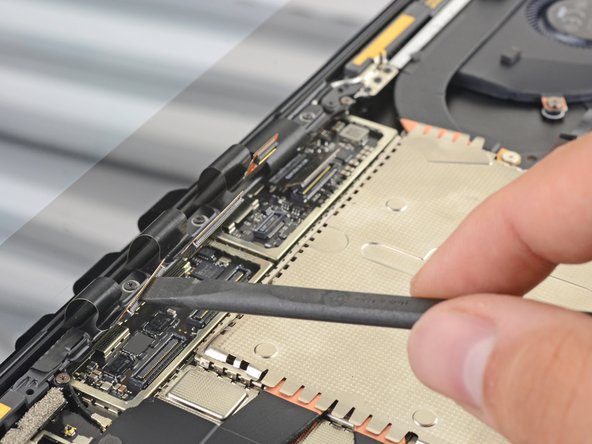

– Time to unplug the last three display connectors. Gently disconnect them, and you’re one step closer to success!
Step 19


– When piecing it all back together, use the flat end of a spudger to gently tuck those display cables back into their cozy little nook in the lower case.
Tools Used
Step 20

– Gently open the screen to its maximum angle.
Step 21
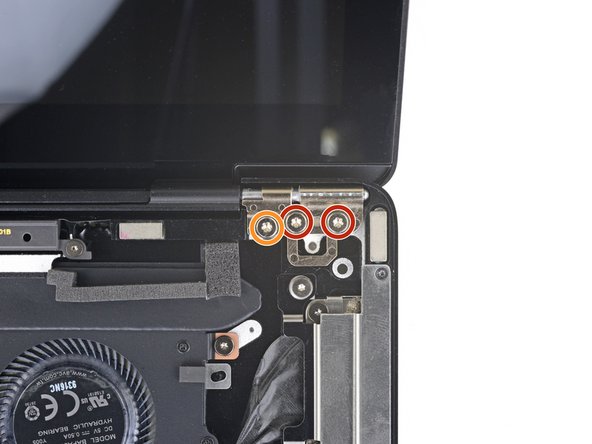

As you start unscrewing those hinge screws, keep a steady grip on the screen! It might feel a bit wobbly as you go, but don’t worry, you’ve got this!
– Steady the screen, and grab your T6 Torx driver to take out the four outermost 5.9mm screws holding it in place—two on each side.
– For now, leave the two inner hinge screws where they are—one on each side.
Step 22

– Gently angle the screen until it’s about upright.
– When putting it back together, after securing the first two hinge screws, the screen can easily tilt open, making it a breeze to install the last four hinge screws.
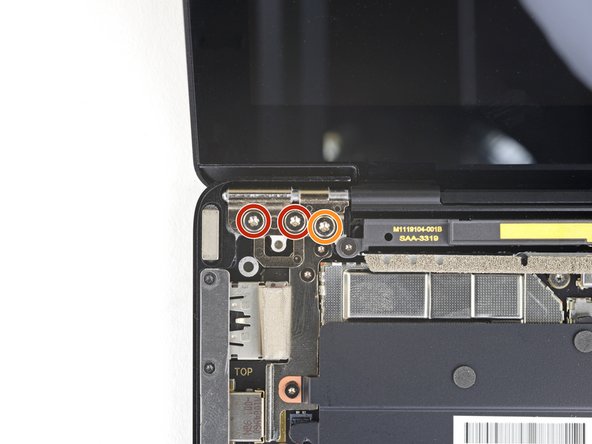
Step 23


Once you pop out these two final screws, the screen will be free, so keep a steady hand.
If the screen stands straight like a soldier, a screwdriver handle might touch the display while you’re removing it. If it’s being stubborn, gently tilt the screen back just enough to clear the driver.
– Hold the screen steady and grab your trusty T6 Torx driver. Unscrew the two 5.9mm screws that are keeping the screen in place—one on each side. Easy peasy!
Step 24


– Before you dive into installing your new part, make sure to compare it with the old one. You might need to swap over some components or peel off those pesky adhesive backings first.
– To get everything back together, just retrace your steps in reverse order and you’re good to go!
– Got some e-waste? Don’t just toss it! Take it to an R2 or e-Stewards certified recycler and do your part for the planet.
– If things didn’t go quite as planned, no worries! Try some basic troubleshooting or visit our Answers community for tips and support.
– If you’re still stuck, don’t hesitate to schedule a repair—we’ve got your back!
Success!